When working on a form, you may want to test changes before making them available to users, save unfinished work, or return to an earlier version of the form.
Form Designer provides several tools for managing changes during the design process. You can undo and redo recent changes, save your work as a draft, preview the draft in the actual form, publish changes when they are ready, and use Version History to access previous versions.
In this tutorial, we'll use a Support Request form to explore these options.
Instructions
Step 1: Undo and Redo Changes
While editing a form, you can use Undo and Redo to move backward or forward through recent design changes.
The Undo and Redo buttons are located in the upper-left corner of the Form Designer workspace.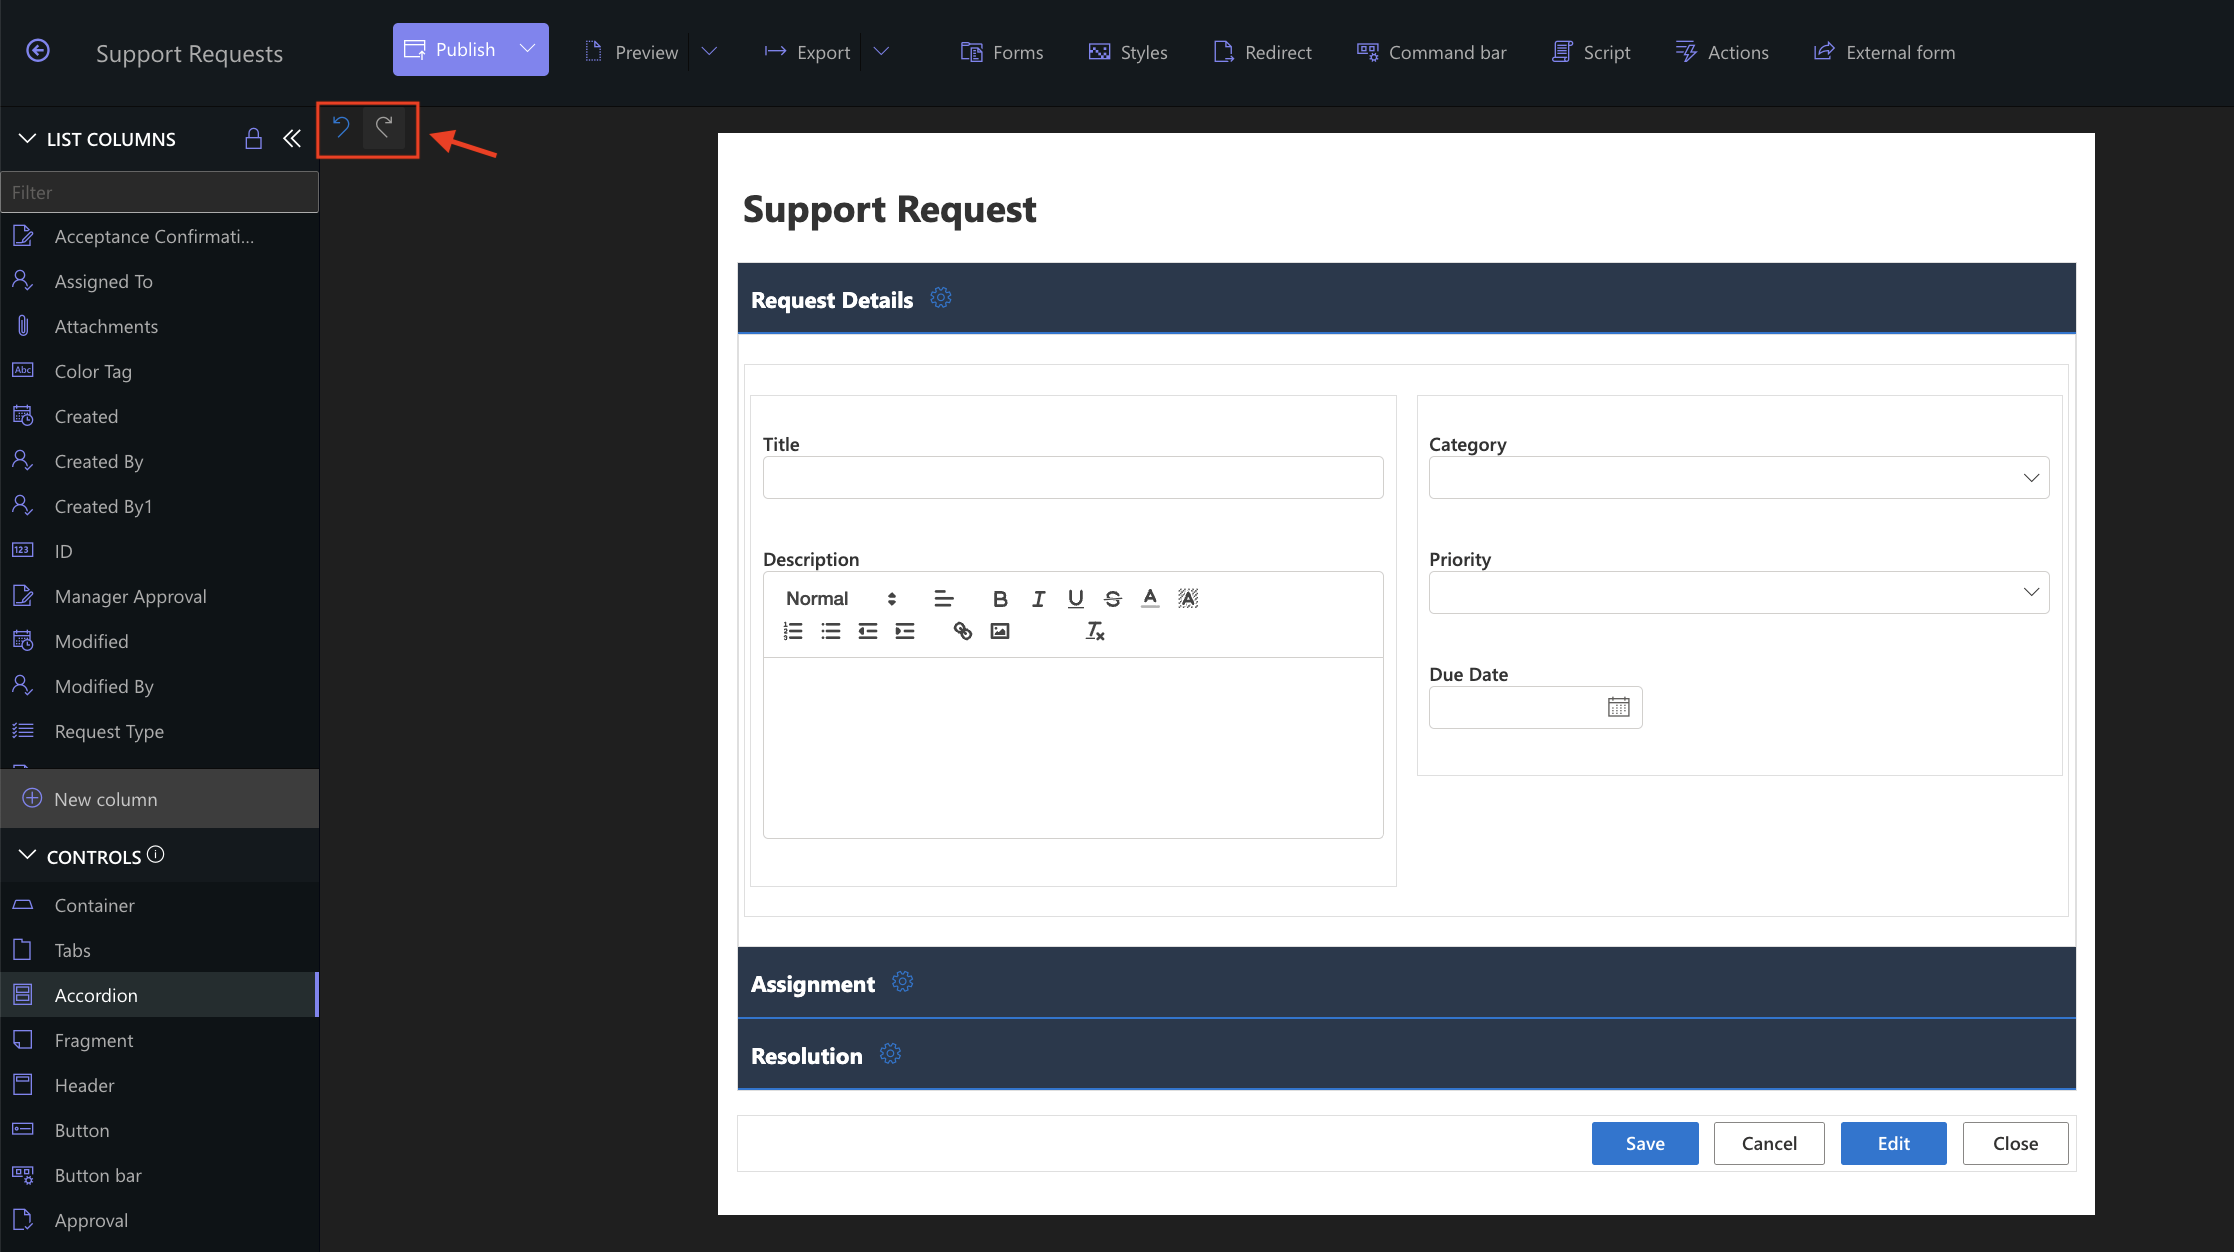
For example, move a column or control to a different position and click Undo to reverse the change. Click Redo to apply it again.
This is useful for quickly correcting changes while you are actively working on the form without returning to an earlier saved version.
Step 2: Save Your Changes as a Draft
You don't need to publish every change immediately.
- Open the menu next to Publish and select Save draft.
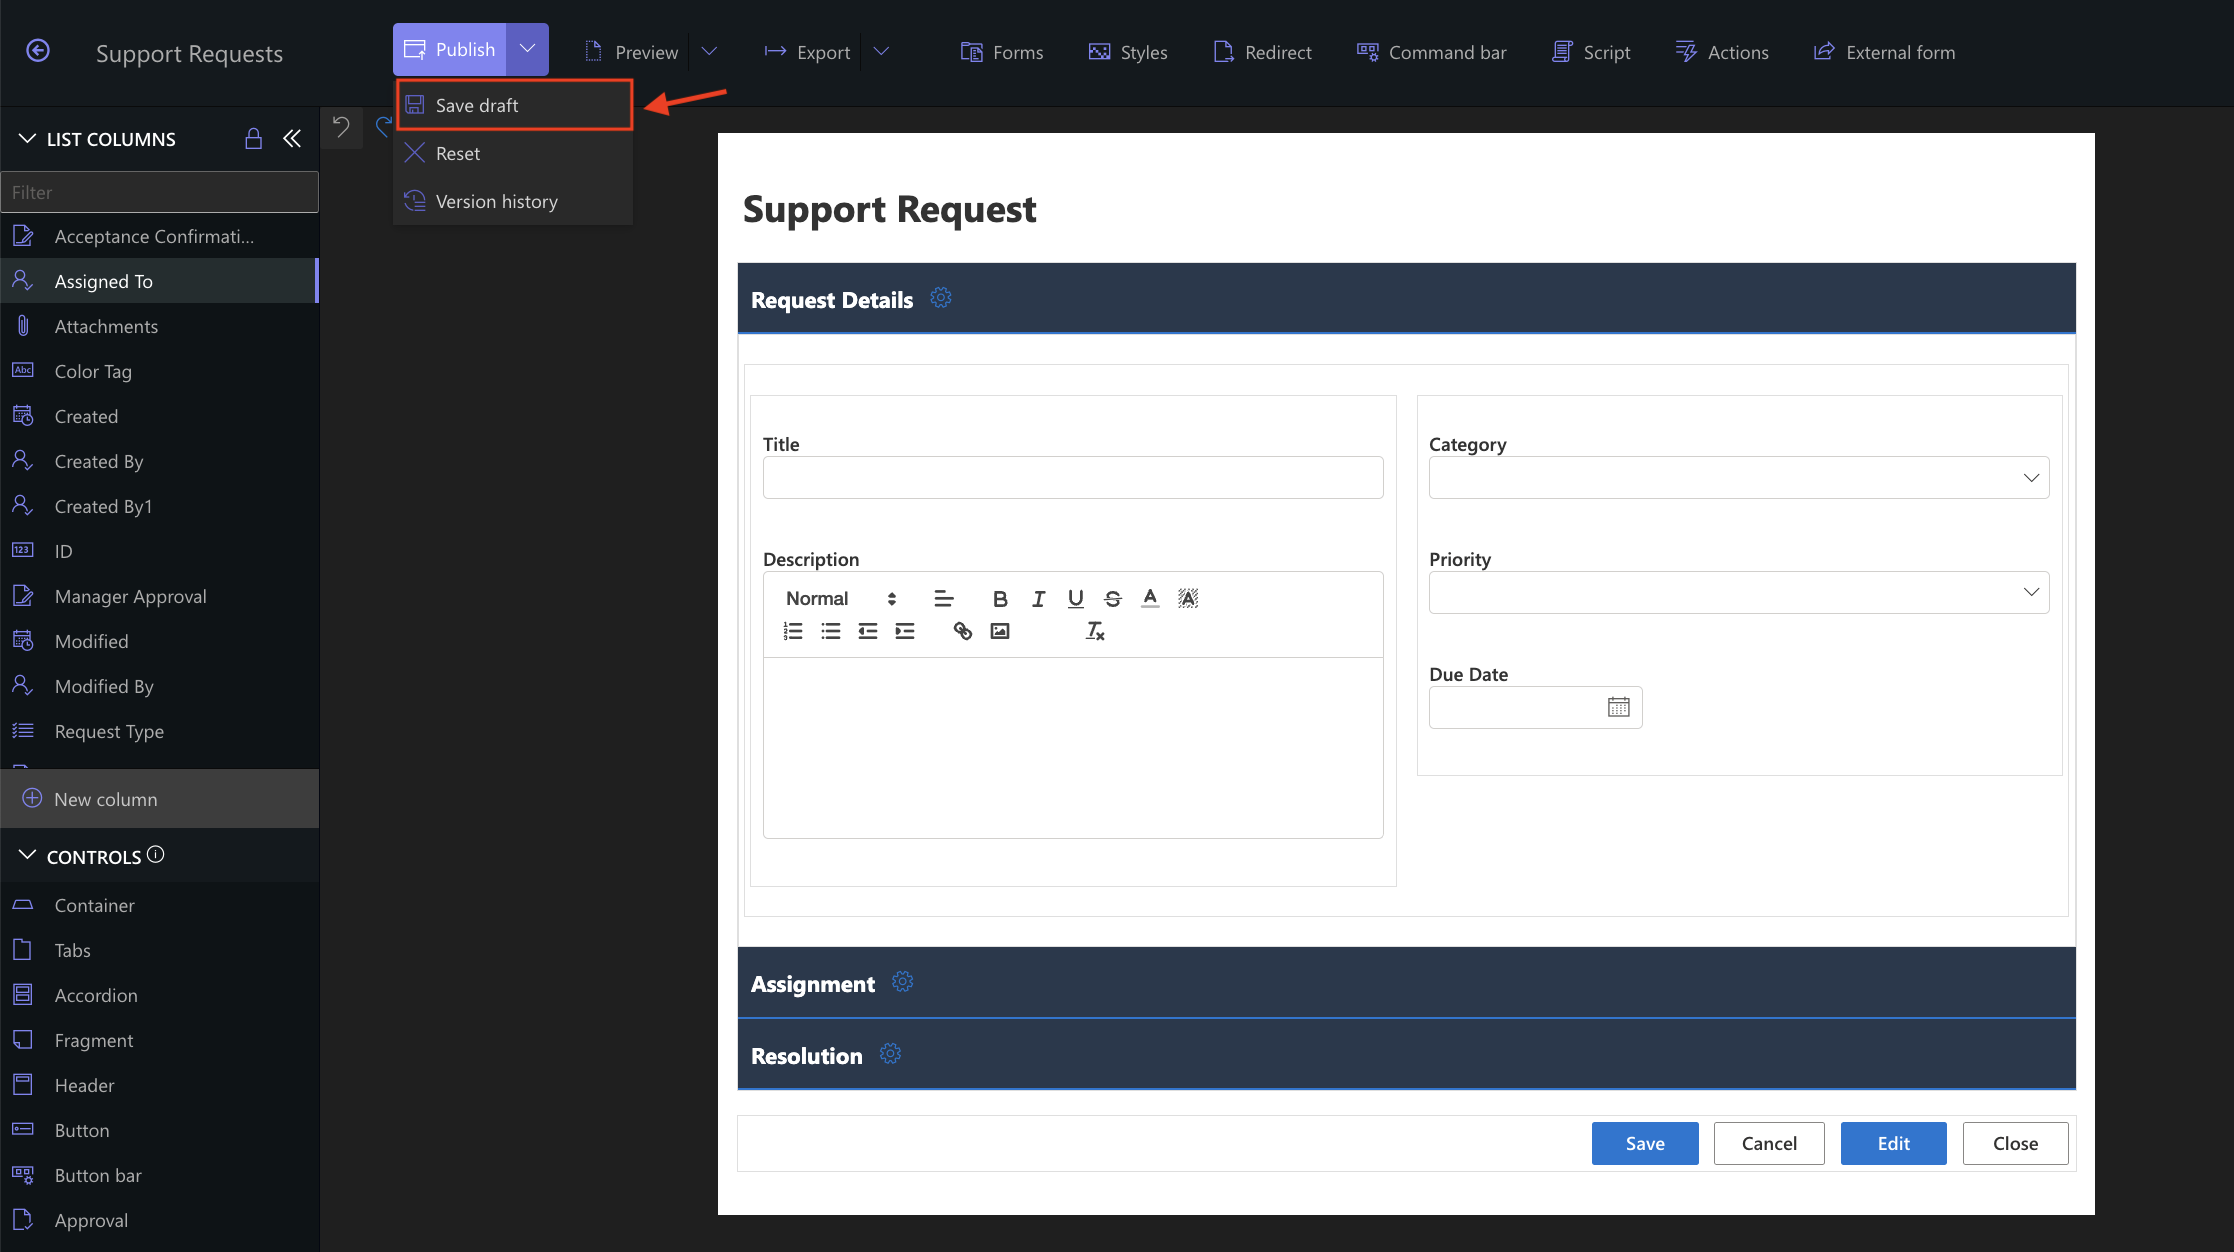
Saving a draft allows you to keep your current form changes without making them available to users of the published form.
You can continue editing the draft and publish it when it is ready.
Step 3: Preview the Form
Before publishing your changes, you can preview the form directly in Form Designer.
Click Preview in the top toolbar to open the form preview.
The preview shows how the form will look and allows you to check the layout, controls, and styling without leaving Form Designer. You can also switch between desktop, tablet, and mobile views using the icons at the top of the preview window.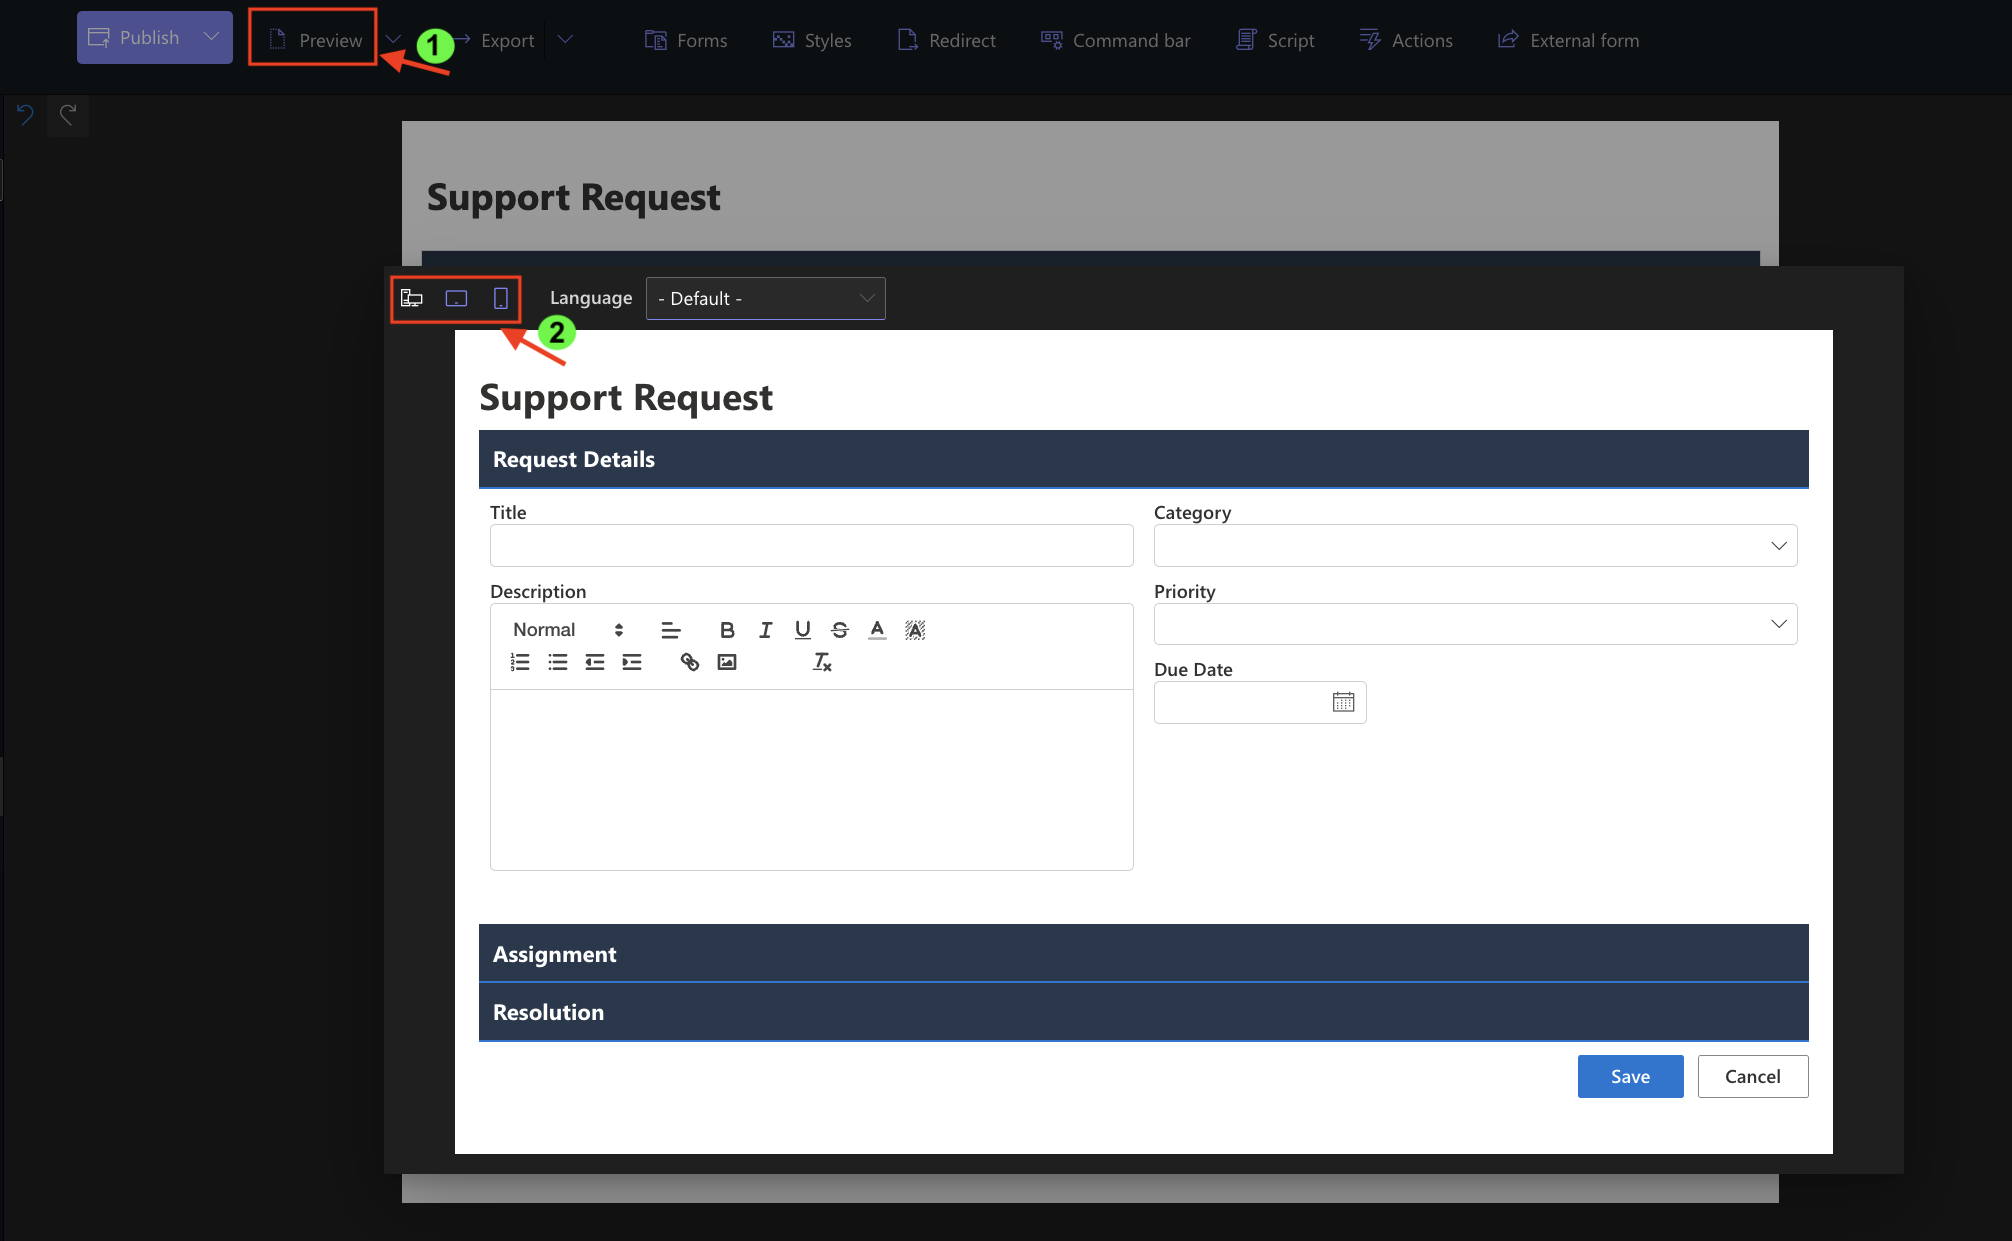
Live Preview for Draft
If you want to test the current draft in the actual SharePoint environment, open the menu next to Preview and select Live preview for draft.
The form opens in SharePoint using the current draft version instead of the currently published version. This allows you to test the form in its actual environment before making the changes available to other users.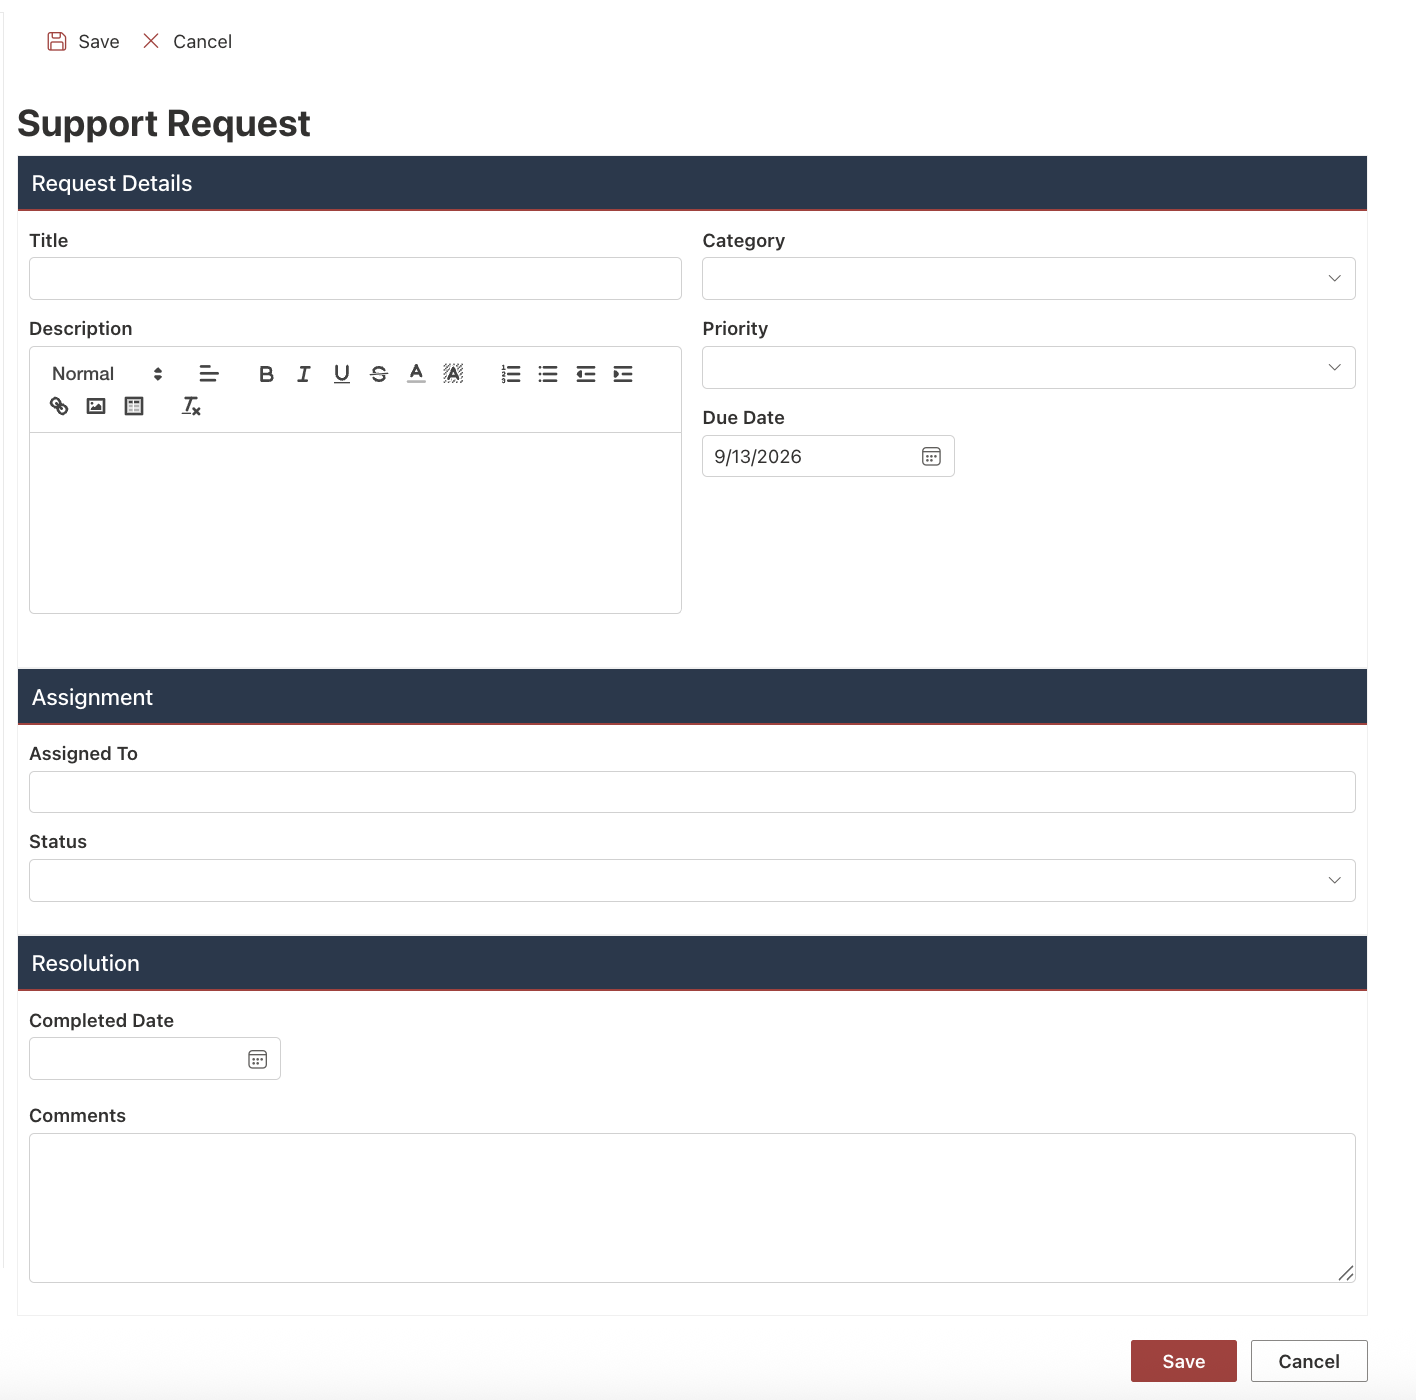
Preview is useful for quickly checking the form directly in Form Designer, while Live preview for draft lets you test the saved draft in the actual SharePoint environment before publishing it.
Step 4: Publish the Form
Once you've reviewed the draft and are satisfied with the changes, return to Form Designer and click Publish.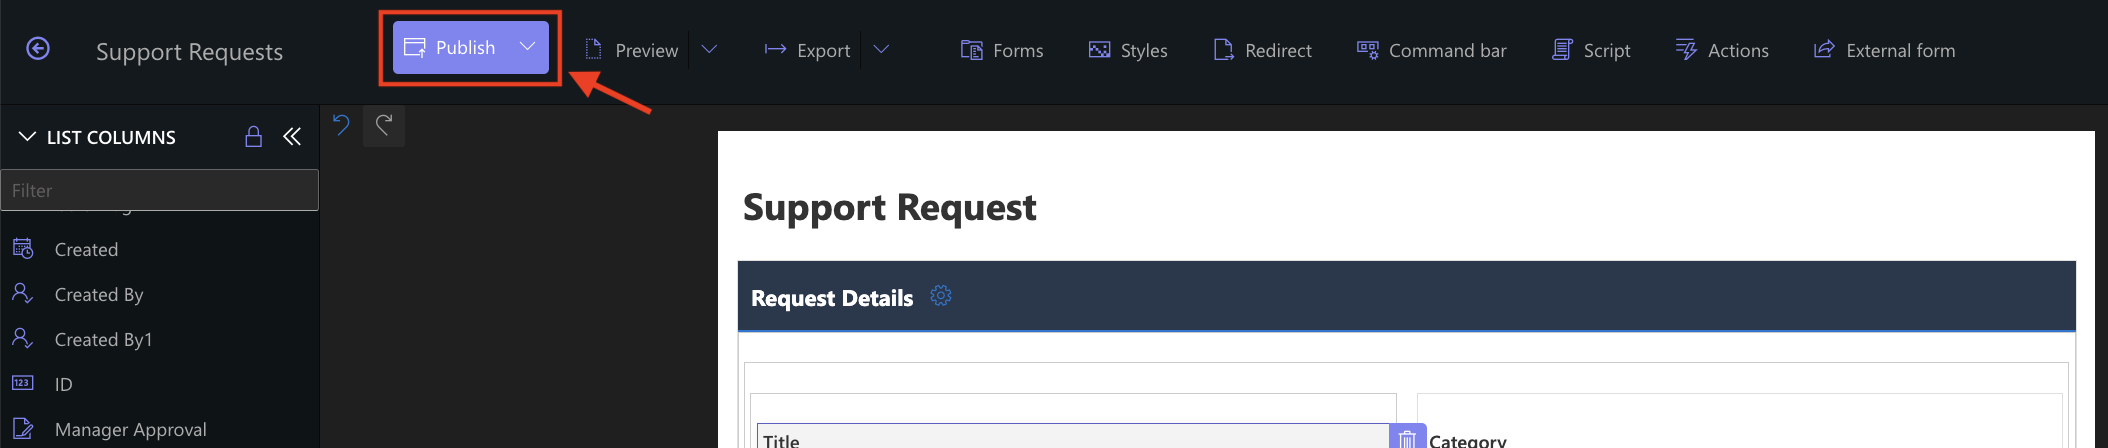
Publishing makes the current form version available to users.
This allows you to work on and test changes as a draft first, while users continue working with the published form, and publish the updated design only when it is ready.
Step 5: View Version History
Form Designer keeps previous versions of the form so you can review and manage earlier designs.
Open the menu next to Publish and select Version history.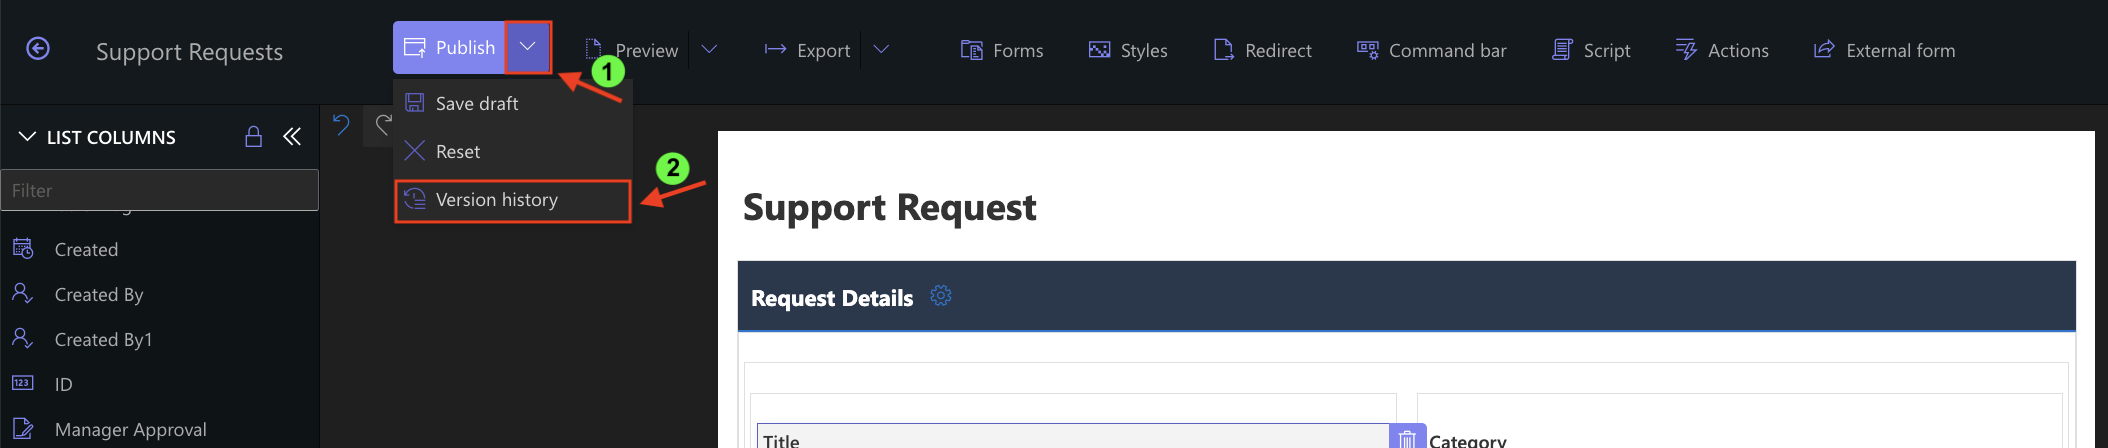
The Version History window displays information about saved versions, including:
- Version ID
- Modified
- Modified by
Enable or disable Published only to control which versions are displayed.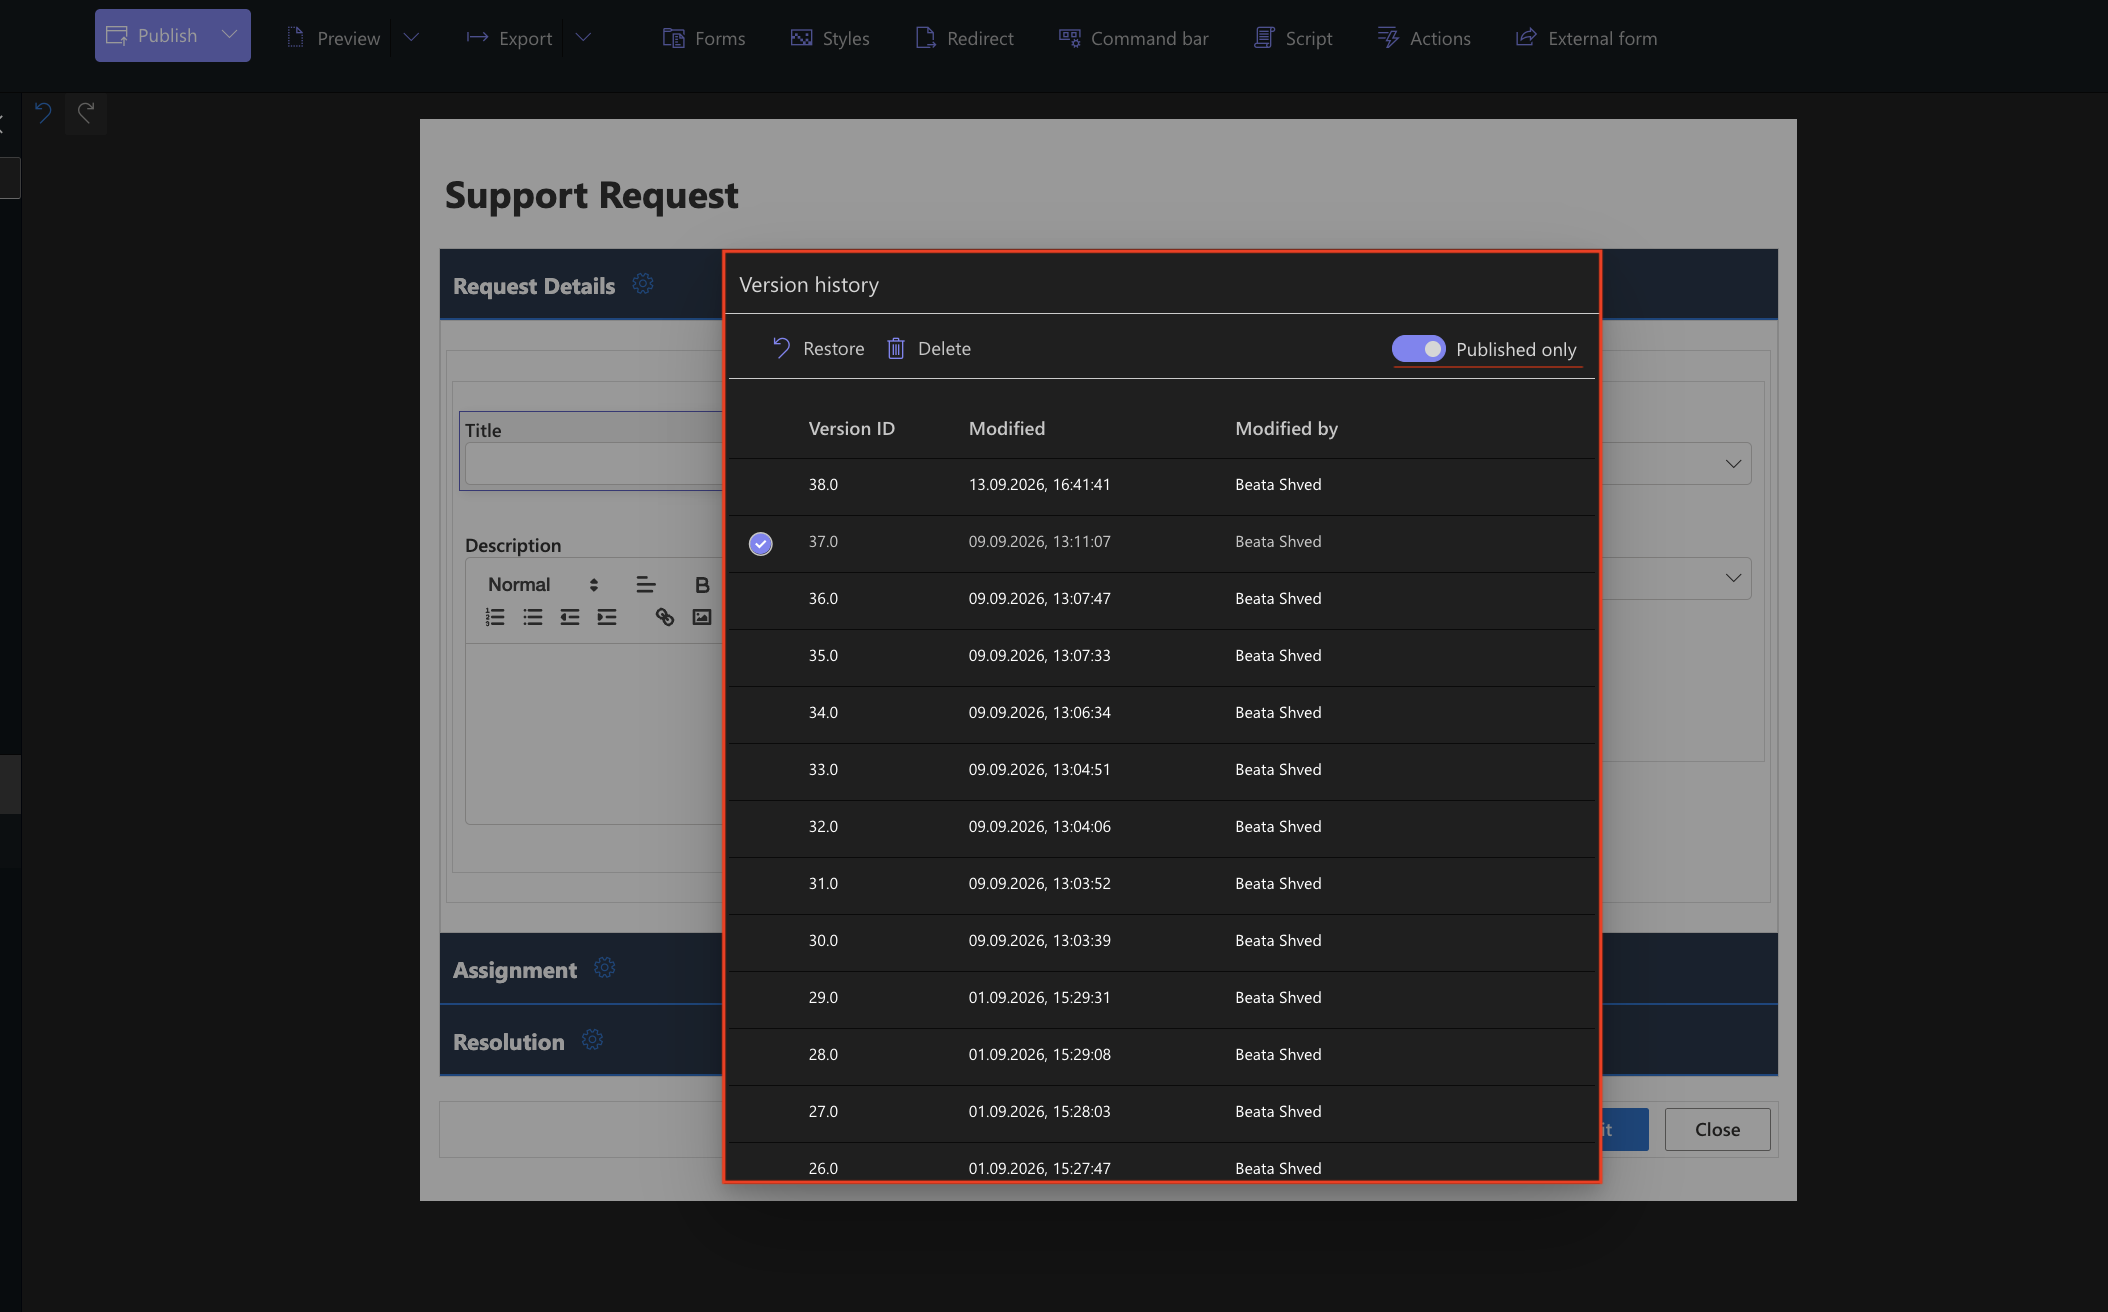
Step 6: Restore a Previous Version
If you need to return to an earlier form design, open Version history and select the version you want to restore.
- Click Restore.
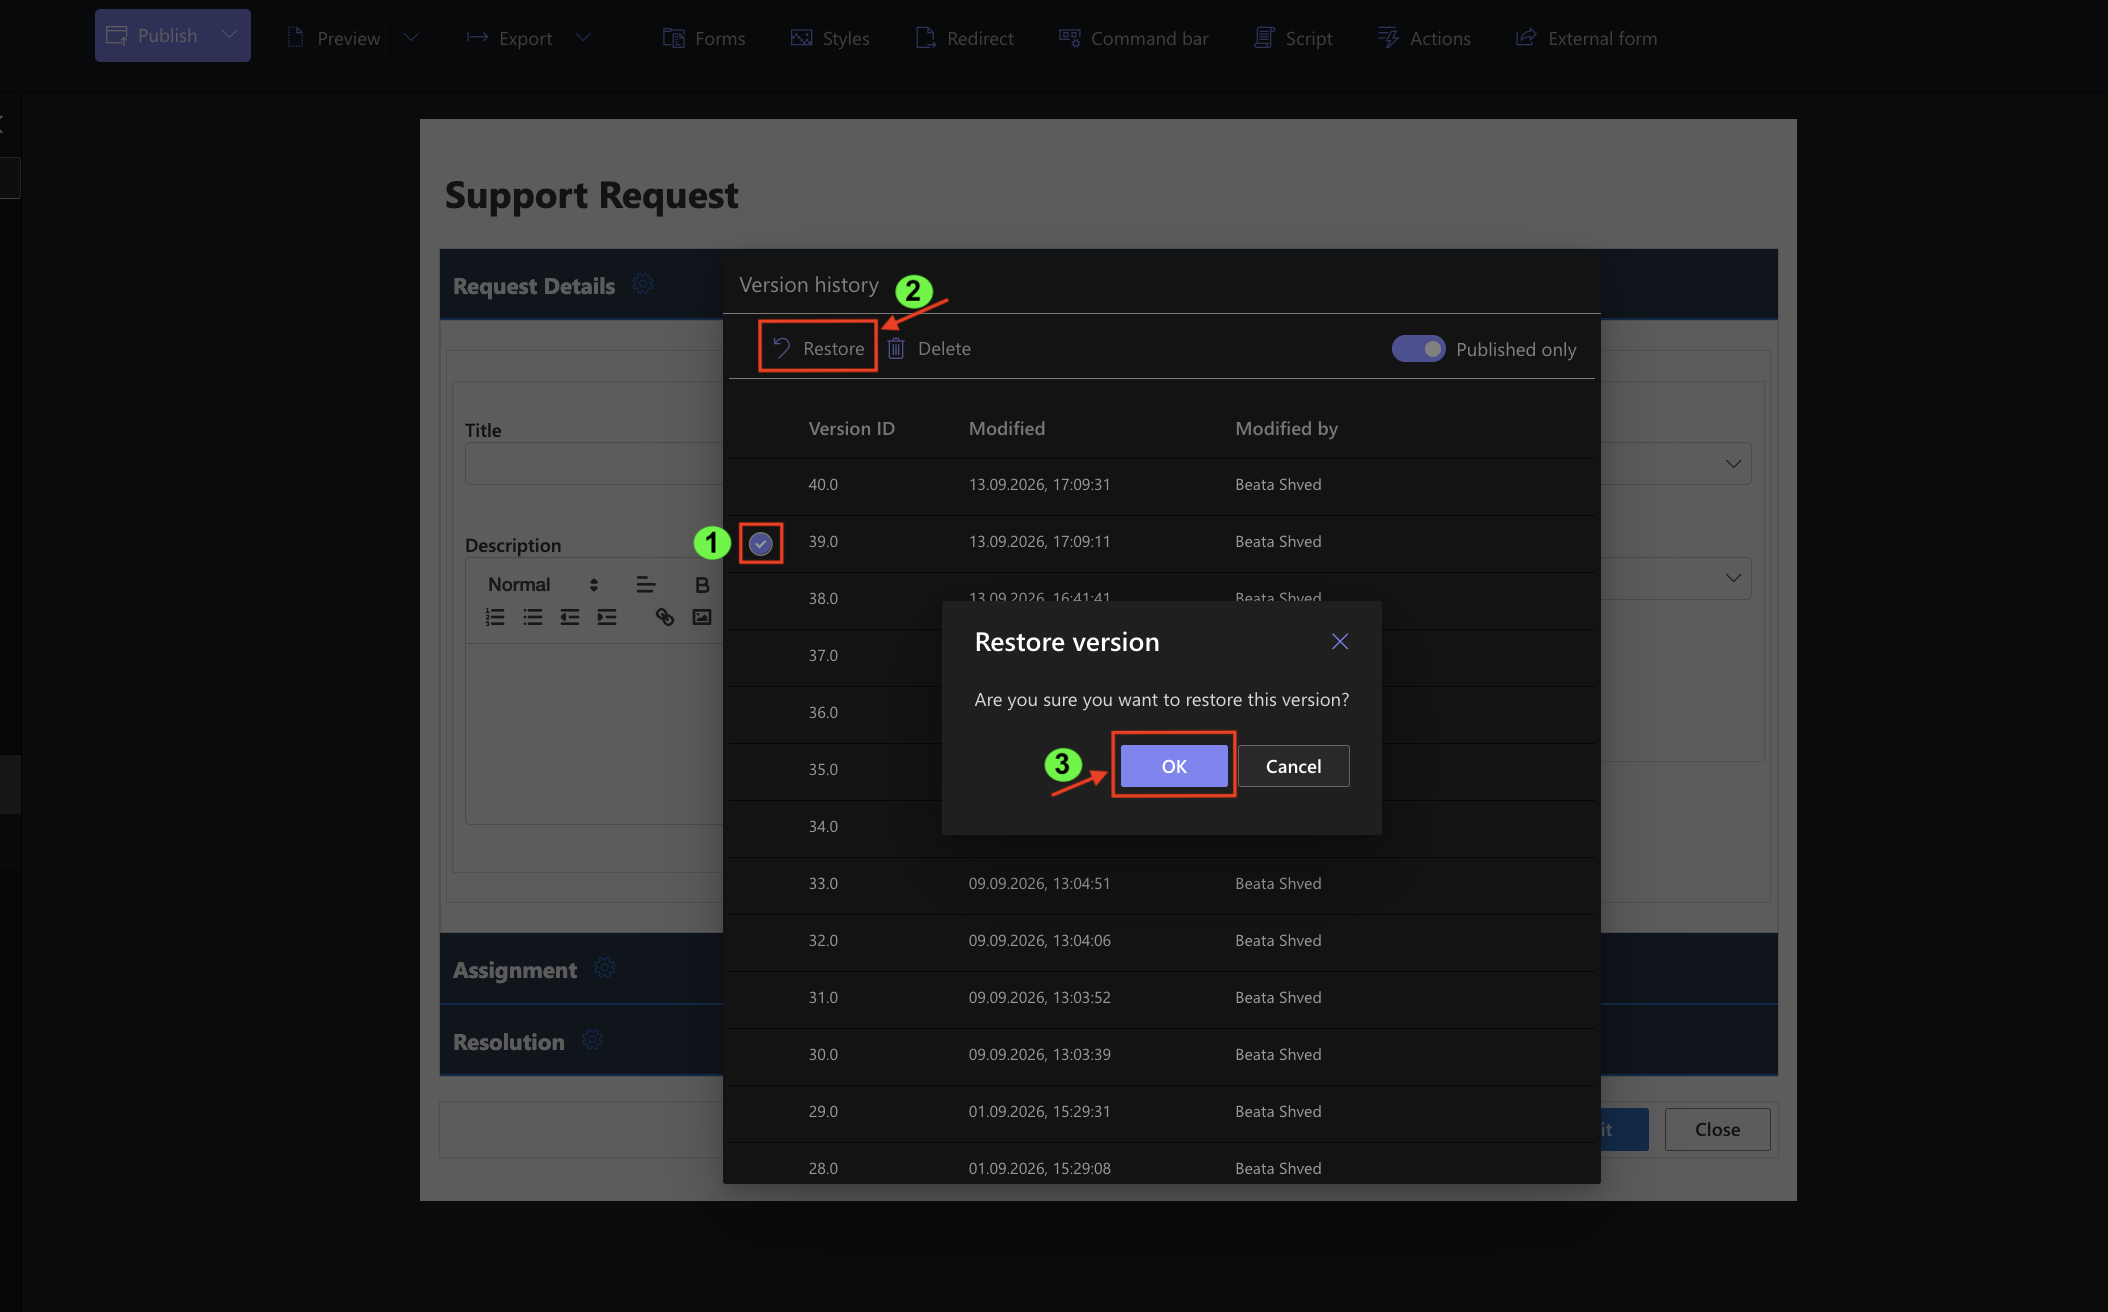
- A confirmation dialog appears. Click OK to restore the selected version.
The restored version is immediately loaded into Form Designer as the current version. You can review it, make additional changes if needed, and then Publish the form when you are ready to make it available to users.
Step 7: Delete an Unneeded Version
Version History also allows you to remove versions that are no longer needed.
- Select the version you want to remove and click Delete.
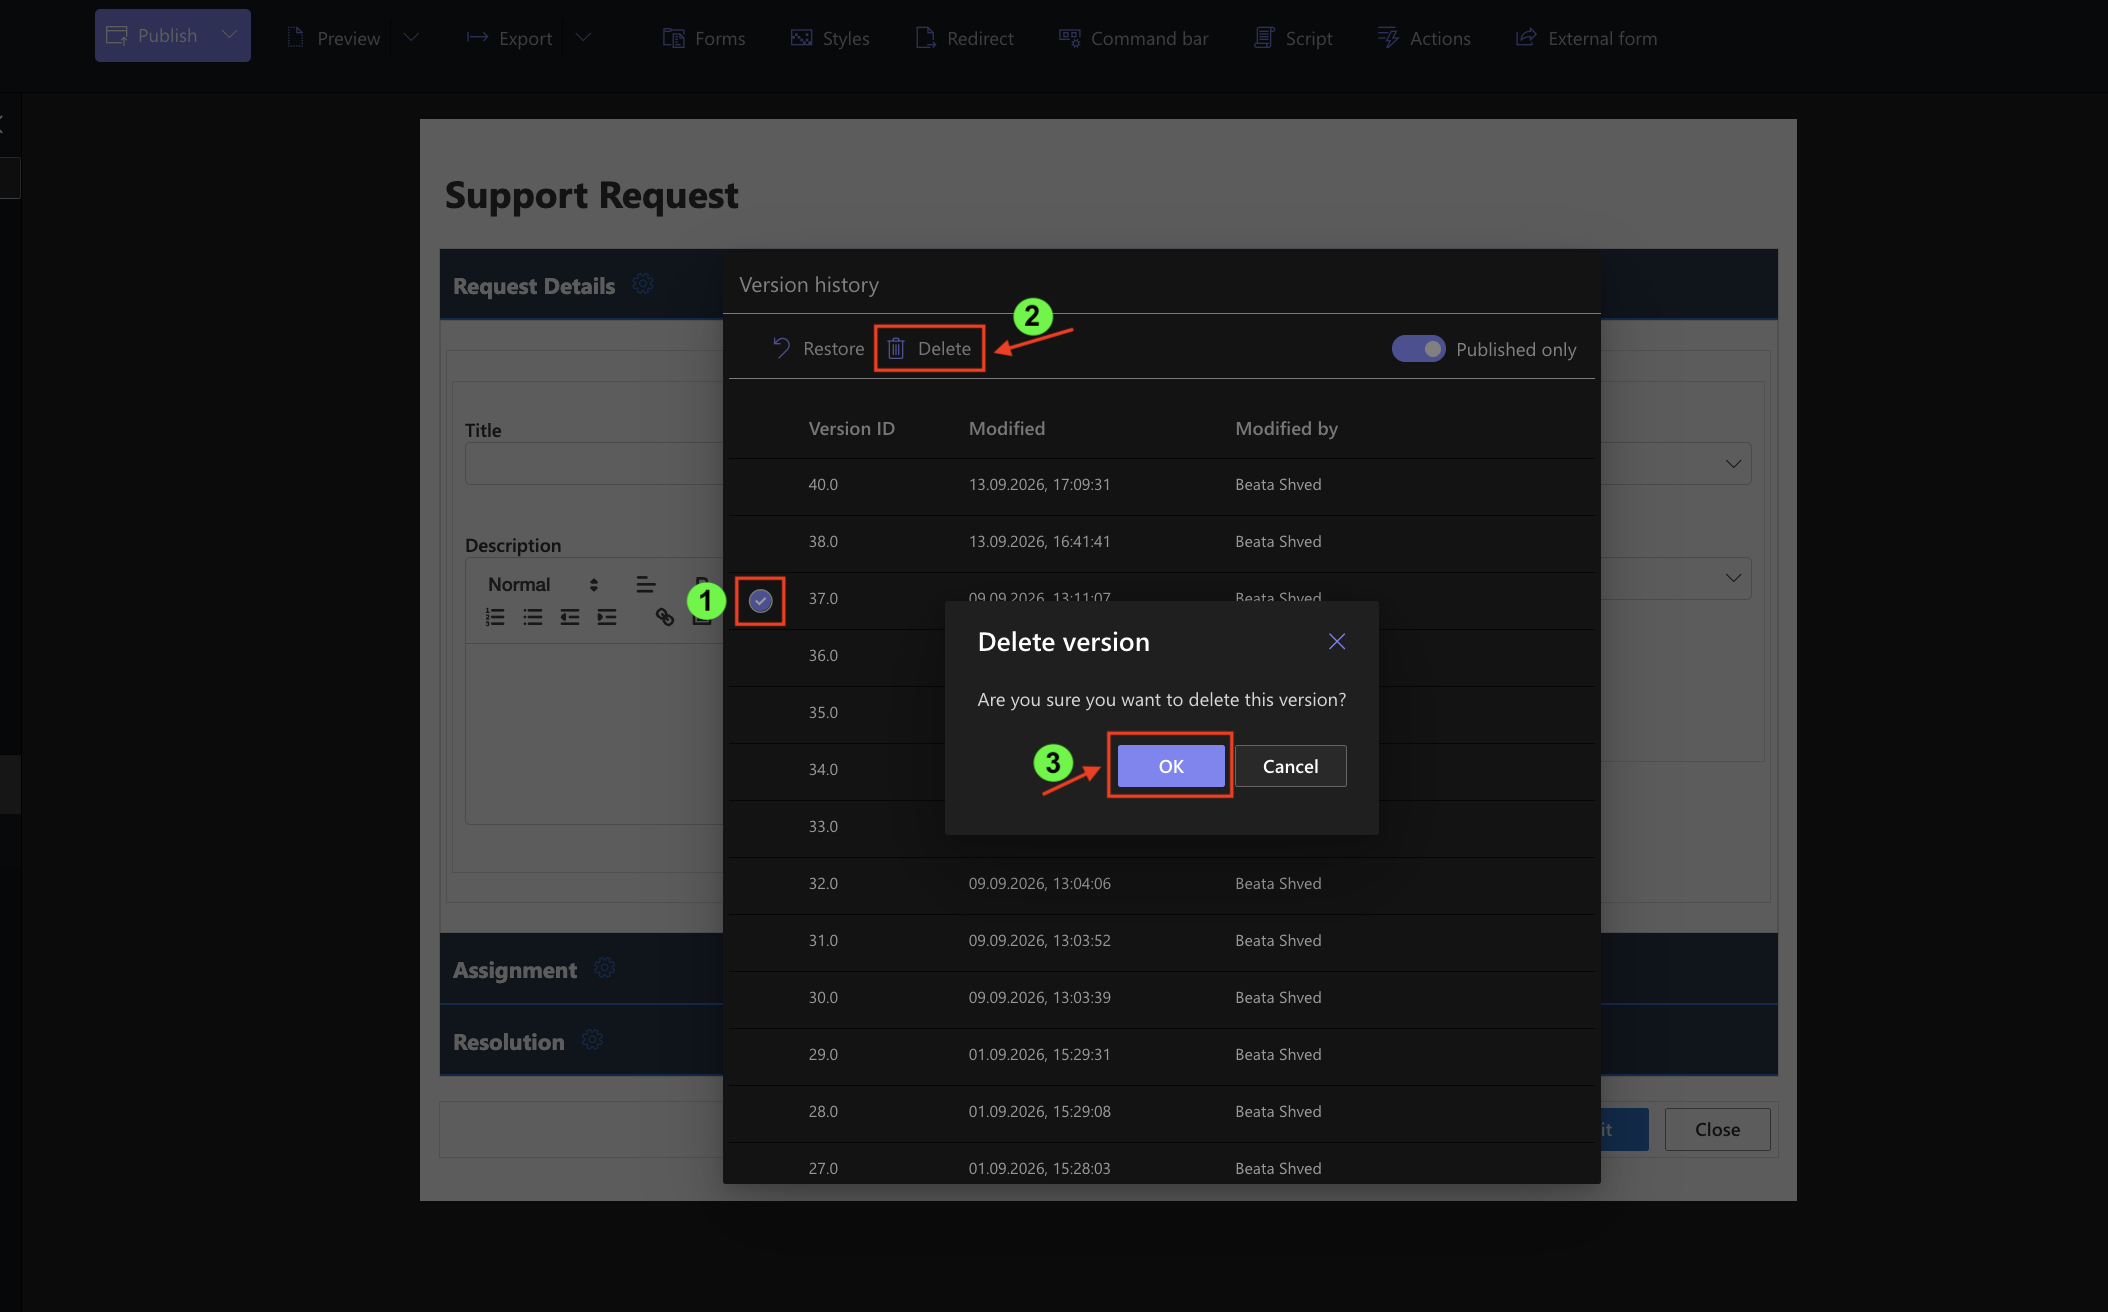
Use this option when you no longer need to keep a particular saved version.
Summary
You can use Undo and Redo for recent design changes, save unfinished work as a draft, use Live preview for draft to test it, and Publish the form when it is ready.
Version history provides access to previous form versions and allows you to restore an earlier version when needed.