In this tutorial, you will add Signature columns to a SharePoint list and configure each available signature type so you can understand how all three behave in real forms:
- Entra ID signature
- Hand-written signature
- Declarative signature
This provides a complete demonstration of how Signature columns work and how they enforce data integrity in different business scenarios.
Instructions
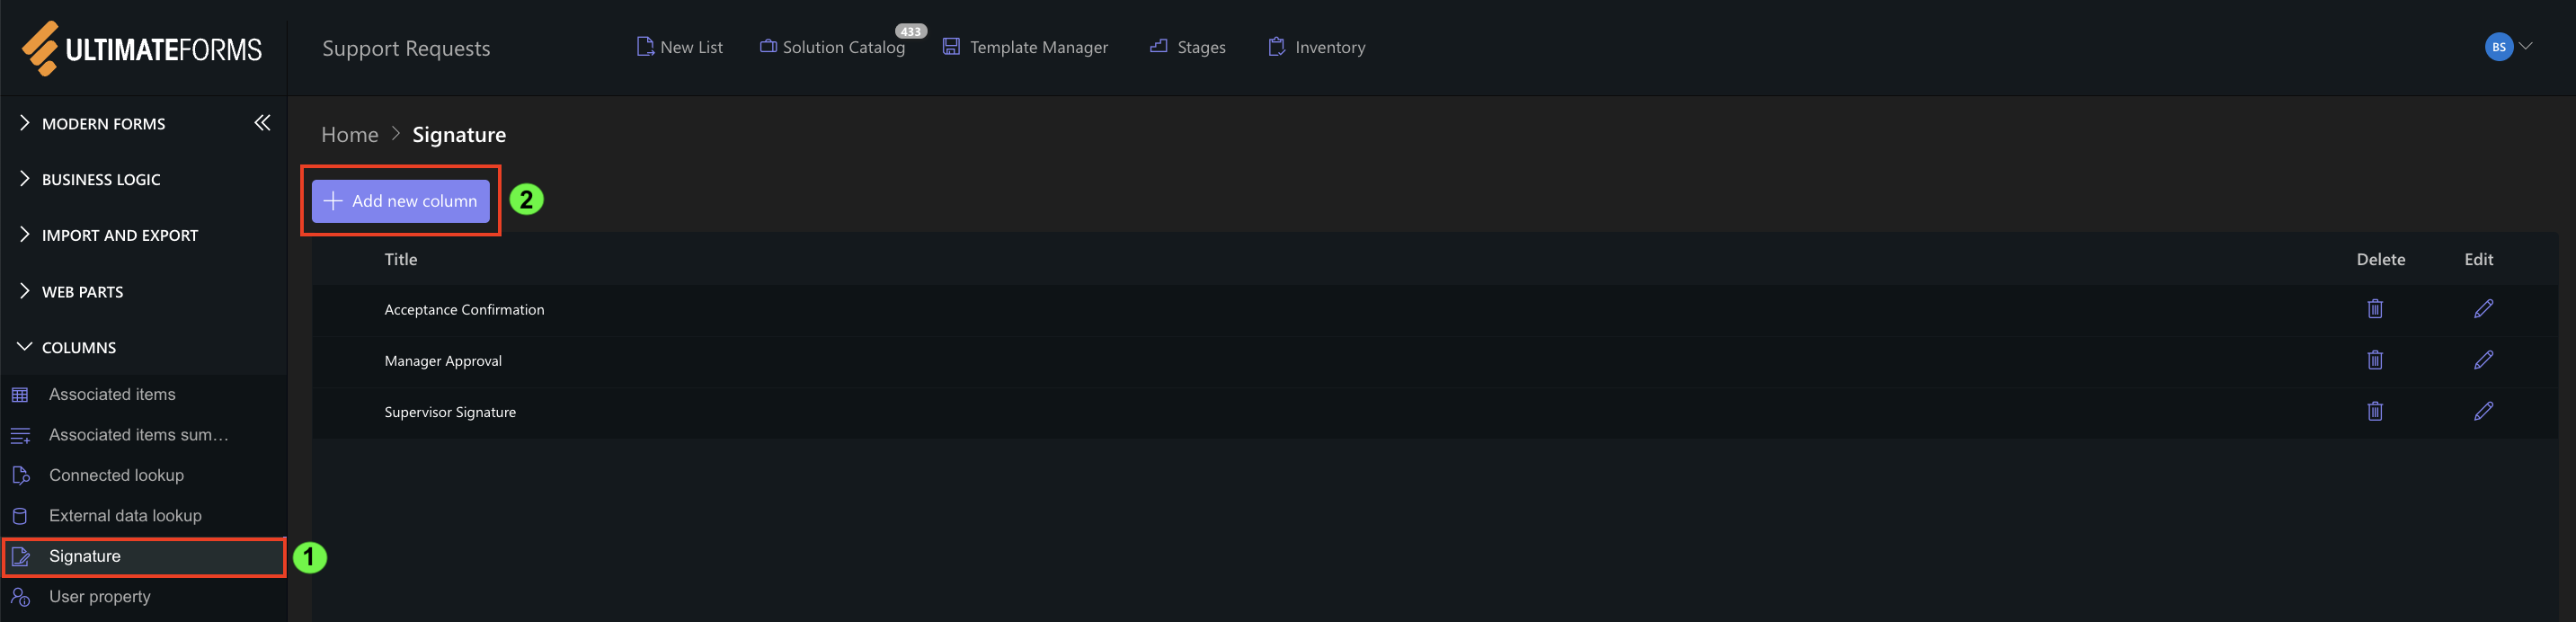
Step 1: Add Signature Columns to Your List
To demonstrate all three signature types, create three Signature columns in the same list:
- Manager Approval (Entra ID)
- Supervisor Signature (Hand-written)
- Acceptance Confirmation (Declarative)
Steps:
- Open your SharePoint list
- Go to → Design → Columns
- Click Add Column → Signature
- Name the column
- Repeat for all three signature types
Step 2: Select Columns to Protect
Each Signature column should protect specific business-critical columns.
For example:
- Manager Approval (Entra ID)
- Title
- Status
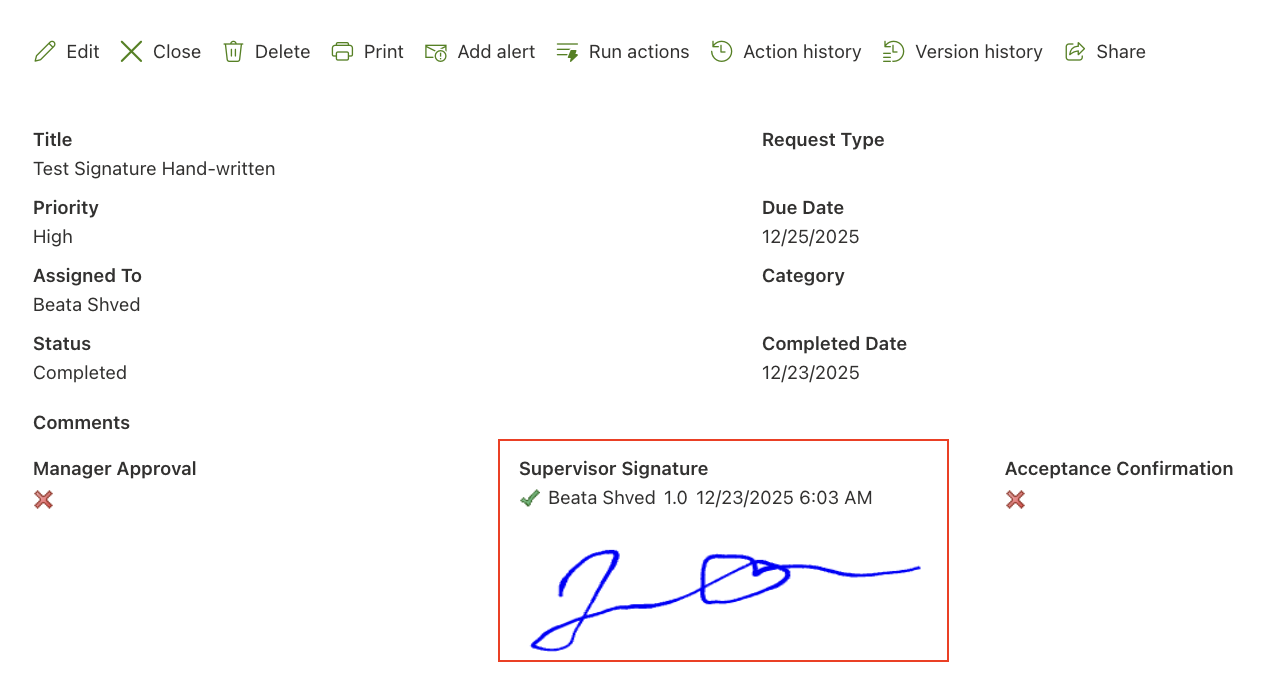
- Supervisor Signature (Hand-written)
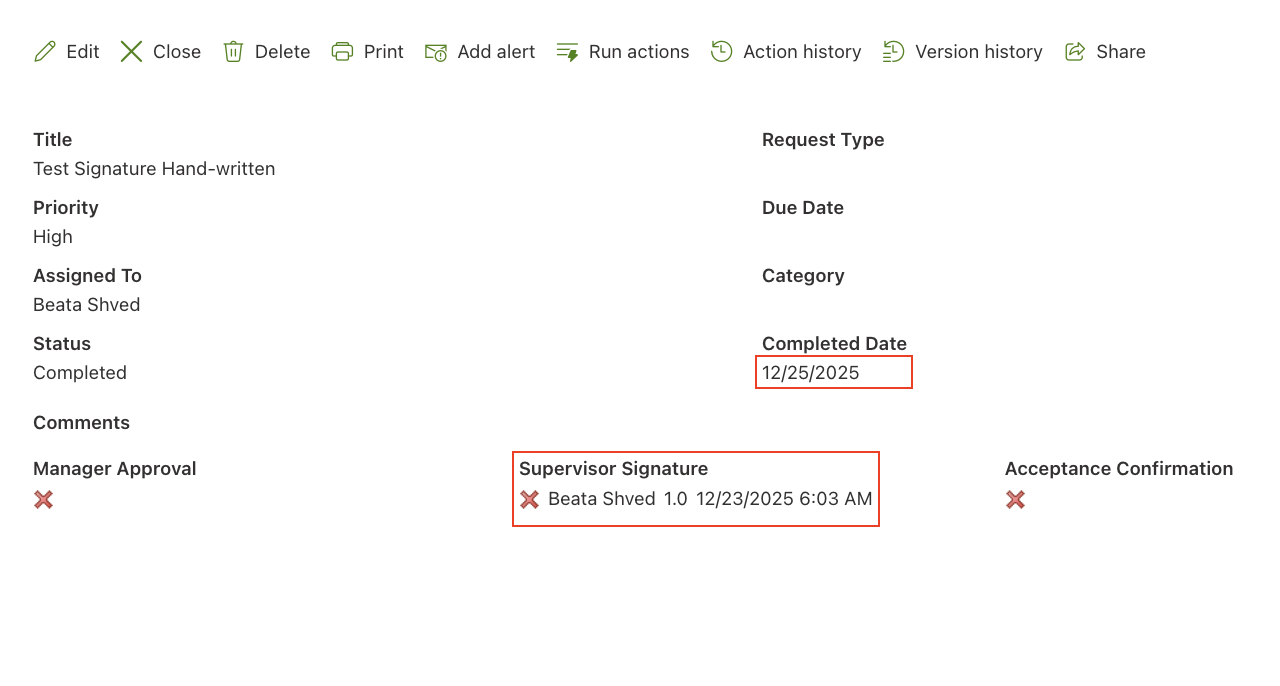
- Completed Date
- Acceptance Confirmation (Declarative) –
- Comments
You can use the same or different protected columns depending on the scenario.
Important: If a protected column changes after signing, the signature becomes invalid.
Step 3: Configure All Three Signature Types
Now configure the signature behavior for each column separately.
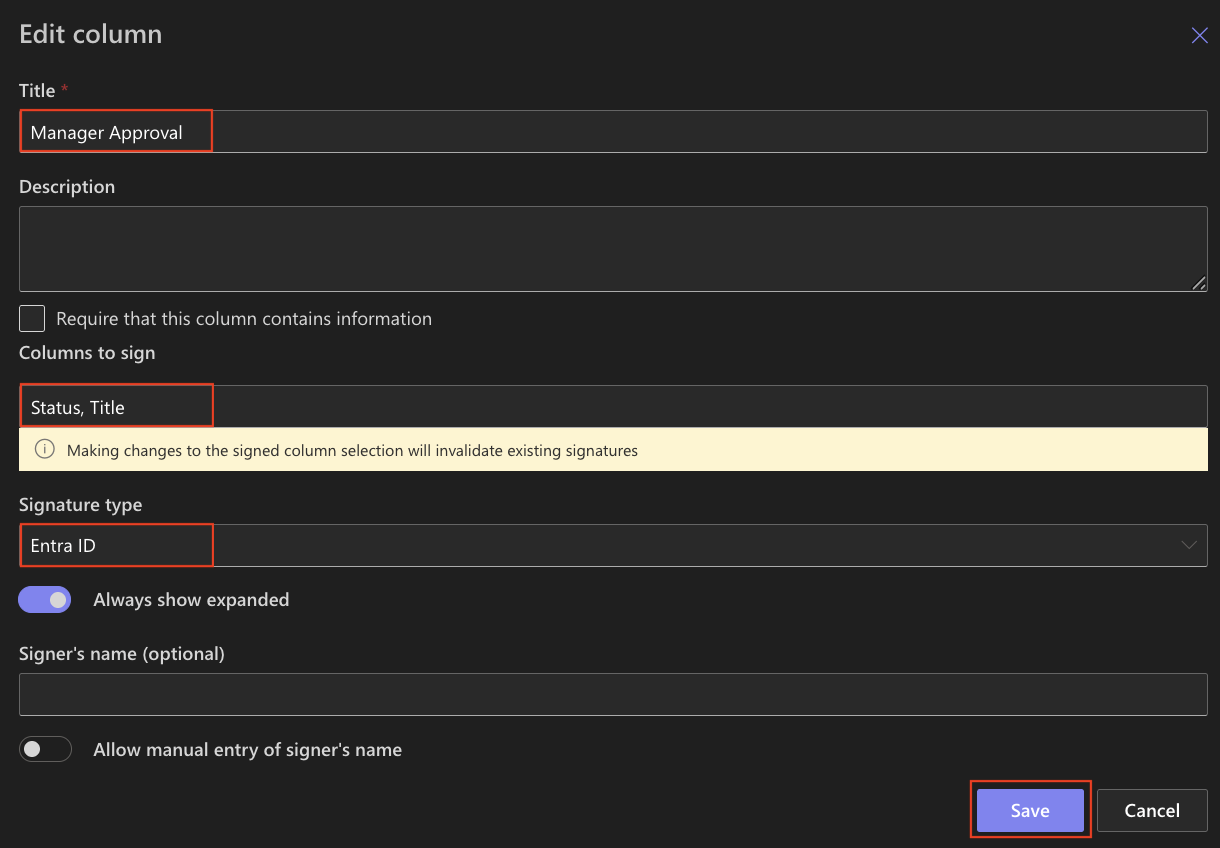
Entra ID Signature (Manager Approval)
- Open Manager Approval column settings
- Columns to sign: Status, Title
- Set Signature Type = Entra ID
- Set Always show expanded
- (Optional) Disable manual name entry
- Save.
How it works:
- The user must re-enter their Entra ID (Azure AD) username/password
- Identity is validated at the moment of signing
- Provides the highest level of assurance
- Perfect for approvals that require accountability and audit trails
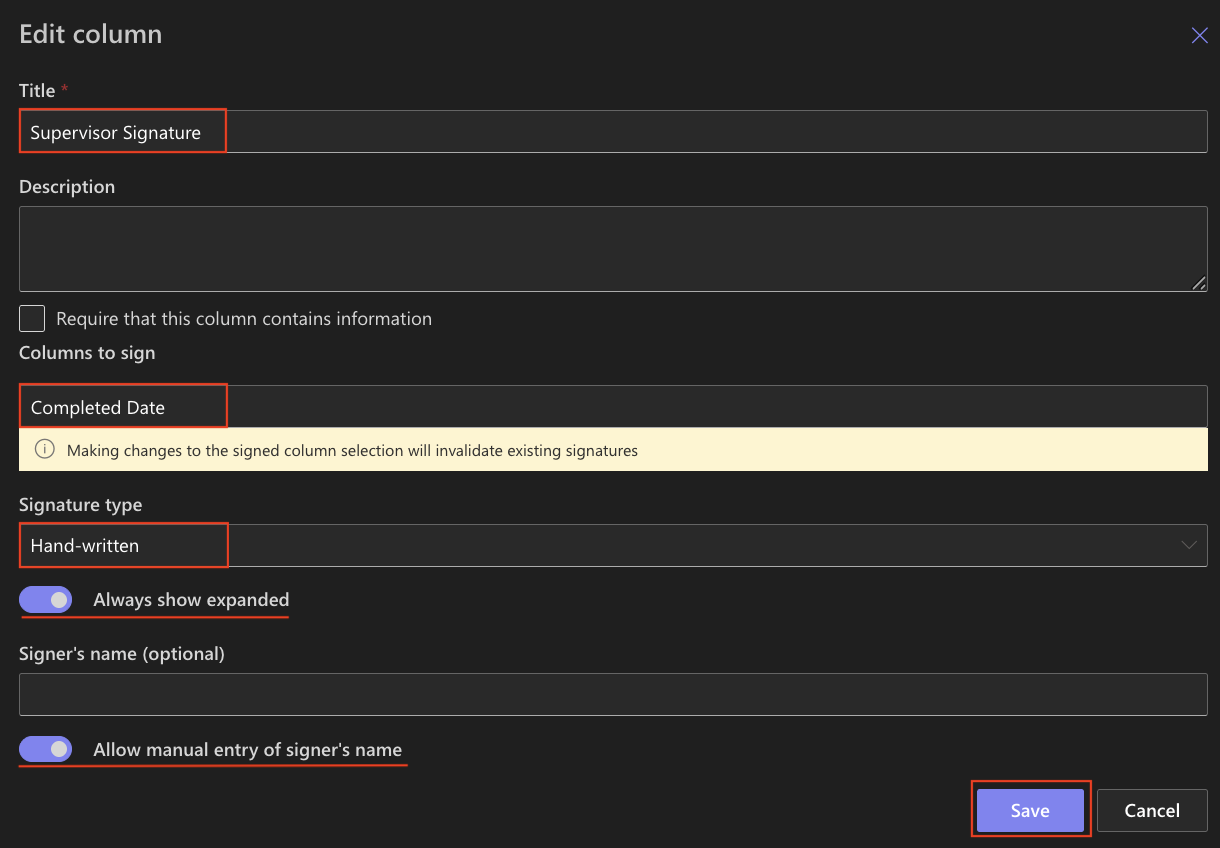
Hand-written Signature (Supervisor Signature)
- Open Supervisor Signature column settings
- Columns to sign: Completed Date
- Set Signature Type = Hand-written
- Set Always show expanded
- Allow manual entry of signer’s name
- Save.
How it works:
- Works great on desktop, tablet, or phone
- User types their full name and draws their signature
- Ideal for operational, mobile or column scenarios
- Feels intuitive and natural, like signing on a delivery pad
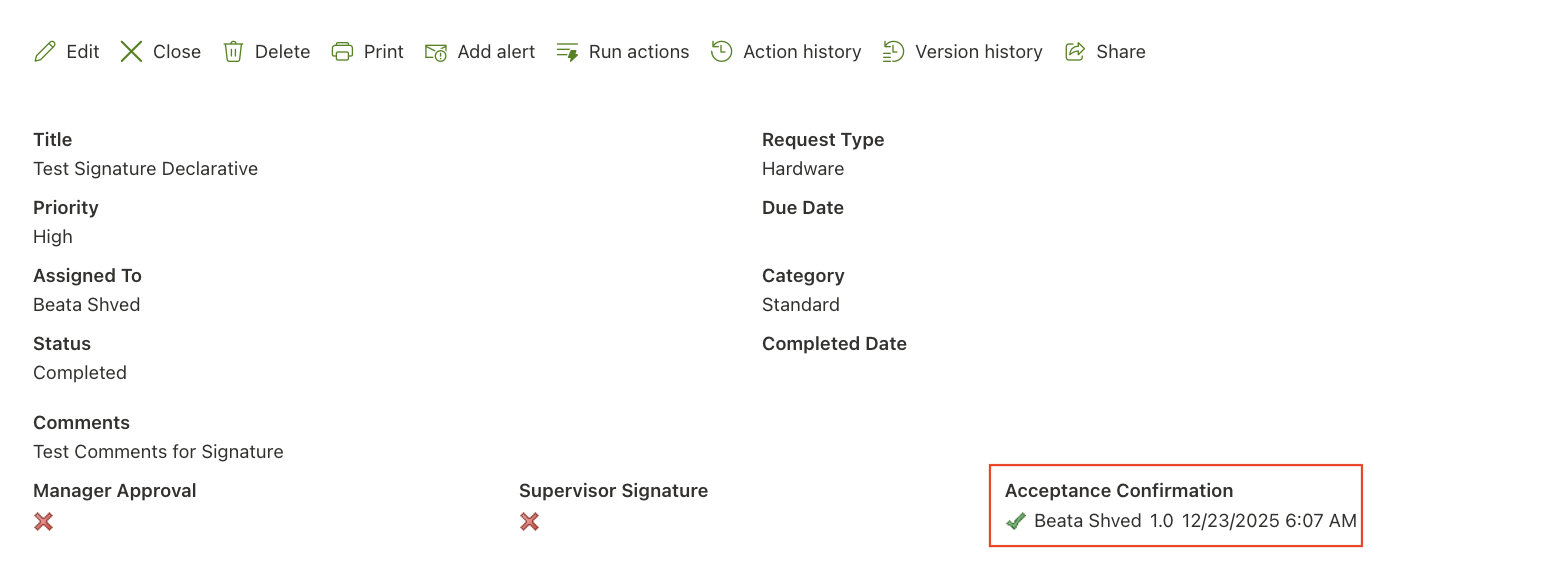
Declarative Signature (Acceptance Confirmation)
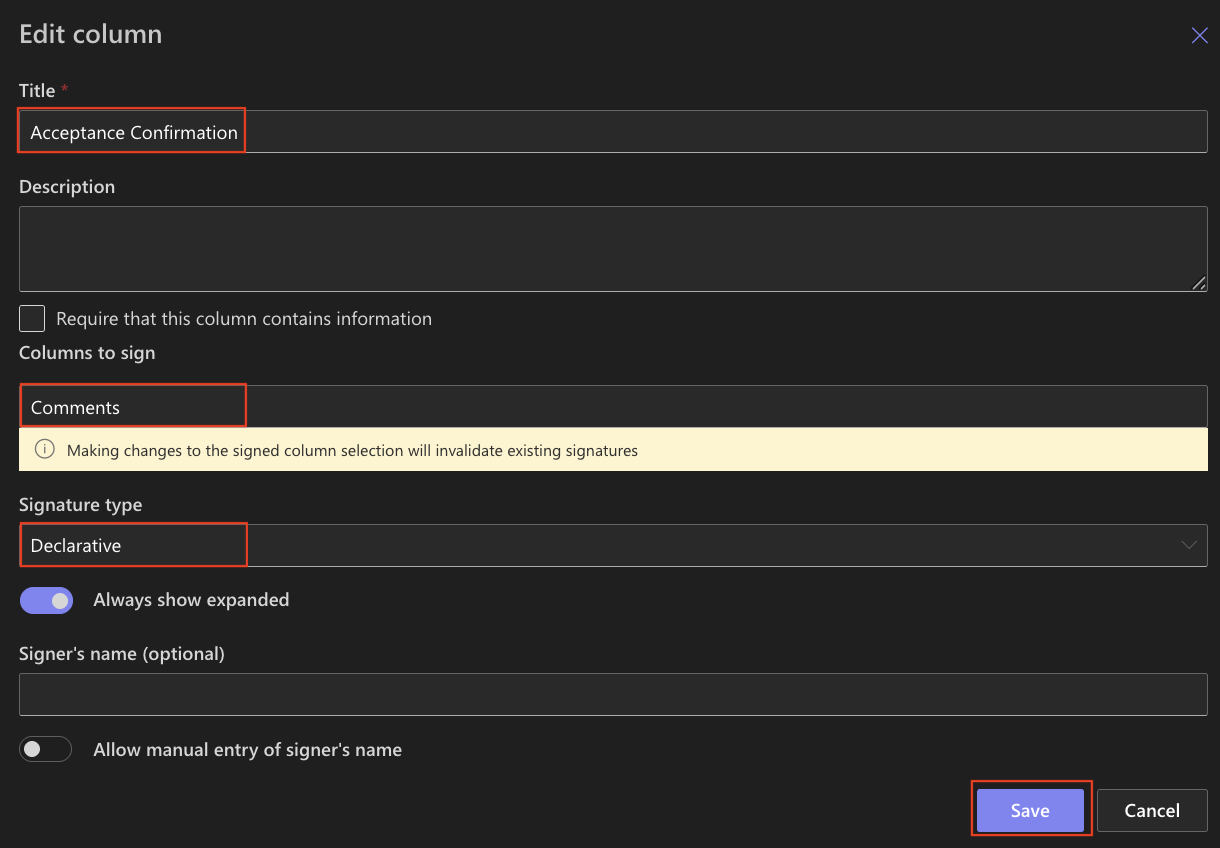
- Open Acceptance Confirmation column settings
- Columns to sign: Comments
- Set Signature Type = Declarative
- Set Always show expanded
- Save.
How it works:
- User simply confirms by checking the signature box
- The logged-in user's name is used automatically
- Great for low-risk acknowledgments or “I agree” statements
Step 4: Add All Three Signature Columns to the Form
- Go to Form Designer
- Drag the three Signature columns onto the form
- Save and publish
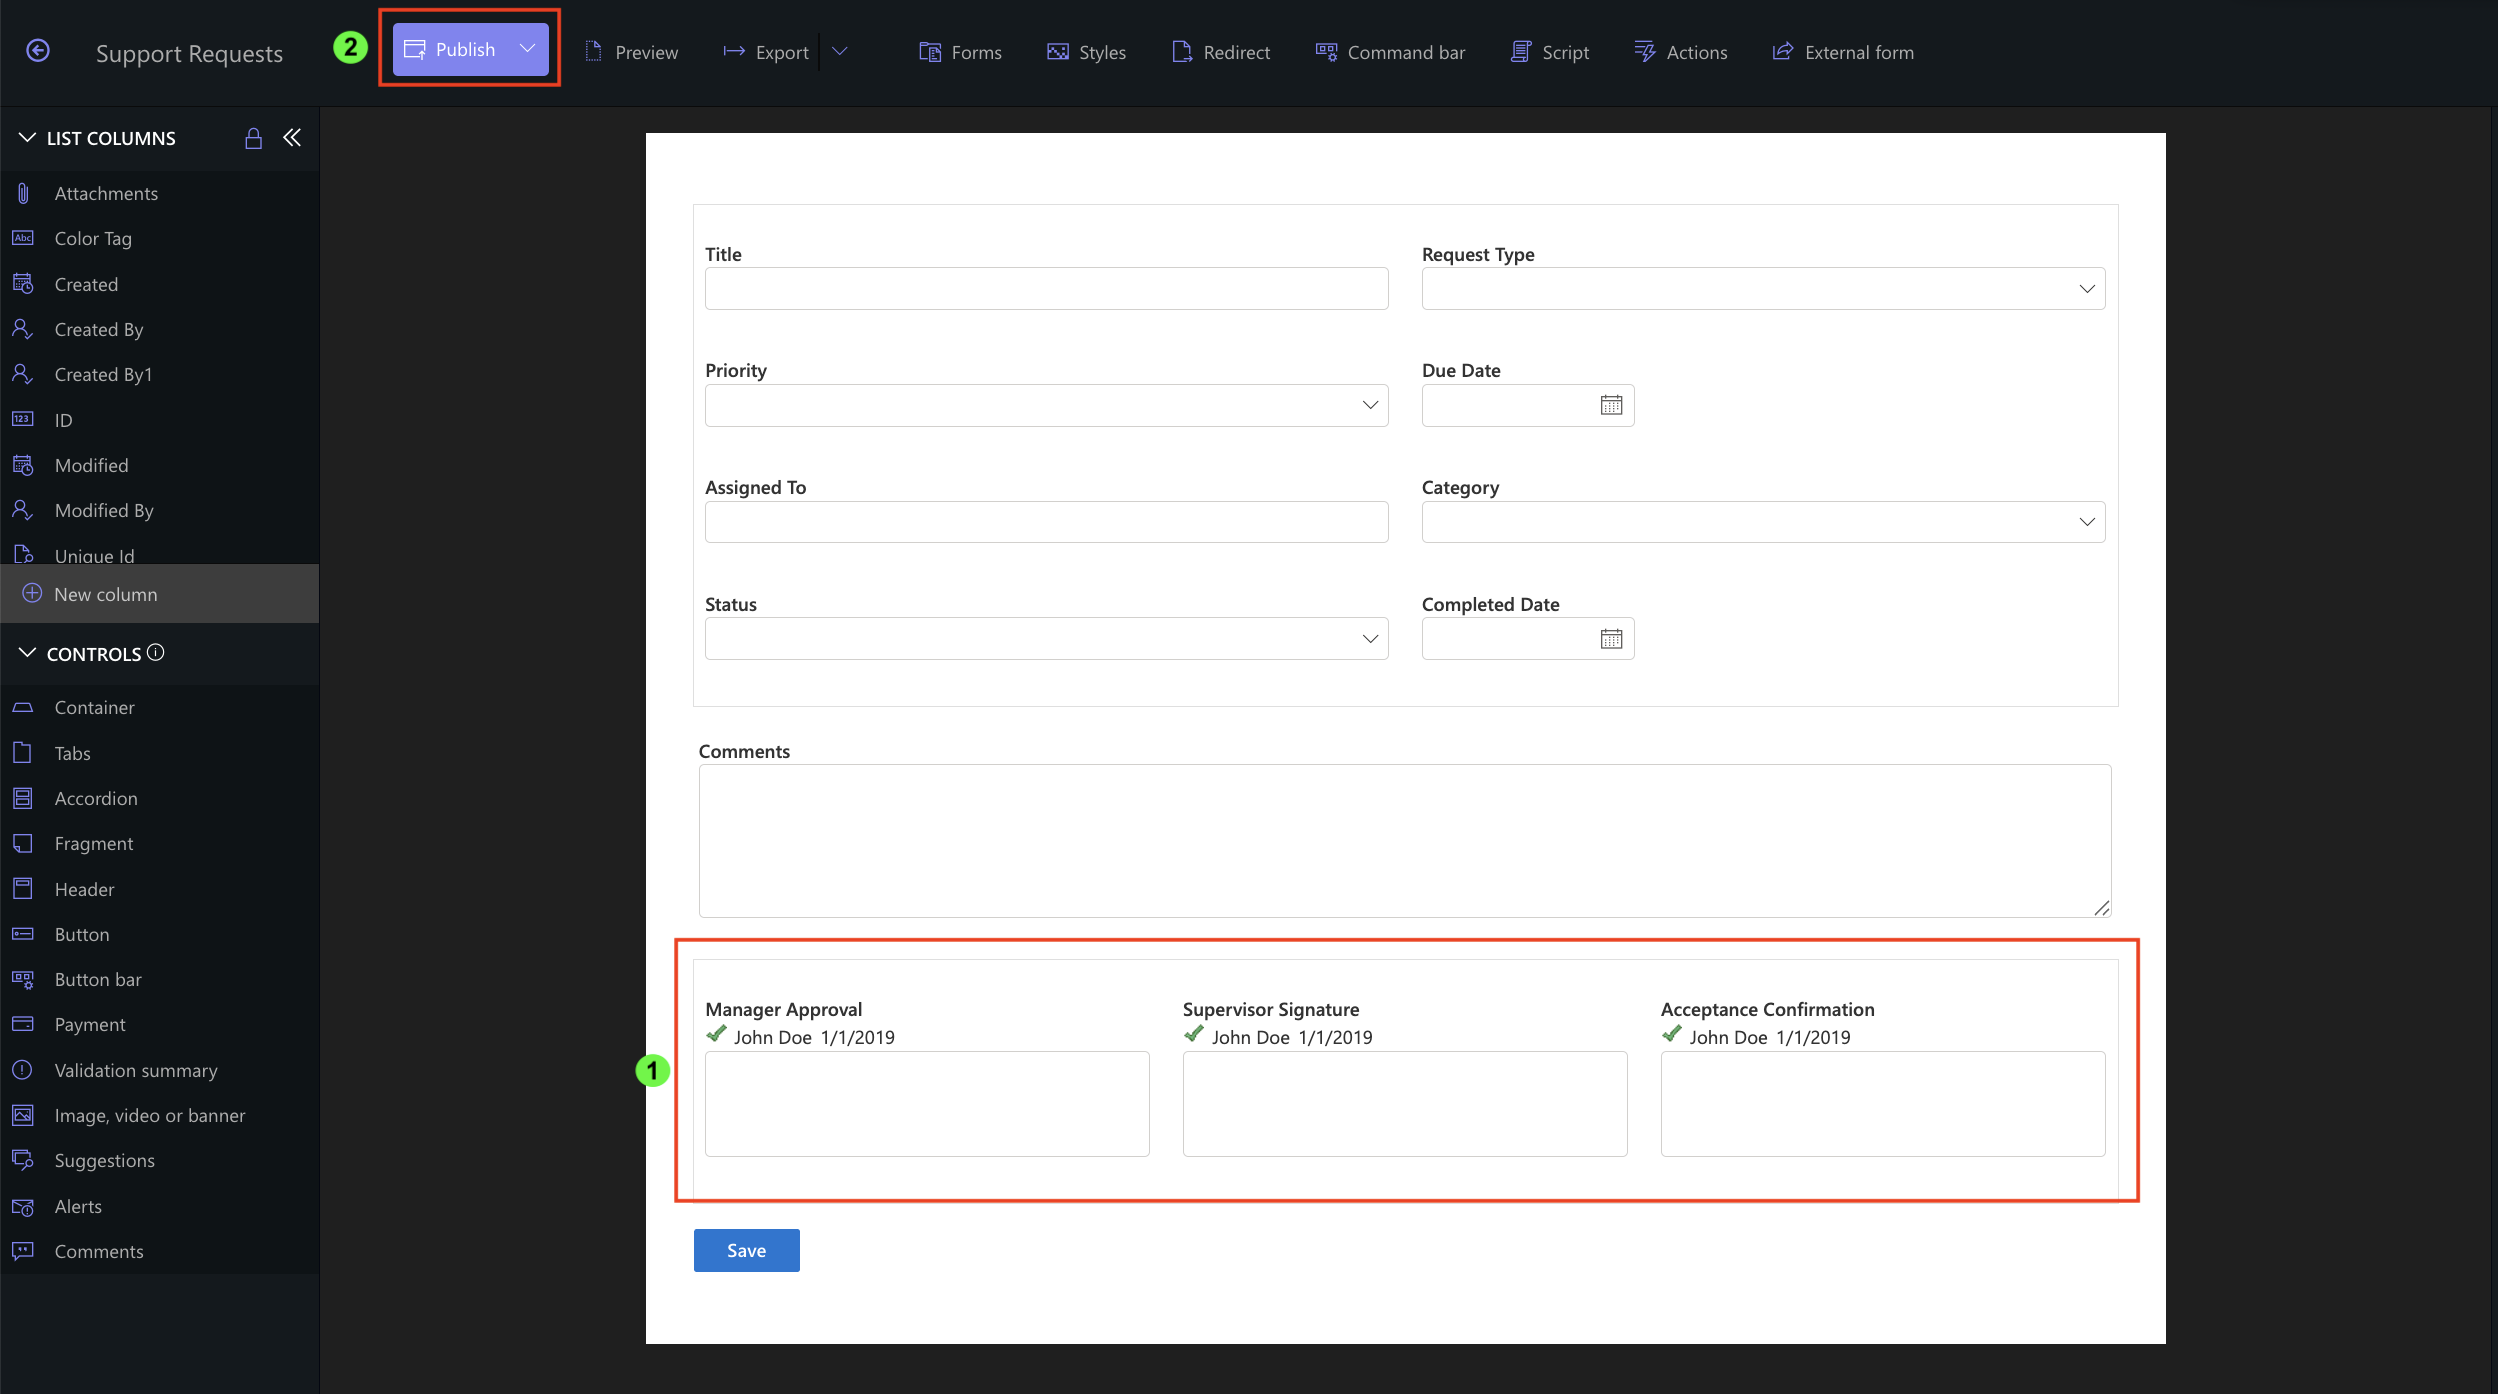
Your form now demonstrates all three signature types side-by-side.
Step 5: Test All Three Signature Types
Test Entra ID
- Open the form → sign as Manager
- Enter Entra ID credentials

- Save the item

- Modify a protected column → signature becomes invalid

Test Hand-written
- Open the form → sign as Supervisor
- Draw with mouse or finger
- Type name
- Save
- Edit protected column → signature invalidates
Test Declarative
- Simply click “Sign”
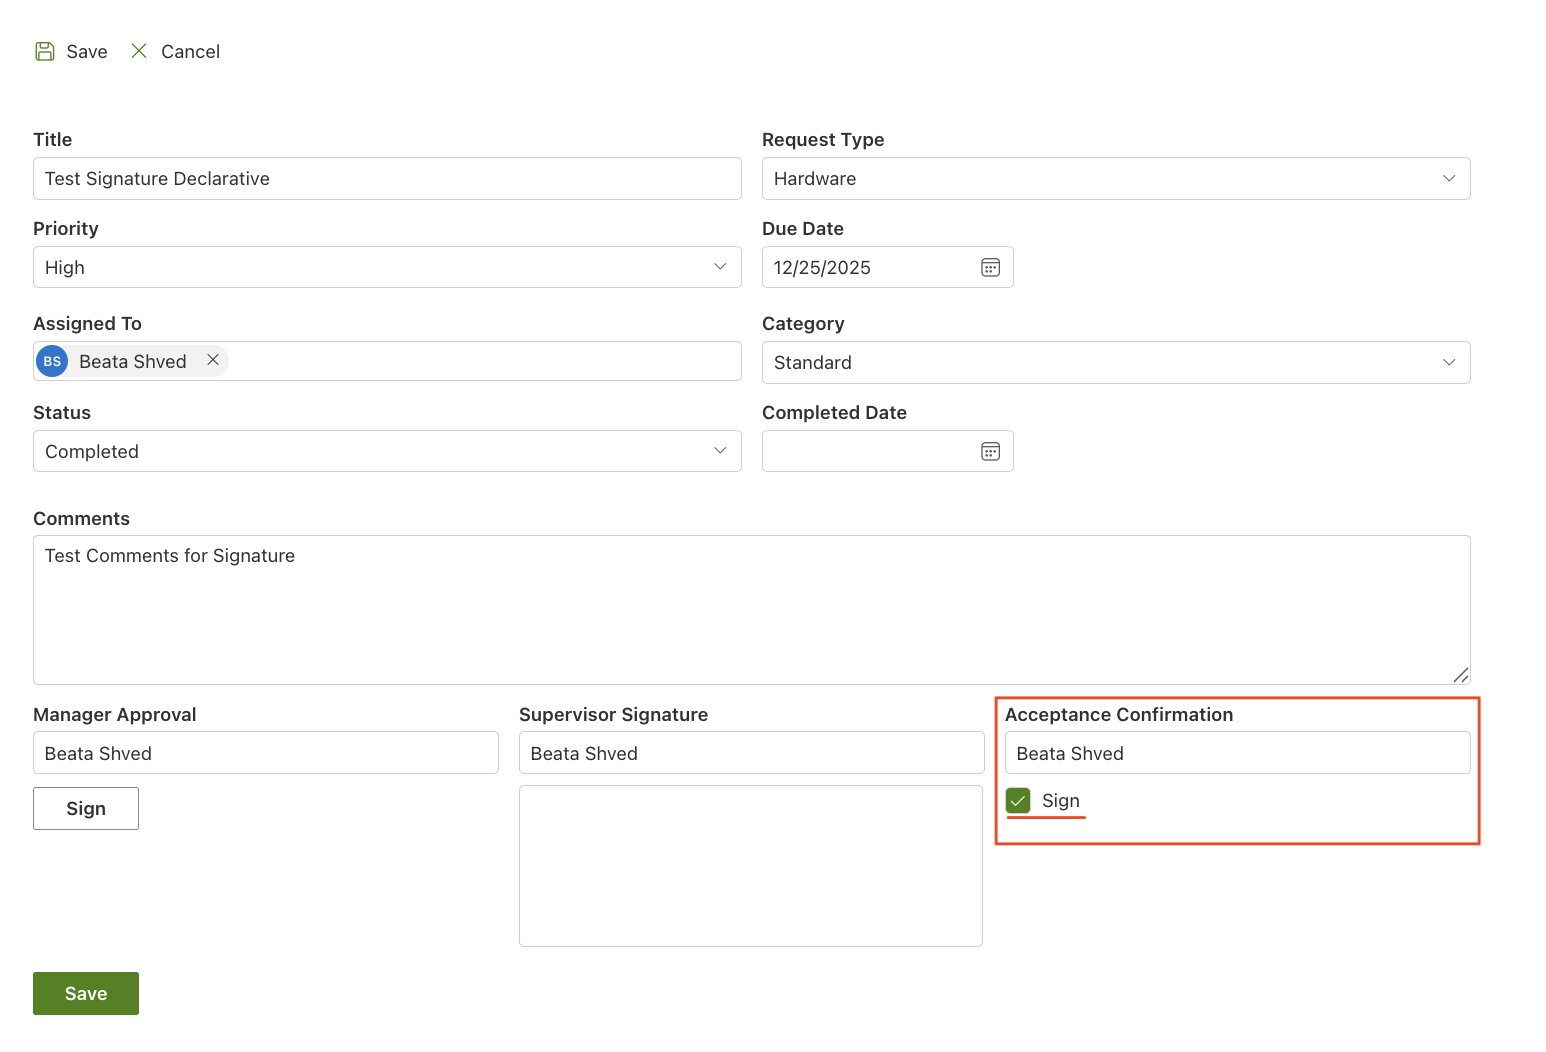
- System uses logged-in user’s identity
Summary
In this tutorial, you learned how to add Signature columns, configure all three signature types, and see how each behaves in a real form. You now understand how signatures protect selected columns and how the system validates or invalidates them based on changes—providing a secure foundation for building approval and verification steps.