In large organizations, information often comes from multiple SharePoint lists — for example, Projects, Tasks, and Company Events.
The Event Calendar web part in Infowise Ultimate Forms for SharePoint allows you to combine all those lists into one synchronized and color-coded calendar view.
This tutorial explains how to connect three different SharePoint lists, assign each a distinct color and category, and manage them within a single unified calendar.
Instructions
Step 1: Prepare the Source Lists
You’ll need three lists that contain date-based information:
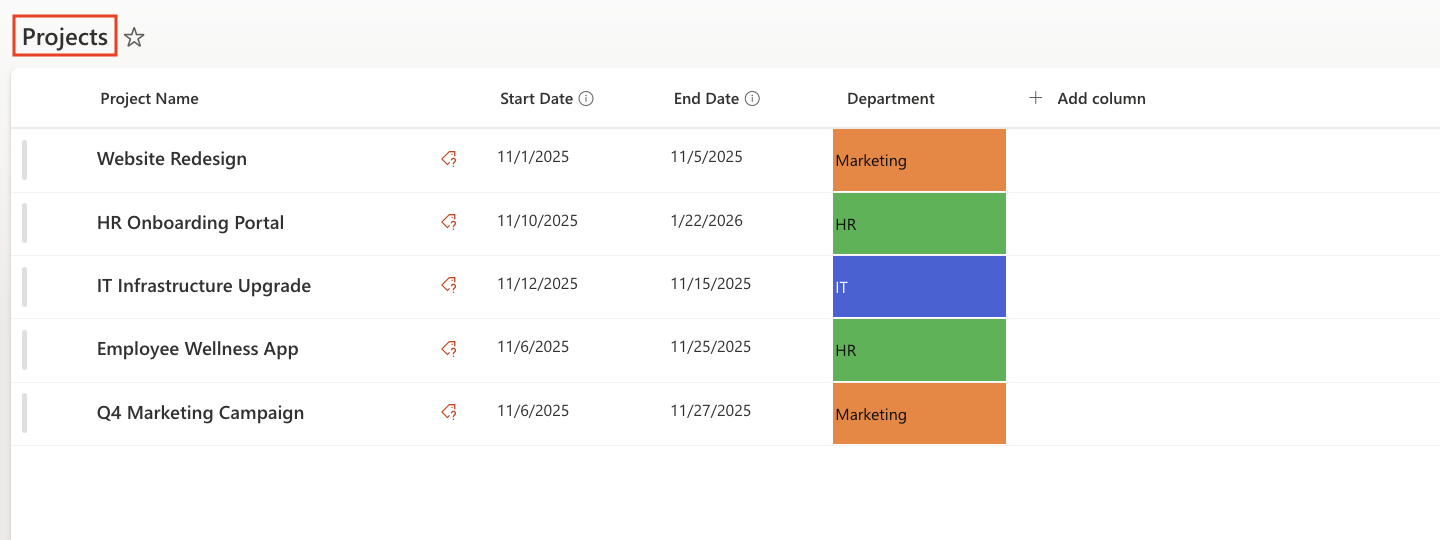
- Projects List
- Title (Single line of text)
- Start Date (Date and Time)
- End Date (Date and Time)
- Department (Color Choice — IT, HR, Marketing)
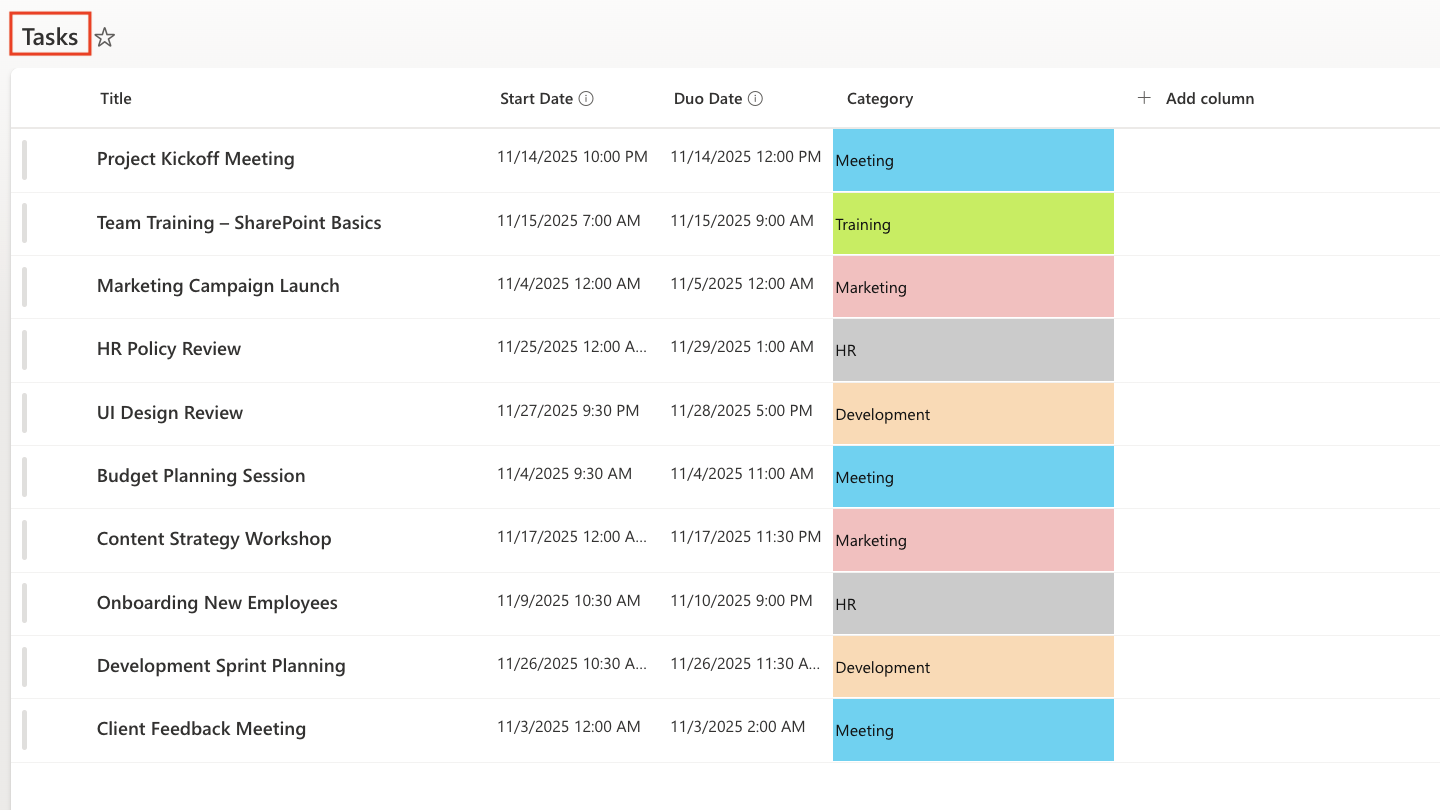
- Tasks List
- Title (Single line of text)
- Start Date (Date and Time)
- Due Date (Date and Time)
- Category (Color Choice — Meeting, Training, HR, Development)
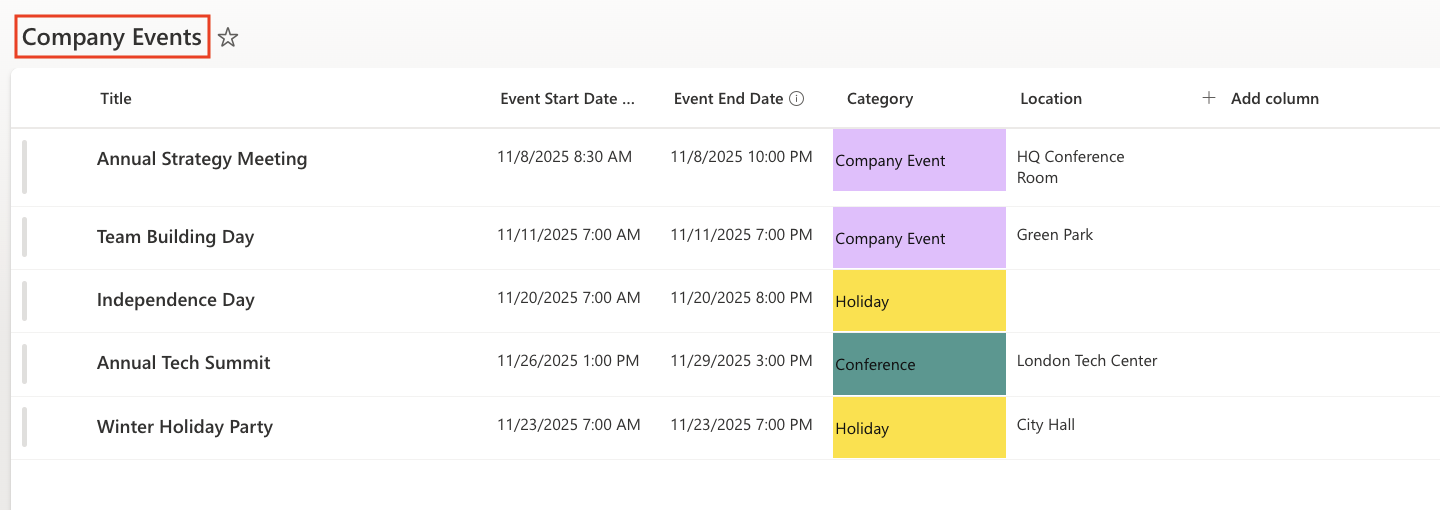
- Company Events List
- Title (Single line of text)
- Event Start Date (Date and Time)
- Event End Date Date (Date and Time)
- Category (Color Choice — Holiday, Company Event, Conference)
- Location (Single line of text)
Add several test items to each list — around 5–7 events per list.
This will help visualize the difference when we connect all three together.
Step 2: Create the Calendar Profile
- Go to your site → click Ultimate Forms → Design.
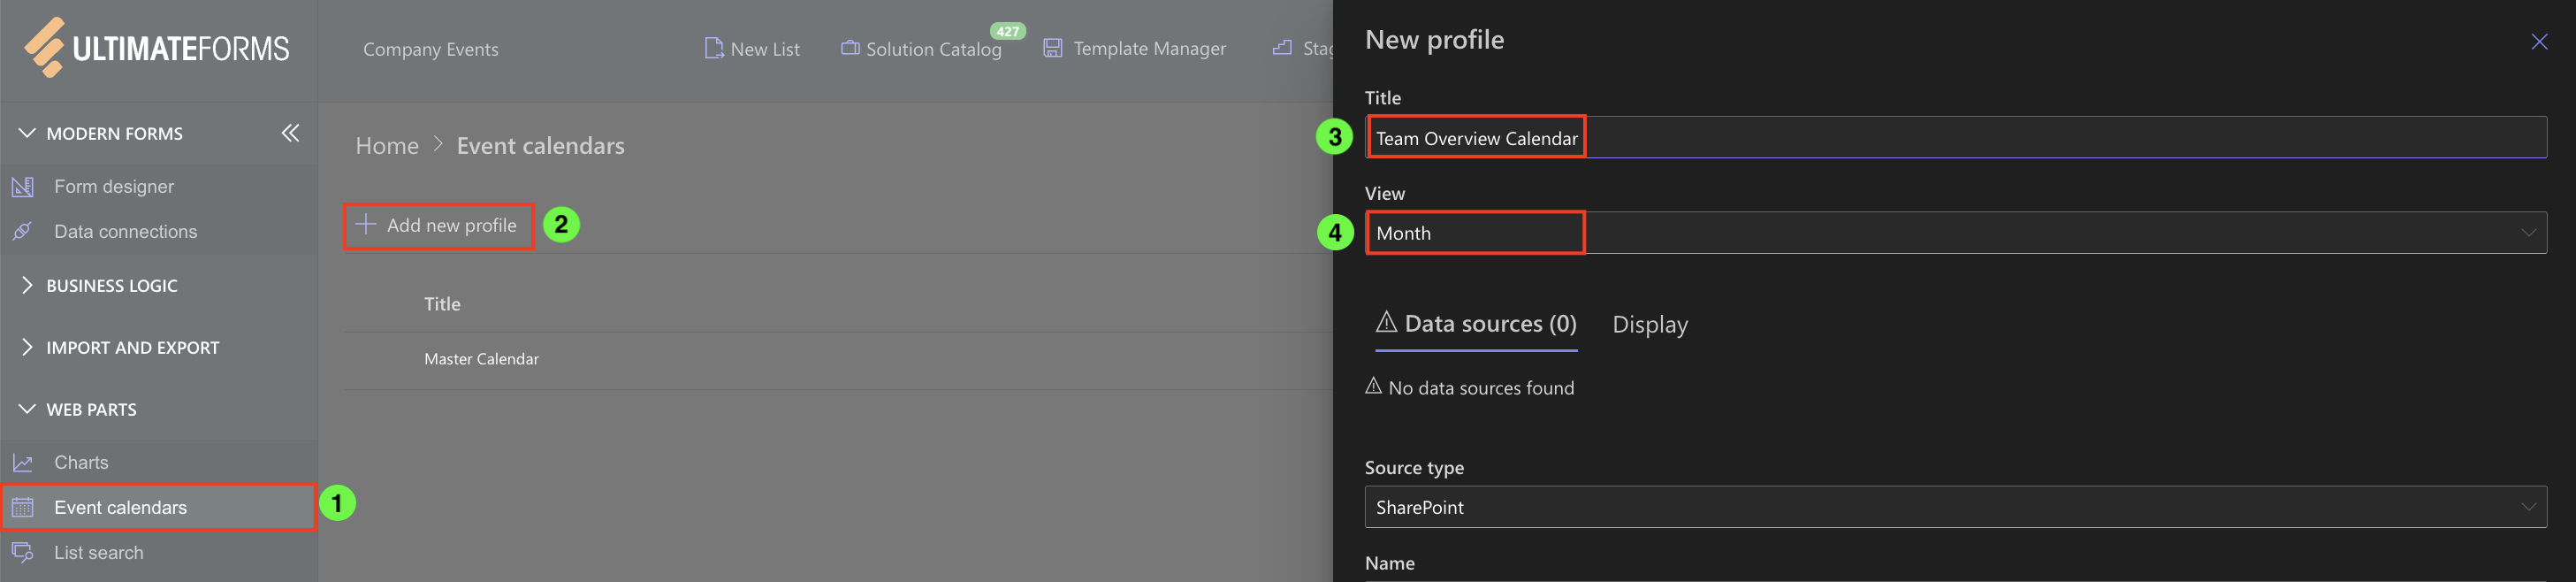
- Under Web Parts, select Event Calendar.
- Click Add new profile.
- Name your profile — for example: Team Overview Calendar.
- For Default view, select Month.
Step 3: Add Data Sources
We’ll now add three separate lists as data sources.
Each list has its own color and field mappings (Title, Start Date, End Date, Category).
Source 1: Projects
- Type: SharePoint
- Name: Projects
- Show data source color✔️
- Color: Blue (#5252d9)
- List: Projects
- Field Mappings:
- Title → Project Name
- Start Date → Start Date
- End Date → End Date
- Add

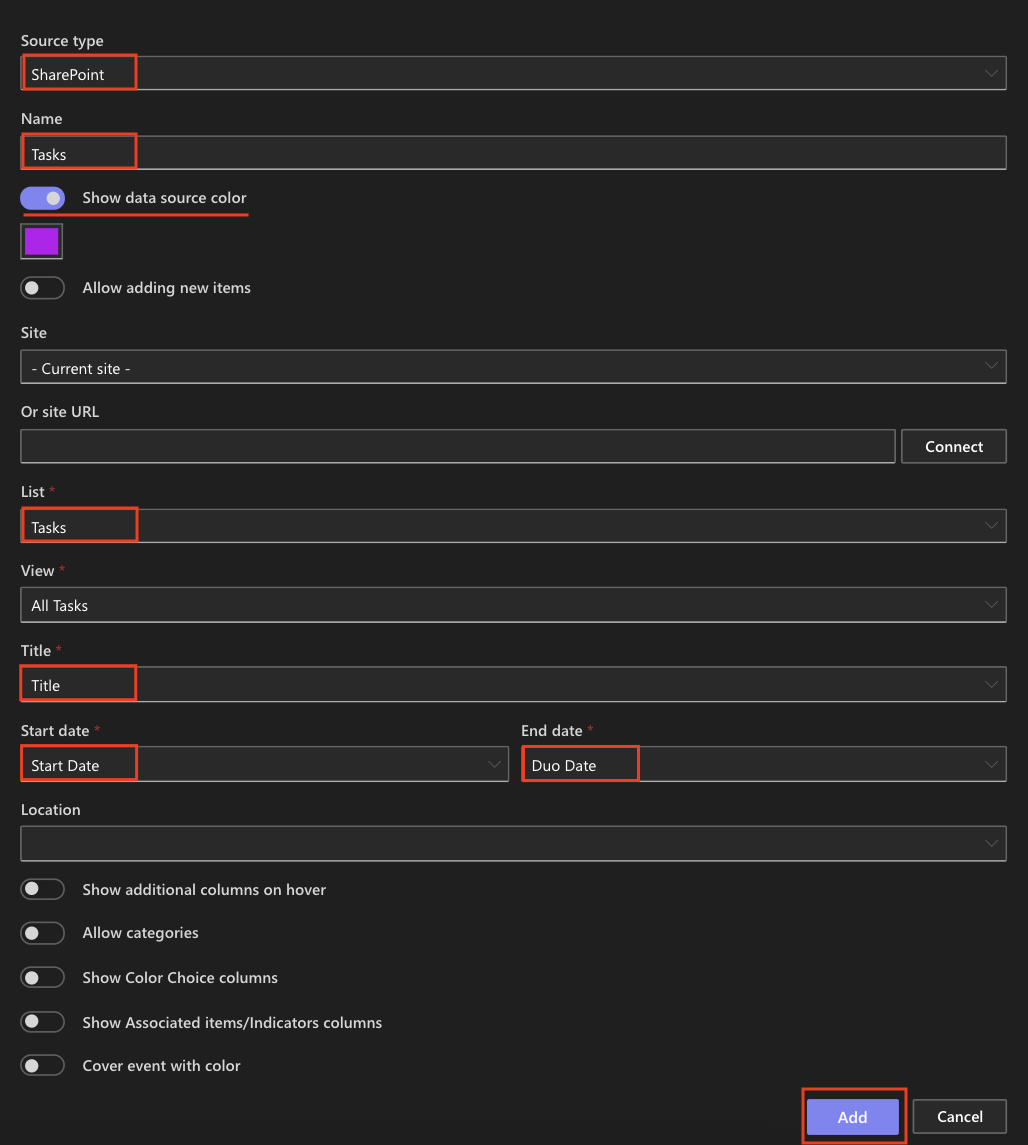
Source 2: Tasks
- Type: SharePoint
- Name: Tasks
- Show data source color✔️
- Color: Purple (#bd07f0)
- List: Tasks
- Field Mappings:
- Title → Title
- Start Date → Start Date
- End Date → Due Date
- Add
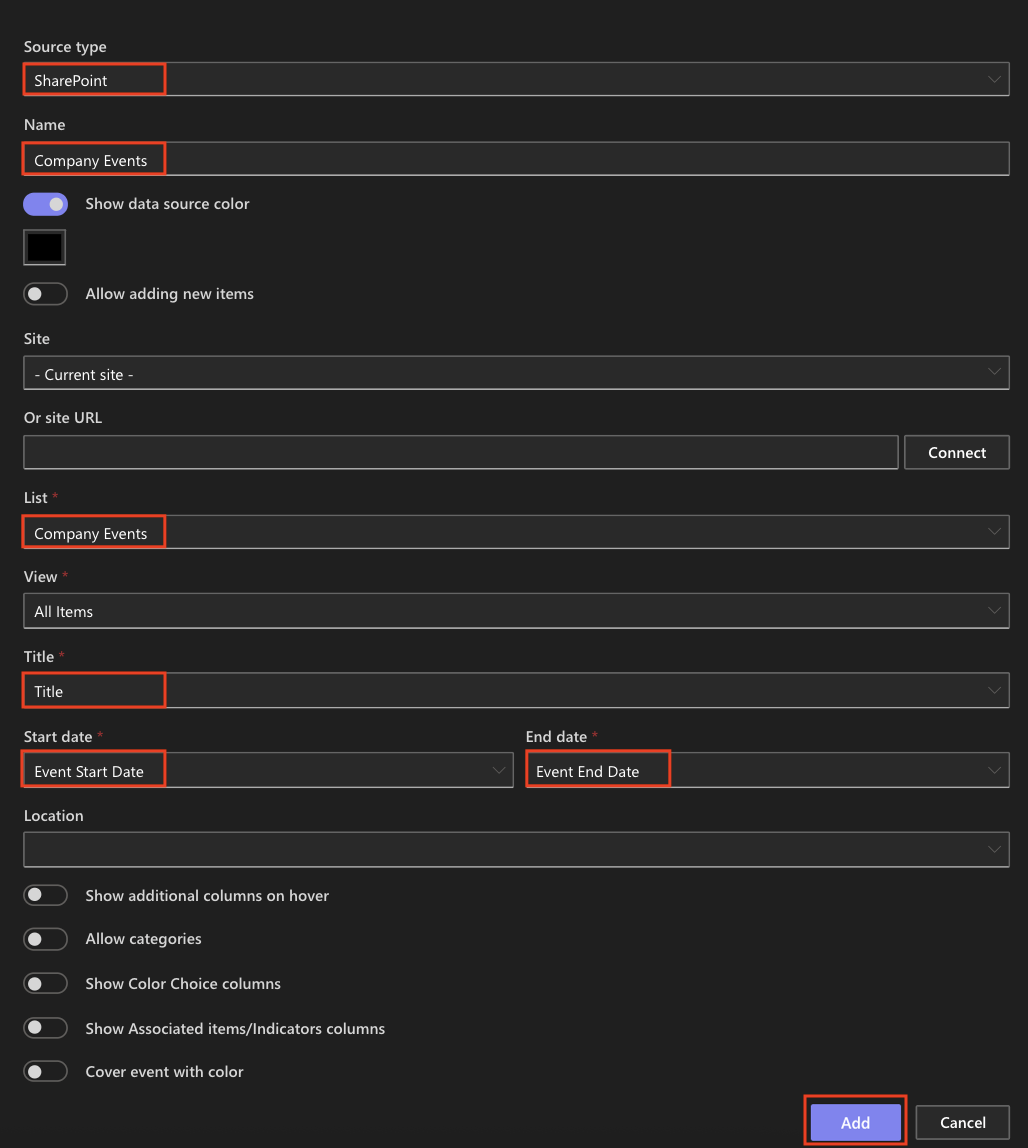
Source 3: Company Events
- Type: SharePoint
- Name: Company Events
- Show data source color✔️
- Color: Black (#000000)
- List: Company Events
- Field Mappings:
- Title → Title
- Start Date → Event Start Date
- End Date → Event End Date
- Add
- Save Profile
Step 4: Add the Calendar Web Part (SharePoint Online)
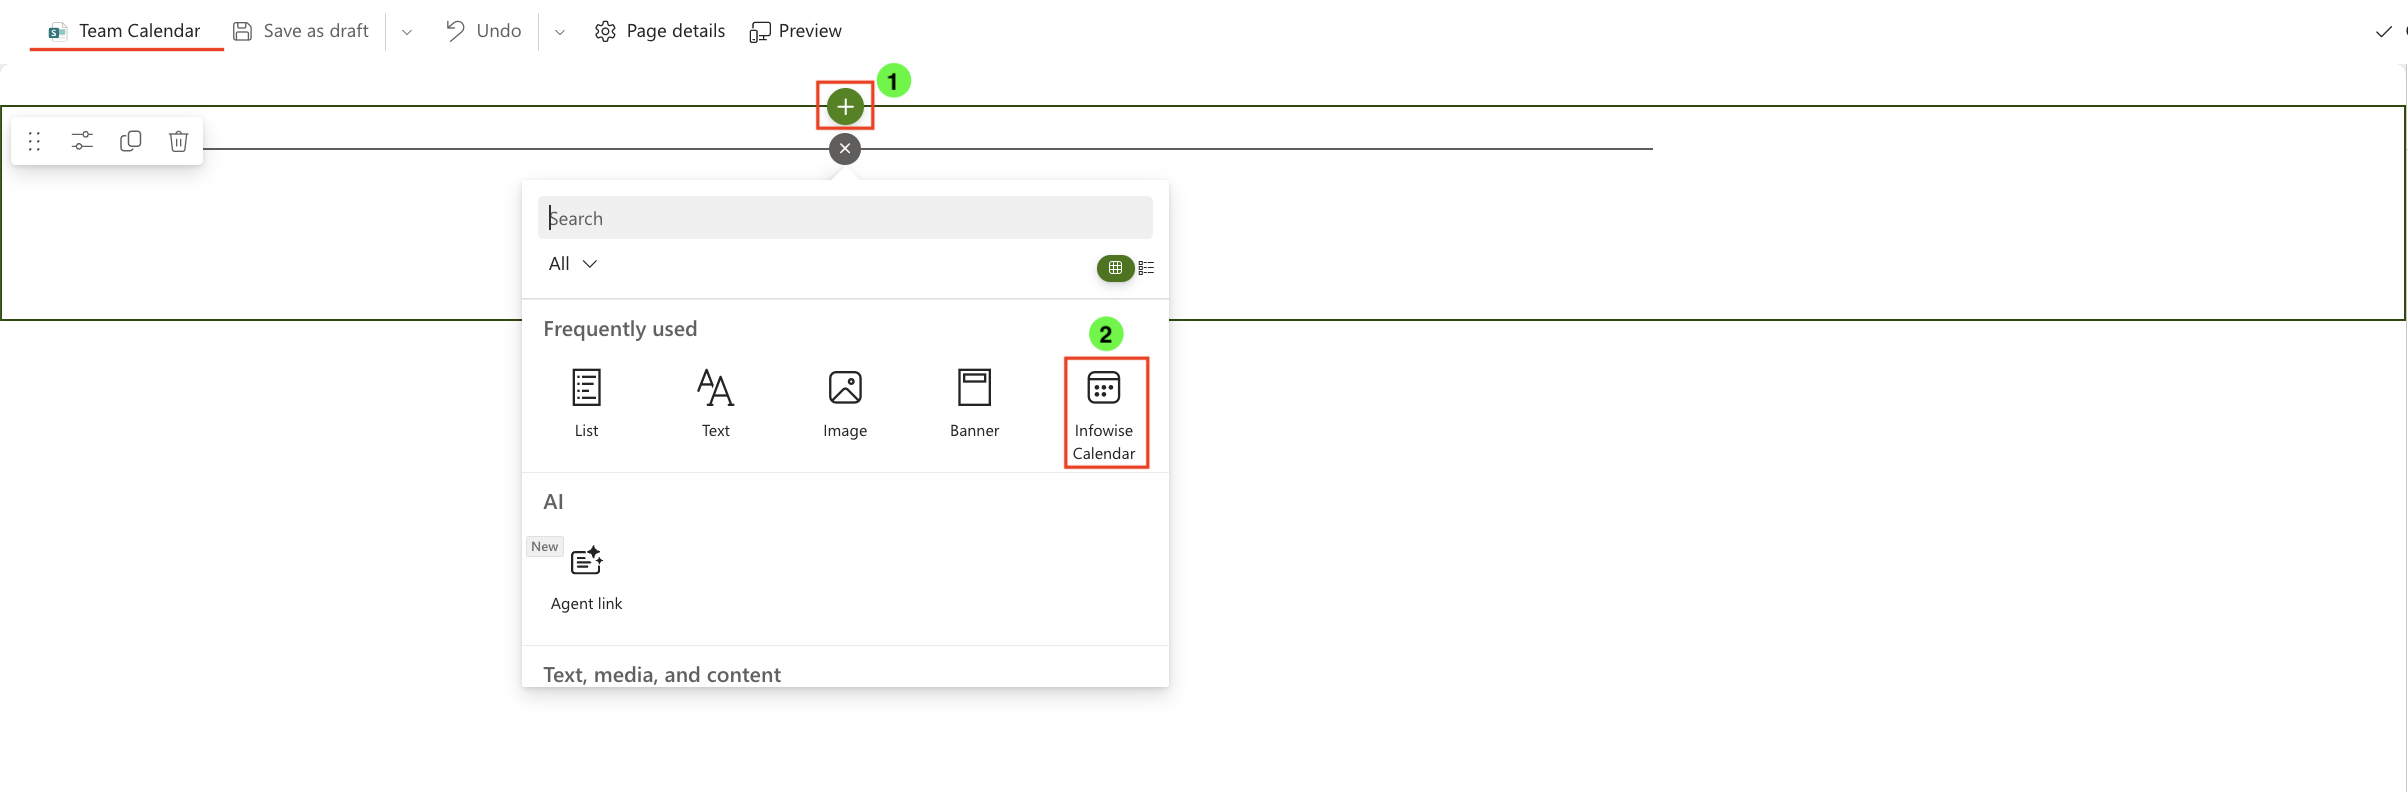
- Navigate to your site page (for example, “Team Calendar”).
- Click Edit in the top-right corner.
- Click + → Infowise Event Calendar to add the web part.
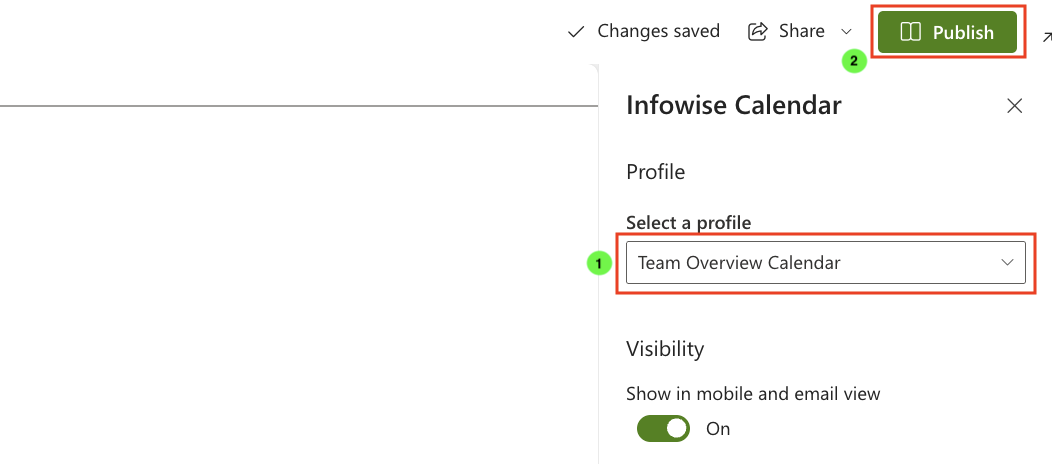
- Click Edit properties on the left side of the web part.

- In the properties panel, select your Profile (e.g., Team Overview Calendar).
- Click Publish the page.
You’ll now see a fully functional calendar that merges all three data sources.
Step 5: Test the Display and Views
- Refresh the page to load the latest data.
- Use the data sources filter to display only events from the selected list.
- Use the top-right view selector to switch between:
- Day – detailed hourly schedule.
- Week – seven-day overview.
- Month – standard calendar grid.
- Gantt – timeline with task durations.

- Each data source (Projects, Tasks, Company Events) is displayed in its own assigned color, making it easy to distinguish them at a glance.
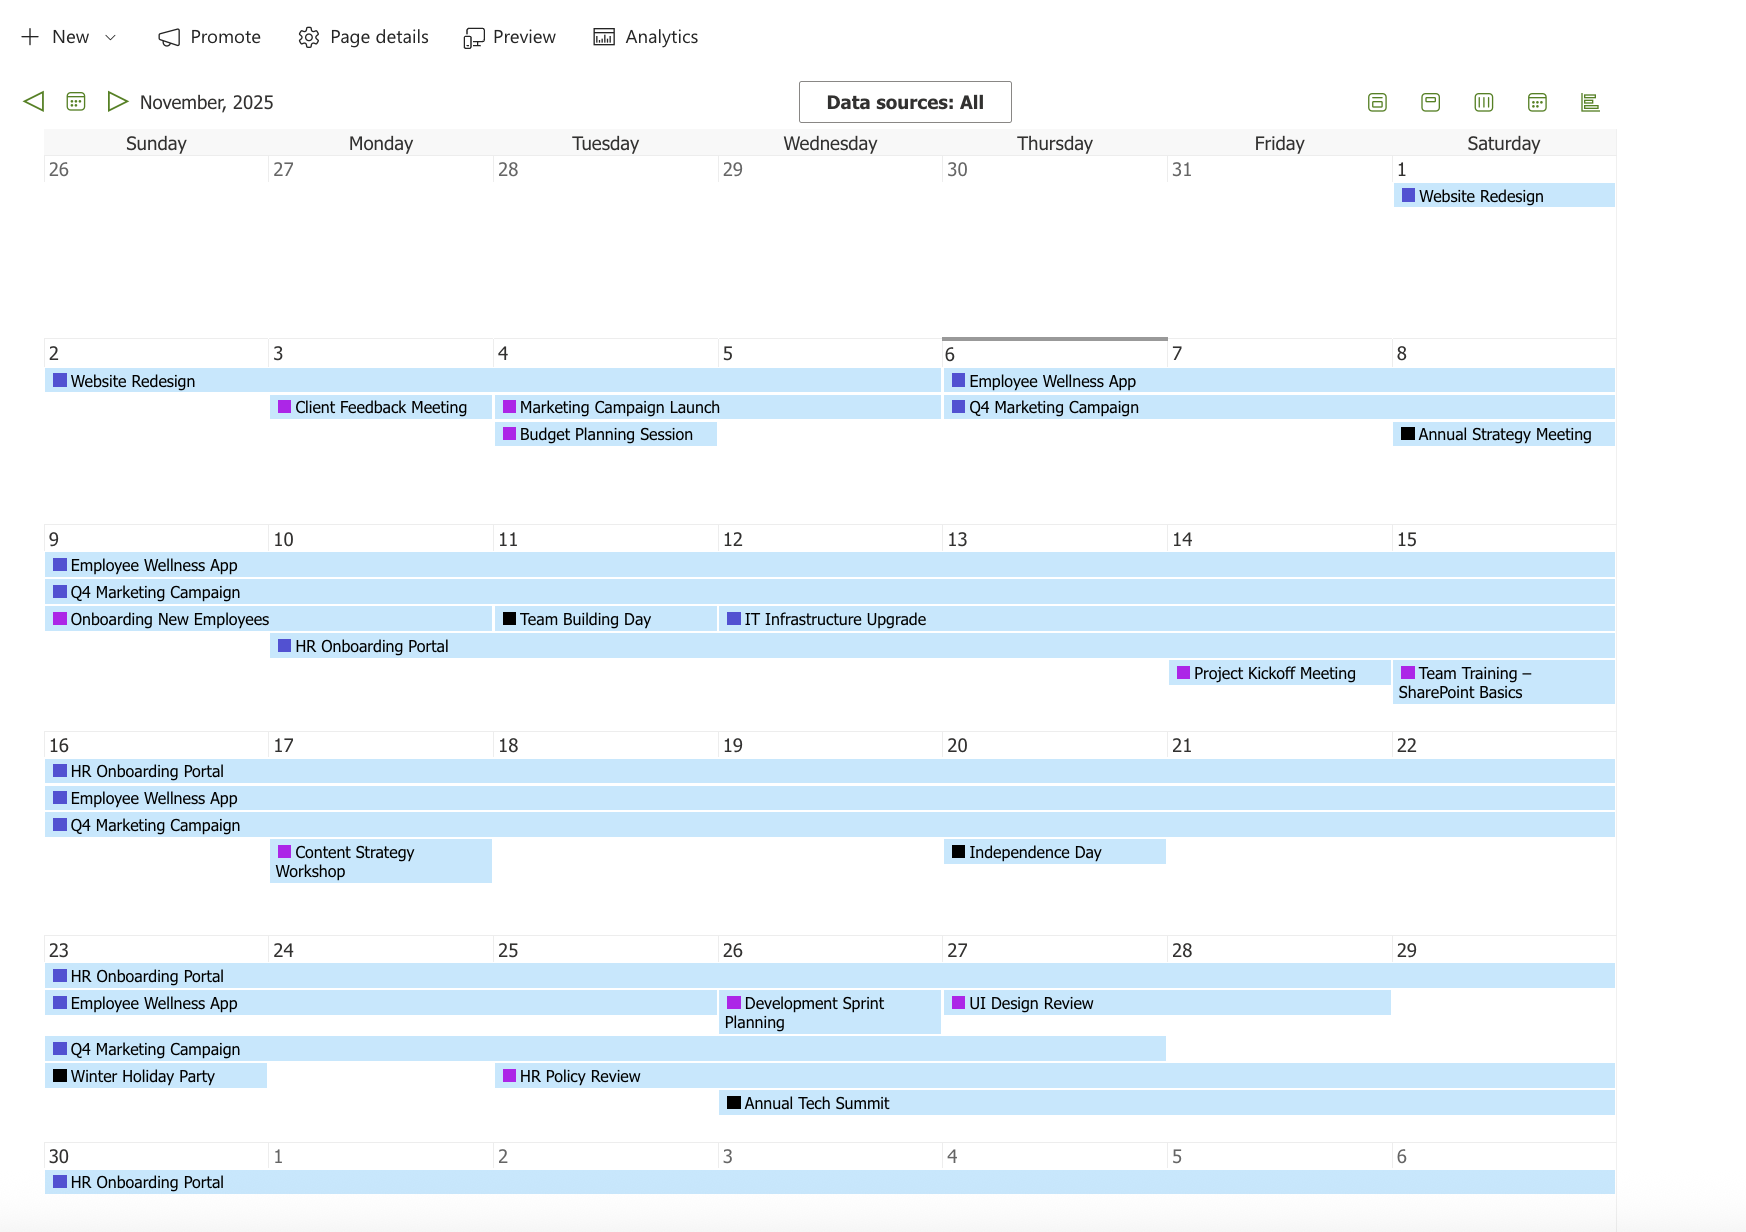
At this stage, colors represent only the data sources.
Step 6: Enable Color-Coding by Category
To make the calendar visually richer, you can enable color-based event highlighting for each data source.
- Go to Ultimate Forms → Design → Event Calendar.
- Edit your calendar profile.
- Open each data source (Projects, Tasks, Company Events) and scroll down to the Display Options section.
- Check both of the following options:
- Allow categories → select the Color Choice column (for example, Department or Category).
- Cover event with color → enables full background color based on the selected category.
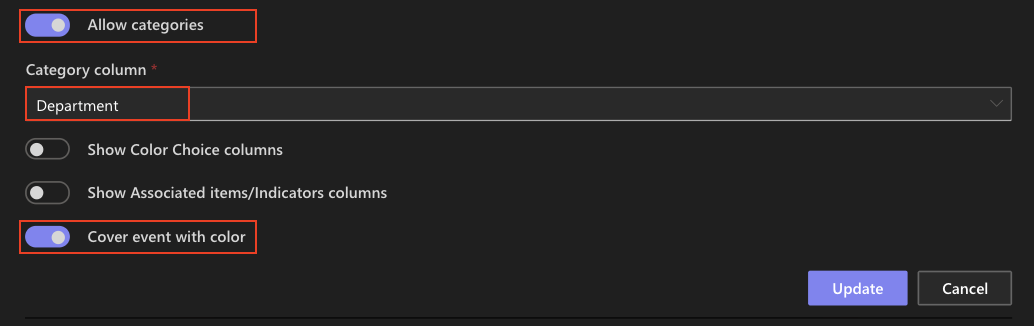
- Click Update → Save Profile.
- Return to your page and refresh the calendar.
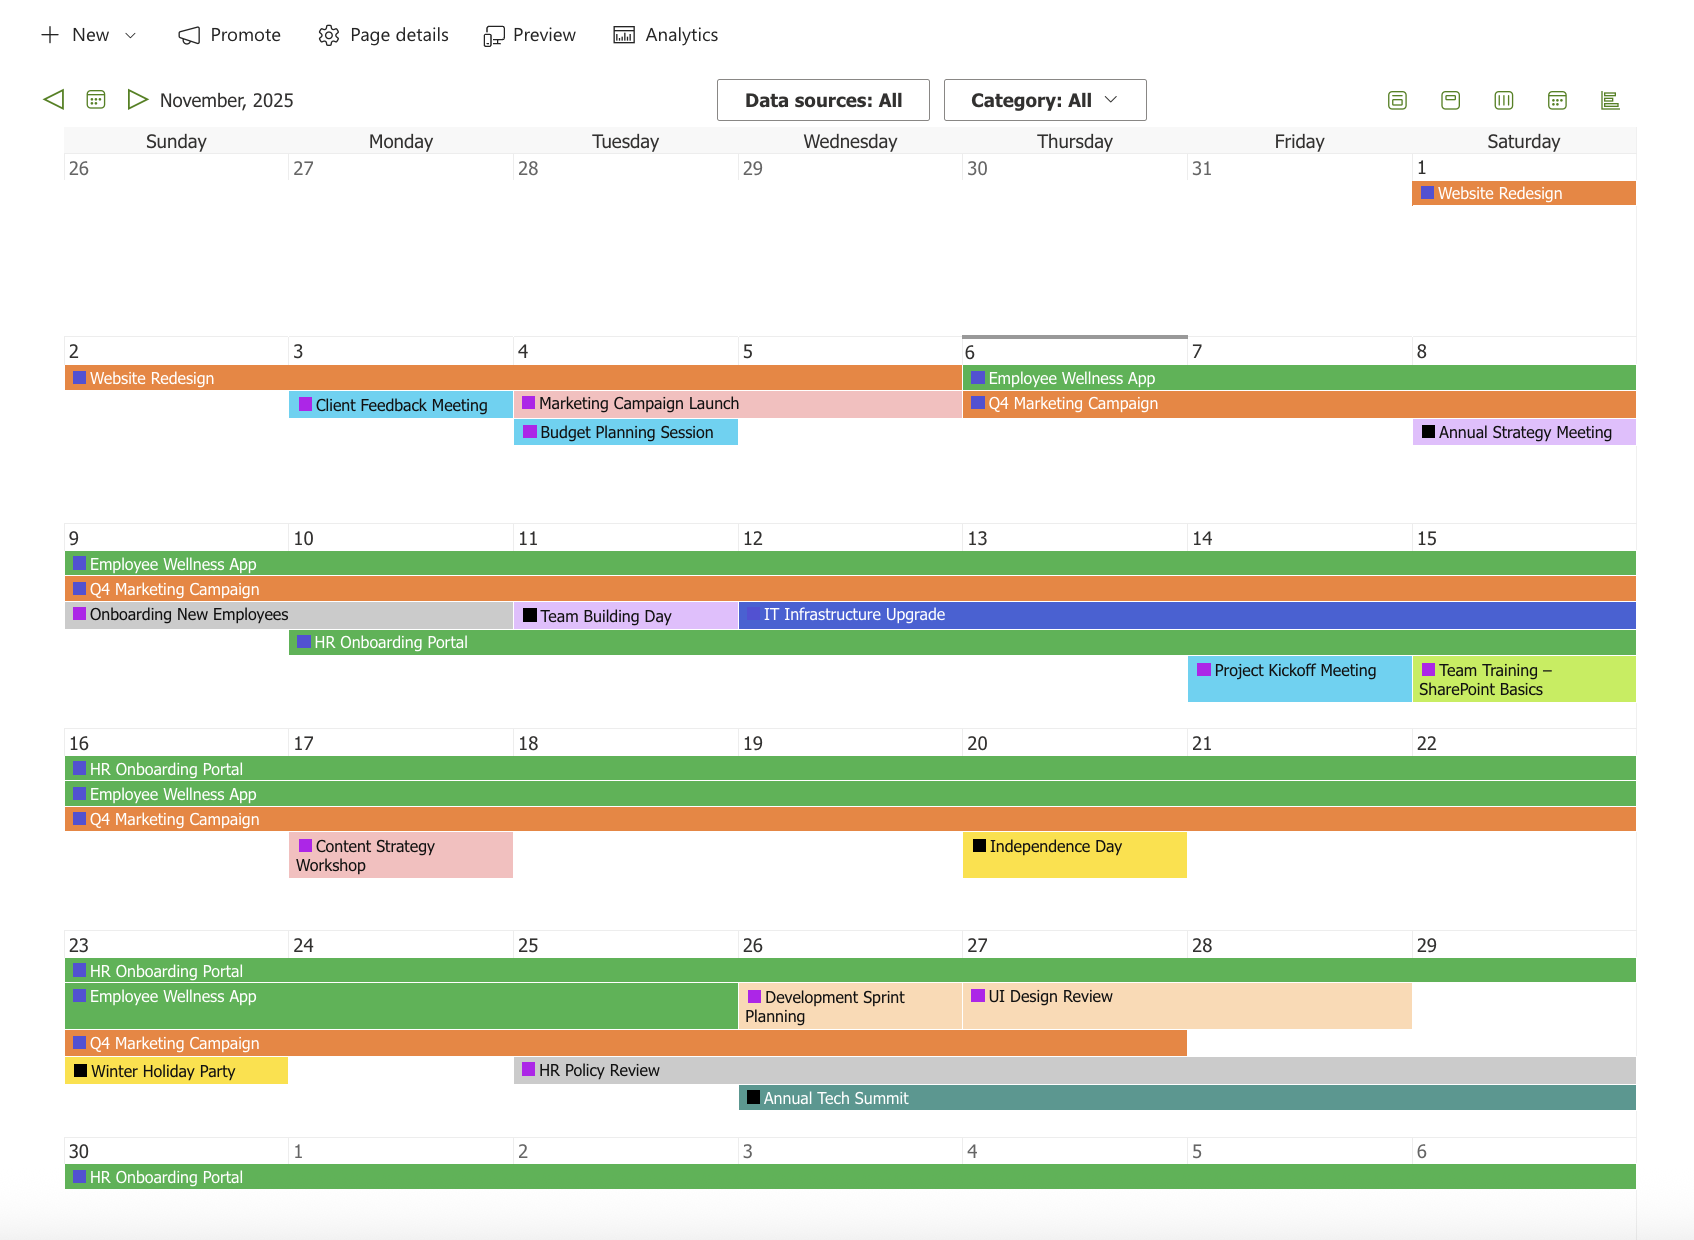
Now:
- You can use the category filter to display only specific event types (e.g., Holiday or Conference) .
- Each data source retains its assigned outline color (Projects, Tasks, Company Events).
- Each event is fully colored according to its Category (e.g., Holiday in yellow, Company Event in purple, Conference in green).
Summary
This tutorial demonstrated how to combine multiple SharePoint lists into a single unified calendar using Event Calendar in Infowise Ultimate Forms.
You learned how to create a calendar profile, connect data sources, and configure category-based color coding for better visualization.
Each data source is marked with its own color, and every event inherits its background color from the Color Choice column, resulting in a clear, dynamic, and visually engaging calendar view.