The Manual Form Layout option allows you to layout your form with fields placed precisely in the location that you want. This can be beneficial in a situation where you want to provide users a web form that matches closely with a printed form. In this example, we will produce a Purchase Order Form in which the web form will match closely with the print output. This creates a more seamless and intuitive experience for users.
Instructions
Often businesses have standard paper forms that they would like to make fully electronic. The best possible transition will allow users to complete a web form that matches the template that was previously used.
(Perhaps a PDF template was used in which fields were entered in a form that matches the print output.)
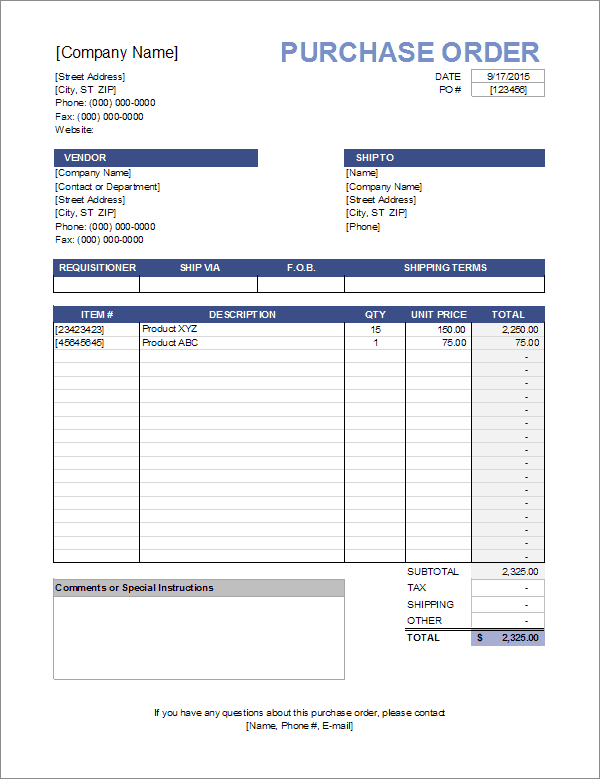
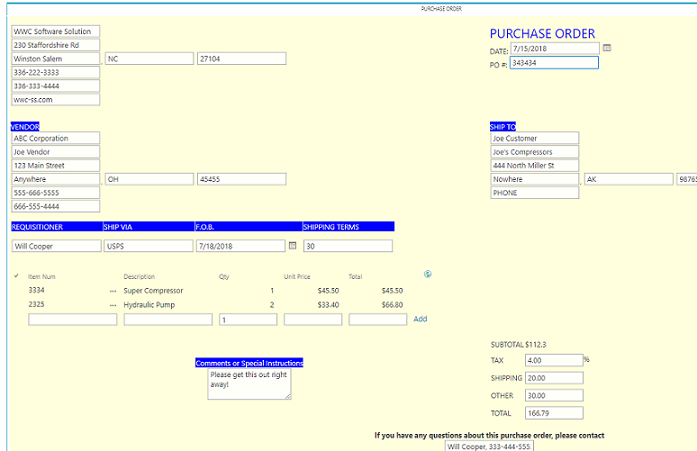
In this example, the business has provided the following template which we want to match both with the web form and print output:
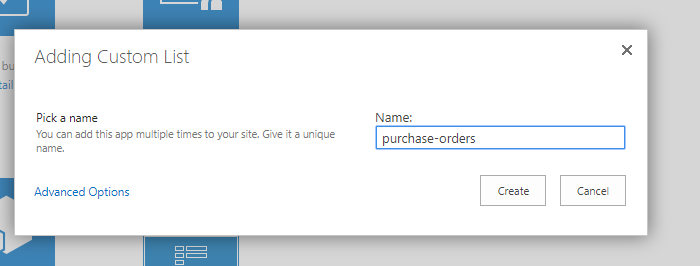
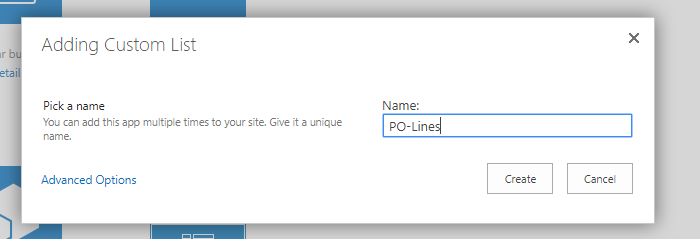
To create this form, we will need two lists: Purchase Orders and also PO Lines. We need two lists so that we can handle the line items in the middle of the form using Associated Items functionality.
Start by creating these two lists in your SharePoint site:
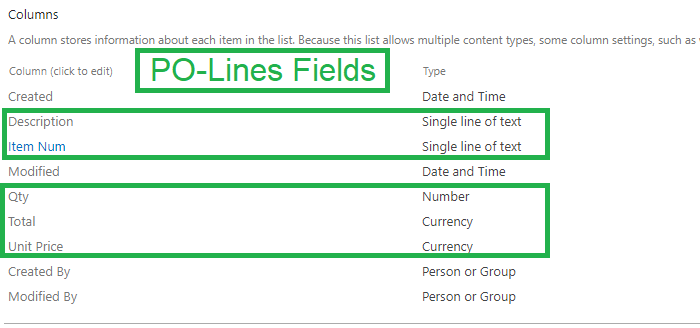
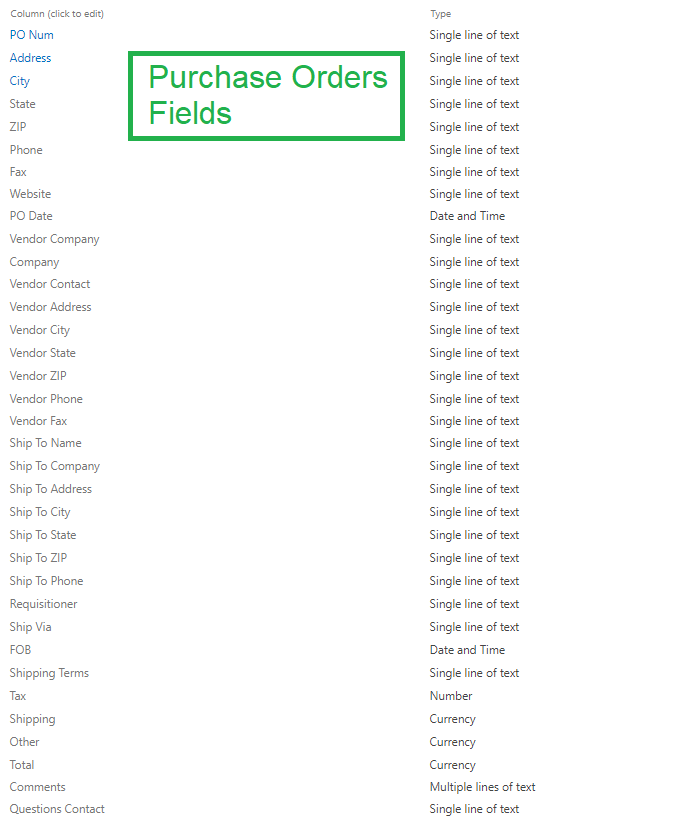
After creating your lists, you will need to add the fields that will be used in the forms.
Note that you need to set up the PO-Lines list to use Associated Items functionality.
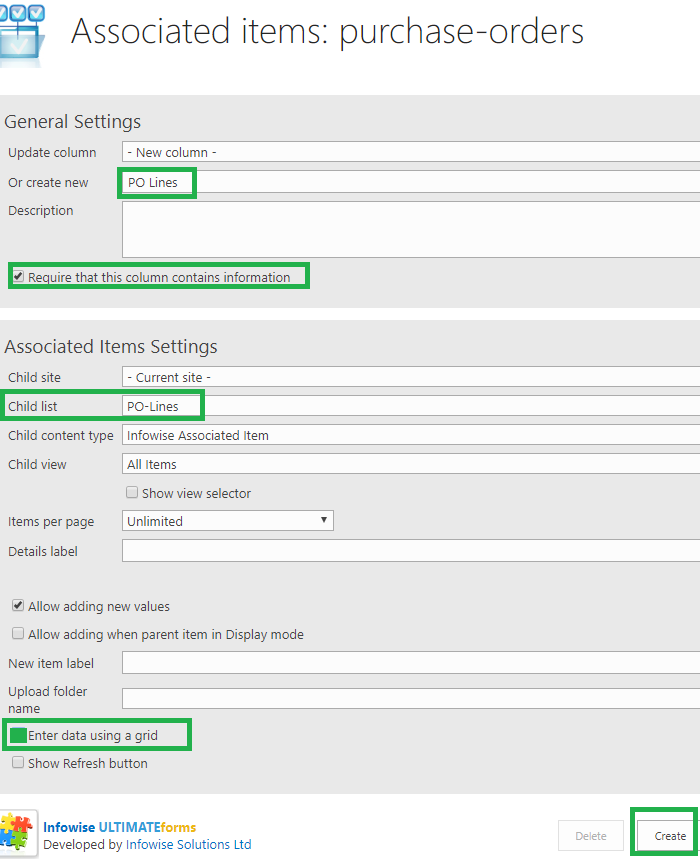
Create an Associated Items field in the parent list for the line items. We'll use the grid edit mode to make this look like the requested form:
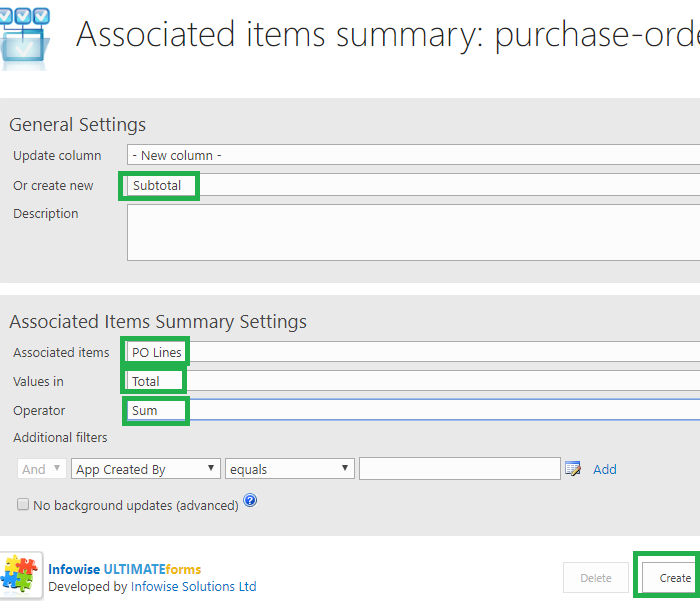
We need to use an Infowise Associated Items Summary field in order to get the total for line items and put that into the Subtotal field:
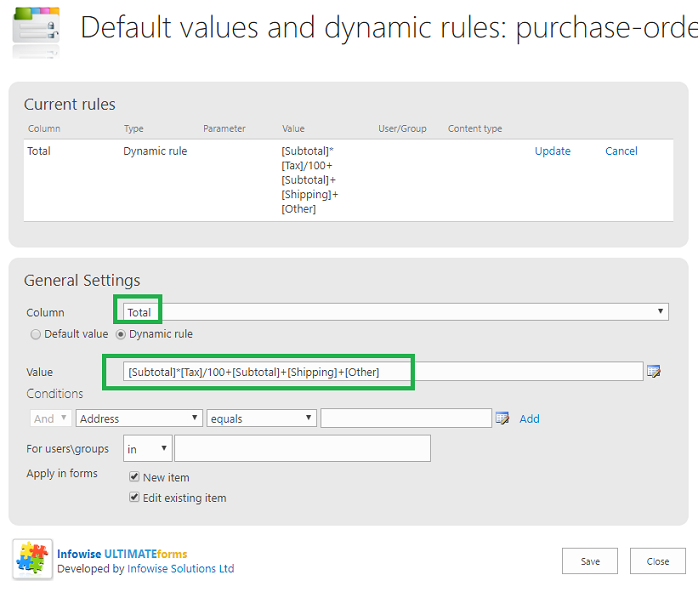
In the parent list, we'll use the Dynamic Rules functionality to include other additional lines plus tax:
Now we can finally use the Manual Layout option in Tabs and Tab Settings to start to put together our form.
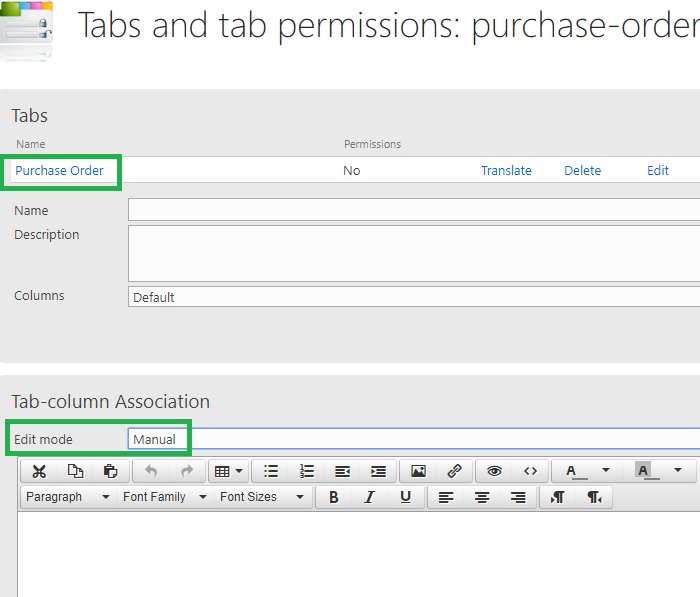
Once you are in Manual Edit Mode you can now insert fields and field labels:
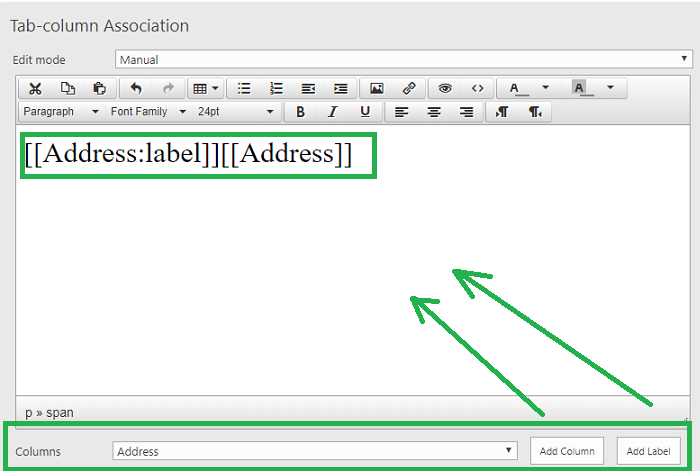
These dynamic pieces of content show up in double square brackets along with static text and formatting codes.
Click on the <> in the visual editor window to toggle into code view.
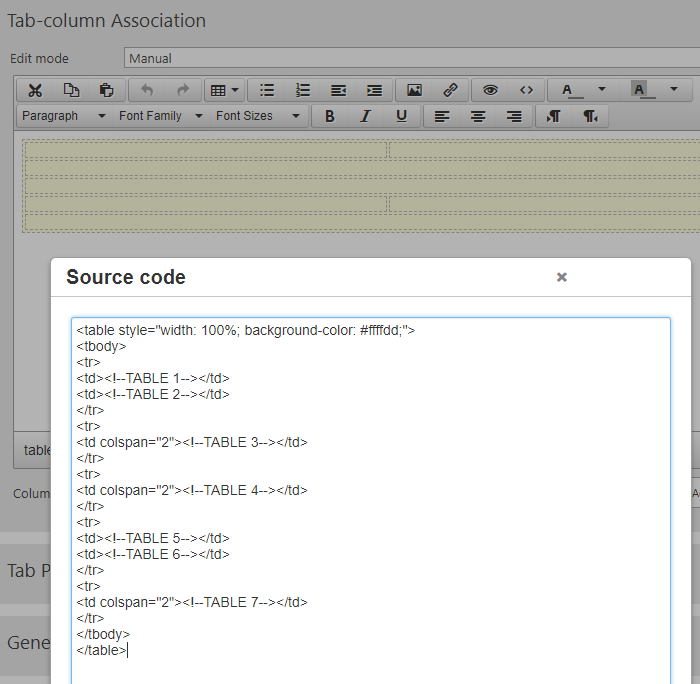
Start with basic HTML table structure and gradually build up your form layout once piece at a time making refinements incrementally.
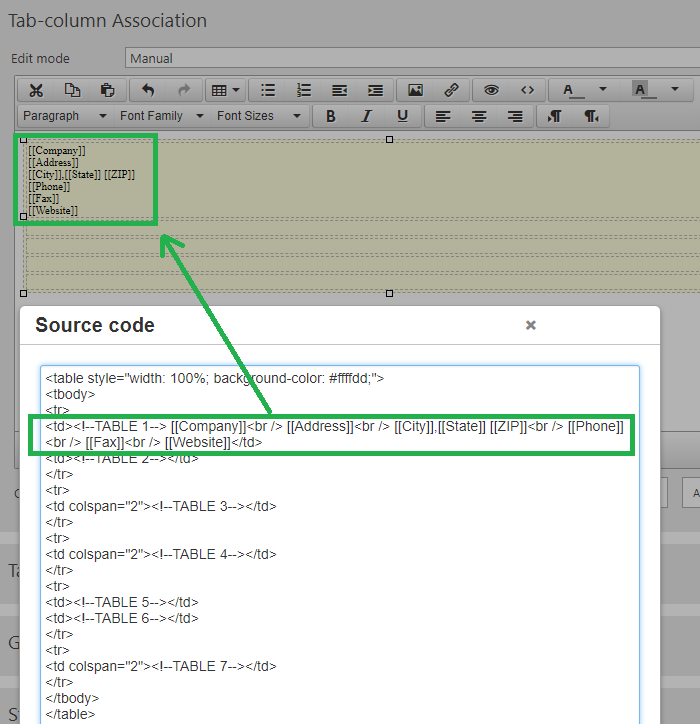
Continue testing your form gradually getting it closer and closer to your finished product:
After completing the web form, the next step would be to build a Custom Print Template in Advanced Mode. The process of creating the print template will also be a similar process of using formatting and HTML Tables to precisely control the print output.
Summary
Setting up a form like this takes more time, but allows for a more highly customized result.