Now that you’ve built your SharePoint form layout and added key components like a container, header, and button bar, it’s time to improve the visual styling of your form.
Instructions
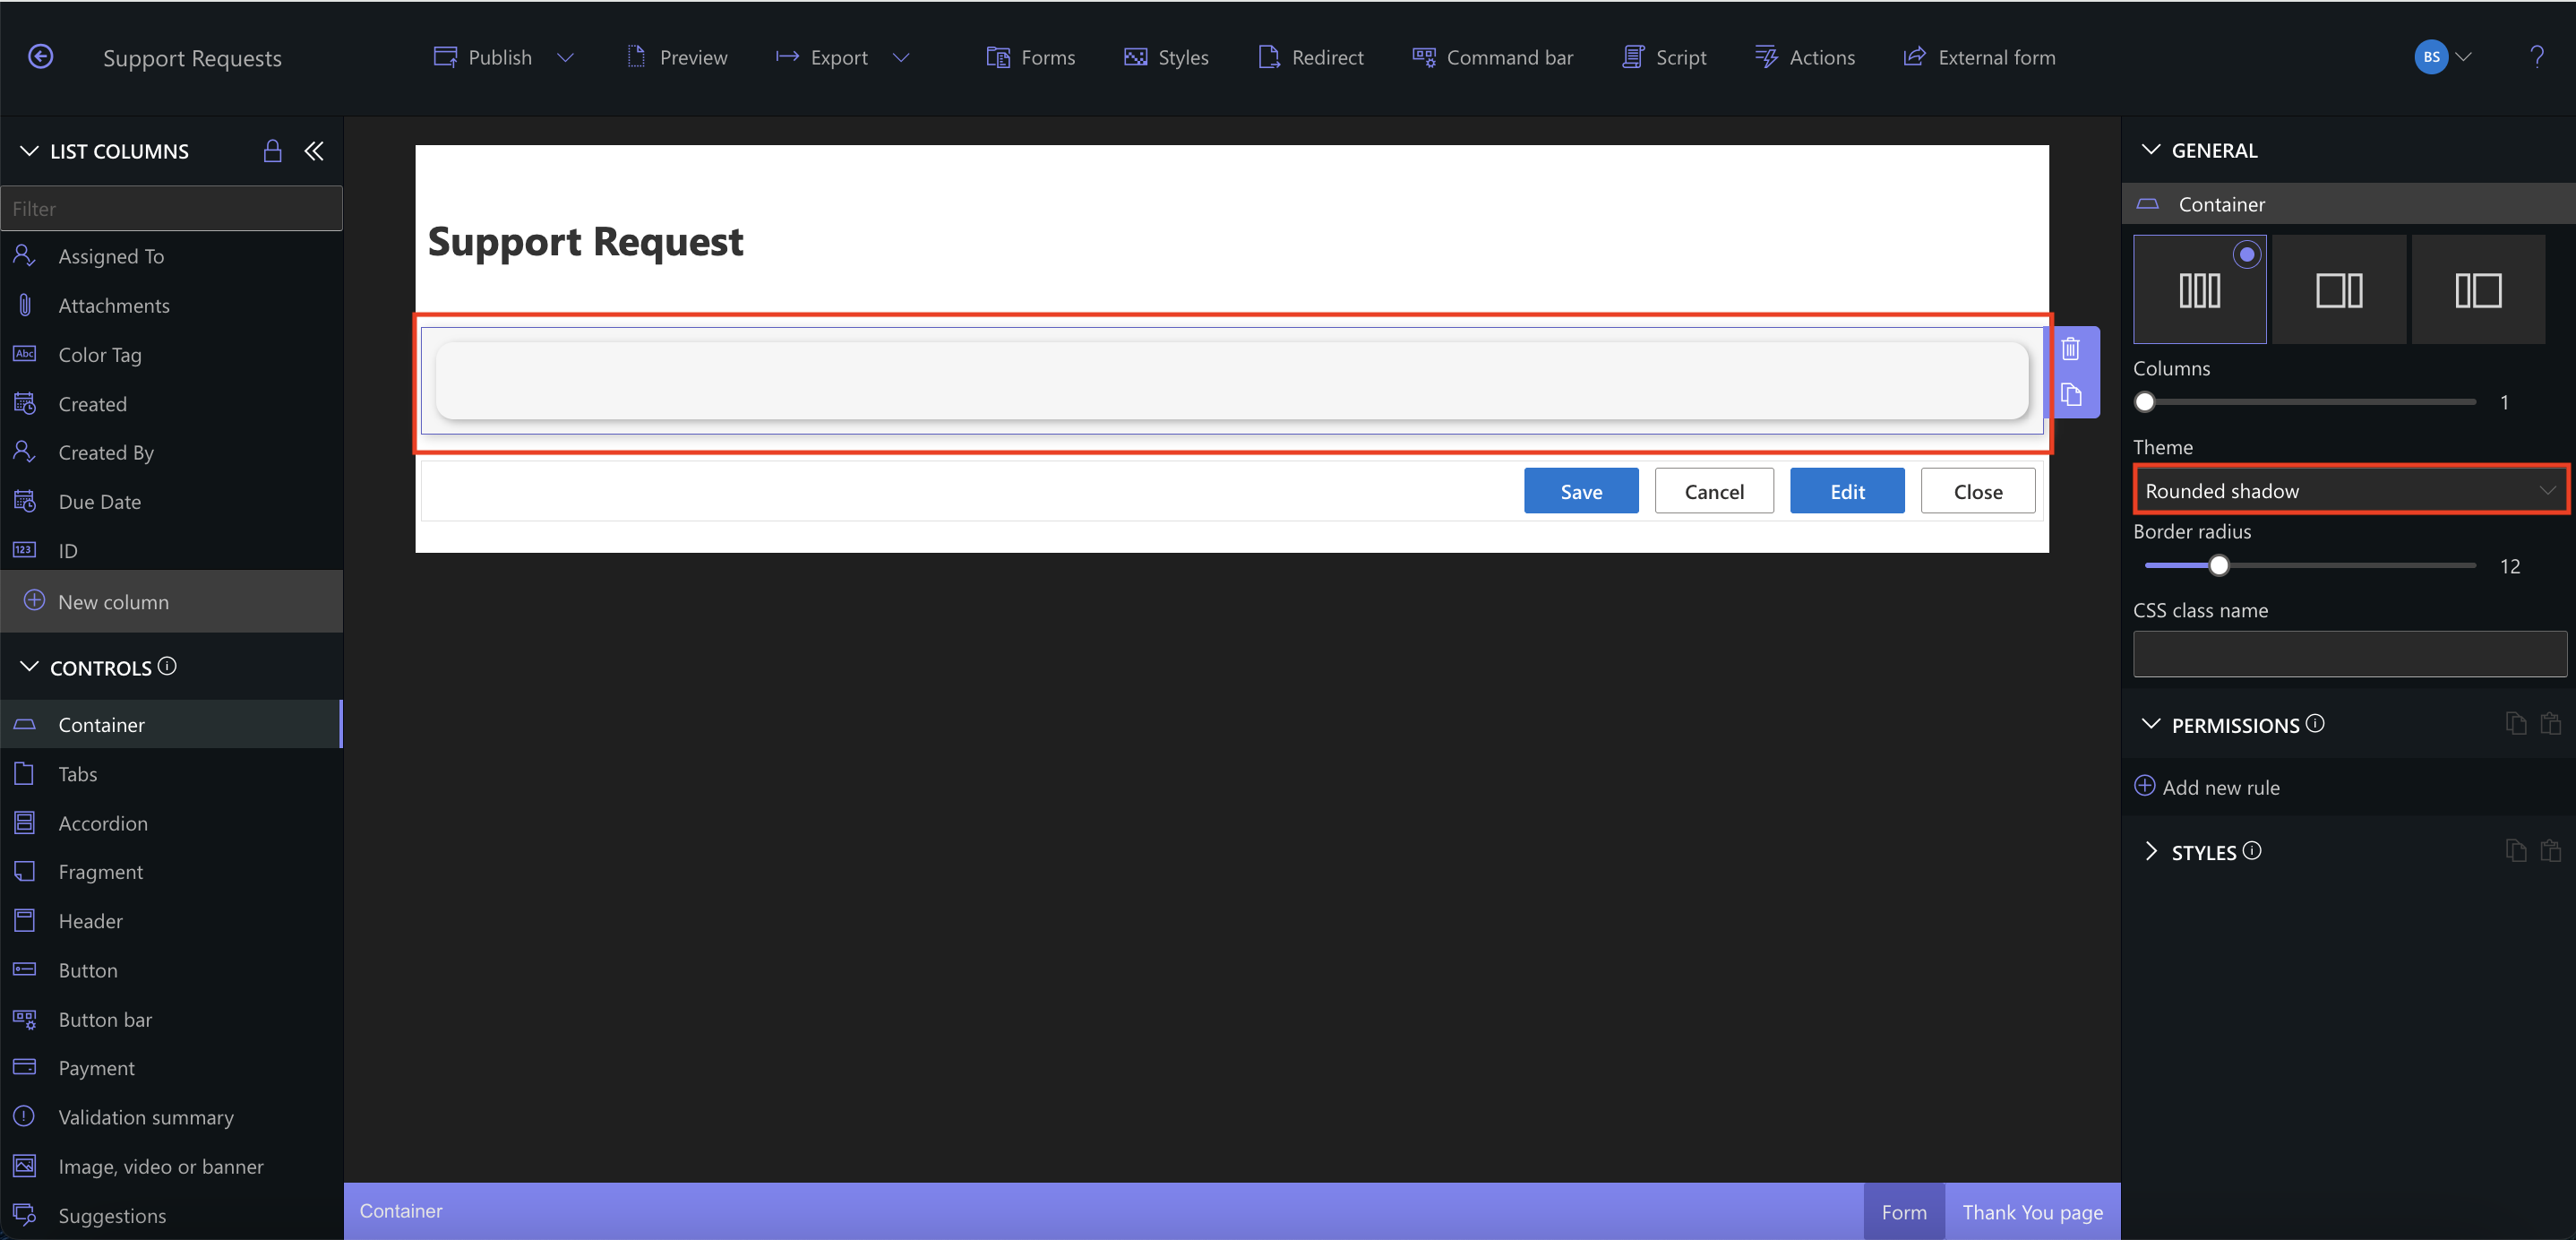
Step 1: Apply Theme and Background Color to the Main Container
- Select Container element
- In the right panel, under Theme, choose Rounded shadow
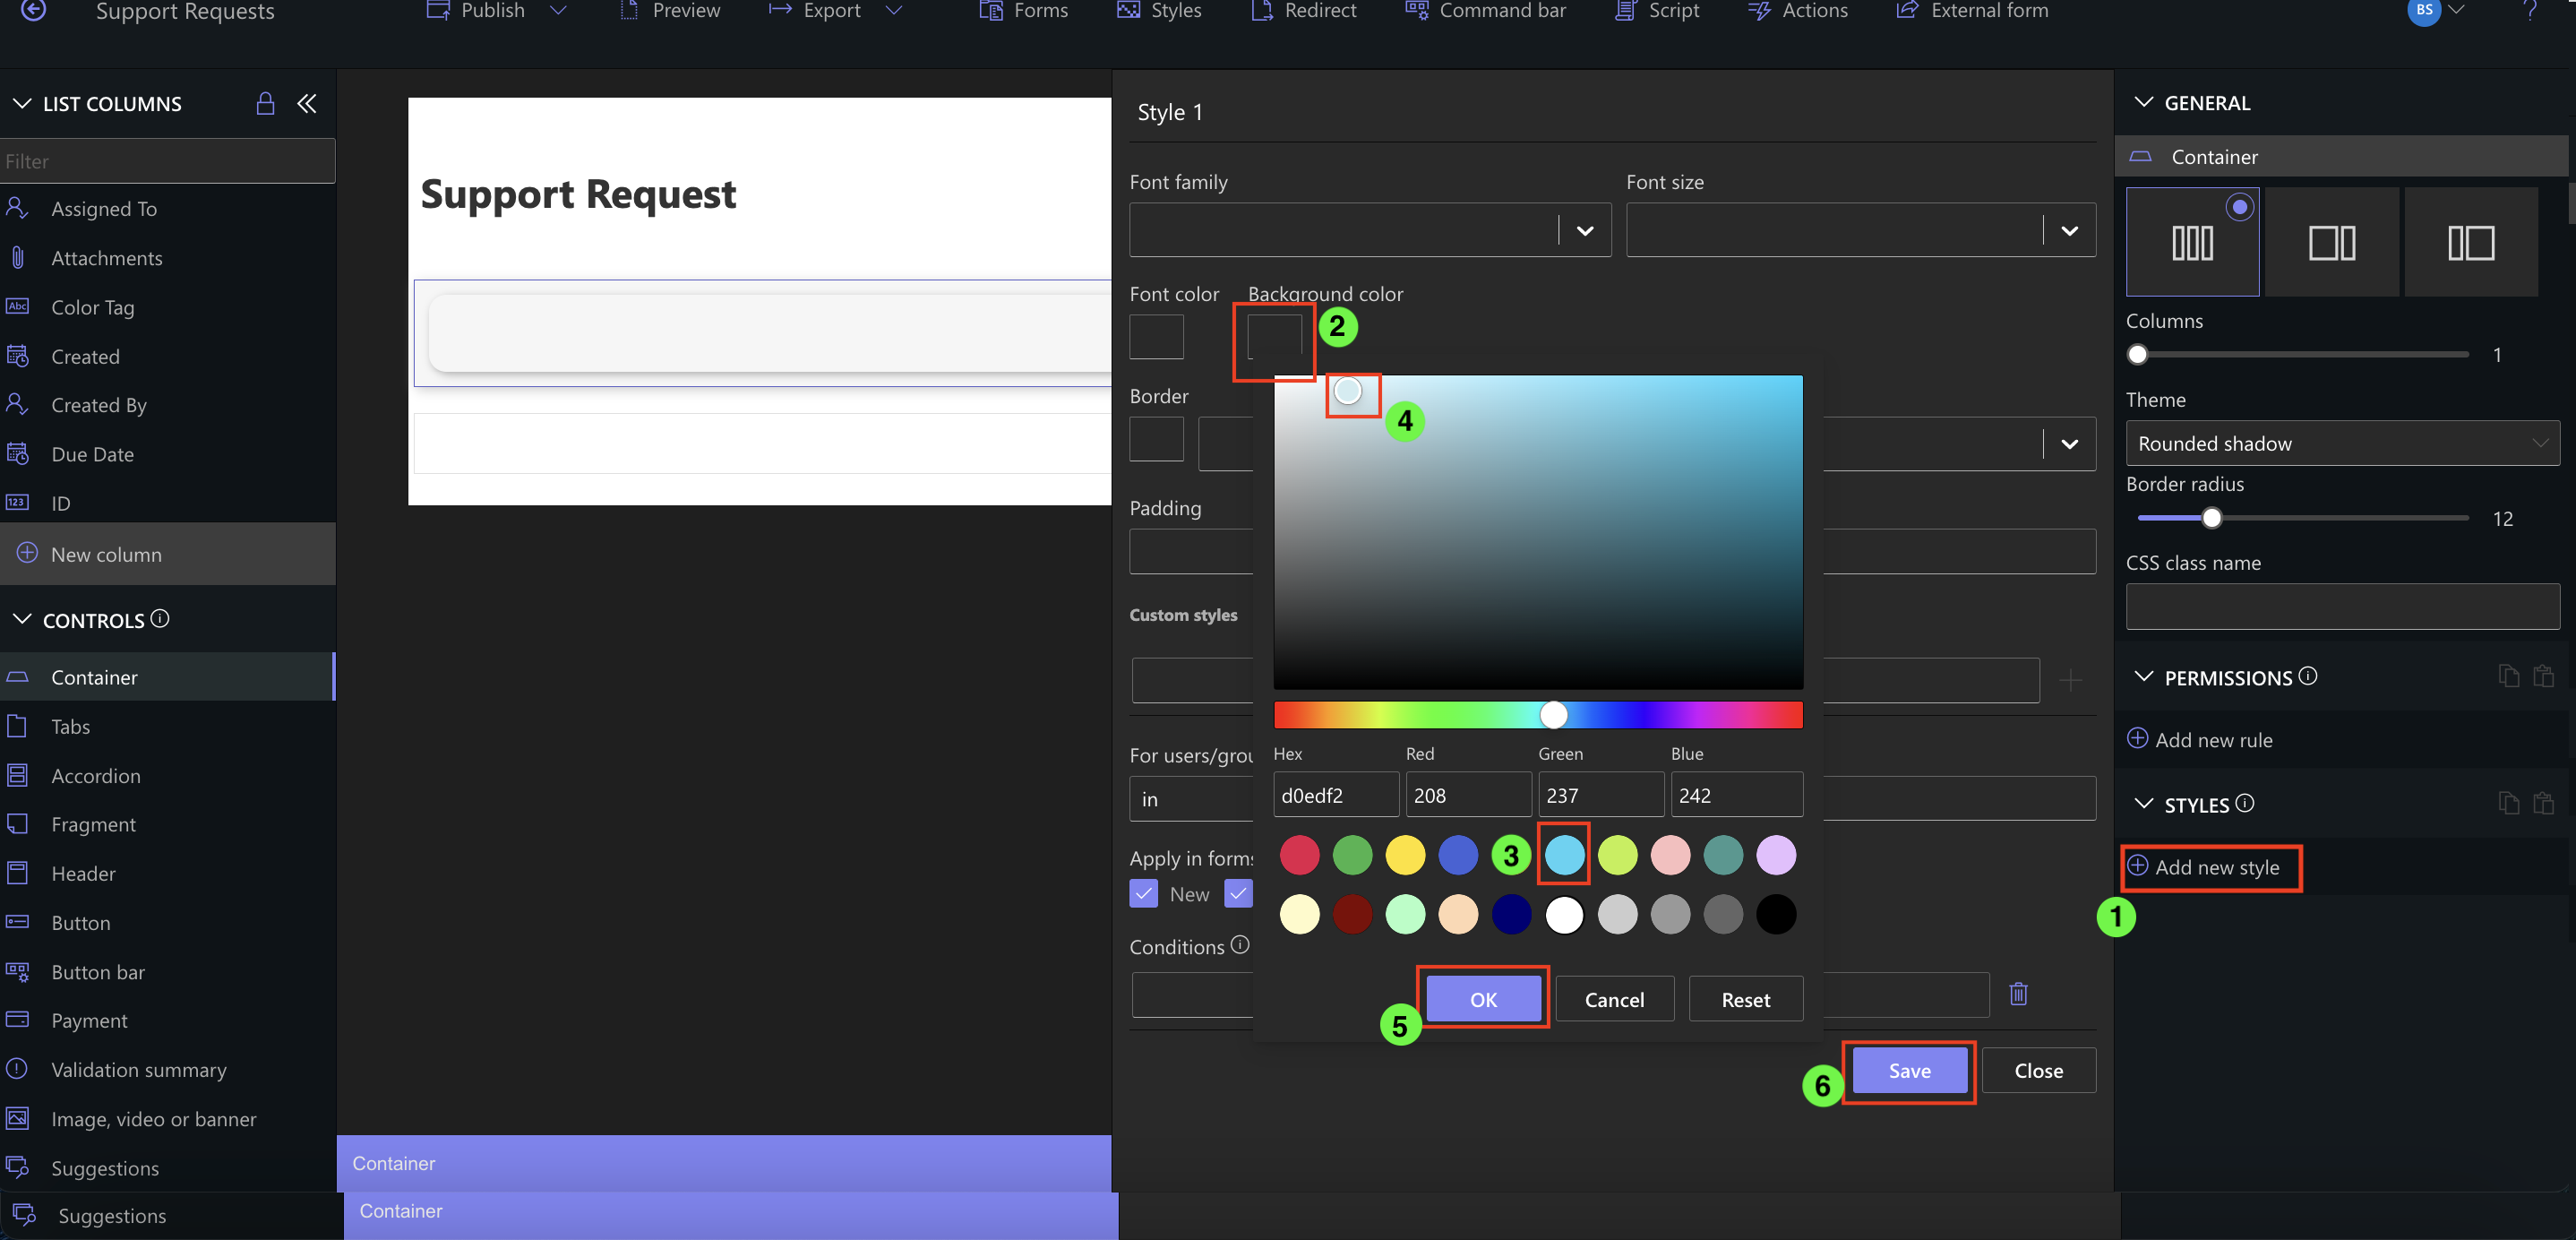
- Click Add new style
- Choose Background color
- Select a light blue color (or any light tone)
- Adjust the slider to make the color even lighter
- Click OK
- Click Save
Step 2: Add Padding to the Container
- Click the pencil icon next to the saved style to edit it
- Set Padding to 10px
- Click Save
This makes sure your content inside the container doesn’t stick to the edges.
Step 3: Nest a Container Inside the Main Container
- Drag a new Container inside the existing top-level container
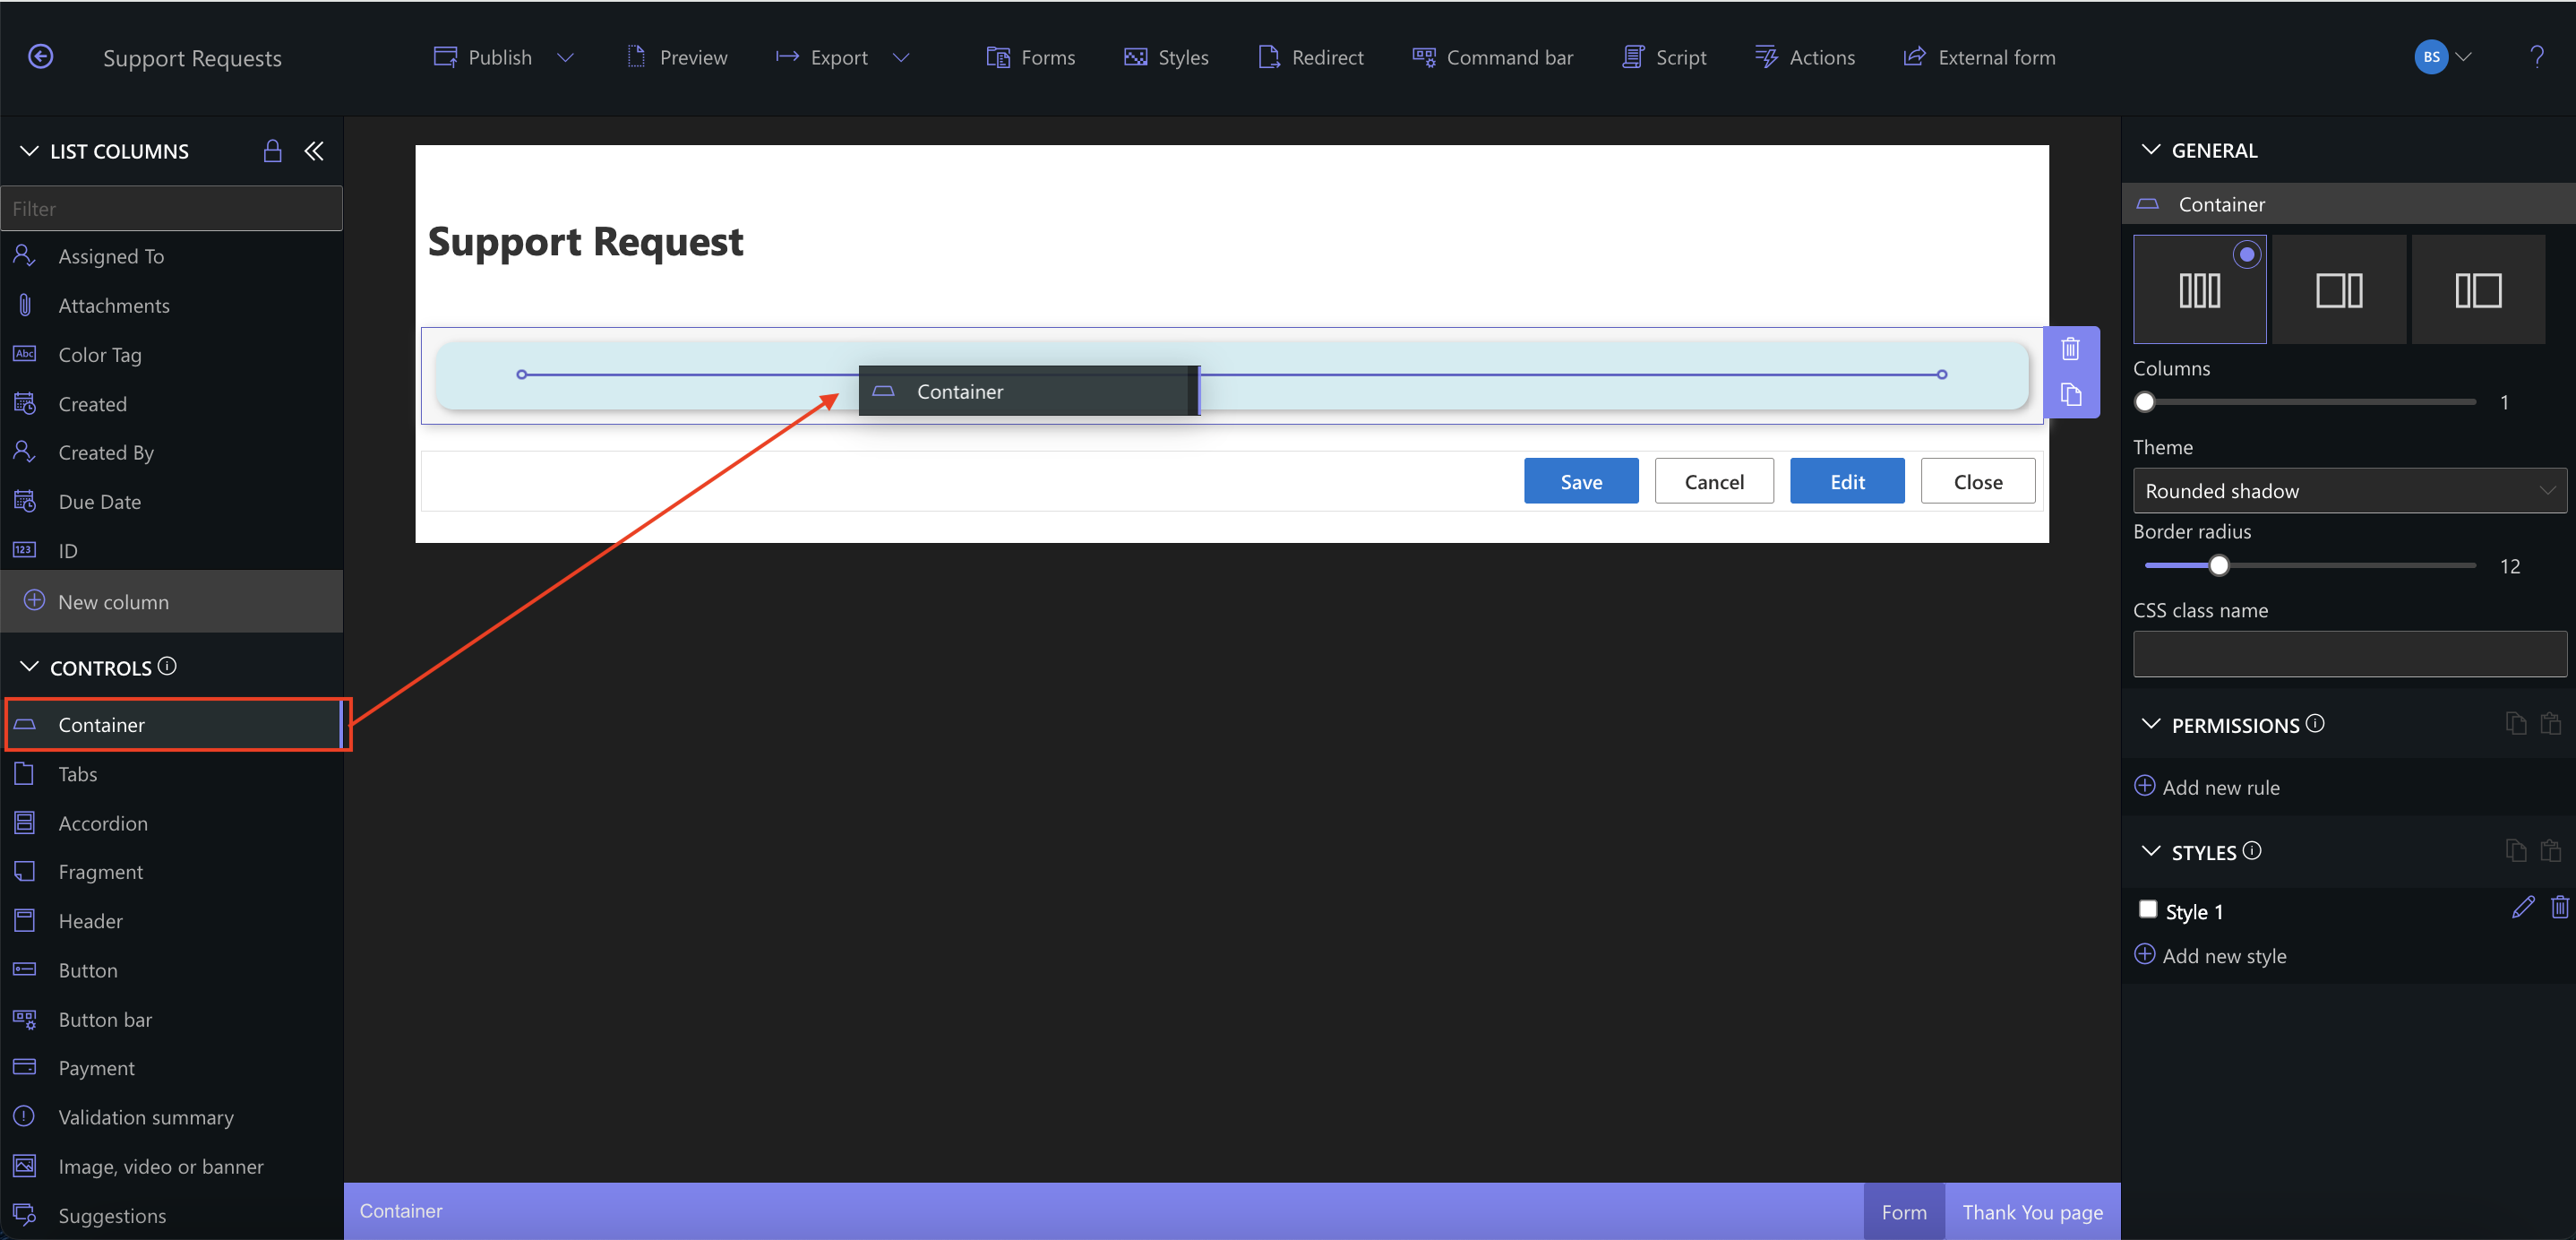
- With the new inner container selected:
- Click Add new style
- Select Border
- Choose Black as the color
- Click OK
- Click Save
This will visually separate the nested section from the rest of the form.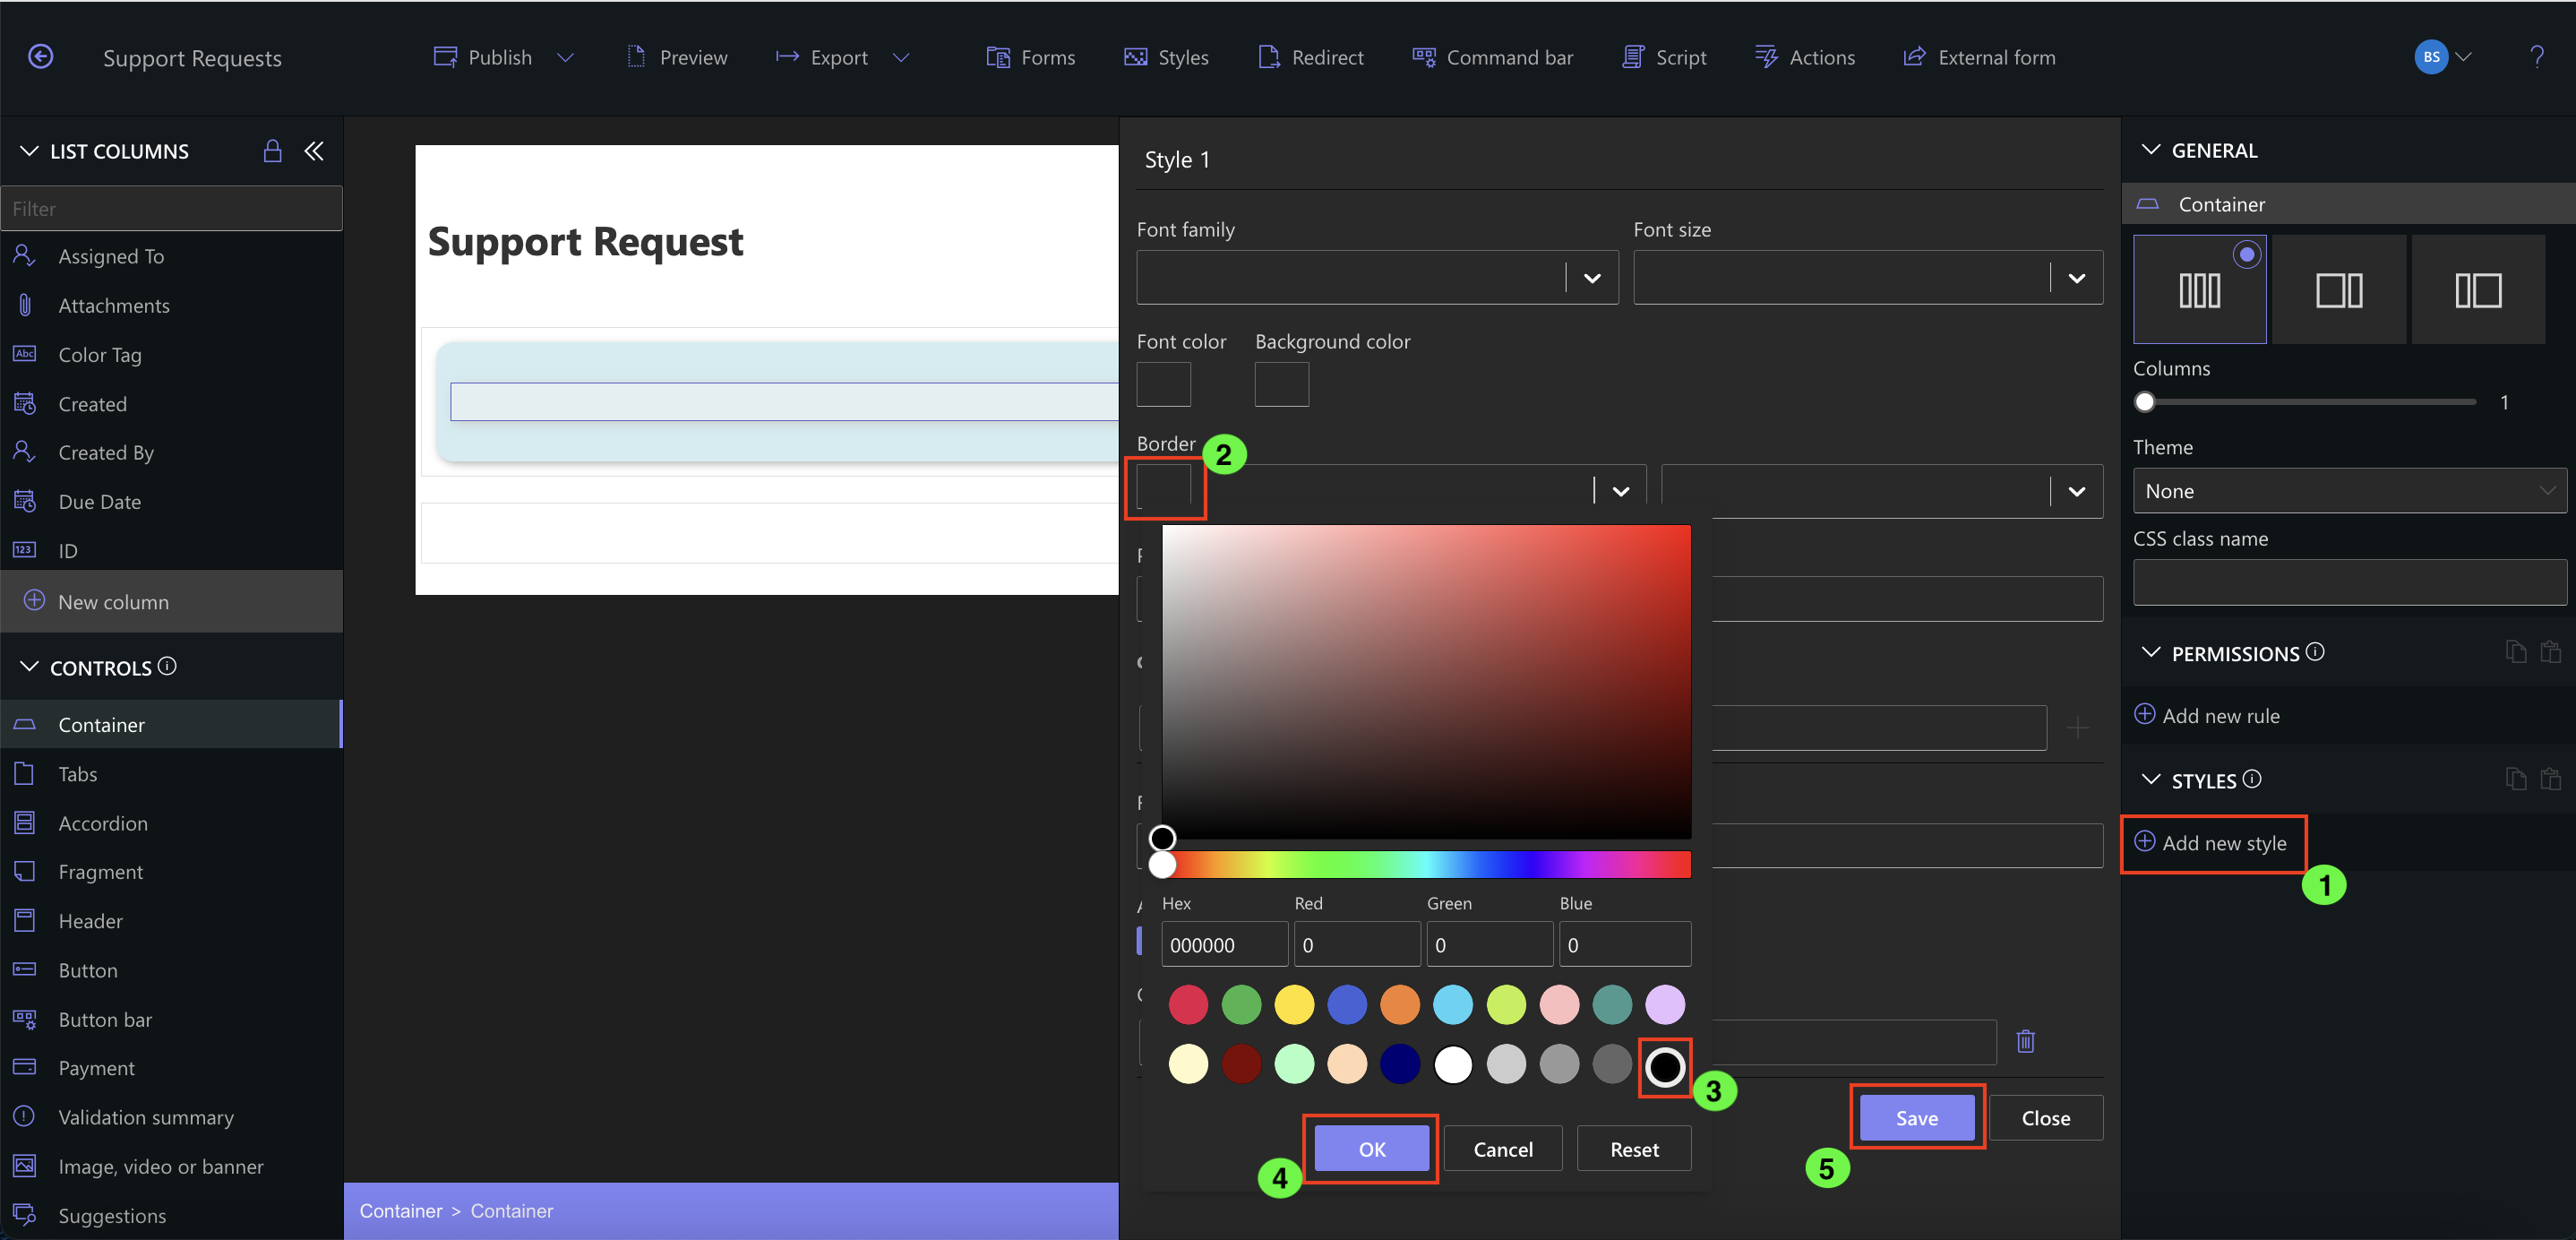
Step 4: Add a Column and Customize Its Label
- Drag the Title column into the new (bordered) container
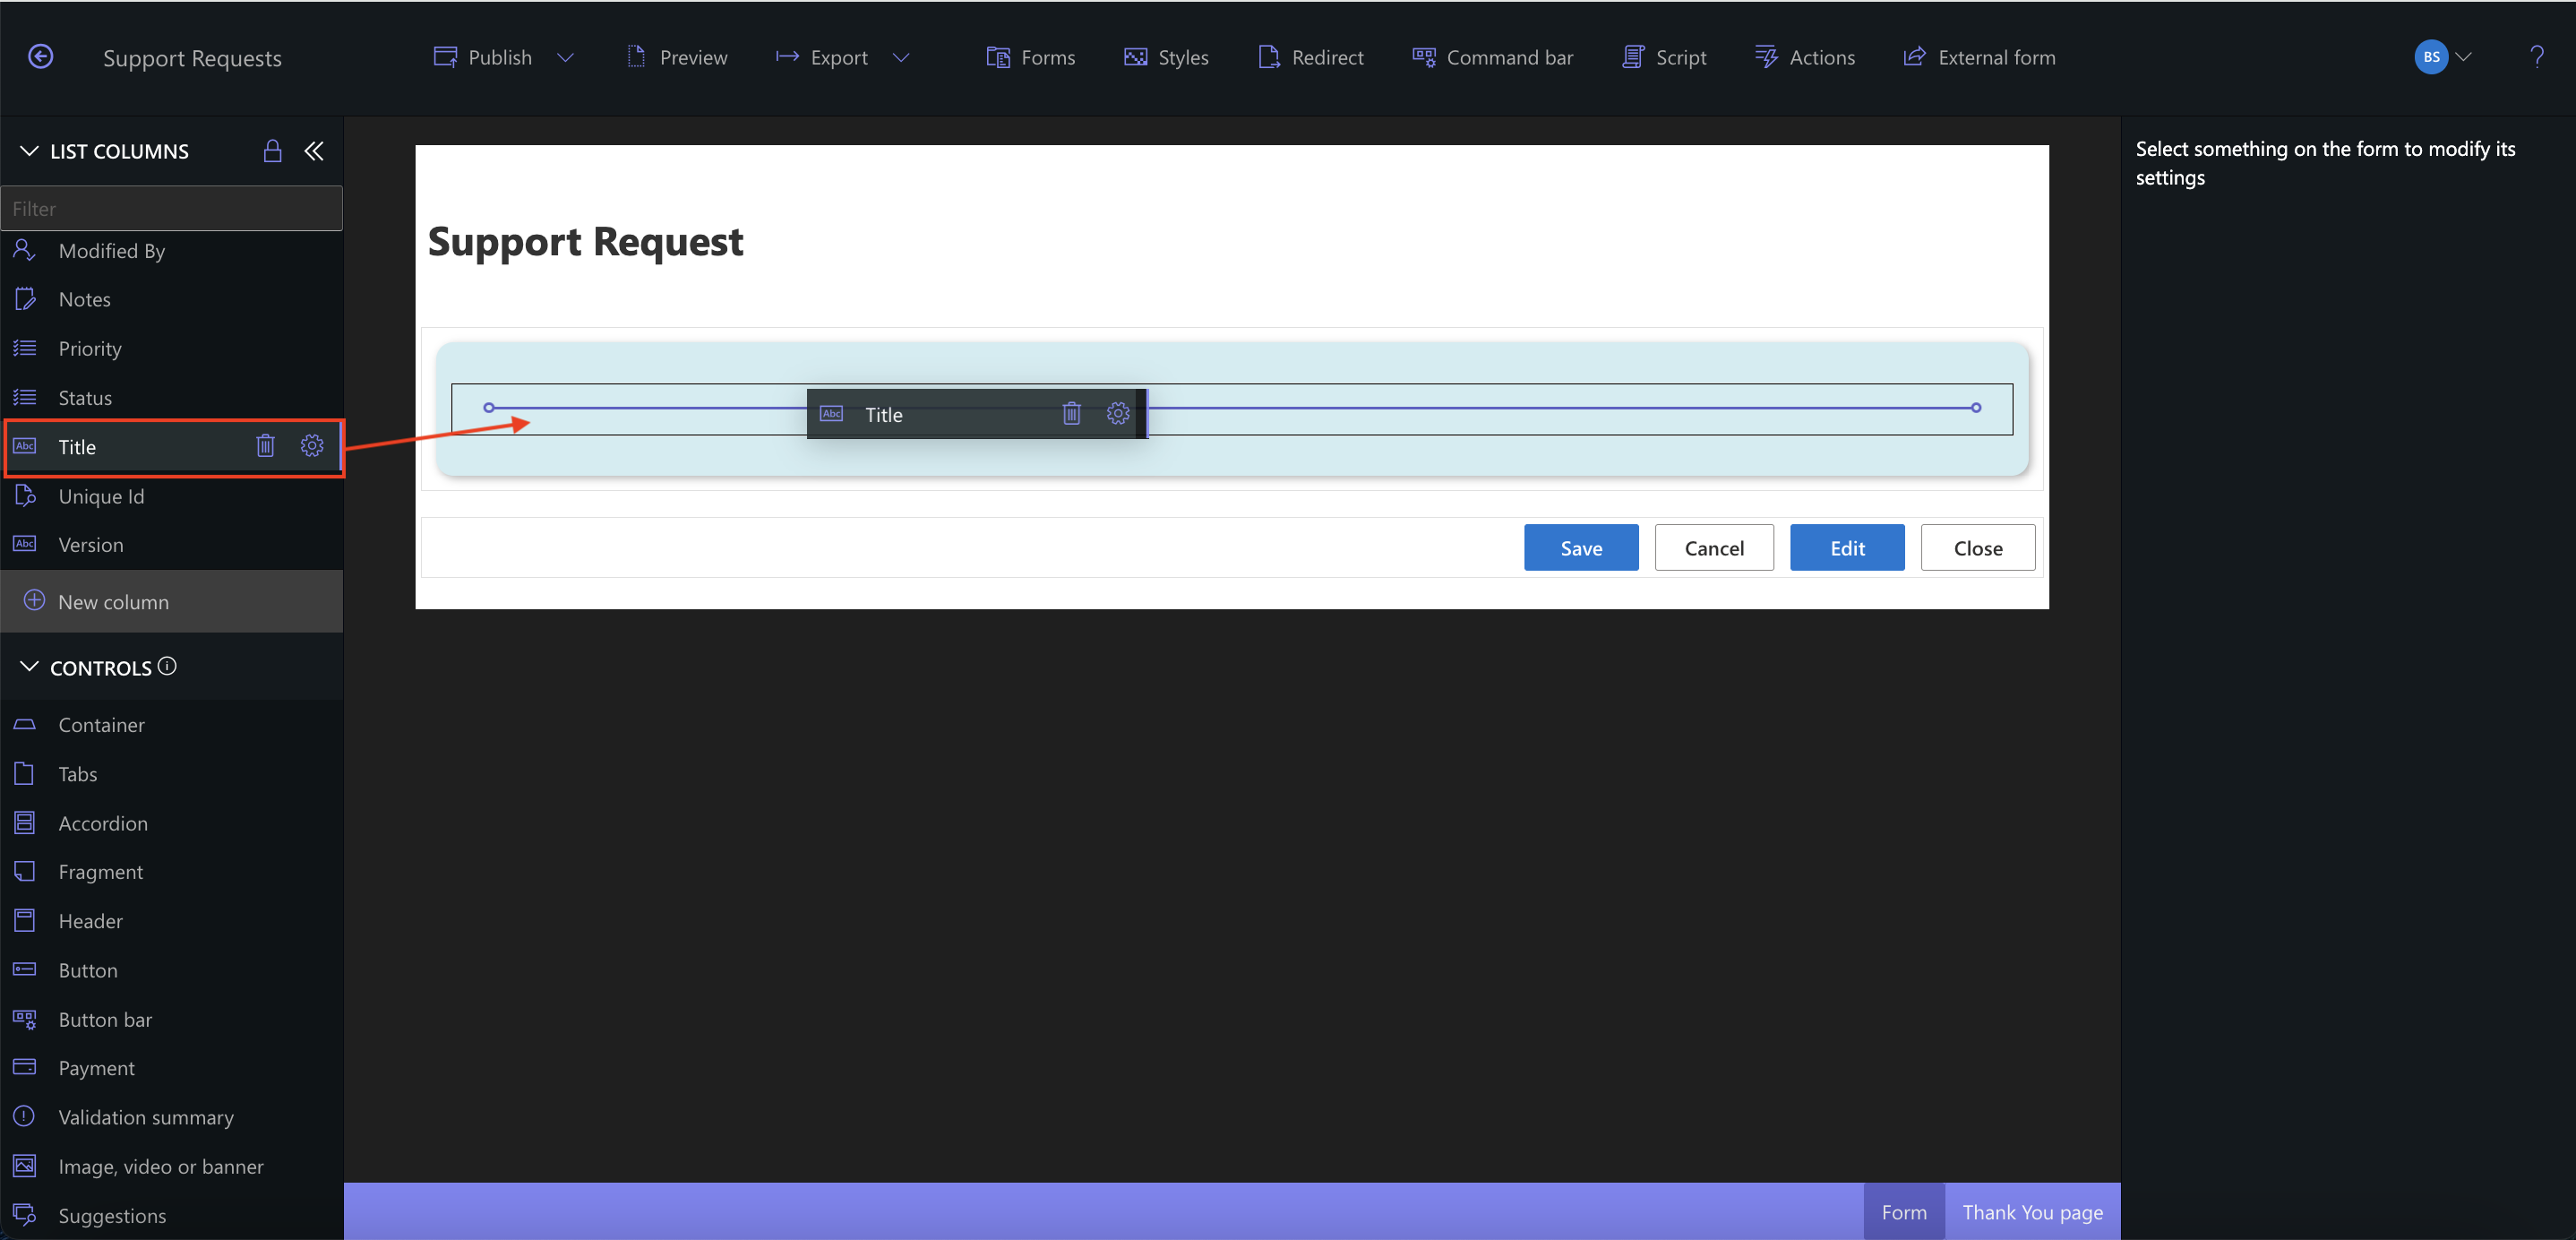
- Select the column and update its Label from “Title” to “Request”
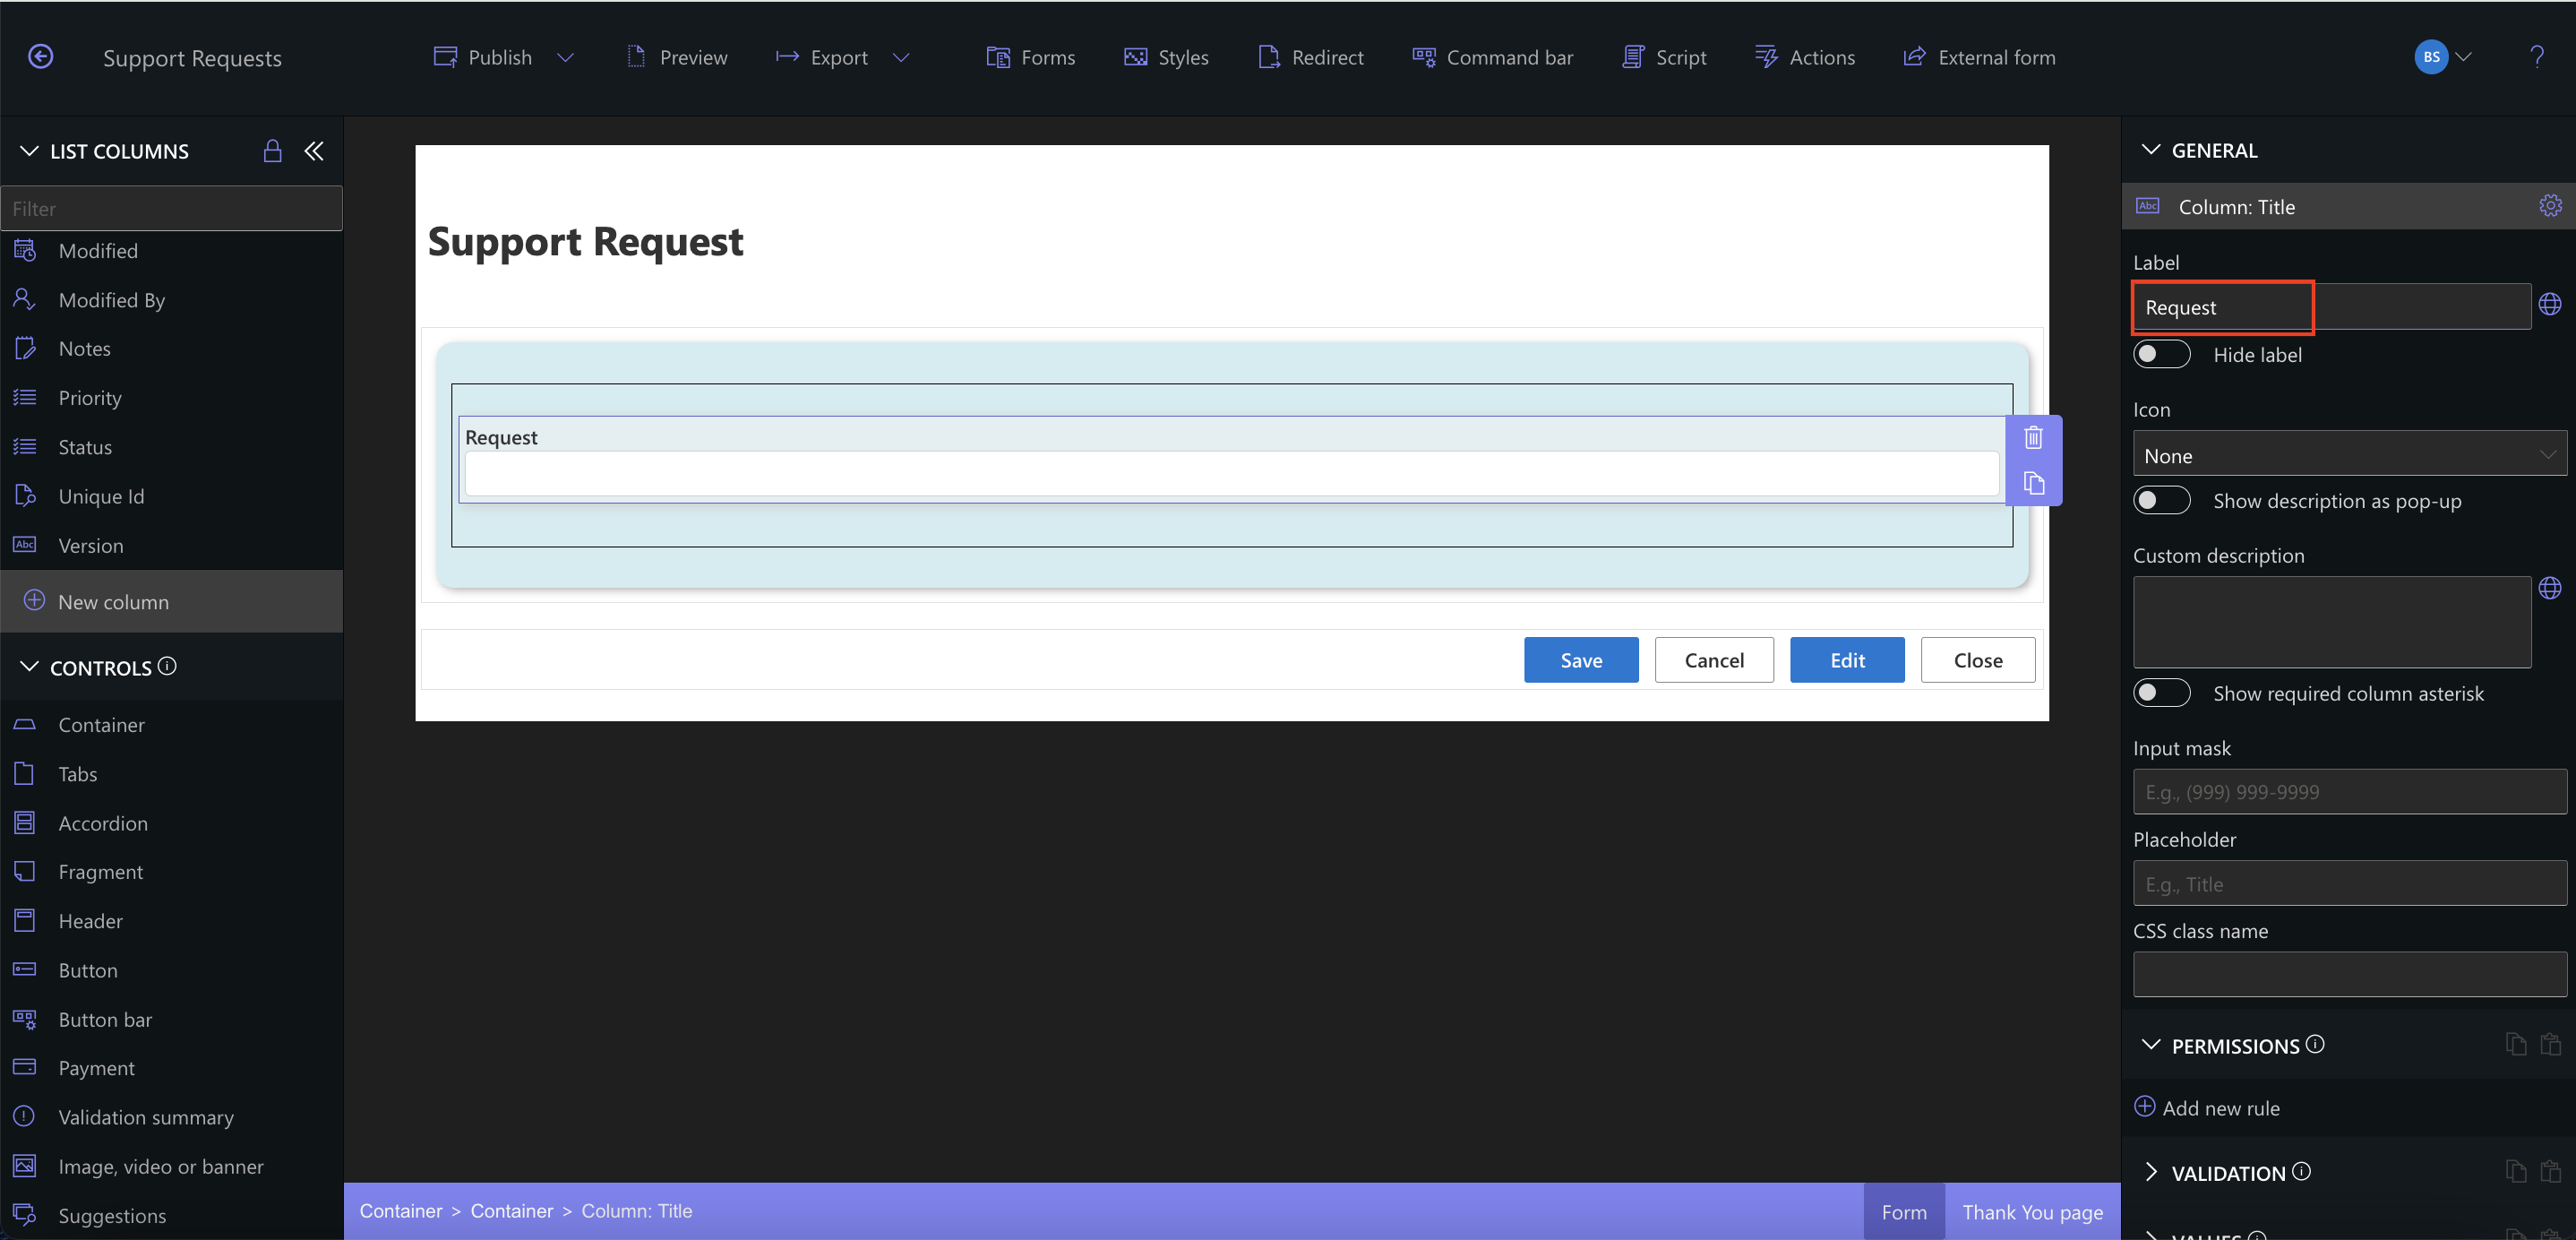
This improves clarity for the user by replacing generic column names with meaningful labels.
Step 5: Let’s go back to our header.
- With the Header selected, click Add new style
- Choose Background color

- Select Light Yellow (or another soft color)
- Click OK
- Set Padding to 2px
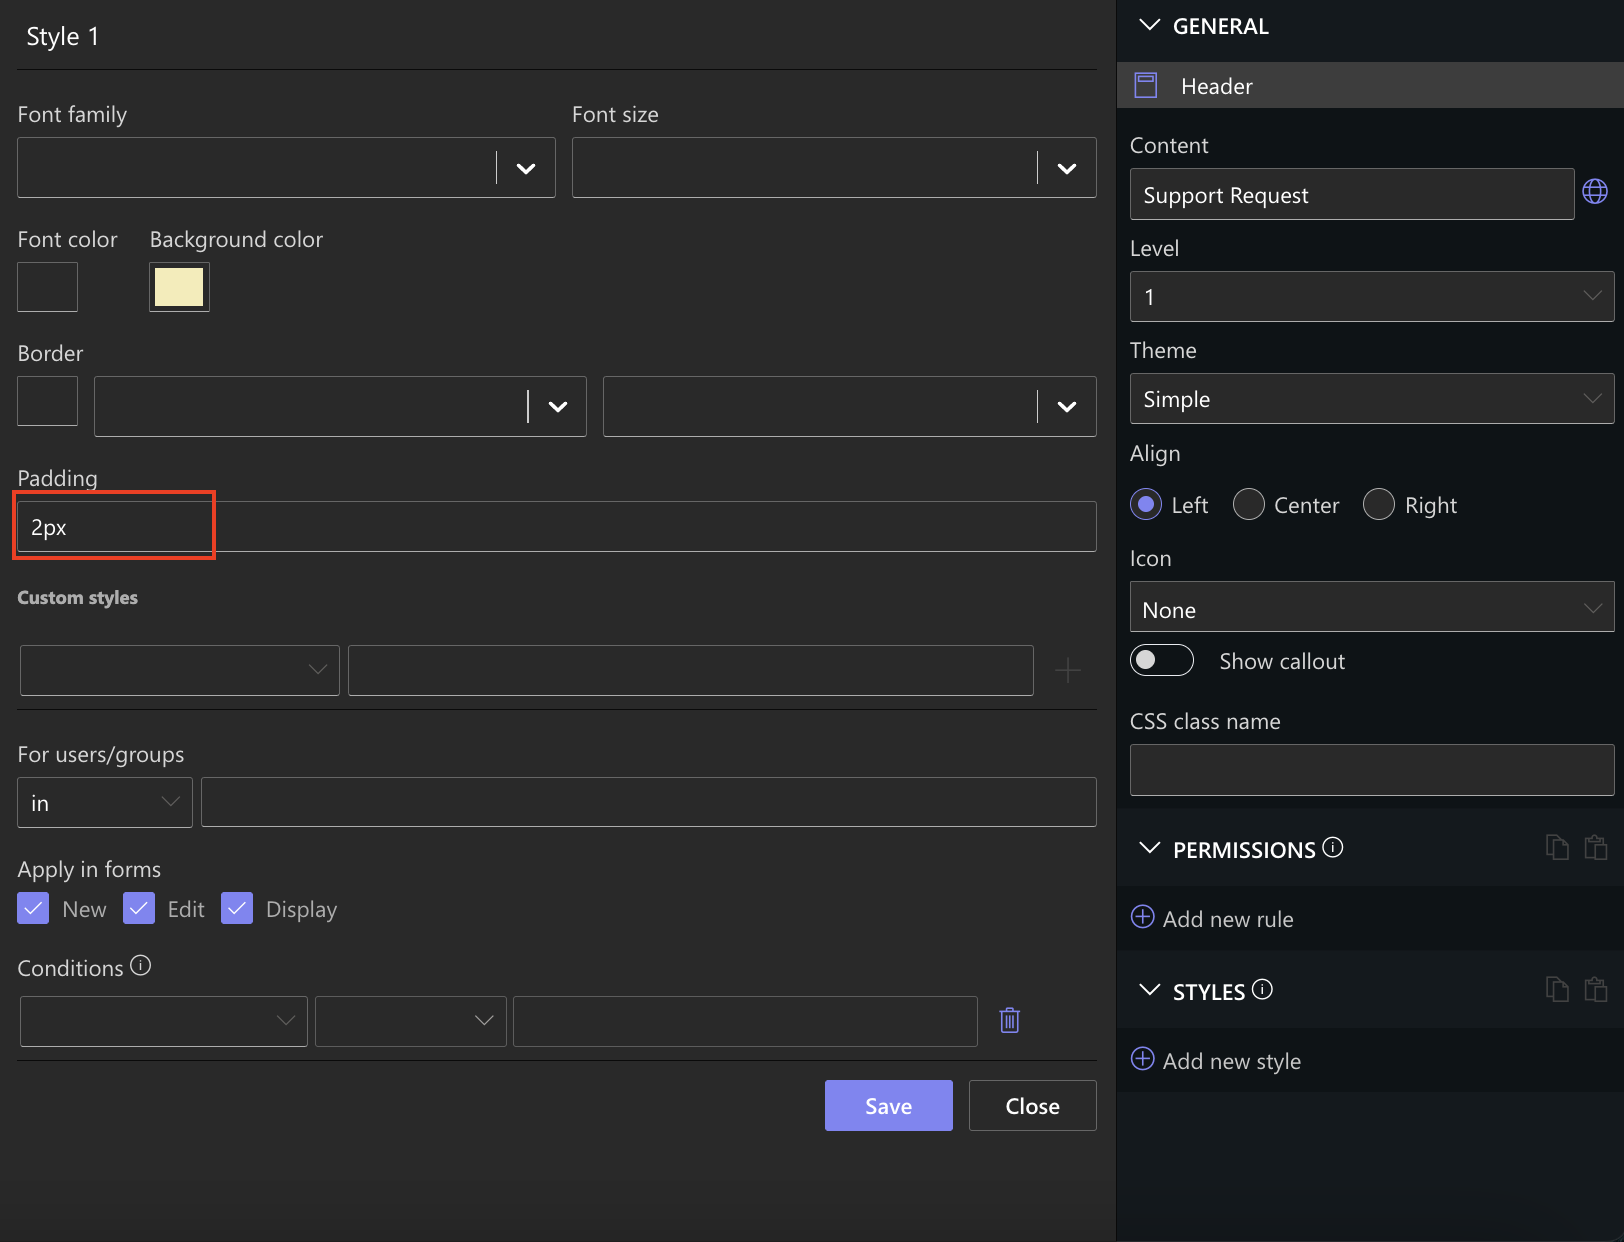
- Click Save
- Choose Align -> Center
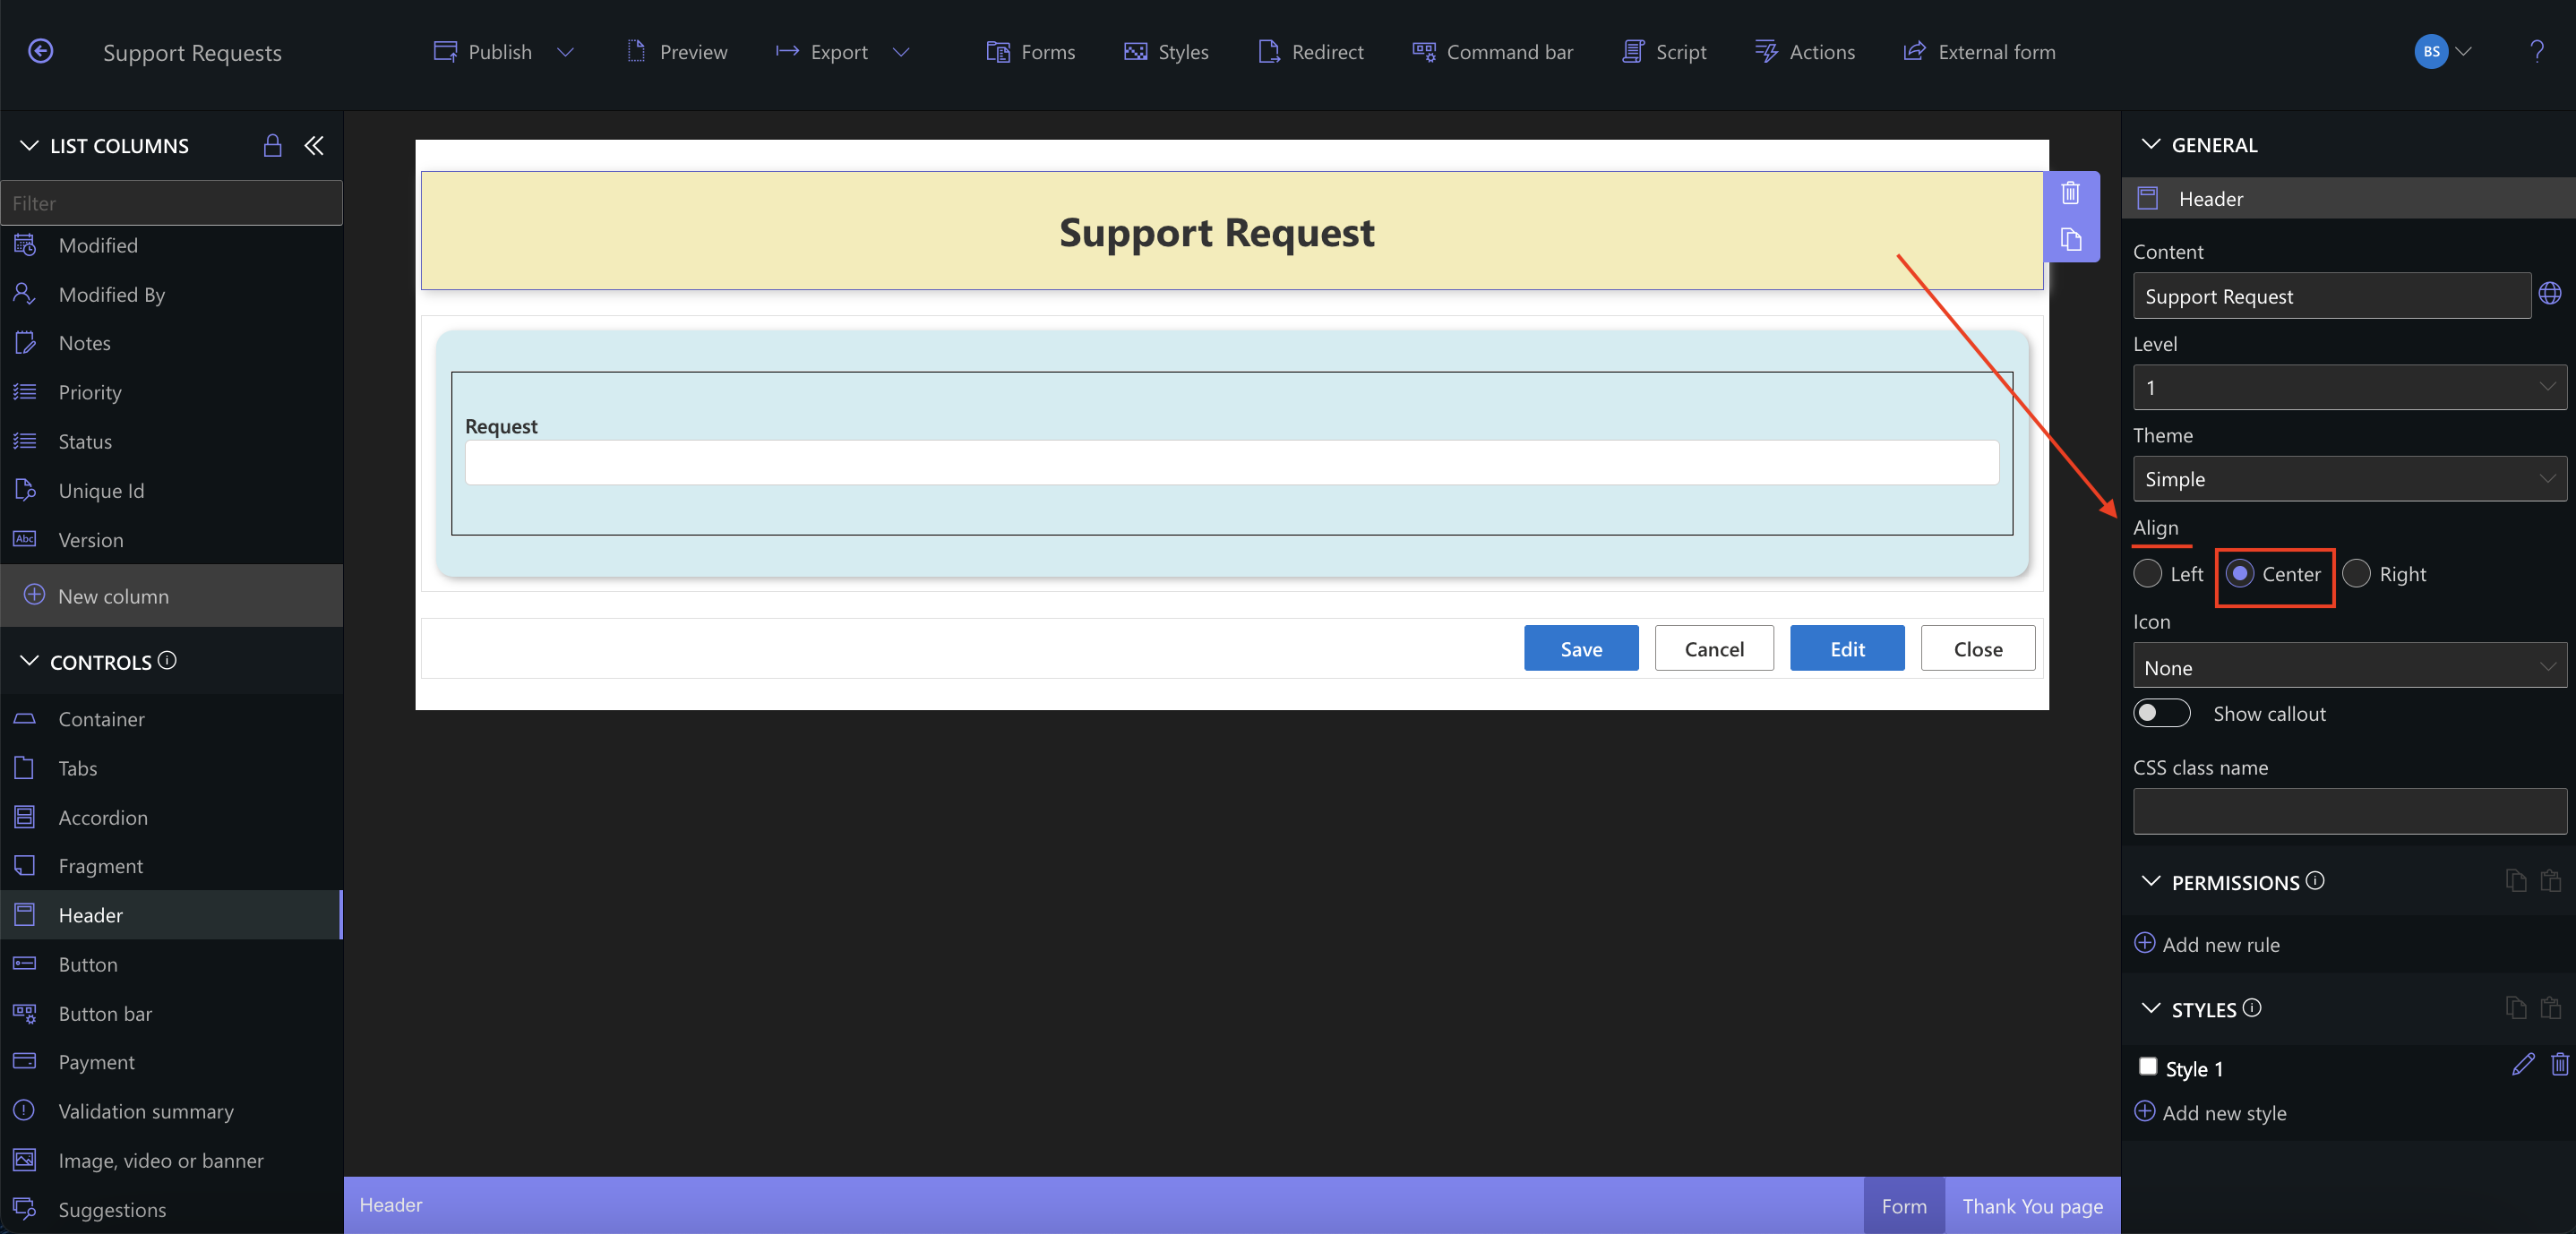
This makes your Header pop and visually separates it from the rest of the form.
Summary
In this tutorial, you enhanced your form layout by applying visual styles such as container themes, background colors and borders. This visual polish makes your form more user-friendly, easier to scan, and more aligned with your branding or organizational style. These small touches make a big impact on usability.