Learn how to build a one-step PTO Request form with Infowise UltimateForms!
Note that this tutorial shows building using classic settings.
Using this system we allow:
- Employees to easily create time off requests
- Employees manager automatically receives an email with a link to the request
- Manager can quickly approve or reject the request
- A relevant email is generated depending on whether the request is approved or rejected
Instructions
Every organization needs a vacation request tool. Luckily for us, creating a vacation request tool with UltimateForms is super simple!
Let’s first discuss how to set up this tool in the Microsoft 365 version.
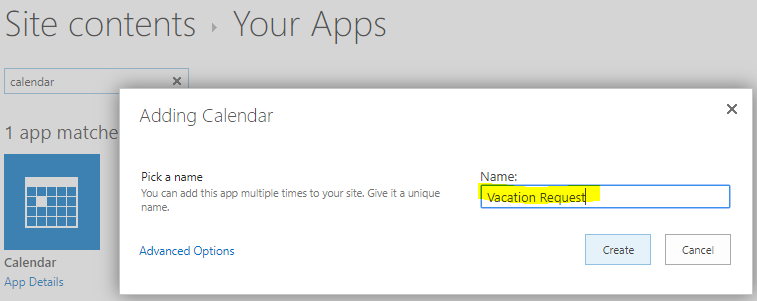
Our first step will be to go ahead and create a normal SharePoint calendar app as shown below:
Next, we will want to add some columns to our calendar that our users will need.
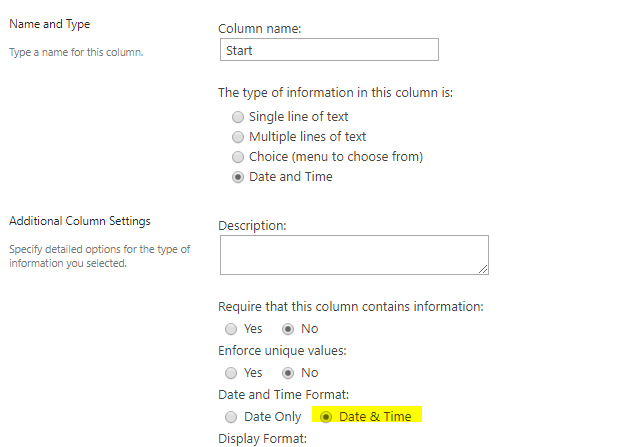
Create a Start and an End column and make sure to select “Date & Time” under Date and Time Format for both these columns as shown below:
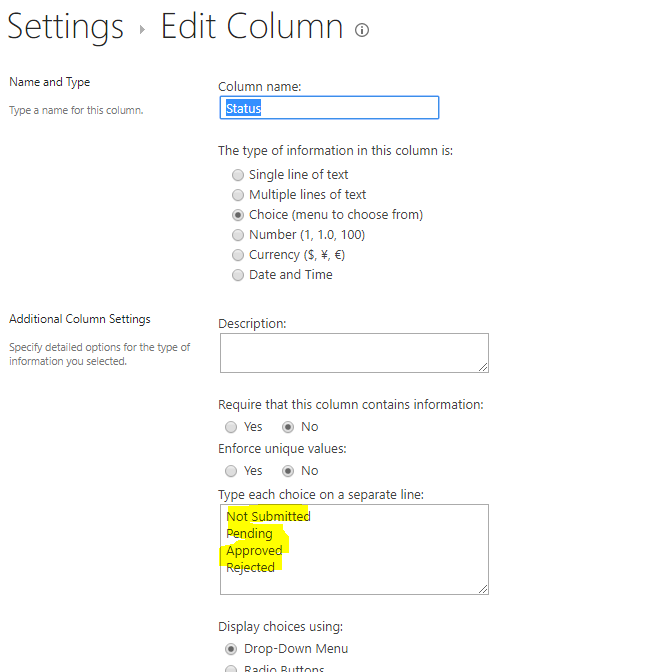
Next, we need to create a Status column that we will use to trigger our workflows. This needs to be a choice column and you should have varying stages. My stages are: Not Submitted; Pending; Approved and Rejected. I would suggest making Not Submitted as your default.
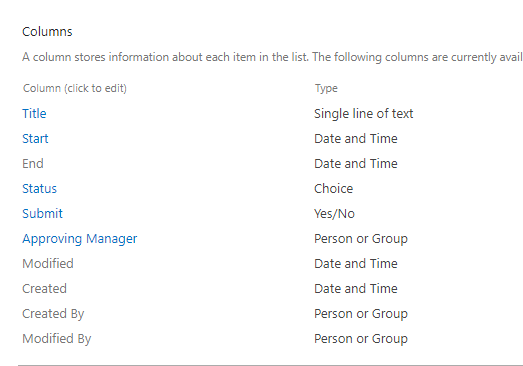
Next, create a Person or Group column titled “Approving Manager” and finally create a Yes/ No column called “Submit” My “Submit” column defaults to Yes but yours does not need to. You Settings page should look similar to below:
Configure Our Tabs
Using Tabs and Tab Permissions we can easily customize which columns we would like to include in our form.
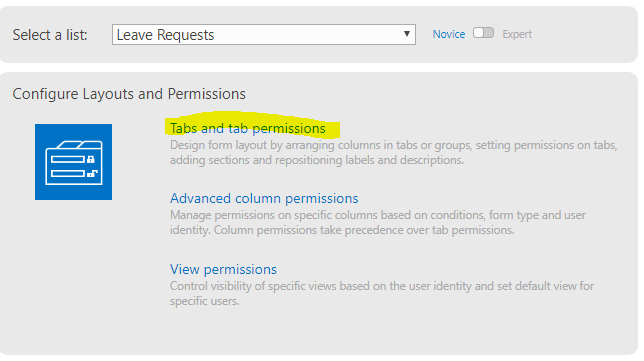
Next, we will want to set the columns in our tabs. From your List Ribbon, click the Design button.

Under the Configure Layouts and Permissions select “Tabs and tab Permissions”
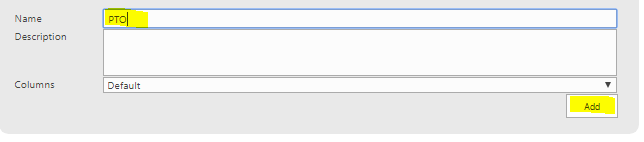
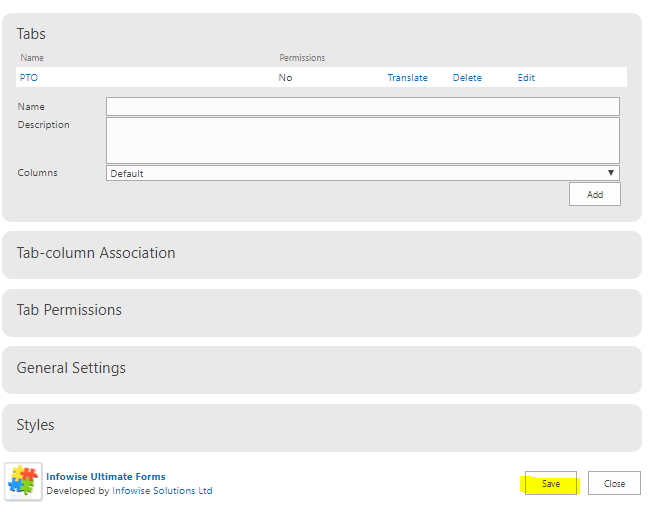
Name your tab something relevant such as PTO and click the Add button.
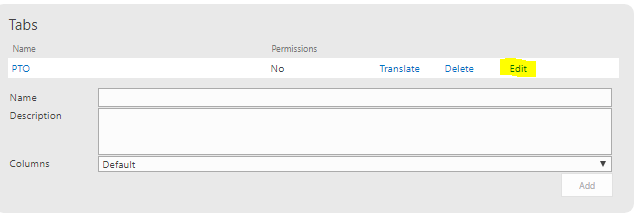
You will see your new tab appear above. Click the Edit button and expand the Tab-column Association section.
As shown below, select the columns you want to include in the PTO tab.
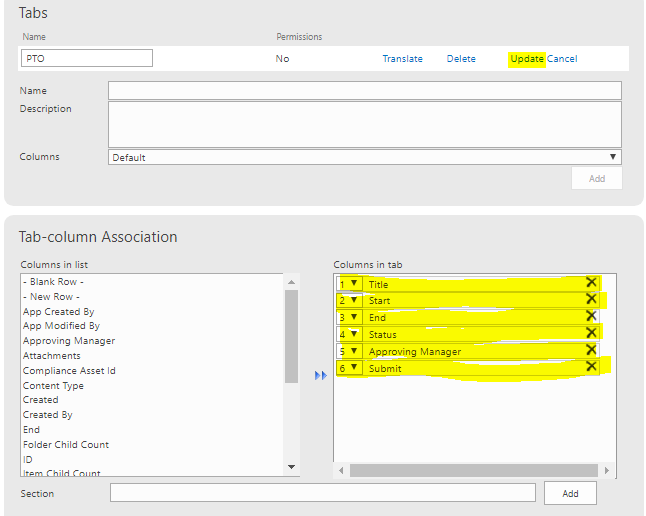
Then click the Update button as shown in the image above and also the Save button at the bottom of your screen as shown below:
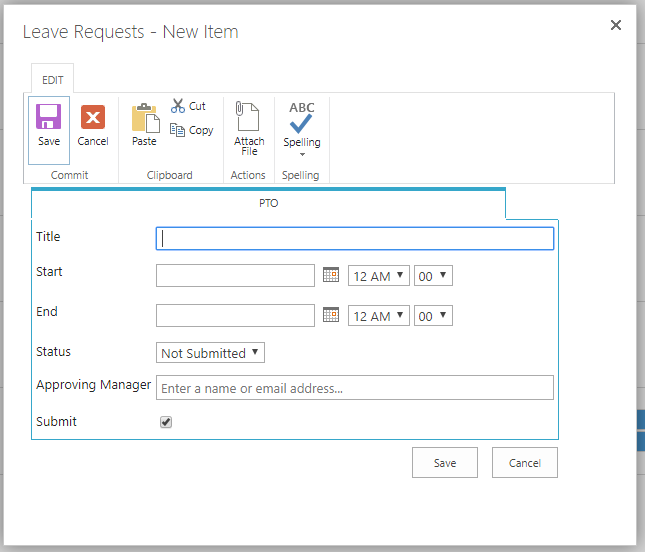
Then click the Update button as shown in the image above and the Save button at the bottom of your screen as shown below: If you navigate back to your calendar and select New Item, your form should look similar to the following:
Build Our Action
In this section, we will build an Action that changes the status of a request to “Pending” if the Submit button has a value of "Yes".
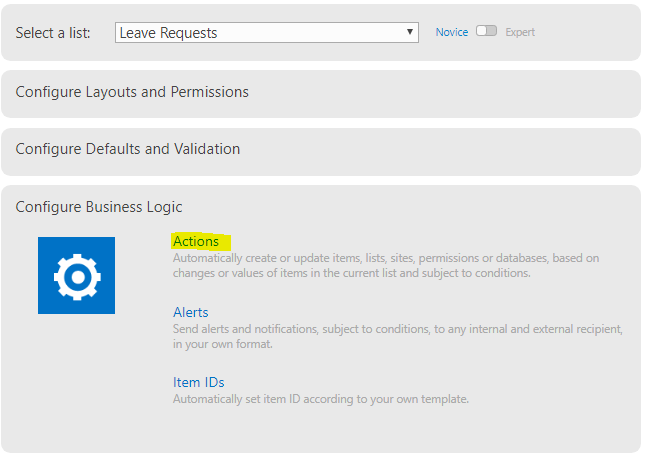
Now we need to navigate back to our Infowise Design screen using the ribbon. Under the Configure Business Logic section, select “Actions”.
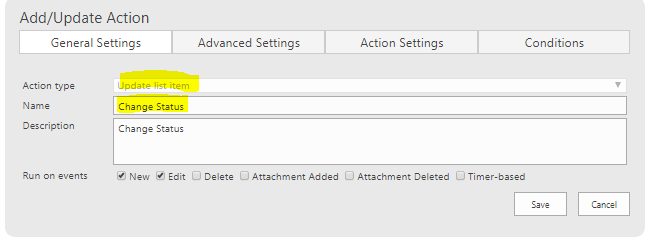
We are going to build a very simple Action that will change the status of our request if the user has checked the Submit button.
We will use the Update List Item action type. Go ahead and give your Action a descriptive name and leave the New and Edit Run on events.
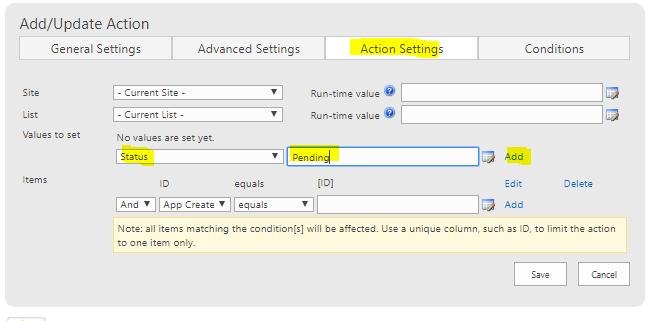
We can leave the Advanced Settings tab as is and move onto the Action Settings tab. In the Actions Settings tab, select your Status column in the Values to Set section. Set the value to ‘Pending’ and then click the ‘Add’ button as shown below.
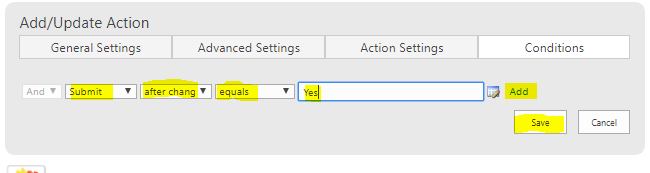
Our final step to complete our Action is to set a Condition for it to run in the Conditions tab. In the Conditions tab, select the “Submit” column. We want to set our Action to run on the event that the value of the Submit button after a change equals Yes as shown below.
Once that is set, click the “Add” button to set the condition and the “Save” button to save our Action.
Once you have clicked Save, you should see your Action appear above similar to below.

Setup Our Email Alerts
Now that we have an Action that updates our status to “Pending”, we want to build an Alert to let the Approving Manager know that a request is pending.
We also need to build two other Alerts to let the requester know whether their request has been approved or rejected. Infowise makes it easy on our users by letting us add links to our Alerts that lead directly to the Item.
We’re almost done!
Our final steps will be to add three different Alerts: one to notify the Approving Manager of a request; one to notify the Submitter that a Request has been Approved and one to notify the Submitter that a Request has been Rejected.
We can set up our Alerts either through the Configure Business Logic section in our Infowise Design Screen or by simply clicking the “Add Alert” button in our ribbon.
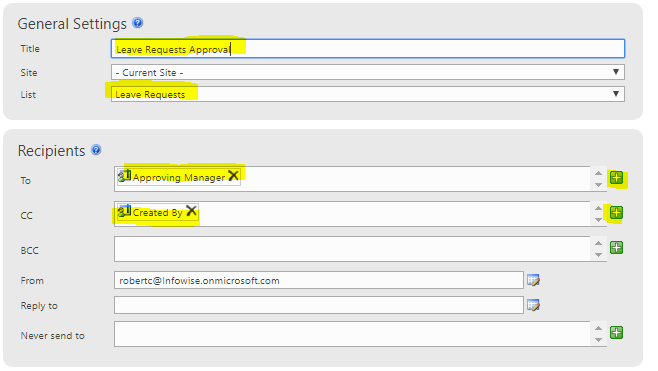
Or we can set up our Alerts either through the Configure Business Logic section in our Infowise Design Screen or by simply clicking the “Add Alert” button in our ribbon. In the General Settings section, give you Alert a descriptive name. Ensure that the correct list is selected.
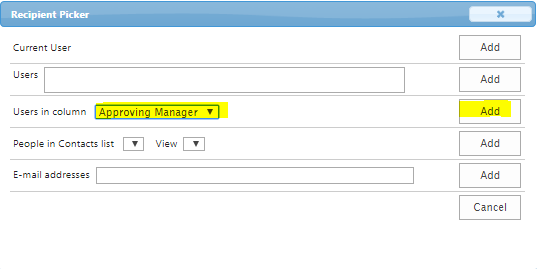
Next, in the recipient’s section, we want to add our Approving Manager as the recipient of the email and “CC” the user who created the record. To do this, click the green plus box next to the “To” section and the following box will appear. Select the “Approving Manager” column in the “Users in column” section and click the “Add” button. Repeat this with the “CC” section and the “Created By” column.
Your General Settings and Recipients sections should look as follows.
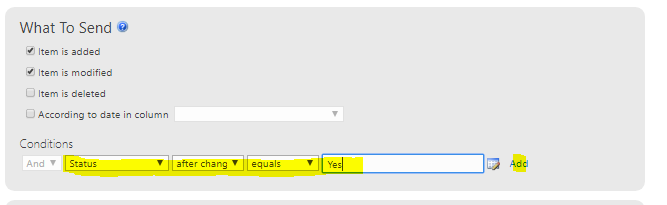
Next, in our “What to Send” section we will add a condition identical to the one we used to trigger our Action. Once this is set, click the “Add” button to save the condition.
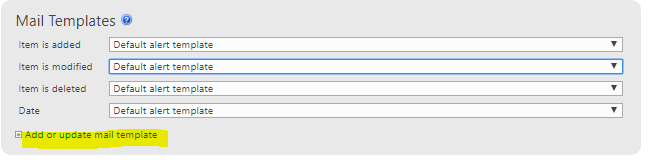
Our last step for this Alert is to add a template. In the “Mail Templates” section, click the “add or update mail template” button.
We will want to give our Template a descriptive name. We want to include column information in our Alert to keep our recipients informed. We can add column info by selecting them from the “Columns in List” section and click either the “Add to Subject” or “Add to Body” button below. Since this is an Approval email, I recommend including a link to edit the item at the bottom. Check the “Share template with all user’s” checkbox and hit OK.

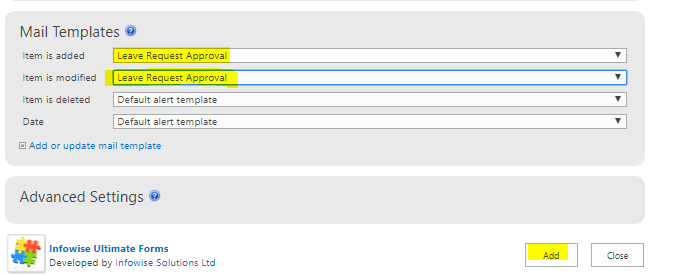
Finally, set our newly created alert as the mail template for when an item is added or modified and click the “Add” button at the bottom of your screen.
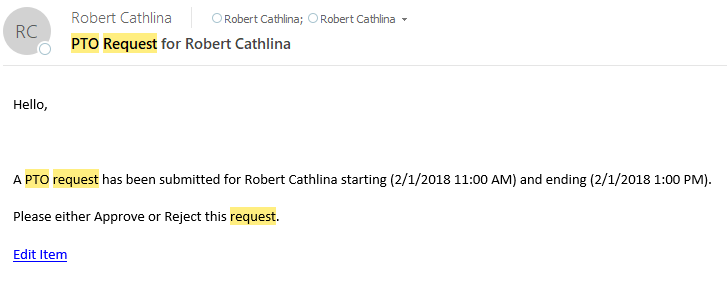
We have successfully created our first alert to notify our manager that a request is in the system. We just need to repeat these steps for our Approval and Reject alerts and we will have a working vacation request system! Below is an example of our Alert:
Let’s start building the Approval alert. Give your Alert a descriptive name. Use the green picker box next to the “To” field to add the Created By column. Add the Approving Manager column to the “CC” field.

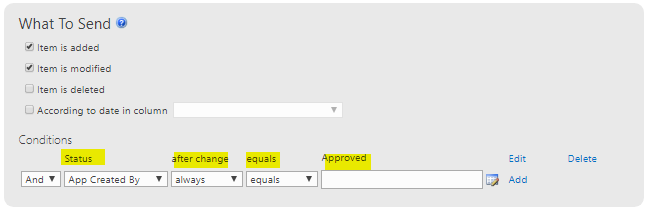
Similar to the initial request Alert, we want to add a condition to trigger our new Alert. We want to send our Alert when the Status column equals Approved after a change. Click the “Add” button to ensure that your condition is saved properly.
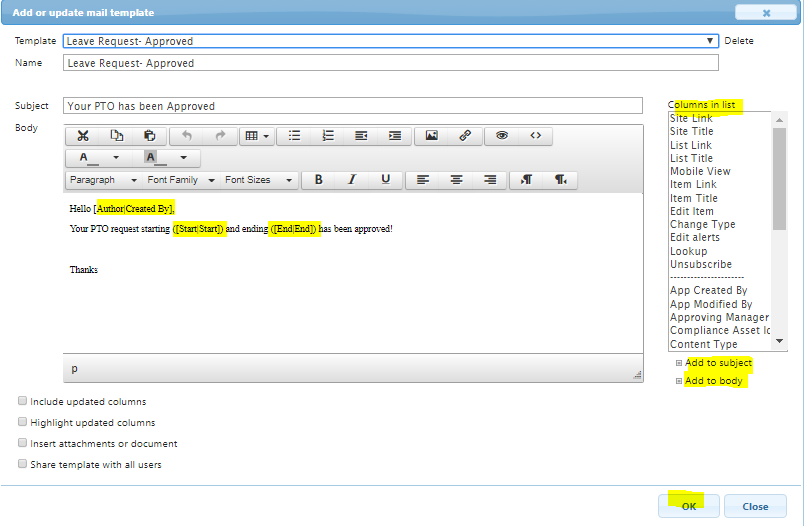
Next, let's build our Approved Request mail template. Give your Template a descriptive name. Add some text letting your user know that their request has been approved. Include the Start and End columns in case our user has multiple requests out. Your Template should look similar to below:
Make sure and set the new Template to send when an item is added or modified.

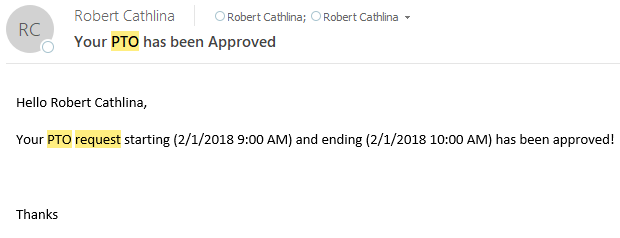
Here is an example of the actual email sent when a request has been Approved:
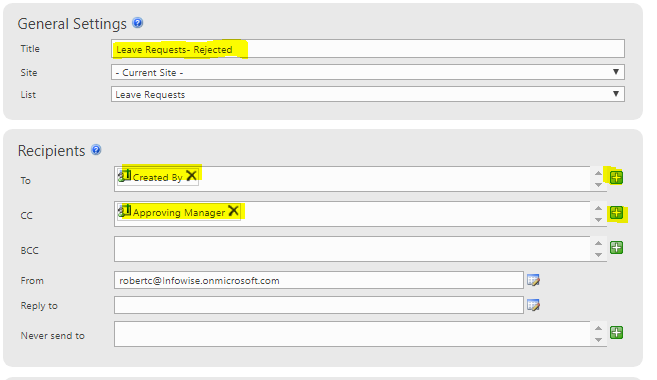
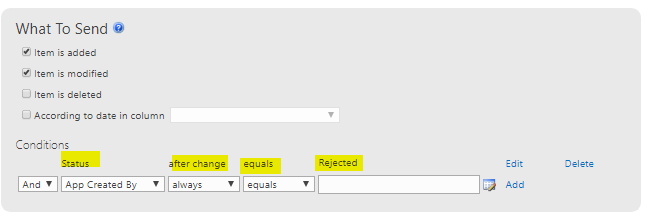
Our final step is to build our Rejection Alert. Give your Alert a descriptive name. Just like in the Approval Alert, use the green box to add the Created By to the “To” section and the Approving Manager to the “CC” field.
We want to add the condition that Status after change equals Rejected to trigger our Alert as shown below:
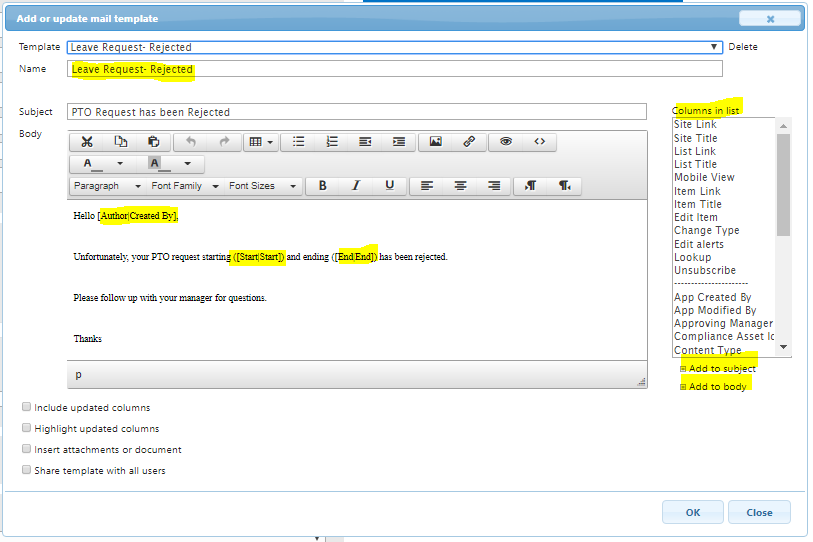
Now we need to create our Template for the rejection email. Give you new Template a descriptive name. Make sure to include the Start and End columns to let the user know which request this pertains to.
After you have constructed the Alert, set the Template to be sent when an item is added or modified:

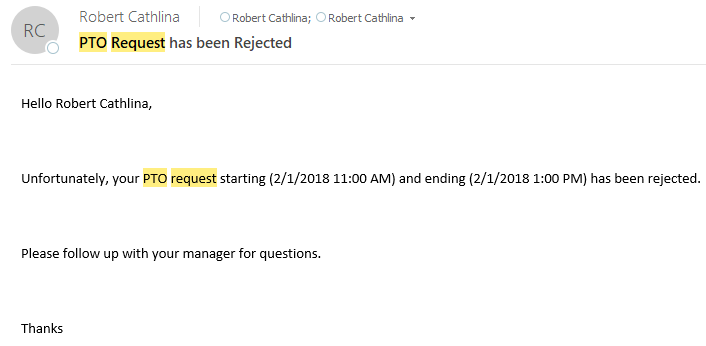
Here is an example of the email that is sent with our Rejection Alert.
Congratulations! You have built a PTO request tool using Infowise in Office 365. We could easily expand our tool with Infowise features by adding specific permissions or use icons to symbolize statuses.
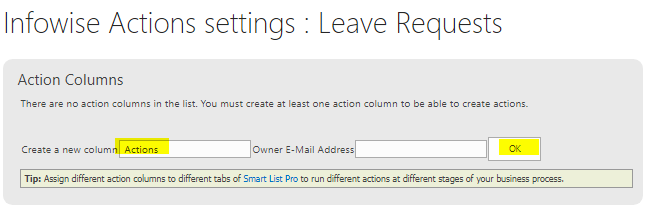
I do want to take a second to point out one specific difference that you will see if you try to build this same system using the Infowise on-premise product. With Infowise on-premise, you need to add an Action column before you can create Actions.
In order to create our “Change Status” Action, we would navigate to the Infowise Design Screen and select “Actions”.
However, before we can create our Action we need to click the “OK’ button to setup our Actions column. Infowise defaults the name to “Actions” but feel free to change it to something more descriptive if you’d like.
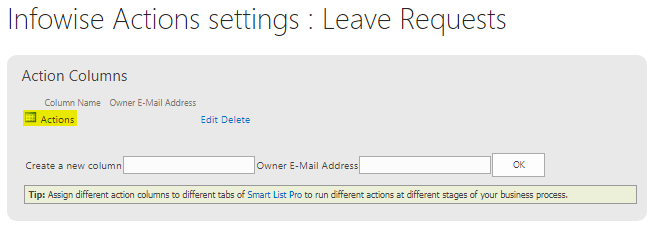
Once you click OK, your column will be created as shown below:
Now we can build our Action just like we were shown above!
Summary
With UltimateForms, building approvals is simple and intuitive!