In this step we will setup the email import to watch for the incoming email approvals. This process will use Import, a component of Infowise Ultimate Forms.
In general, when setting up email alerts, there are 3 major considerations:
- Adding/Deleting/Updating list fields
- Choosing which items to effect
- Choosing which emails to act on
Instructions
From the Procedures list, navigate to the Infowise dashboard and select the “Import” dialog. It is important to navigate to this screen from the context of the Procedures list as the import will only effect that list.

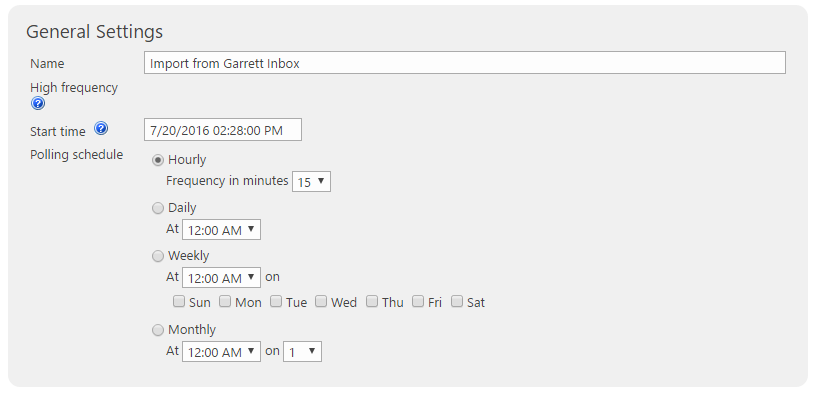
General Settings – This dialog is where the import will be given a name and the frequency of the import is set. In this case we will use the default polling interval of 15 minutes meaning that the email box will be checked every 15 minutes and any new emails which arrived will be reviewed.
For SharePoint Online users, an accelerated polling interval of 2 minutes is available at an additional charge. Contact Support@infowisesolutions.com for more details.
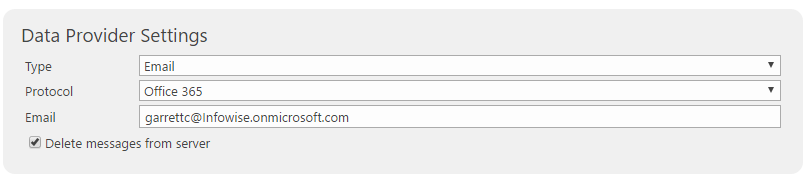
Data Provider Settings – Here is where the email inbox to watch is specified. There are several options to choose from, in this case we are importing from the Office 365 email inbox garrettc@infowise.onmicrosot.com. If you are using a different service (POP3 or Exchange) then you will need to provide the mail server settings as well as the username and password for the desired box. It is a good idea to use a generic inbox such as Sharepoint@companXYZ.com or Approvals@companyXYZ.com. This field should match the “From” field on the email alert so that when an approver replies to the email it goes directly into the correct email box. We will select "Delete messages form server" so that the handled emails will not remain on the server inbox.
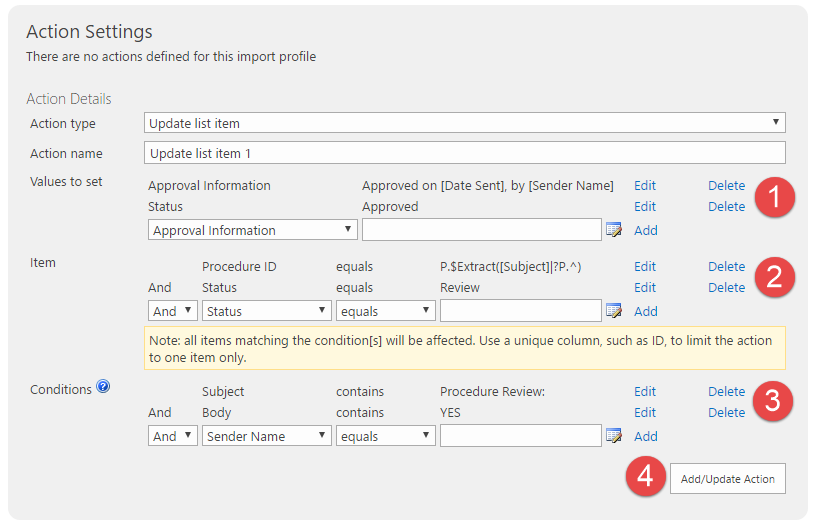
Action Settings – This section is where logic is used to decide which emails to import, which items to update and what columns to update in that item. For this example, we will use the “Update list item” action which will make changes to existing list items. After entering a name for the action, three sections will need to be filled out:
- Values to set – This area is where the changes to individual items are specified. For this example, we will be setting the Approval Information field using information from the email. The “Date Sent” and “Sender Name” are read form the email and put into this field. Also, the Status field should be set to Approved.
- Item – This area is where we select the items in the list which will be affected by the action. In this example, we want to update the list item which matches the “Procedure ID” in the subject. For this operation we will use the Extract Infowise function. Much like the linked example, we will extract the text from the email’s subject, starting at “P.” and ending at the next space or line break. That will return the numerical portion of the procedure id. Additionally, we only want this email import to happen when the item is in the “Review” status. This will prevent follow on emails from effecting the item.
- String for Procedure ID: P.$Extract([Subject]|?P.^)
- Conditions – This area is where we will choose which emails are “imported” into the system. Since the email inbox can be used for multiple imports or other reasons, not every incoming email should be imported. We will limit the emails imported based on the subject containing “Procedure Review:” in the subject and “YES” in the body.
Be sure to press the “Add/Update Action” button to save the new action. If you forget this step, then you will need to create the action again!
Click “Add/Update Profile” to save the new profile, this will begin the polling procedure.
Next: Step 4: Testing