SharePoint permissions are both important and often complex. Once a SharePoint permissions structure is established, it is often counter intuitive to develop a new one. Luckily, the Infowise Ultimate Forms Suite offers advanced permissions that work together with SharePoint groups!
NOTE: This tutorial demonstrates the older method of creating custom Forms in Ultimate Forms. This method is appropriate to use with the SharePoint Classic experience; if you are using the Modern Experience, our recommendation is that you use the Modern Form designer instead.
Instructions
Tabs are one of the core functionalities of the Infowise Ultimate Forms Suite. Tabs allow us to make more complex forms and even to use permissions to ensure only a select audience can use portions of our form. In this instance, we want to set up a tab specific to our manager’s. As will often be the case, we already have a SharePoint group defined for our manager’s.
So in this example, we want to create a tabbed interface that one of our SharePoint group’s has a different level of permissions to than another.
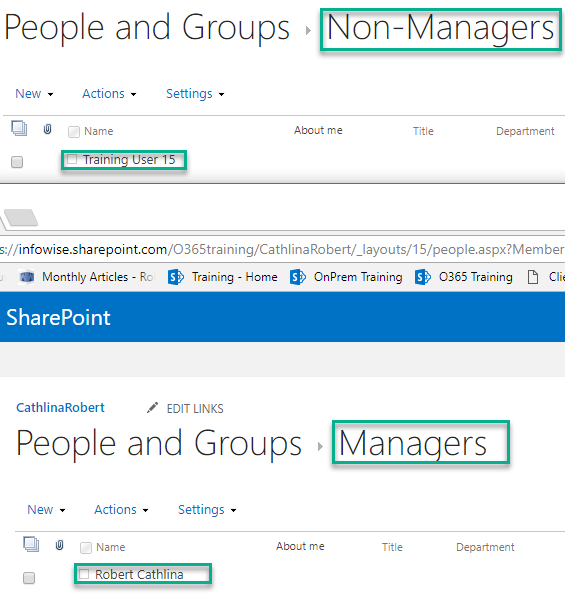
In order to demonstrate this functionality, we will start with two SharePoint groups:
Managers- User ‘Robert Cathlina’ is in this group
Non-Managers- User ‘Training User 15’ is in this group
The Manager’s group will be able to Edit our Project’s List while the Non-Managers group will only be able to Read the list.
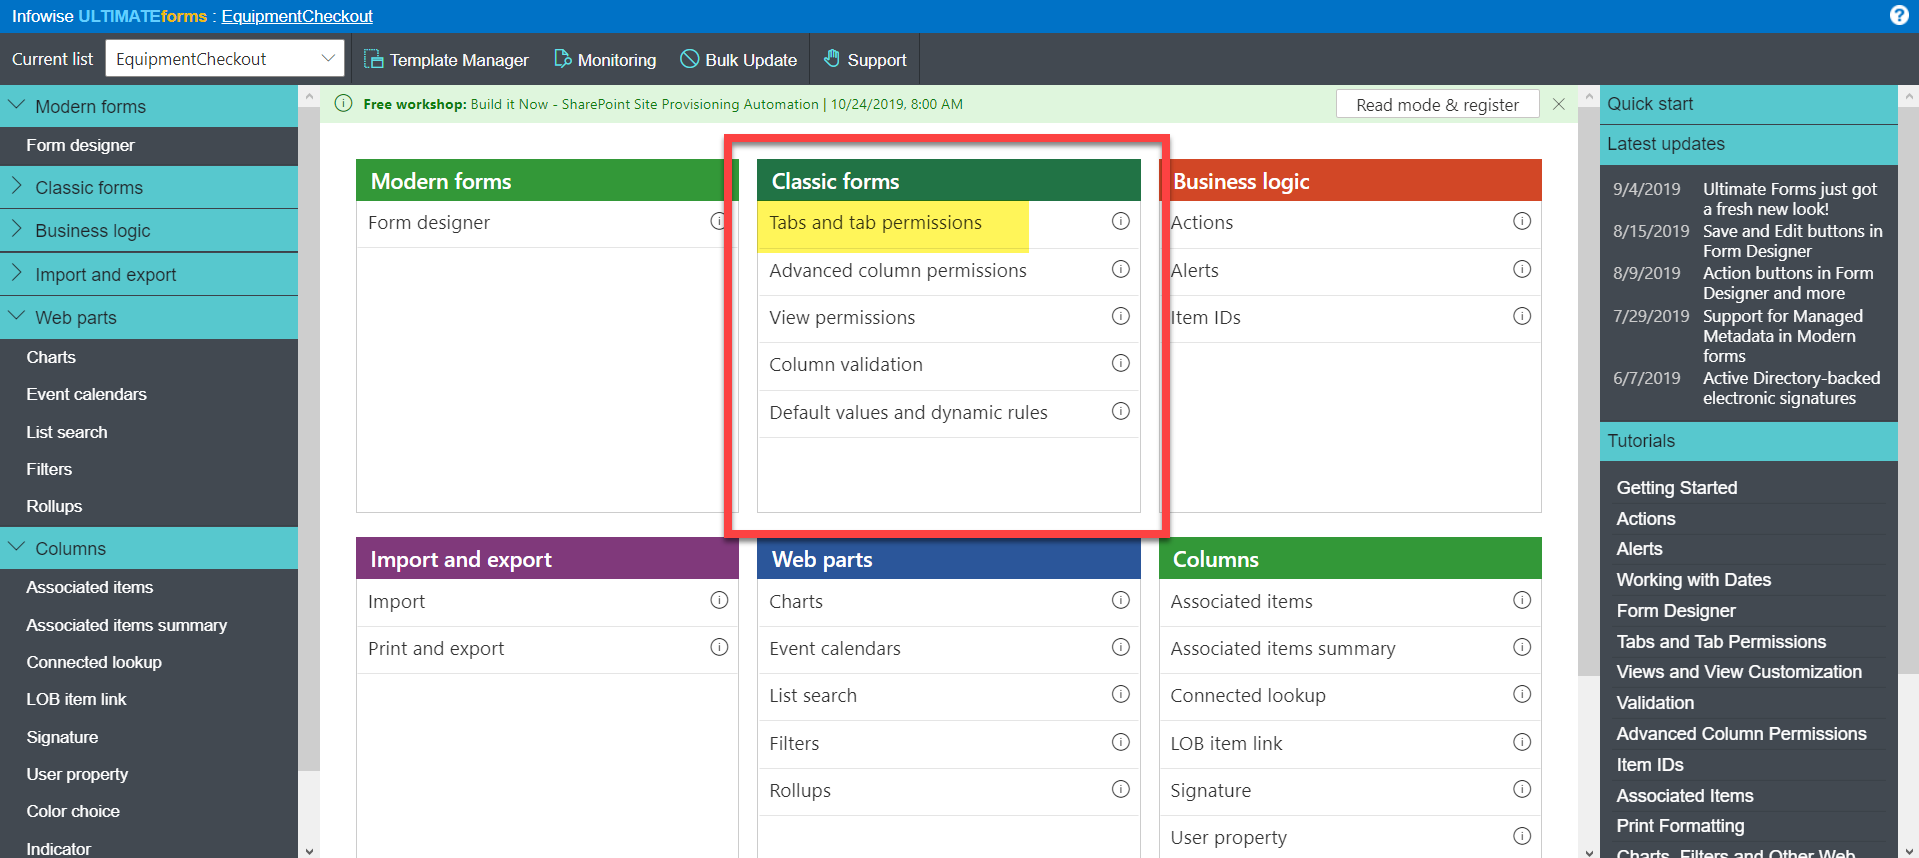
Navigate to our list where we want to create our forms. Once in this list, navigate to your Infowise Design Screen and select Tabs and Tab Permissions in the Configure Layouts and Permissions section.
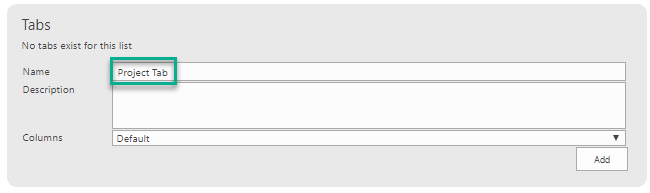
The first step is to give your tab a name as shown below.
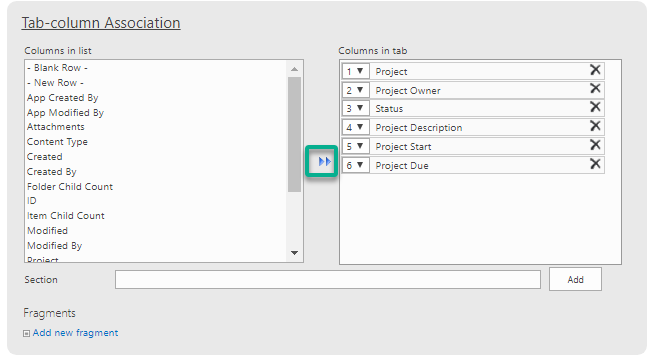
In the next section, we will select the columns from the list that we want to include on this tab. Use the double blue arrow to select the columns.
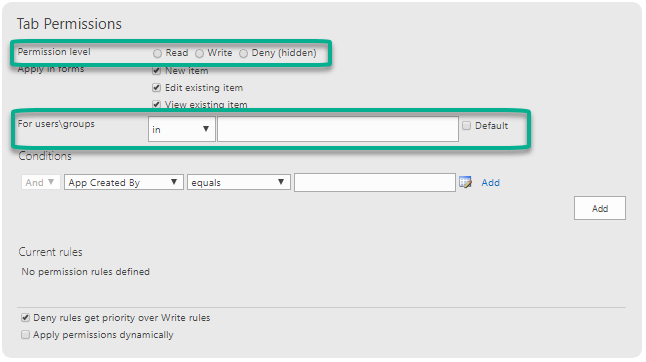
The Tab Permissions section is next and it is here that we will set our rules. For the tab to work as intended, we will need to setup two rules.
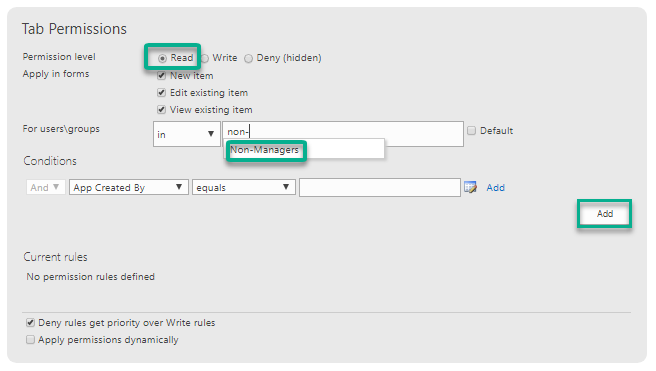
Our first rule will give Read level permissions to our Non-Manager’s SharePoint group. For Permission level, check the Read option. In the For users\groups section, enter in the name of our SharePoint group “Non-Managers”. Infowise conveniently searches through our existing groups to make selection easier. Click the Add button below to save the rule.
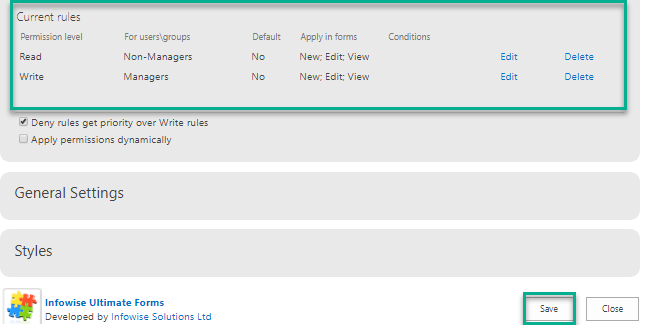
You will see a new rule appear in the section below labeled Current rules as shown below.

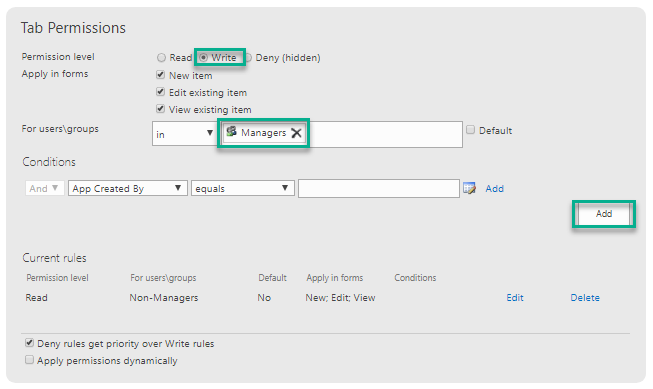
Next, we need to create our Write rule and give our Manager’s group access.
Using the same Project tab, under the Tab Permissions section, select the Write Permission level and add your Managers group to the For users\groups section. Click the Add button to save it as a Current Rule.
Once you have your two Current rules, click the Save button at the bottom of your screen to add the rules to your tab.
Next, we will want to test our functionality to make sure it works as expected. First, I will login as Training User 15 to test to see whether our Read level permissions are working as expected
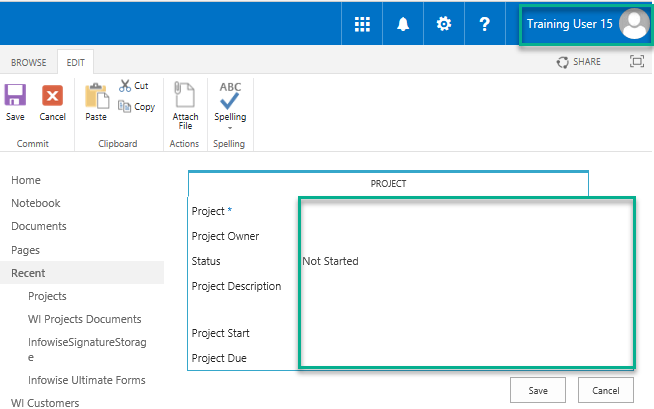
As you can see, when logged in as Training User 15, all of our fields are displayed as read only fields and the Edit button is not given to us as an option.
Next, I want to check and see what our Write level permissions look like for those users in the Manager group.
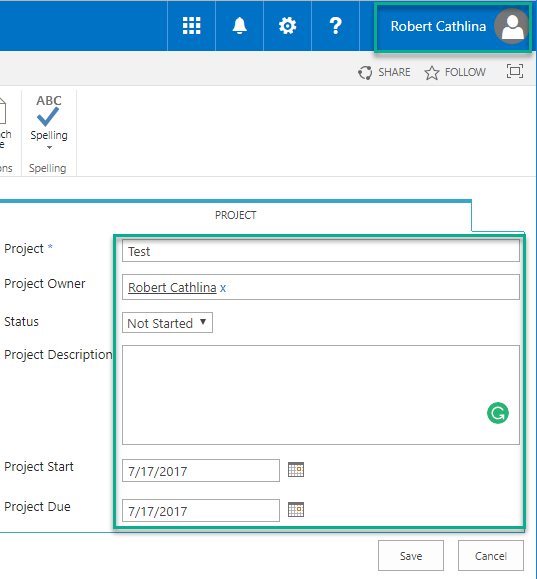
Now that we are logged in as a user in the Manager group, we can clearly see a difference in the form. We are able to enter new information in and save if we’d like.
Summary
In this example, we went over how to combine existing SharePoint user groups with Infowise tab permissions feature to extend the functionality of our forms.