This tutorial applies to Microsoft 365. A separate tutorial will explain the configuration for SharePoint On-Premises.
Once your List Search Profile is created, the next step is to add the List Search web part to a SharePoint page and connect it to your profile.
This allows users to run searches, view results, and interact with items directly on a custom search page.
In this tutorial, we will add the List Search web part to a modern SharePoint page and connect it to the profile created earlier: Project Search Center.
Instructions
Preparation
Before starting, make sure you have already created the profile:
- Profile name: Project Search Center
We will reference this name when configuring the web part.
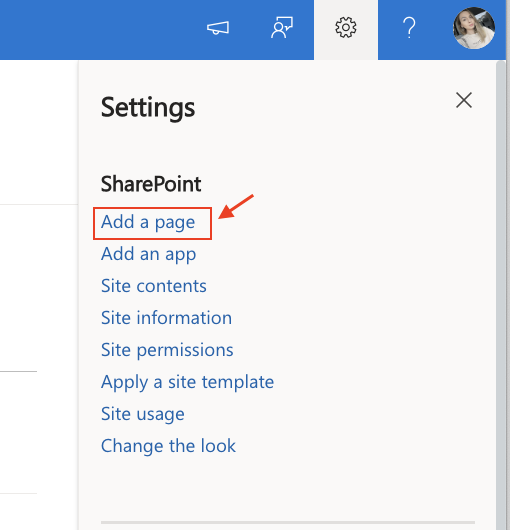
Step 1: Create a New SharePoint Page
- Open the SharePoint site where you want the search page to exist.
- Click Settings → Add a page.
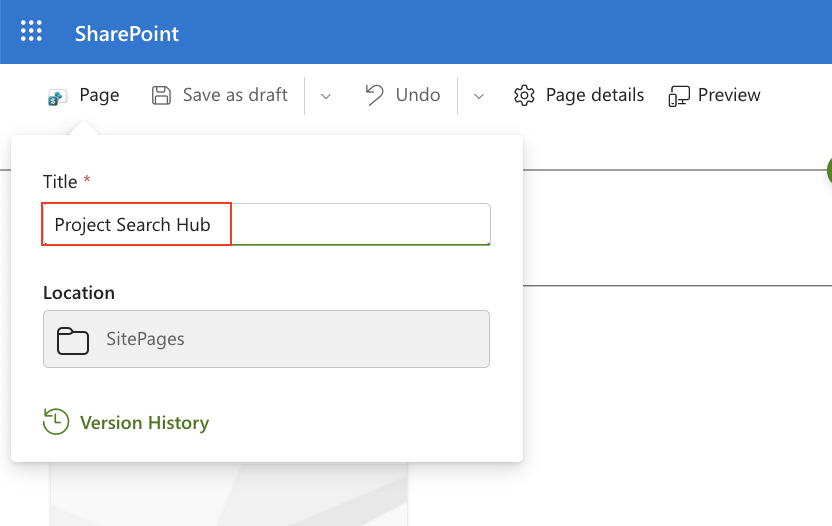
- Enter a page name, for example: Project Search Hub.
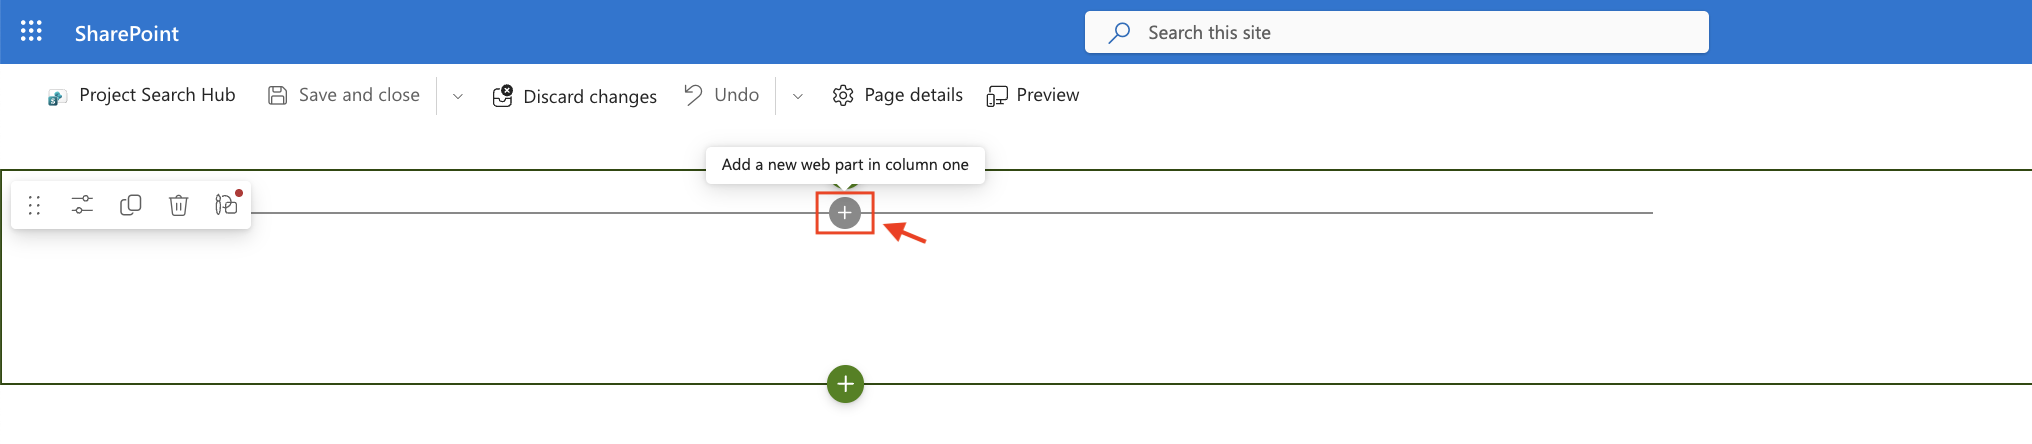
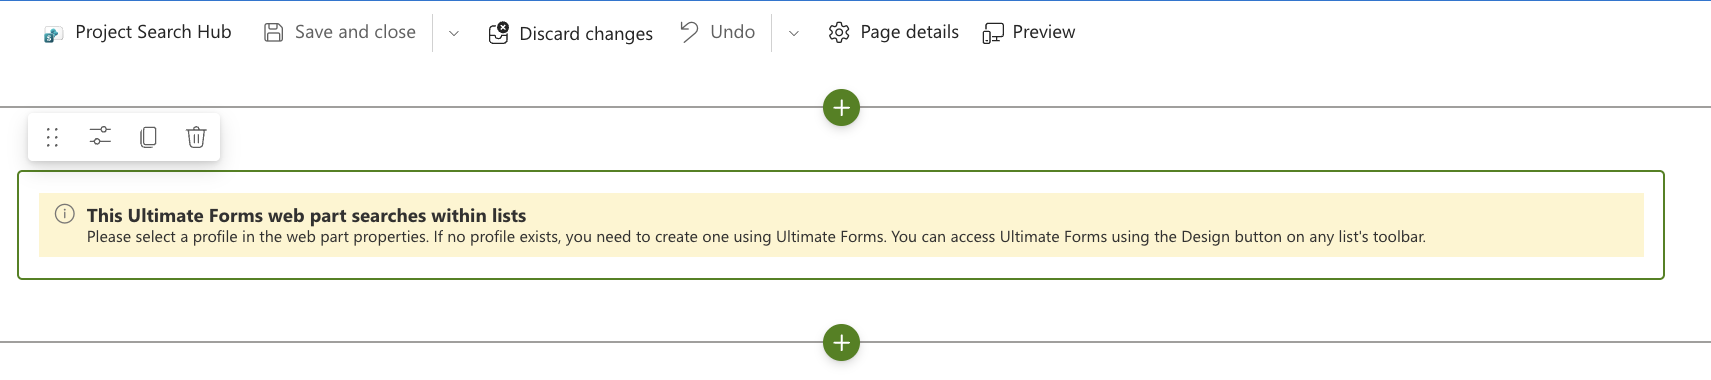
Step 2: Add the List Search Web Part
- On the page, click the + icon to add a new web part.
- Search for Infowise List Search.
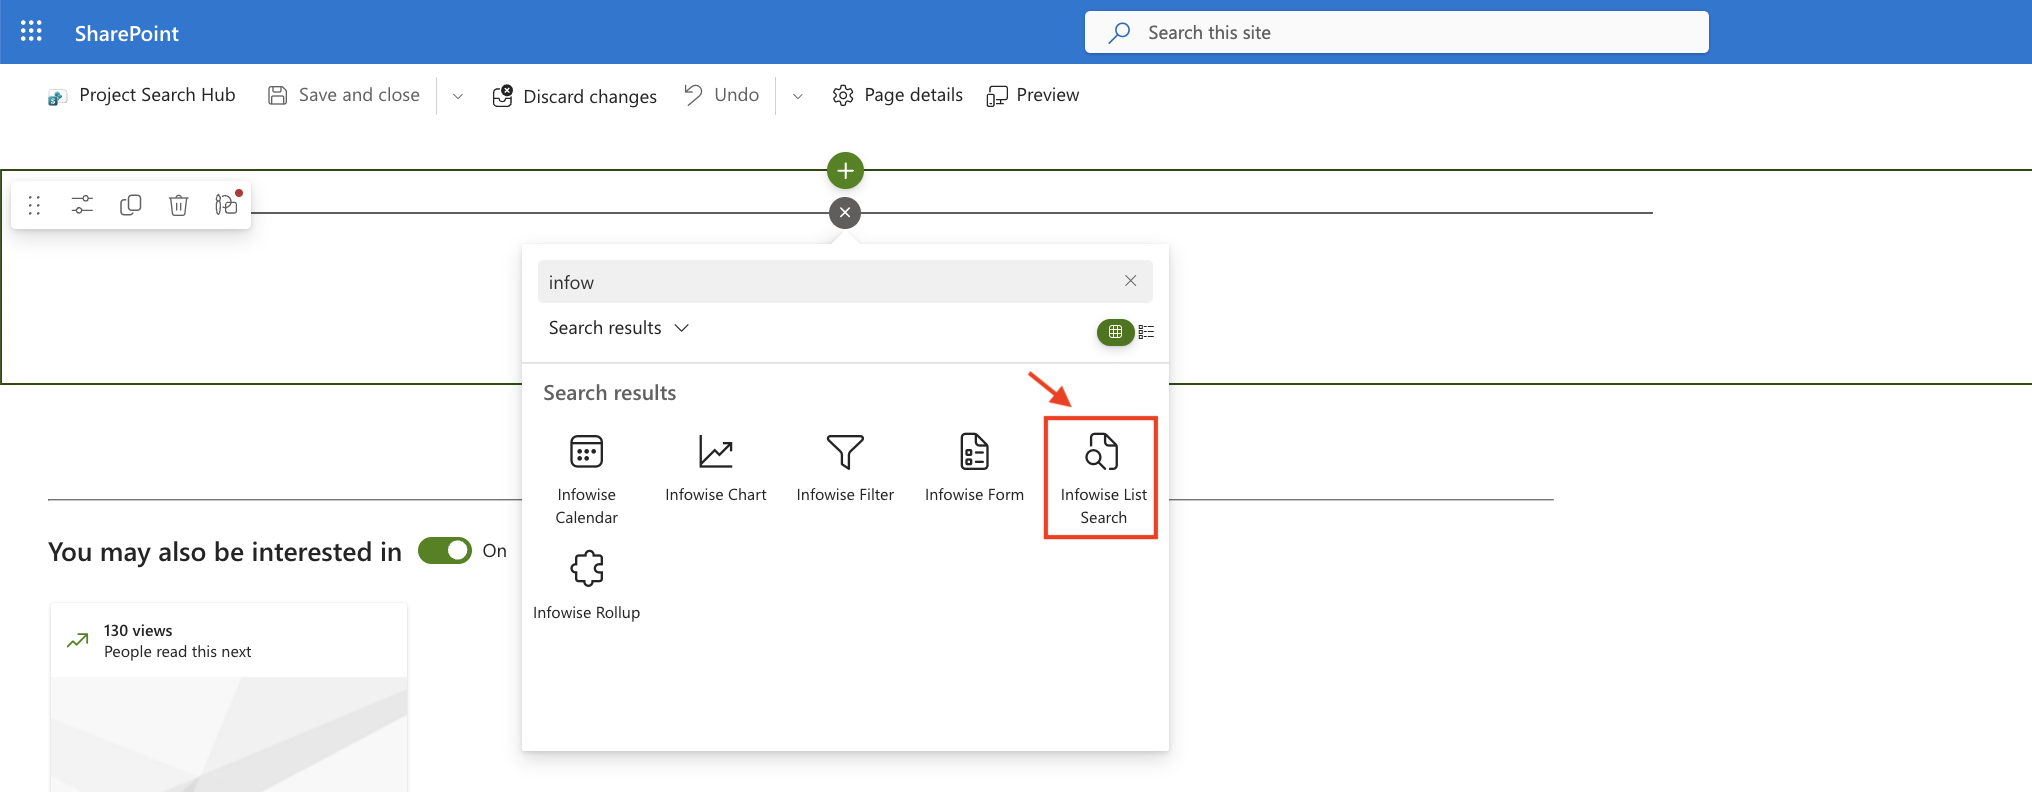
- Click to insert it into the page.
- At this moment, the web part will show a message indicating that it requires configuration.
Step 3: Open Web Part Settings
- Click Edit properties in the left toolbar.
- A panel with configuration options will open on the right.
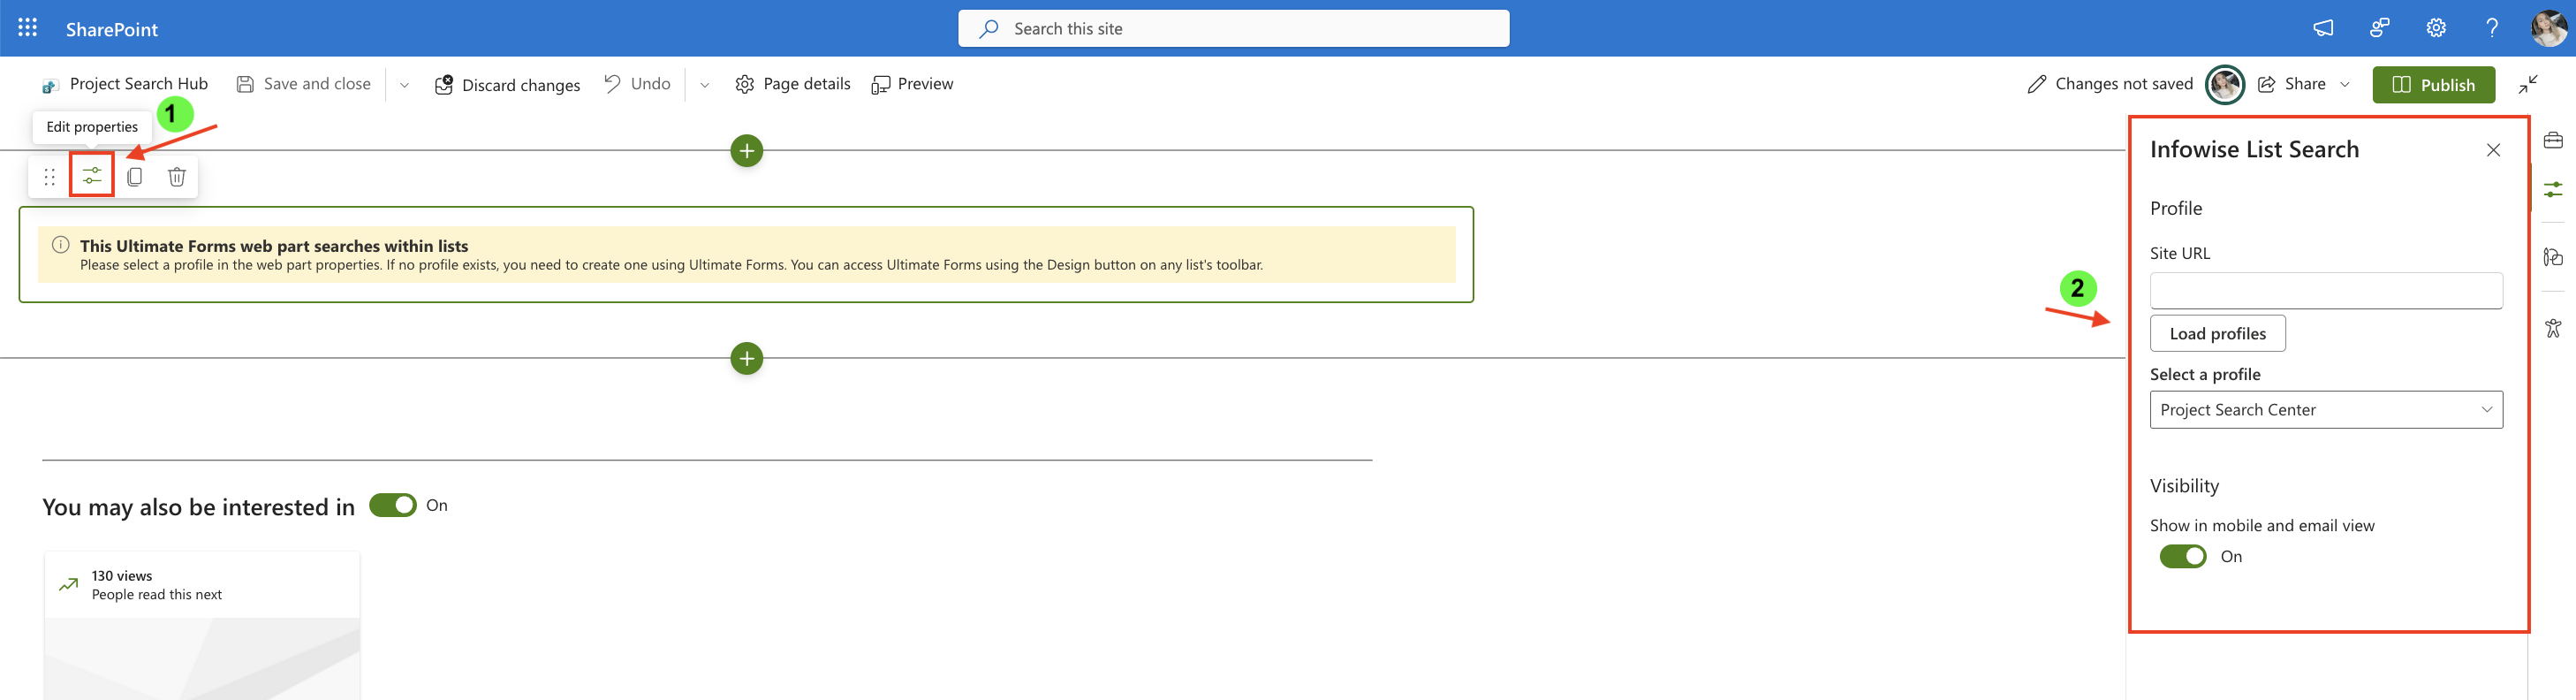
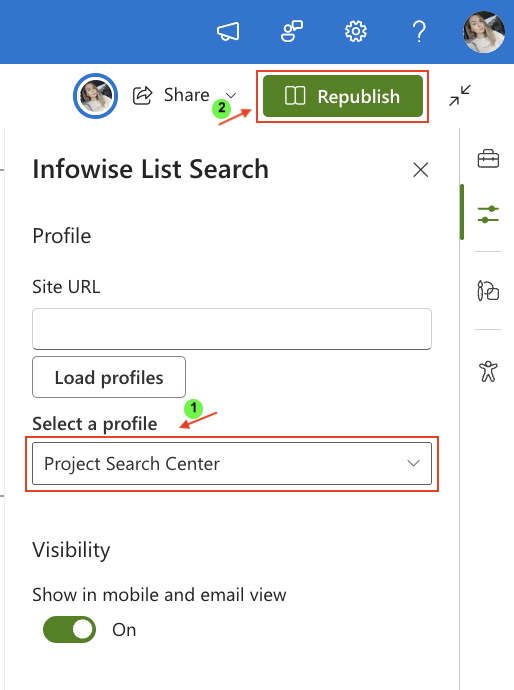
Step 4: Select Profile and Publish
- Select our profile: Project Search Center.
- Click Reublish (or Publish if first time).
- Test the page by entering a sample search or switching between lists.
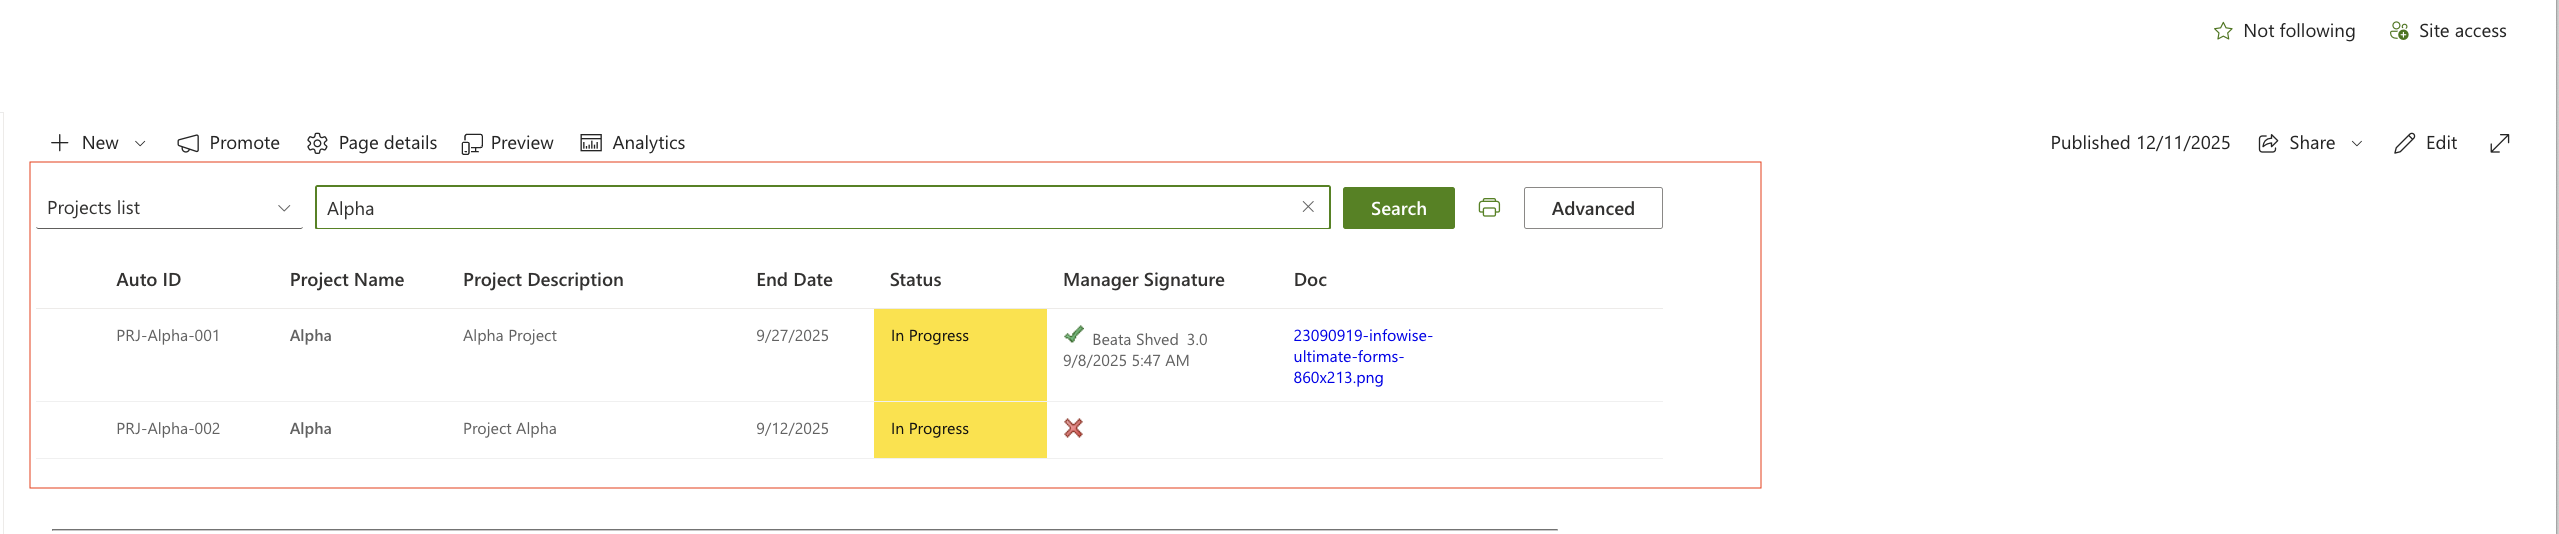
Your List Search web part is now fully functional.
Summary
In this tutorial, you added the List Search web part to a modern SharePoint page and connected it to your profile Project Search Center. Users can now perform searches, filter lists, view results, and interact with items directly from the search page.