In this tutorial, you will learn how to configure the Rollups web part in SharePoint On-Premises.
You will use the same example as in the Microsoft 365 tutorial to aggregate items from multiple lists and display them on a classic SharePoint page.
While the Rollups concept is the same across platforms, configuration in On-Premises is done directly through Web Part Properties rather than profiles.
Before You Start
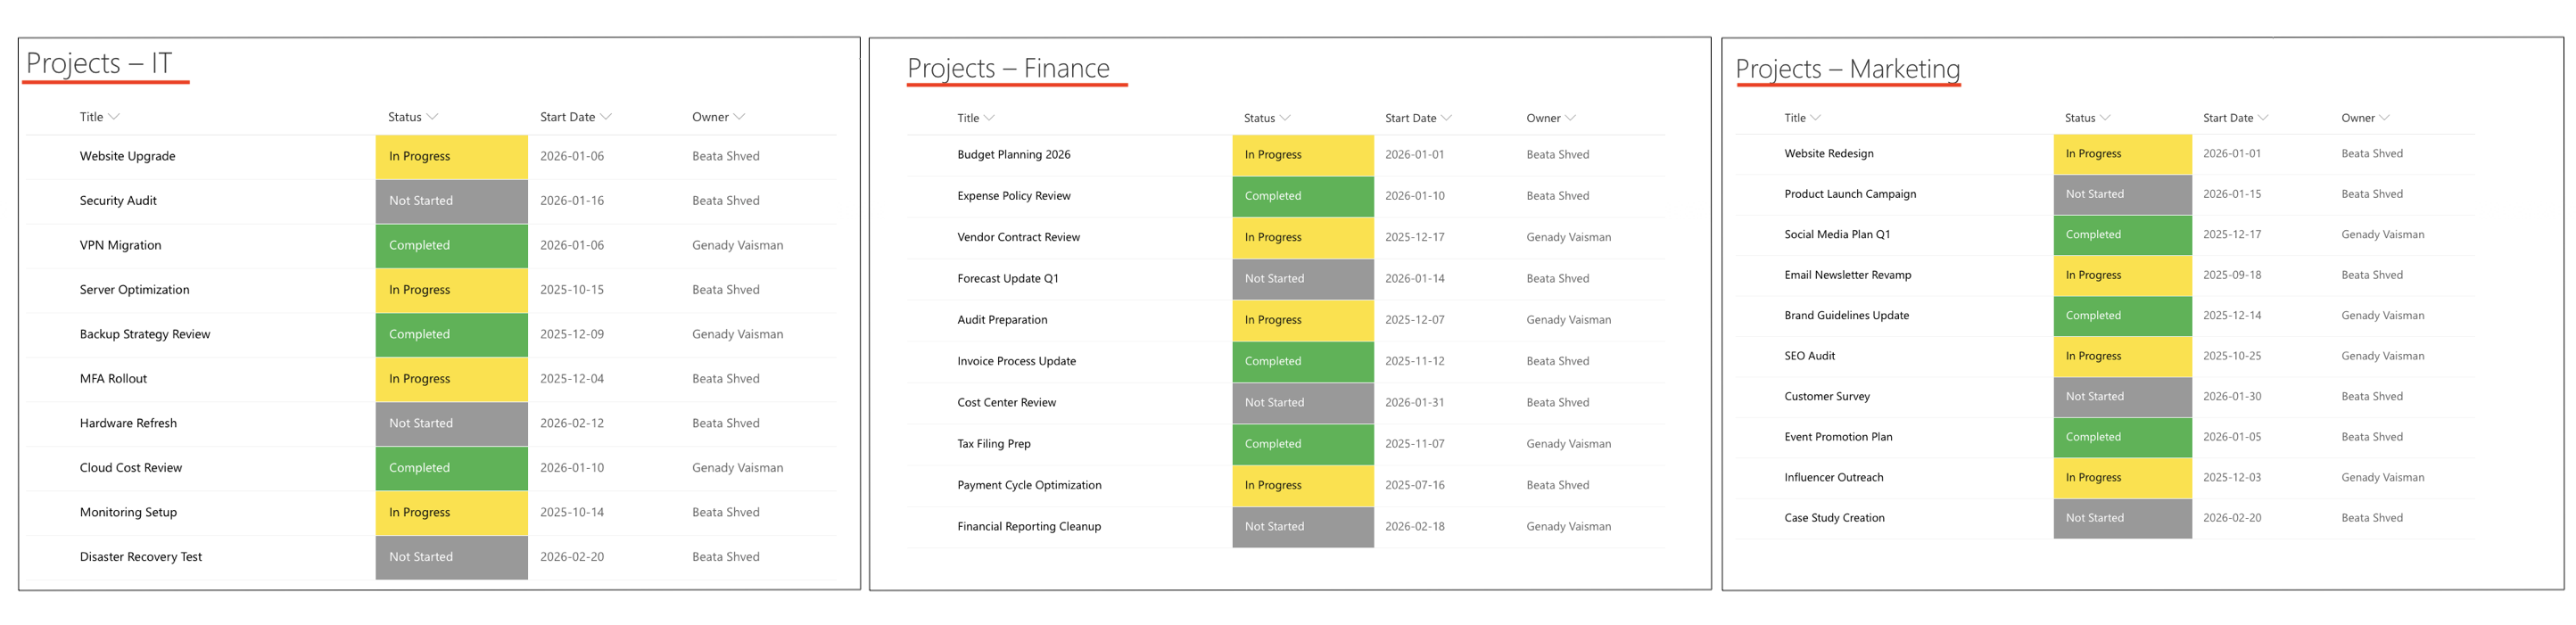
This tutorial continues using the same lists created earlier:
- Projects – IT
- Projects – Marketing
- Projects – Finance
Each list contains the same columns:
- Title
- Status
- Start Date
- Owner
Make sure:
- you are working in a SharePoint On-Premises environment
- the lists exist on the site
- you have permission to edit pages and web part properties
Instructions
Step 1: Add a New Wiki Page
- Go to Site Content → Site Pages.
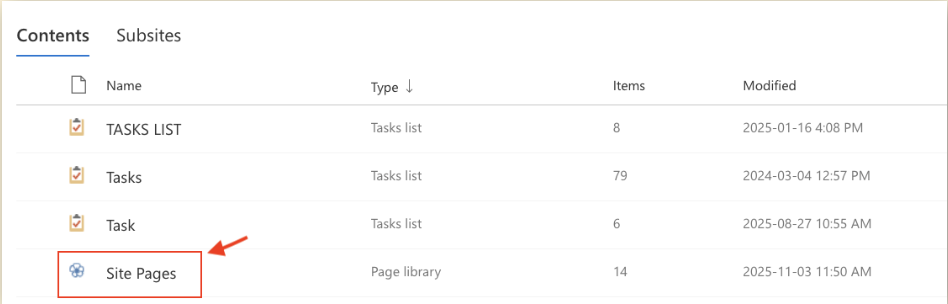
- Click New → Wiki Page.

- Enter a page name, for example: All Projects.

- Click Create.
You will be redirected to a blank Classic page.
Step 2: Add the Rollups Web Part
- At the top ribbon, select the Insert
- Click Web Part → Infowise → Infowise Rollup.
- Click Add.

The web part will appear on the page.
Step 3: Open Web Part Properties
- Click the arrow in the upper-right corner of the Rollups web part.
- Select Edit Web Part.

The Rollups configuration panel opens on the right side of the page.
Step 4: Configure General Settings
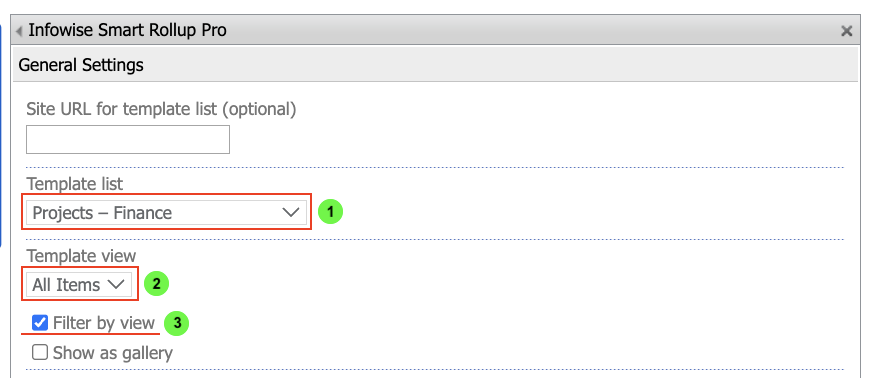
- Template List
- Select one of the project lists, for example: Projects – Finance.
- This list defines the structure and available views for the Rollup.
- Template View
- Select the view that controls how items are displayed: All Items.
- Only the columns included in this view will appear in the Rollup.
- Filter by View (Optional)
- Enable Filter by view if you want the Rollup to respect filters defined in the selected list view.
- Enable Filter by view if you want the Rollup to respect filters defined in the selected list view.
Step 5: Apply Filters
To display only active projects, configure a filter:
- Column: Status
- Operator: is equal to
- Value: In Progress
- Click Add
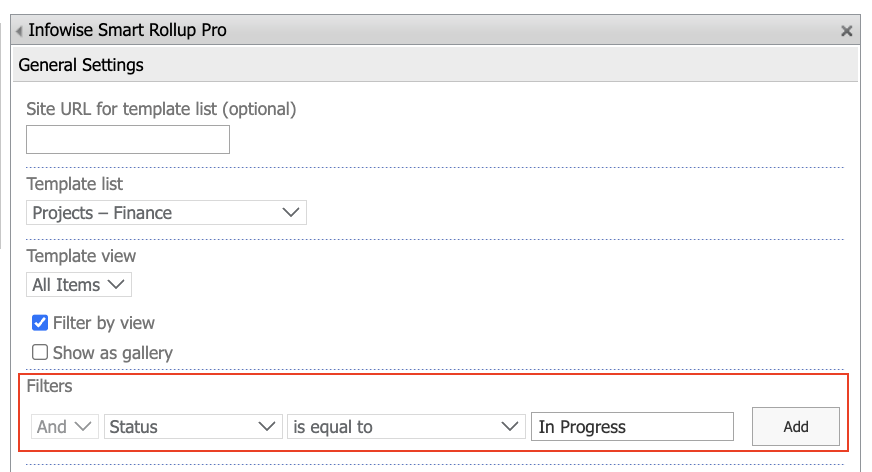
This ensures that only items with Status = In Progress appear in the Rollup.
Step 6: Configure Display Options
Grouping
- Group by: List
- Display as tabs: Enabled
- Collapse by default: Optional
When grouping by List and enabling Display as tabs, each source list is displayed as a separate tab in the Rollups web part.
Paging
- Page size: 0 (no paging)
This displays all matching items in a single view. 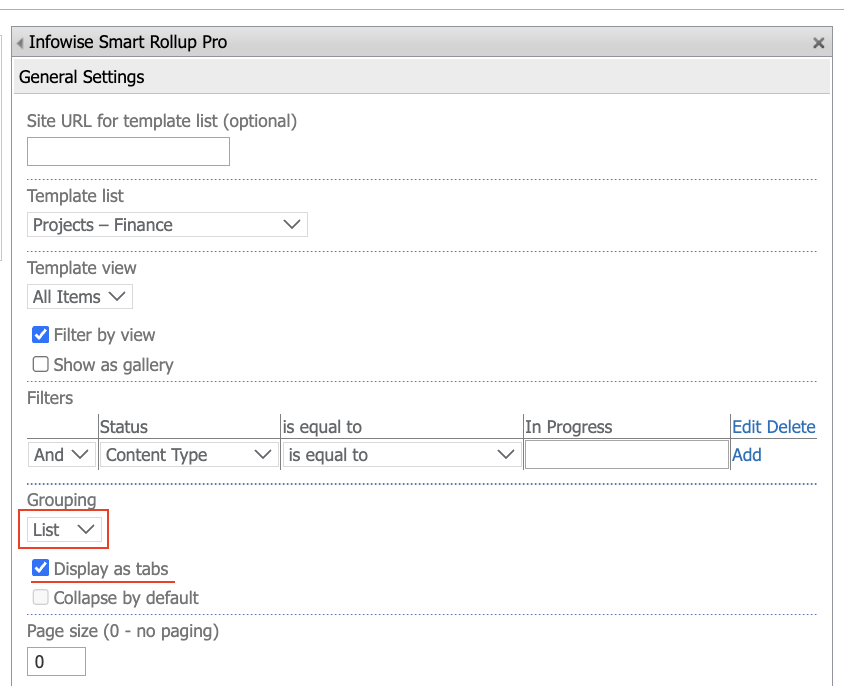
Step 7: Enable Interaction Options
Enable additional options to allow users to work with Rollup items directly:
- Allow adding new items
- Show ‘Print’ button
- Show ‘Add alert’ button
- Show ‘Run actions’ button
- Open forms in a dialog
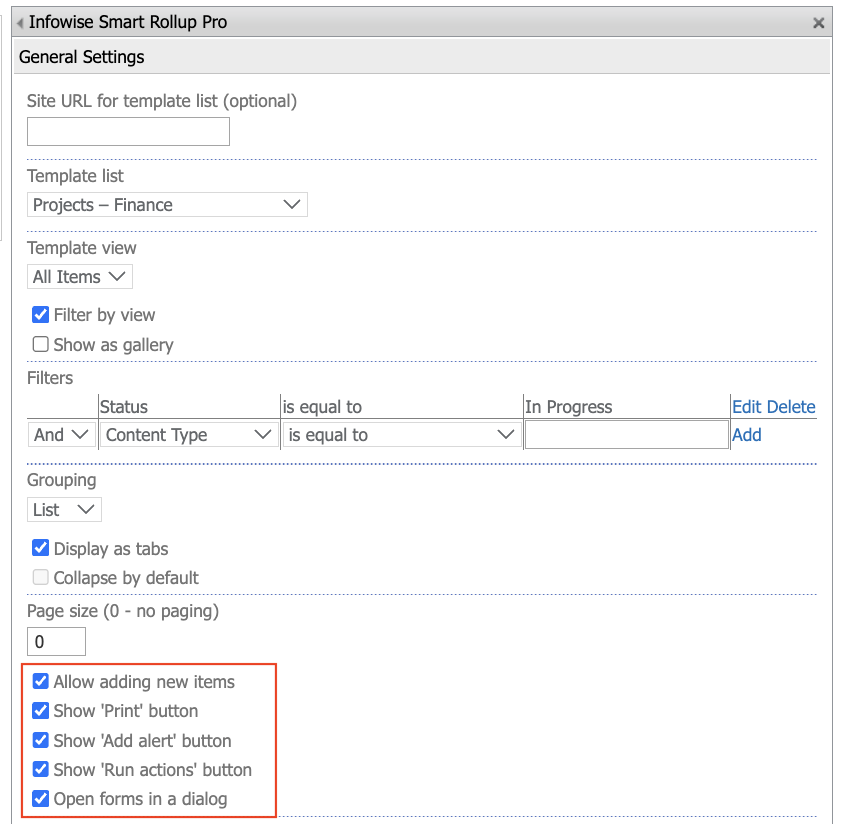
These options allow users to interact with items without navigating away from the page.
Step 8: Configure Data Sources
Scroll to the Data Sources section.
- Set Scope to Current site.
- Set Locate by to Specific Lists.
- Lists: Choose lists you created: Project – IT, Project – Finance, Project - Marketing
- Click Add.
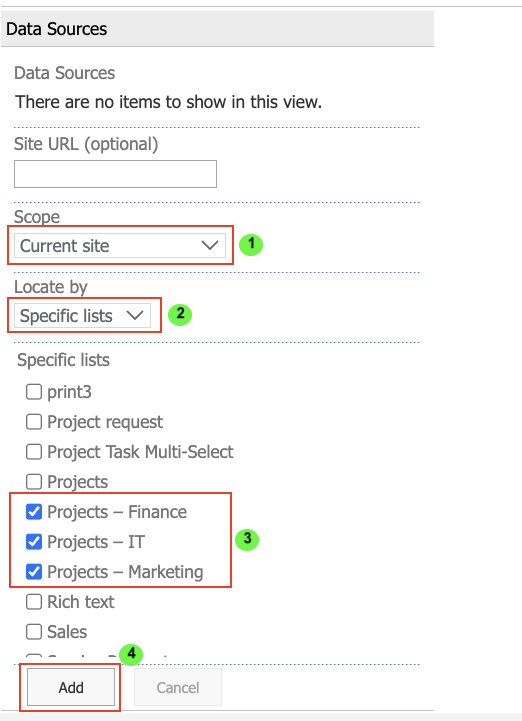
This configuration explicitly defines which lists should be included in the Rollup and avoids pulling in unrelated lists.
Step 9: Save and Review the Results
- Click Apply, then OK.
- Save and Publish the page.
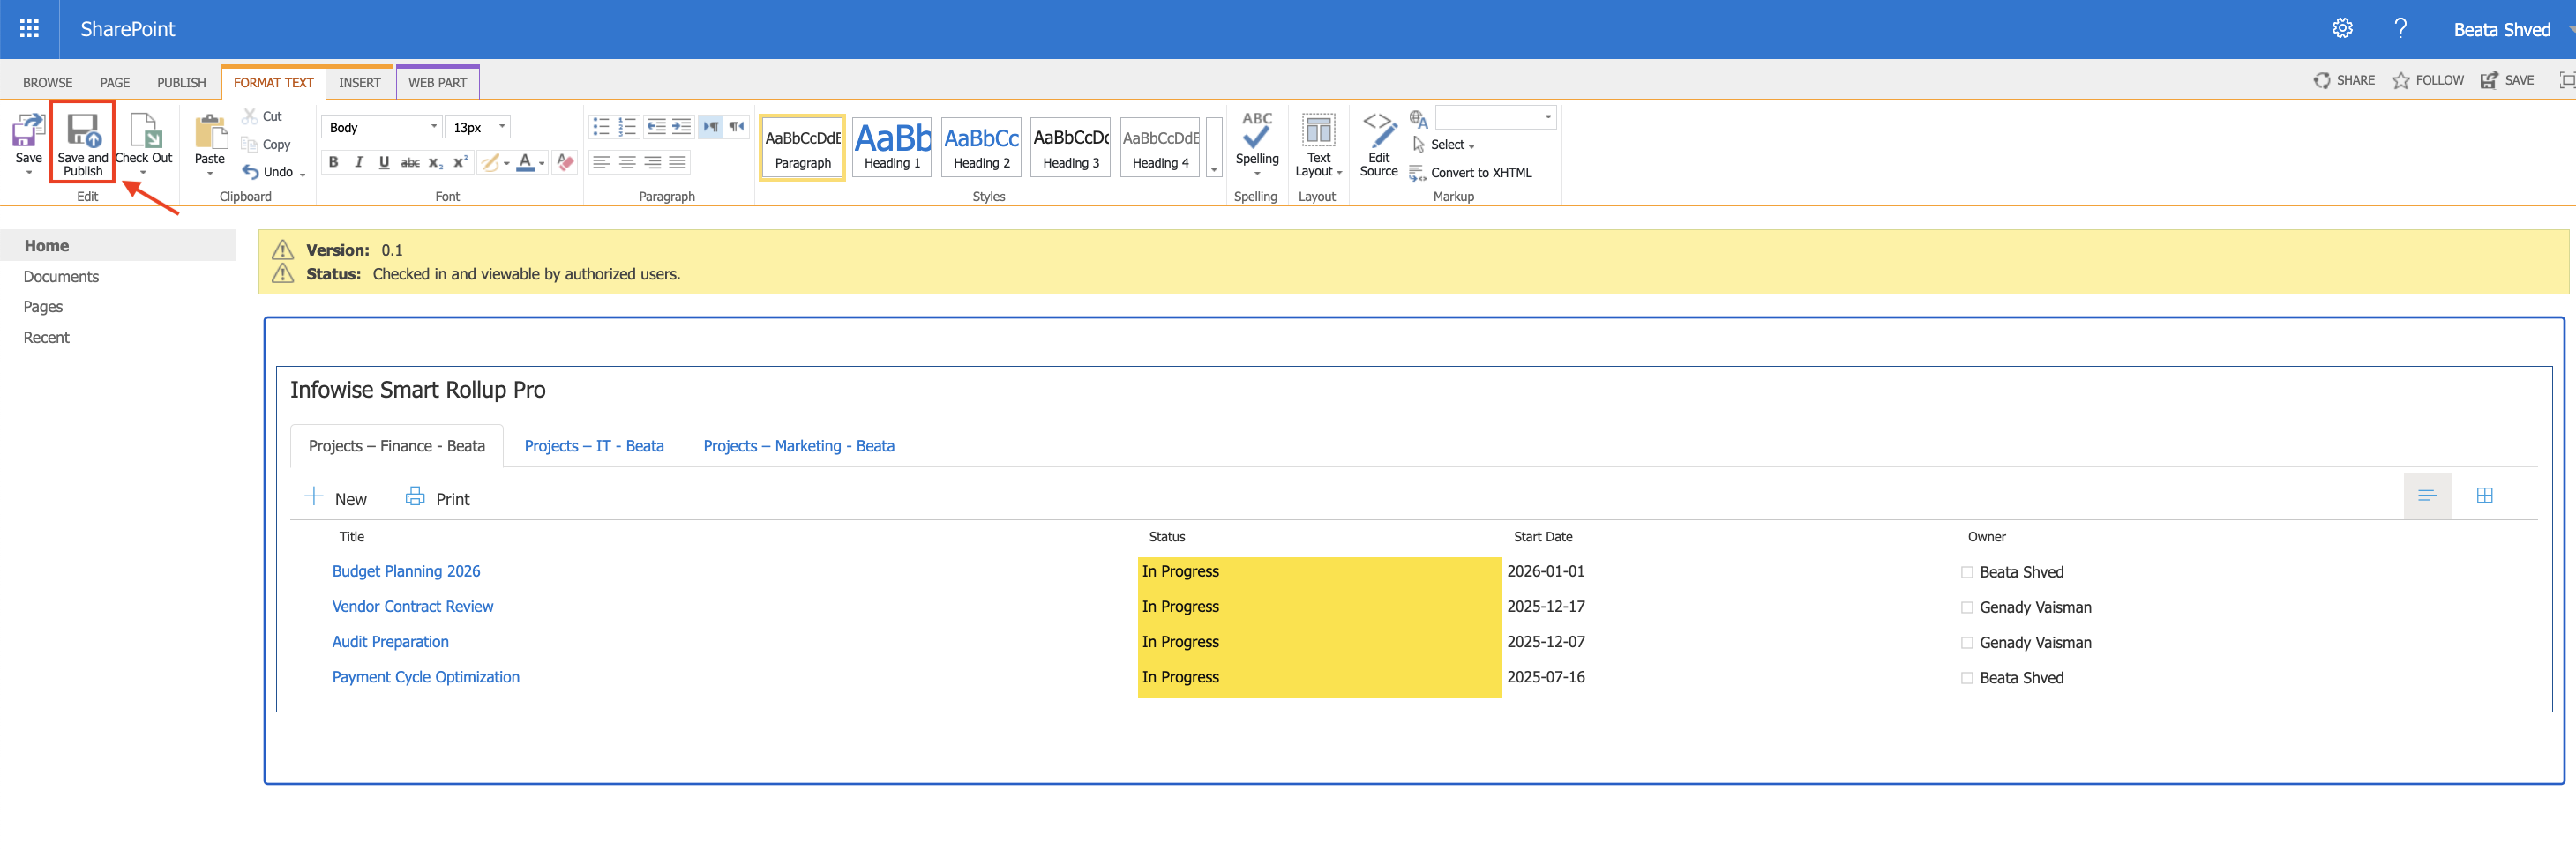
After publishing the page, open it in view mode.
You can now:
- See items from Projects – IT, Projects – Marketing, and Projects – Finance in one Rollup

- View only projects with Status = In Progress
- Identify items by their source list or site
- Open and manage items directly from the Rollup

Summary
This tutorial showed how Rollups work in a SharePoint On-Premises environment using the Rollup web part. You learned how to select source lists, apply filters, organize results with grouping, and enable interactive options that allow users to work with items directly from the page. Despite differences in configuration compared to Microsoft 365, Rollups in On-Premises provide the same centralized and flexible way to surface related data without duplicating or restructuring existing lists.