In this tutorial, you will learn how to work with Rollups results after they have been configured and added to a SharePoint page.
Using the same Rollups example created earlier, you will see how to review items, open forms, run actions, create alerts, and print data directly from the Rollups view.
This tutorial focuses on using Rollups in practice, rather than configuring them from scratch.
Before You Start
Make sure you already have:
- a Rollups profile configured (Microsoft 365 or SharePoint On-Premises)
- a Rollups web part added to a page
- multiple lists aggregated into a single Rollup
This tutorial continues using the All Projects Rollup example.
Instructions
Step 1: Review the Rollups Results on the Page
Open the page that contains the Rollups web part.
You can see:
- items aggregated from multiple lists
- results grouped by list and displayed as tabs
- only projects with Status = In Progress, based on the configured filter
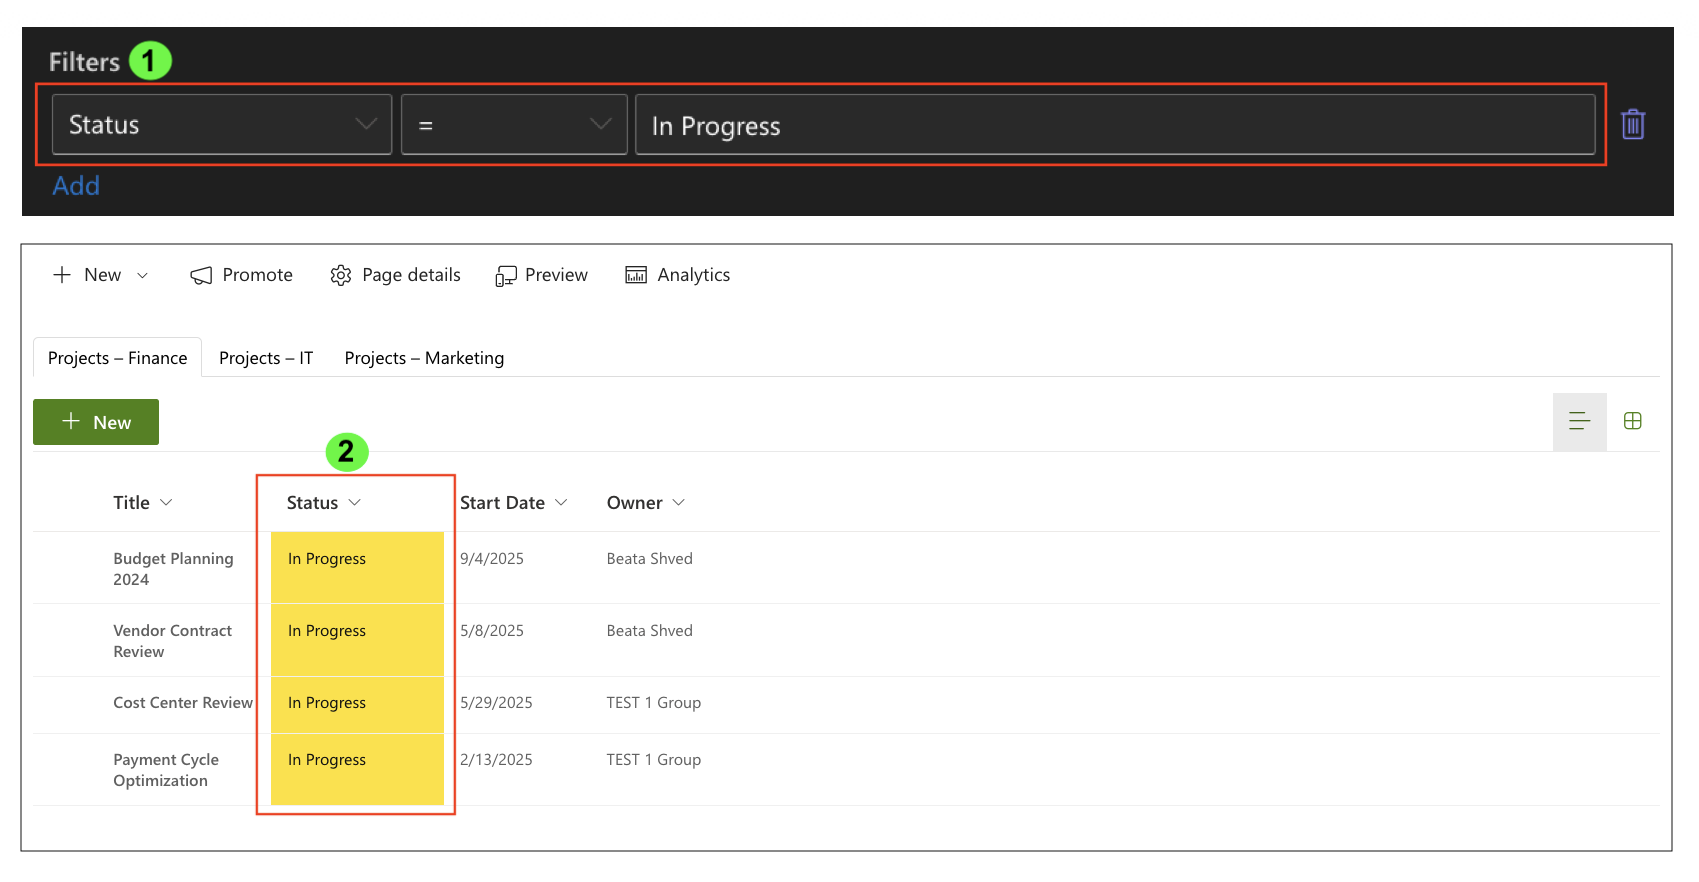
This provides a centralized view of active items across lists.
Step 2: Open and Edit Items from Rollups
Click an item in the Rollups results.
- the item form opens in a dialog
- you remain on the same page
- changes are saved back to the original list
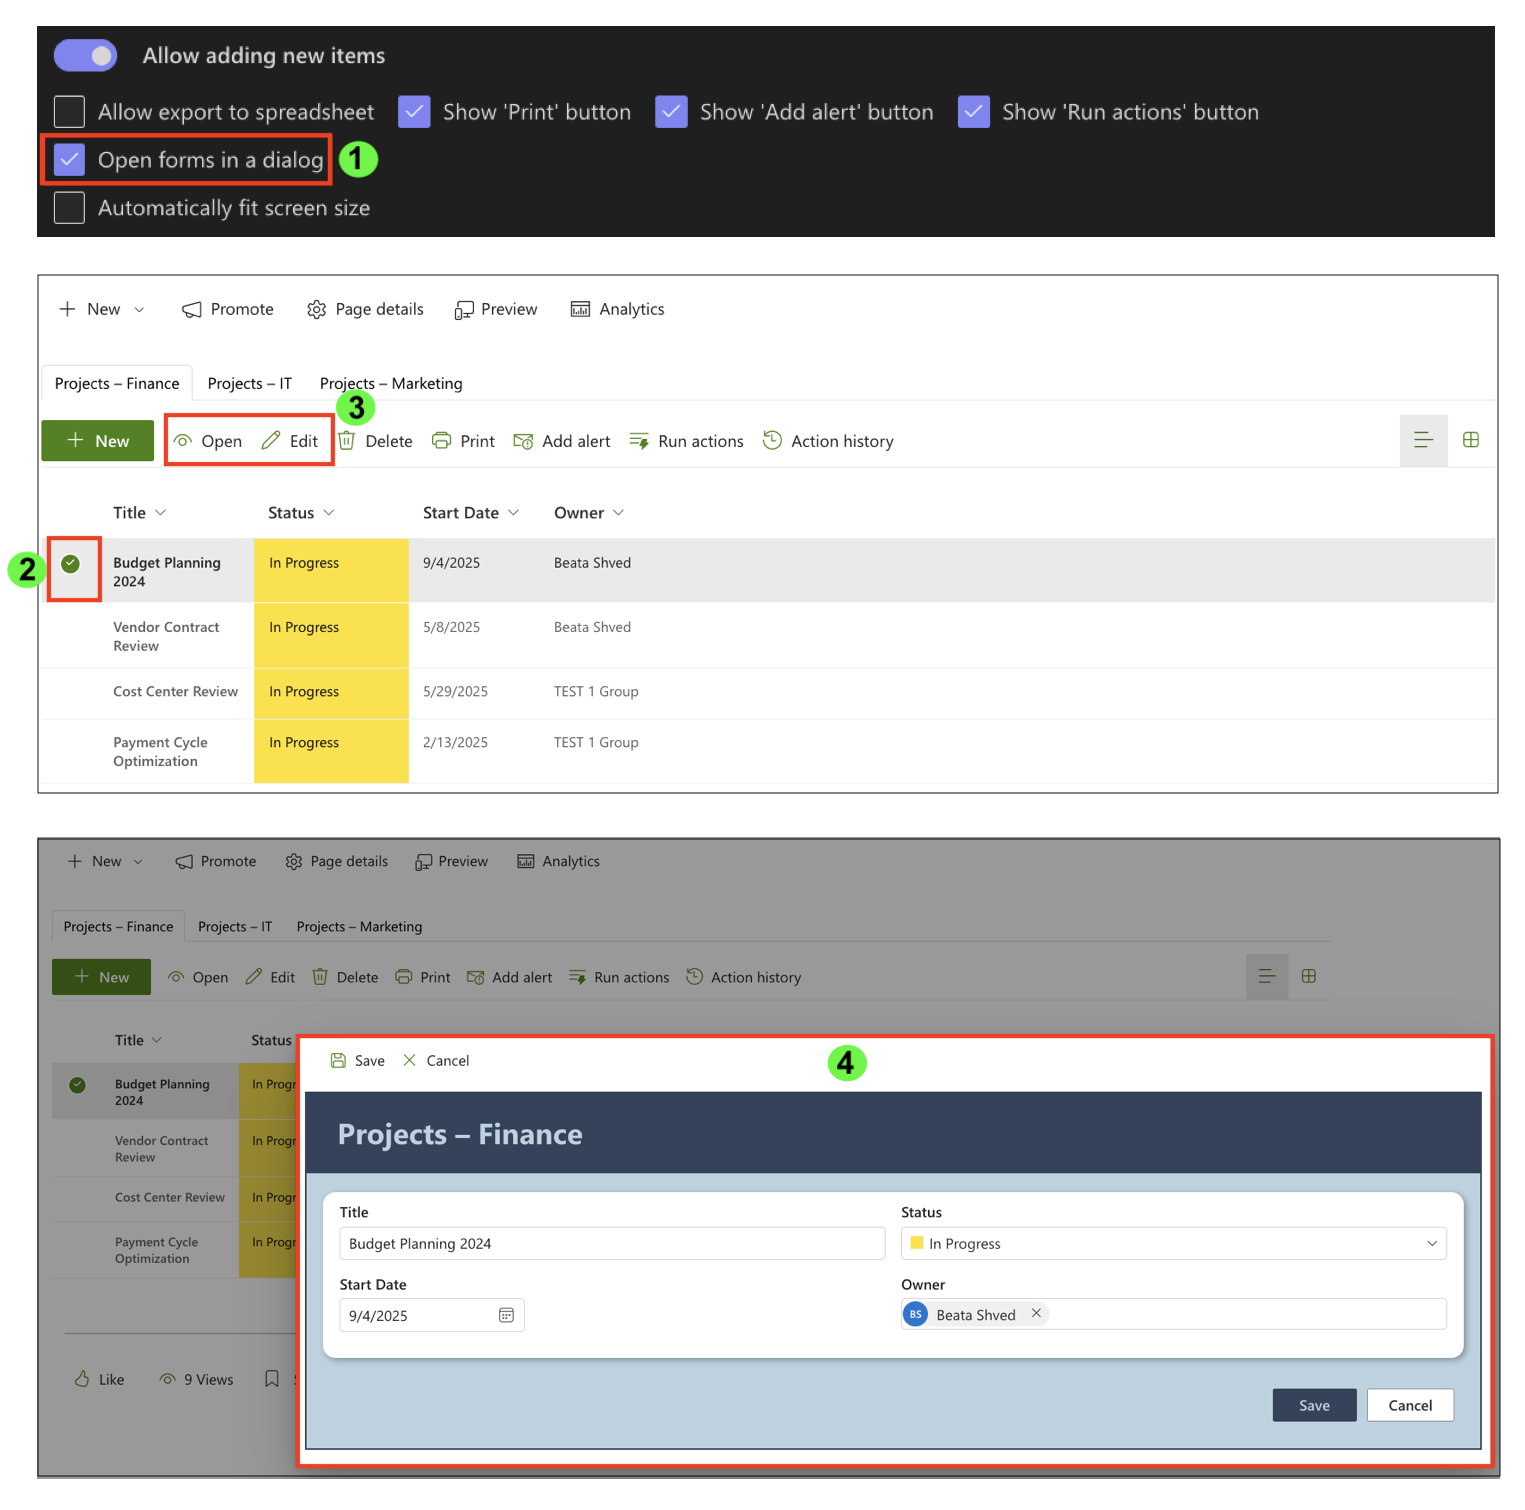
This allows you to work with items without navigating away from the Rollups page.
Step 3: Viewing Data in List or Gallery Mode
Rollups support two display modes:
- List view — ideal for structured data and quick scanning
- Gallery view — useful when visual presentation is preferred
If Show as gallery is enabled, users can switch between modes (unless Hide mode switch is enabled).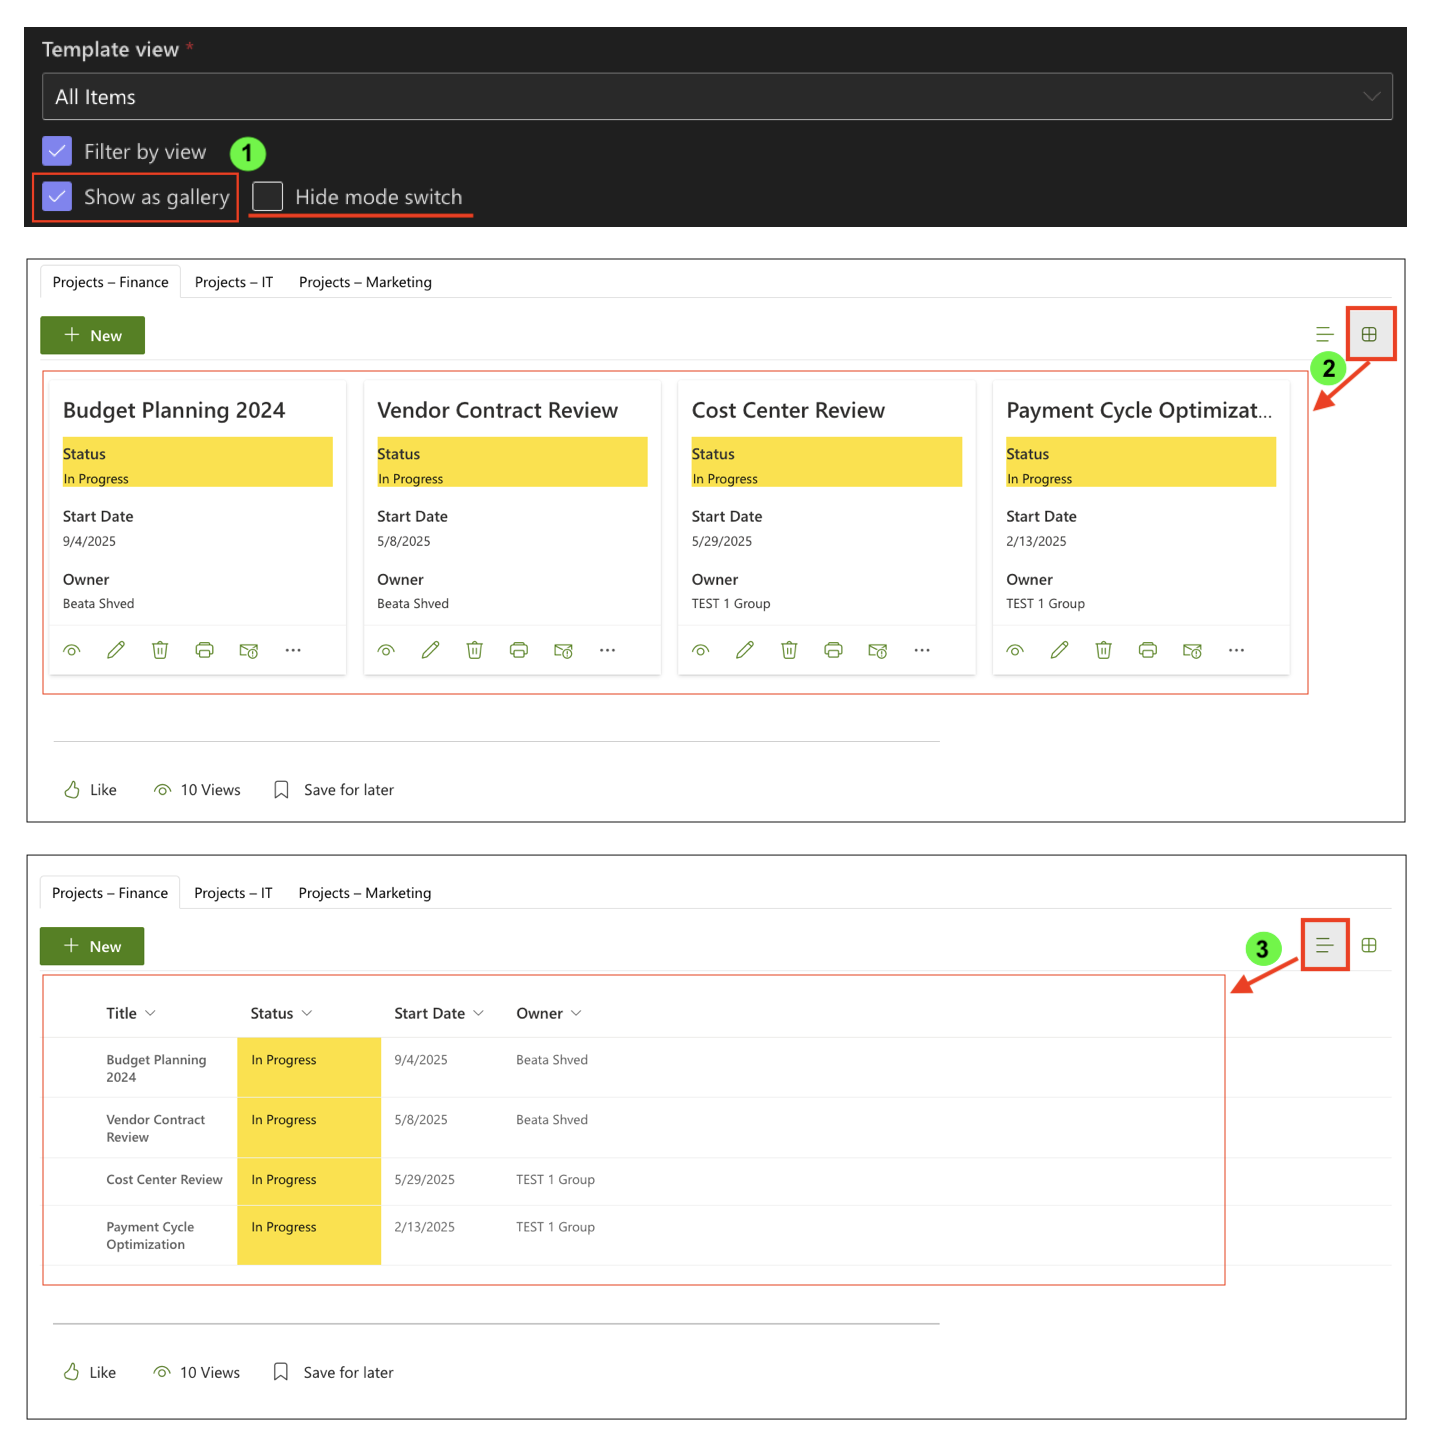
This allows Rollups to be used both for:
- operational work
- dashboard and overview pages
Step 4: Adding New Items
When Allow adding new items is enabled:
- users can create new projects directly from the Rollups web part
- the item is automatically added to the correct source list
- the Rollup refreshes and displays the new item immediately
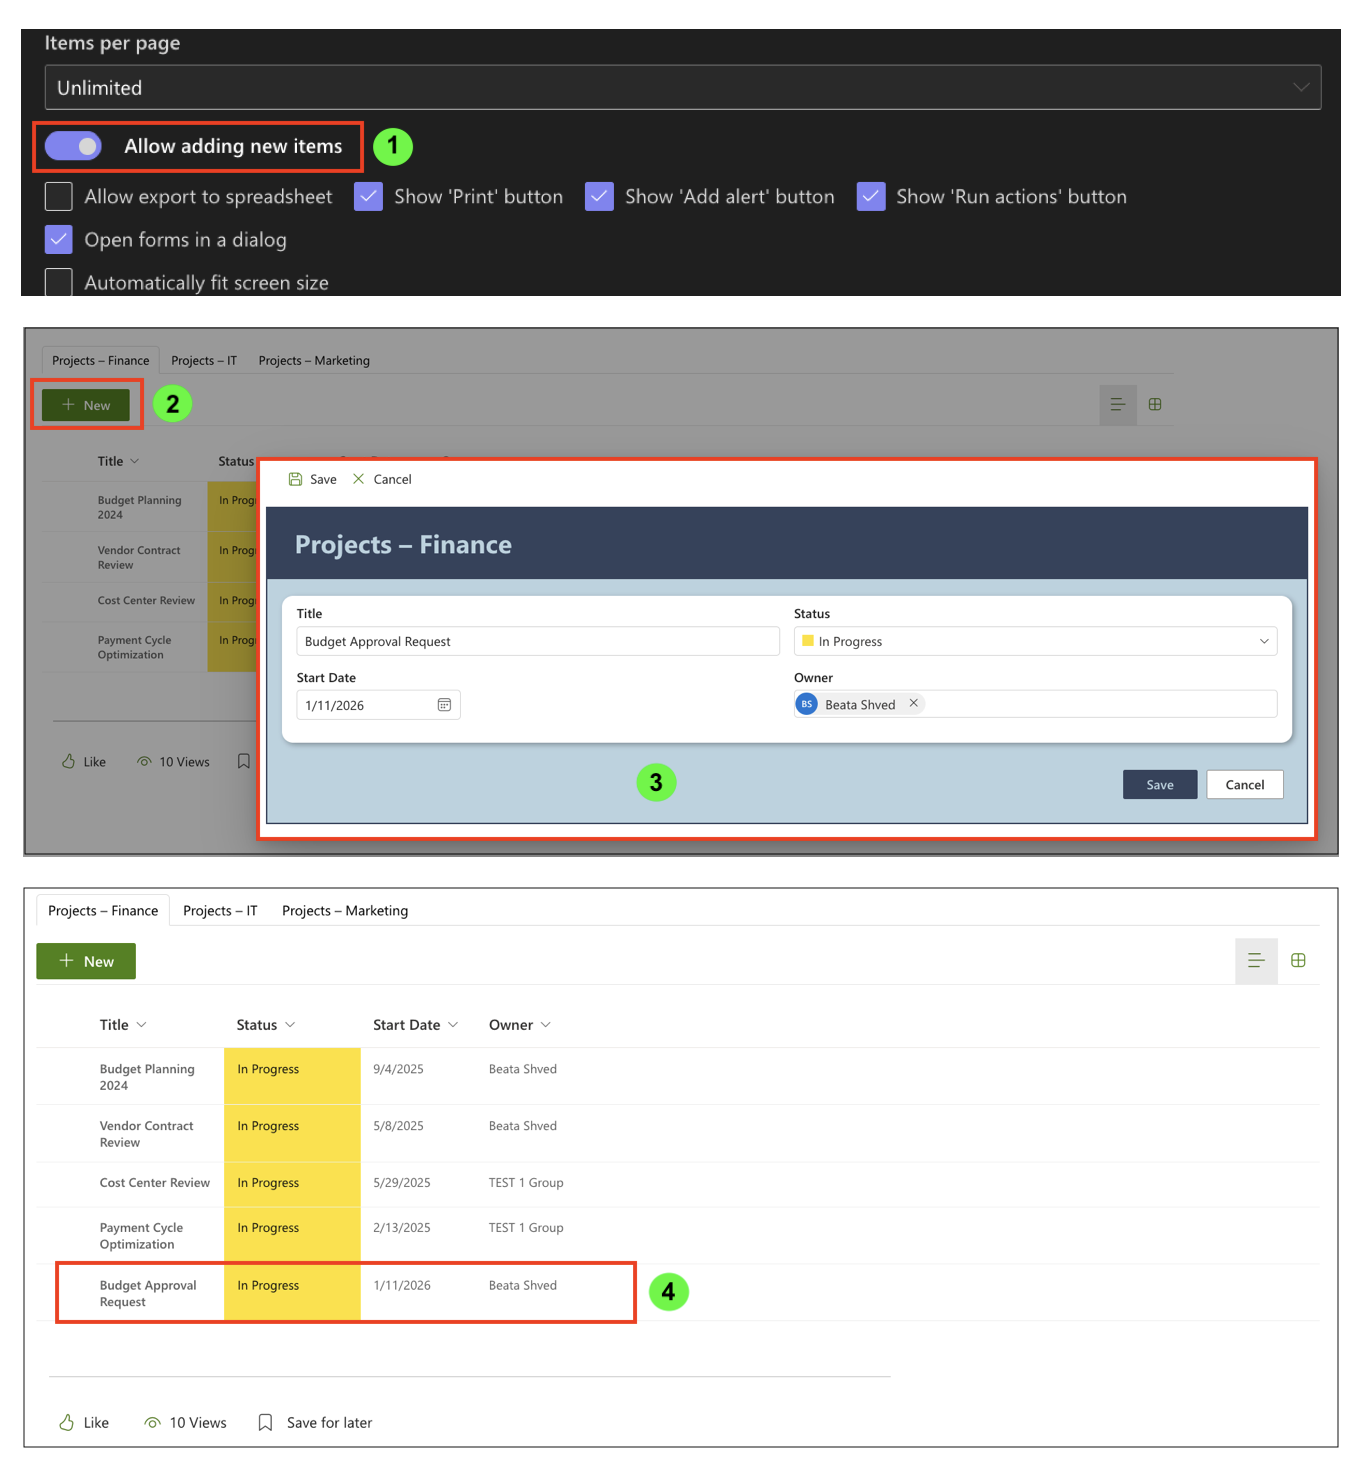
This allows Rollups to function as an entry point, not just a viewer.
Step 5: Running Actions, Alerts, and Print
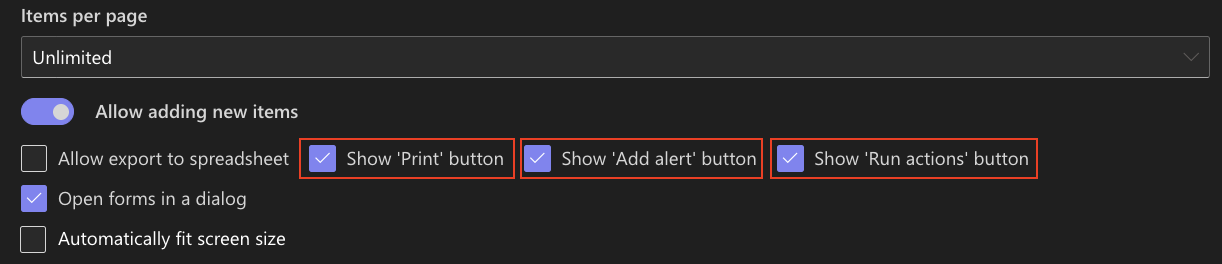
If enabled in the profile, Rollups results allow users to:
- Run Actions on selected items
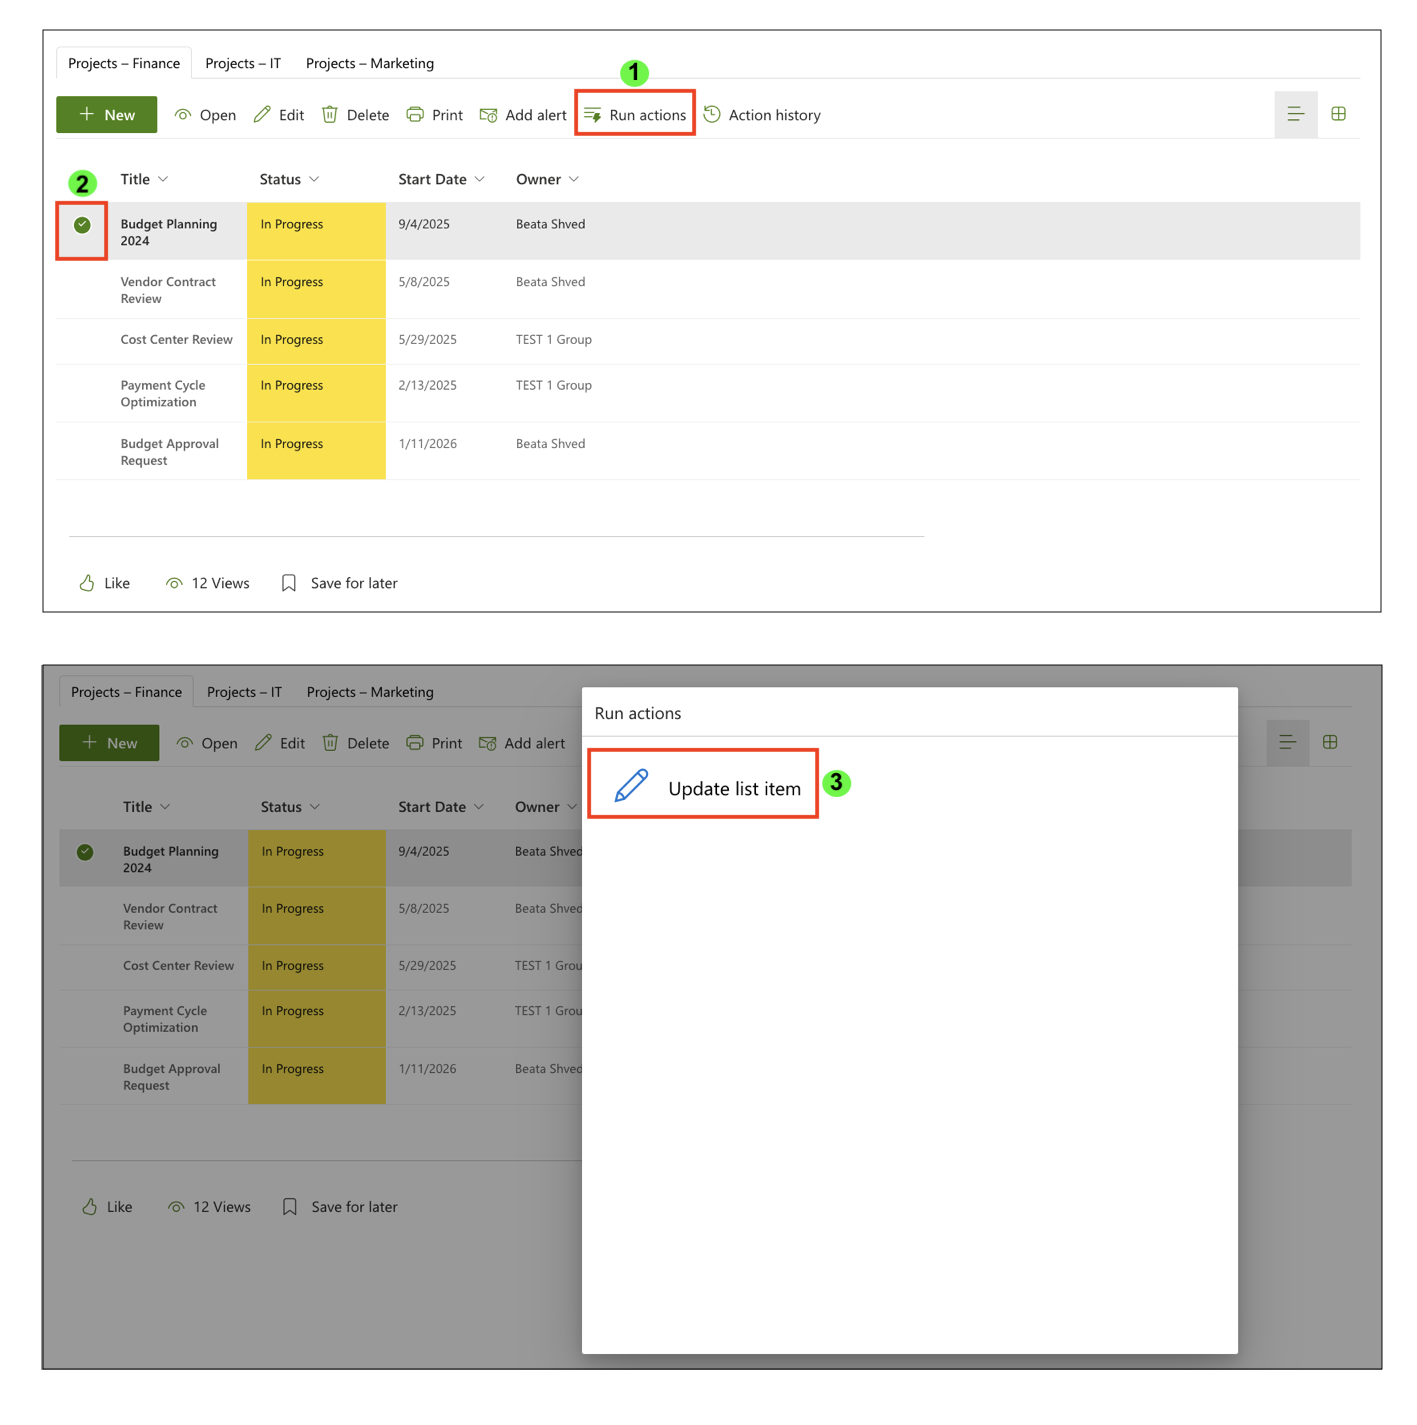
- Create alerts directly from the Rollup
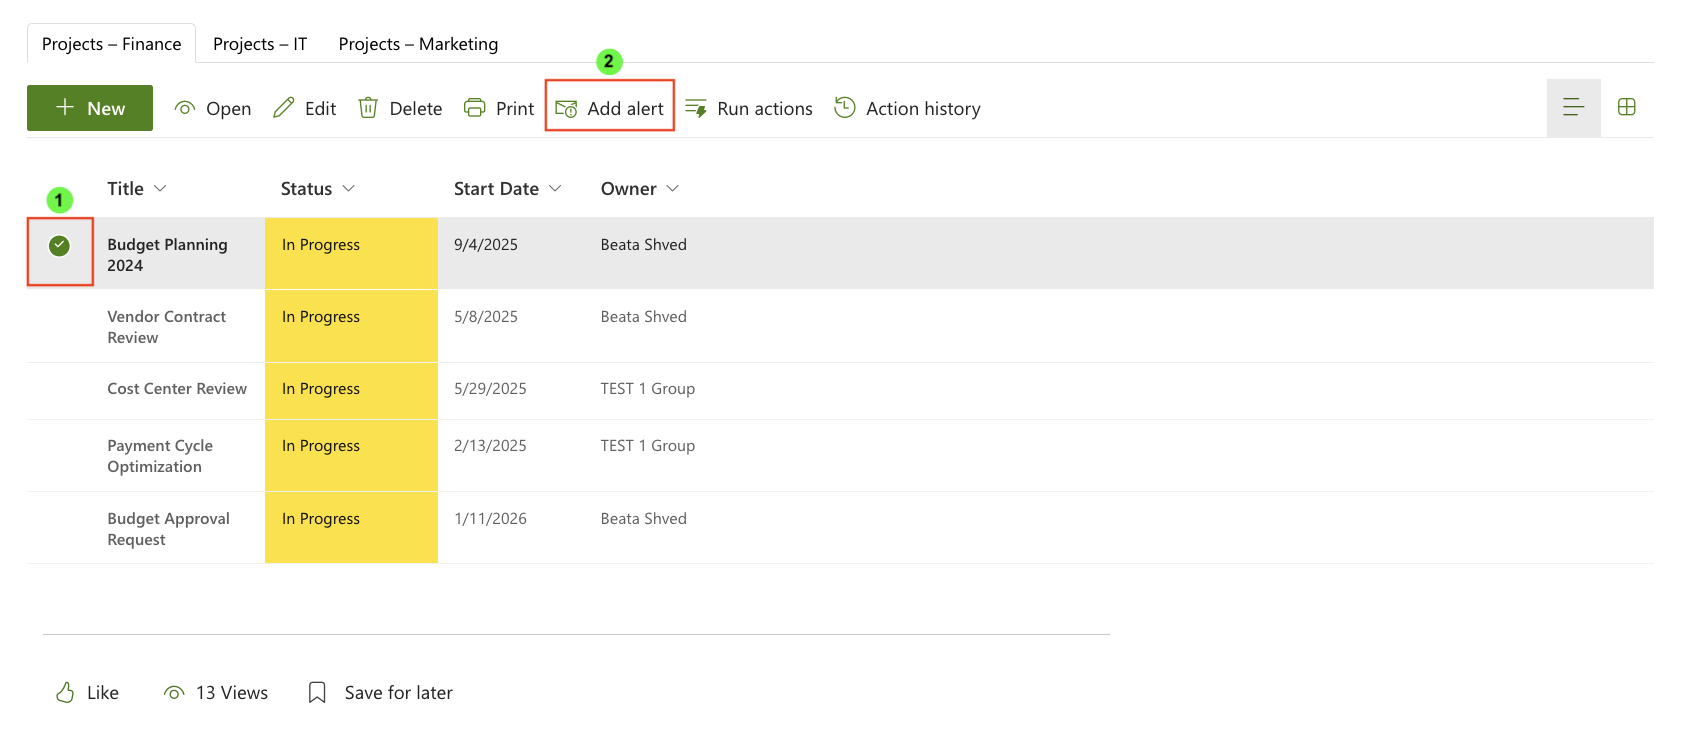
- Print items using Print Templates
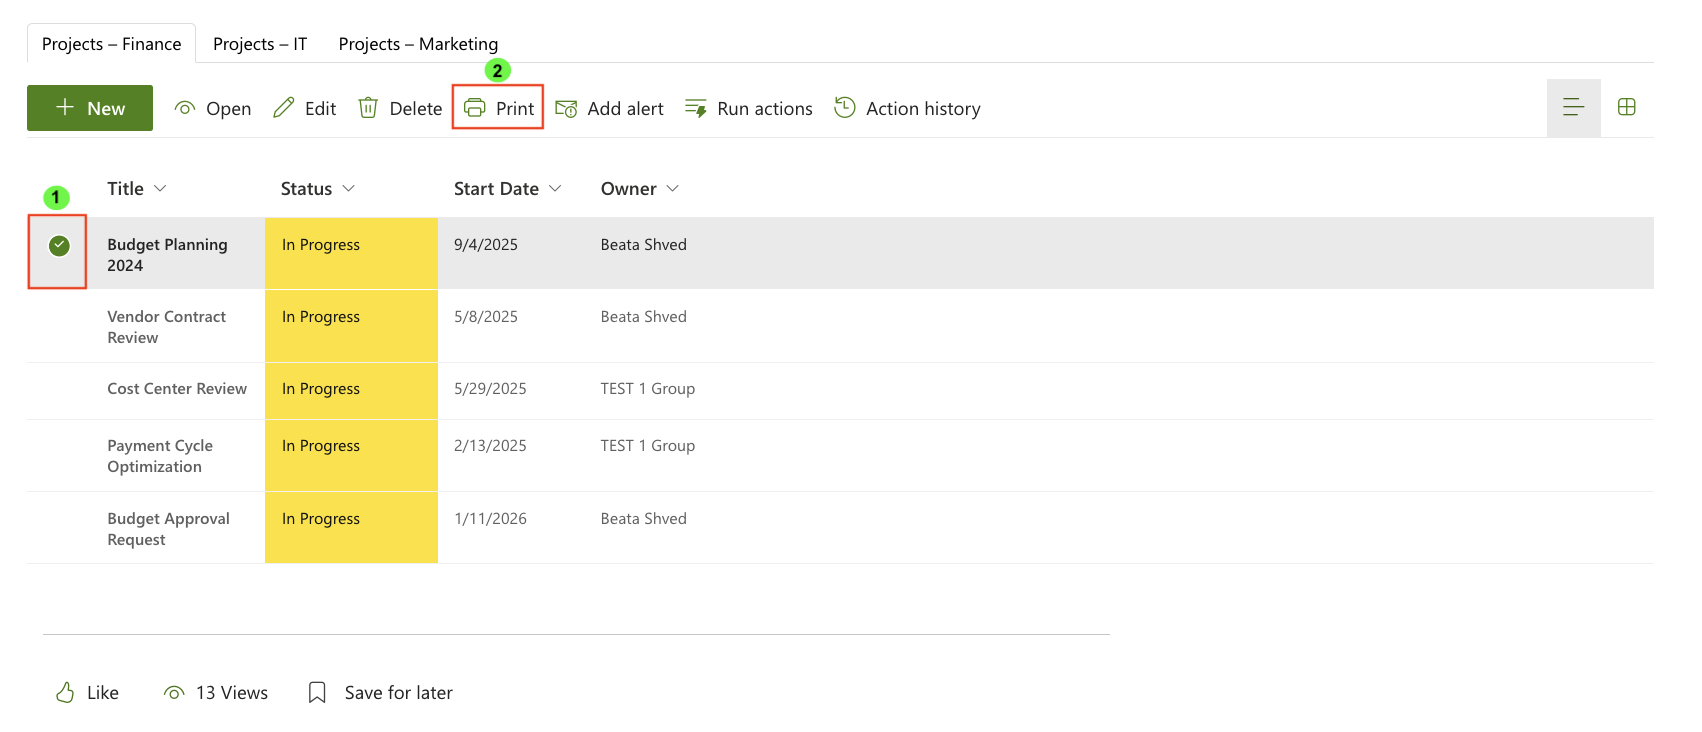
These options turn Rollups into an interactive working surface that integrates with other Ultimate Forms features.
Step 6: Exporting and Paging Through Results
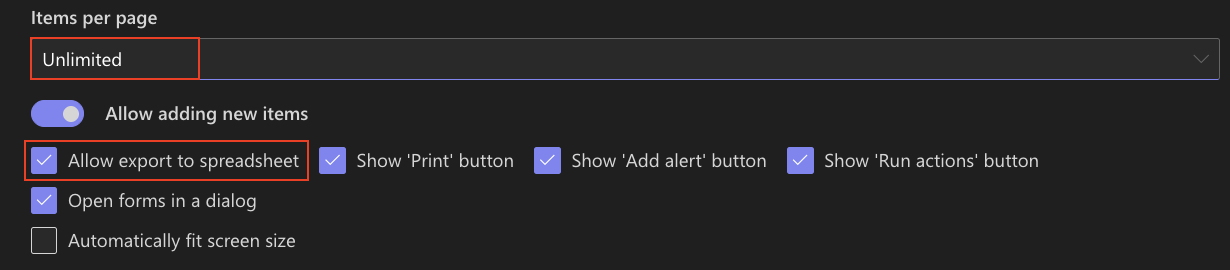
Depending on configuration, users can:
- export Rollup results to a spreadsheet
- page through large datasets
- work with grouped and filtered results efficiently
All interactions respect SharePoint permissions and list-level security.
What This Means in Practice
Using Rollups results, users can:
- review items from multiple lists in one place
- take action without navigating to individual lists
- work with live data instead of static reports
- maintain a clean and focused workspace
Rollups are not just about aggregation — they are about working with aggregated data as if it were one list.
Summary
In this tutorial, you learned how to work with Rollups results on a SharePoint page.
You saw how users can switch between lists, view data in different modes, open and edit items, create new records, and trigger actions — all from a single Rollups web part.
This makes Rollups a powerful tool for building interactive, actionable overview pages without duplicating data or changing existing list structures.