After running a search, the List Search web part displays all matching results in a flexible table layout.
This results grid is more powerful than a standard SharePoint view: it allows users to open, edit, delete, and manage items directly from the search page — without navigating to list pages.
In this tutorial, we will explore how to work with search results using the Project Search Center profile created earlier.
Instructions
Step 1: Understanding the Results Layout
When a search is executed:
- results appear below the search panel,
- each result is displayed as a row,
- columns match the view settings of the Default list or selected list.
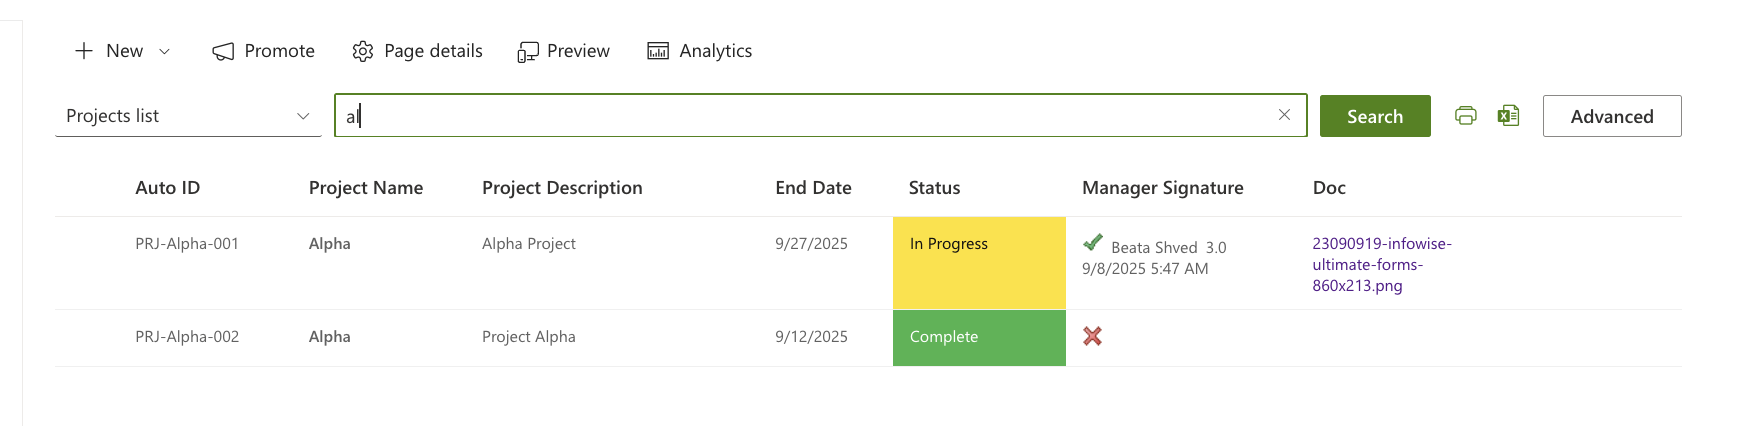
Results update instantly after every search.
Step 2: Switching Between Lists in Results
If multiple lists are included in the profile:
- Use the List dropdown above the search box.
- Select the required list for search.
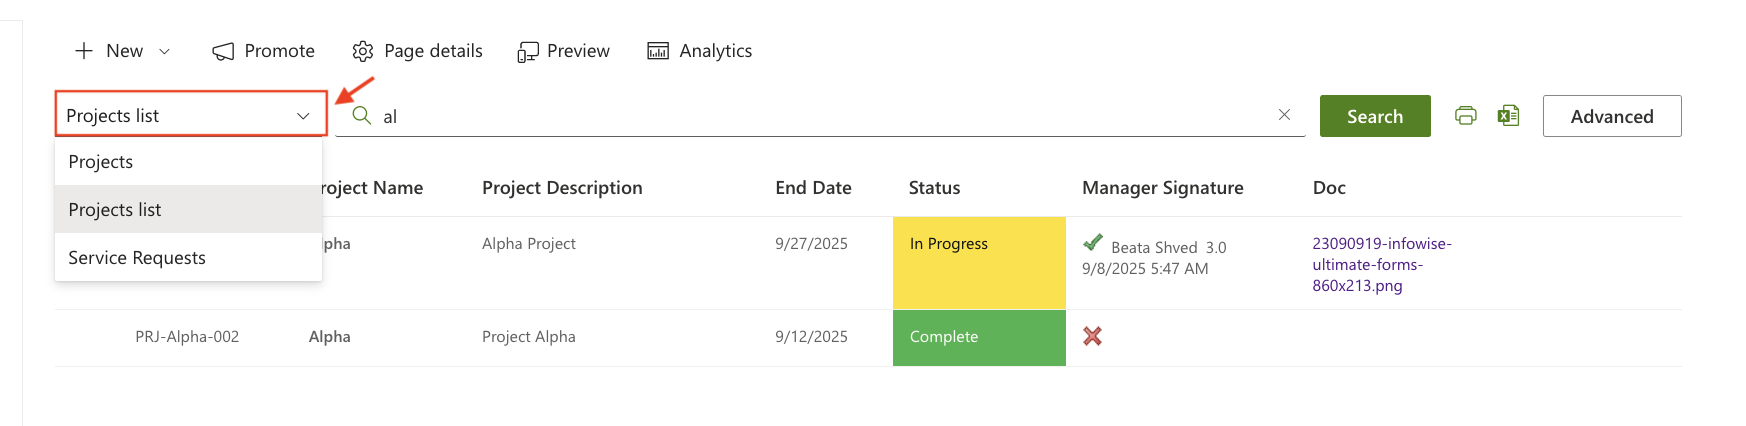
- The results grid reloads accordingly.
Important:
Search conditions only apply to columns relevant for the selected list.
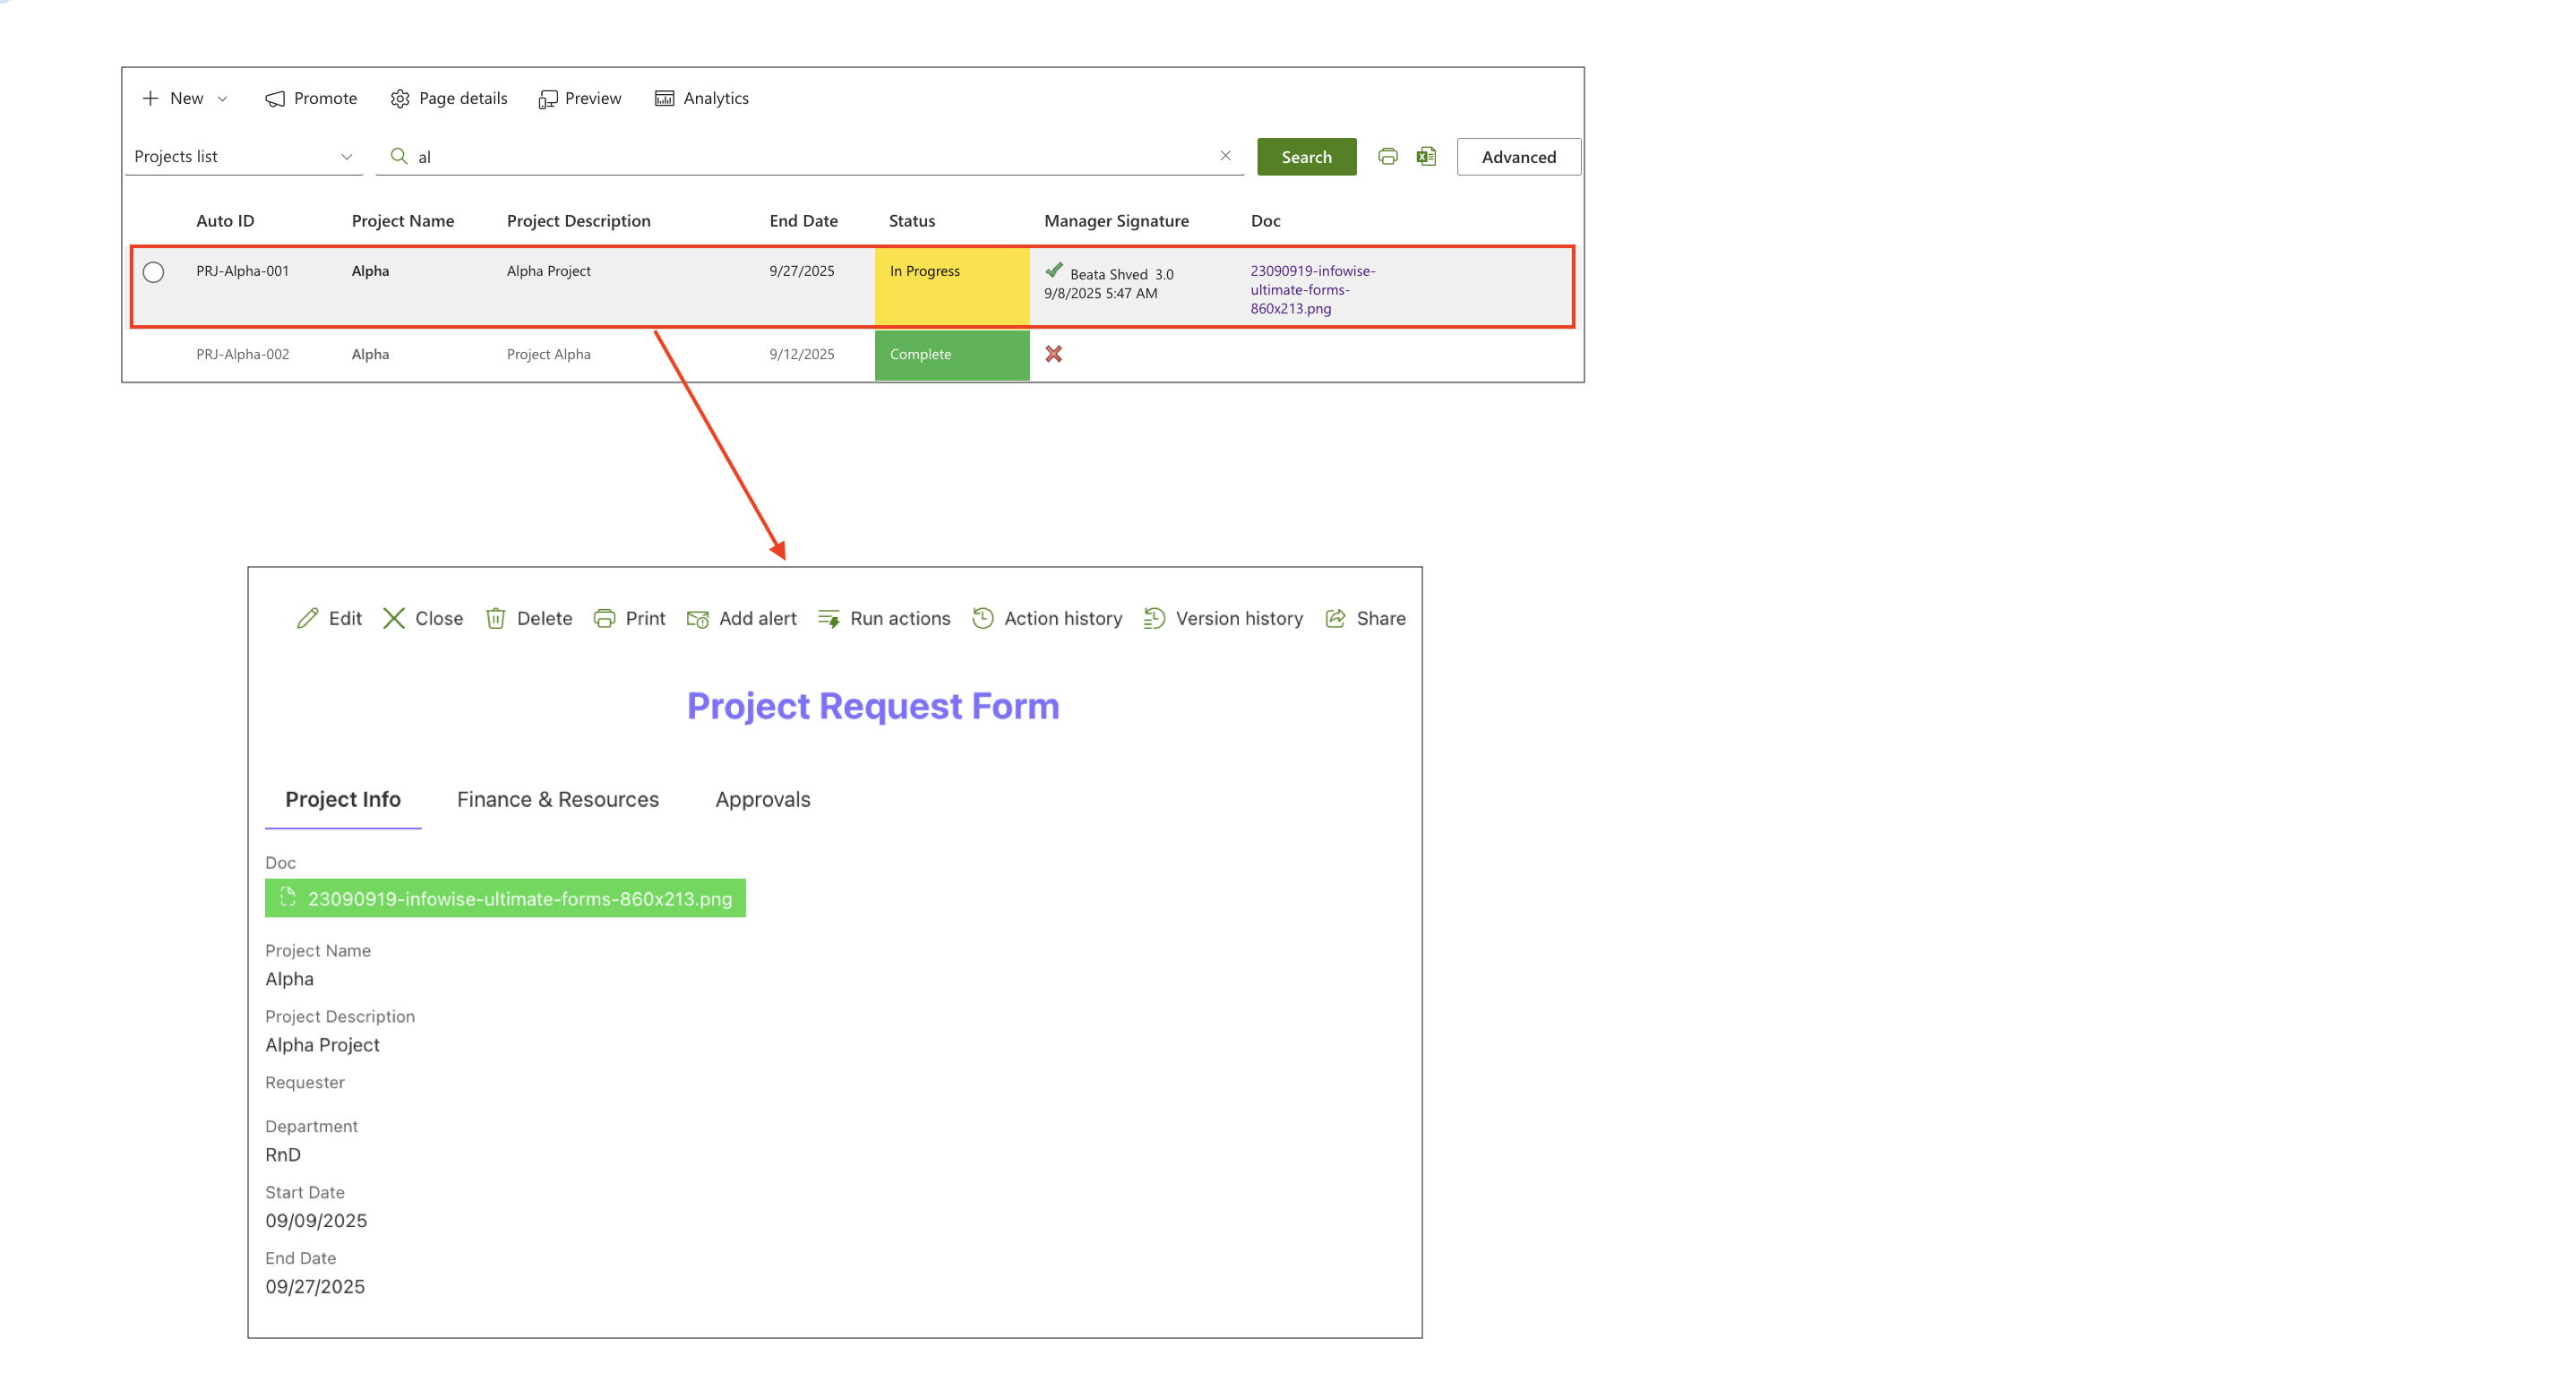
Step 3: Opening Items from Results
To open an item:
- Click the Title (or Name) of the row.
- The item opens in the form.
Step 4: Using the Context Menu
Each row provides a context menu, just like a normal SharePoint view.
Common actions include:
- Open
- Edit
- Delete
- Add alert
- Run actions
- Action history
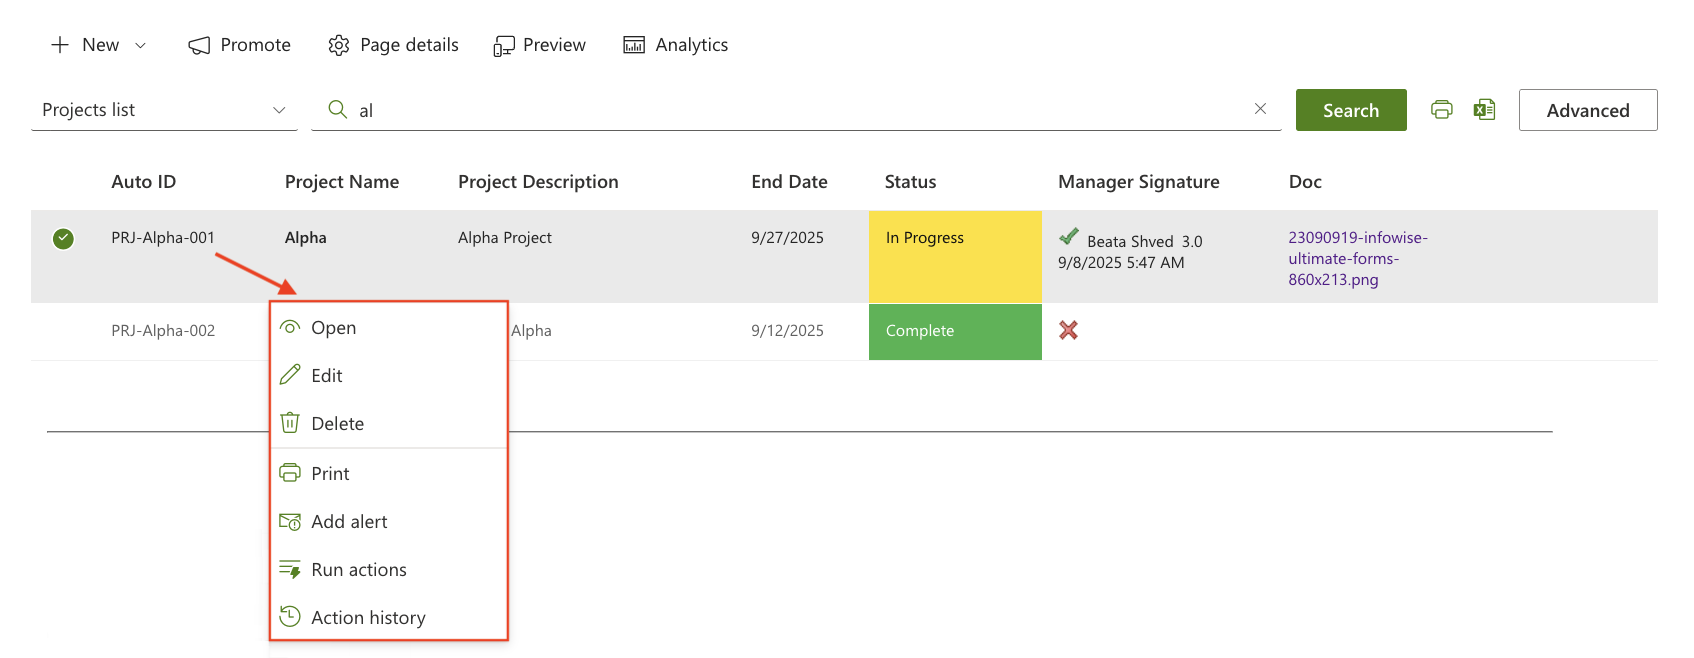
This is one of the key advantages of List Search — users can work with items directly from the search page.
Step 5: Running Actions from Results
If your list uses Ultimate Forms: Actions, they will appear in the context menu as well.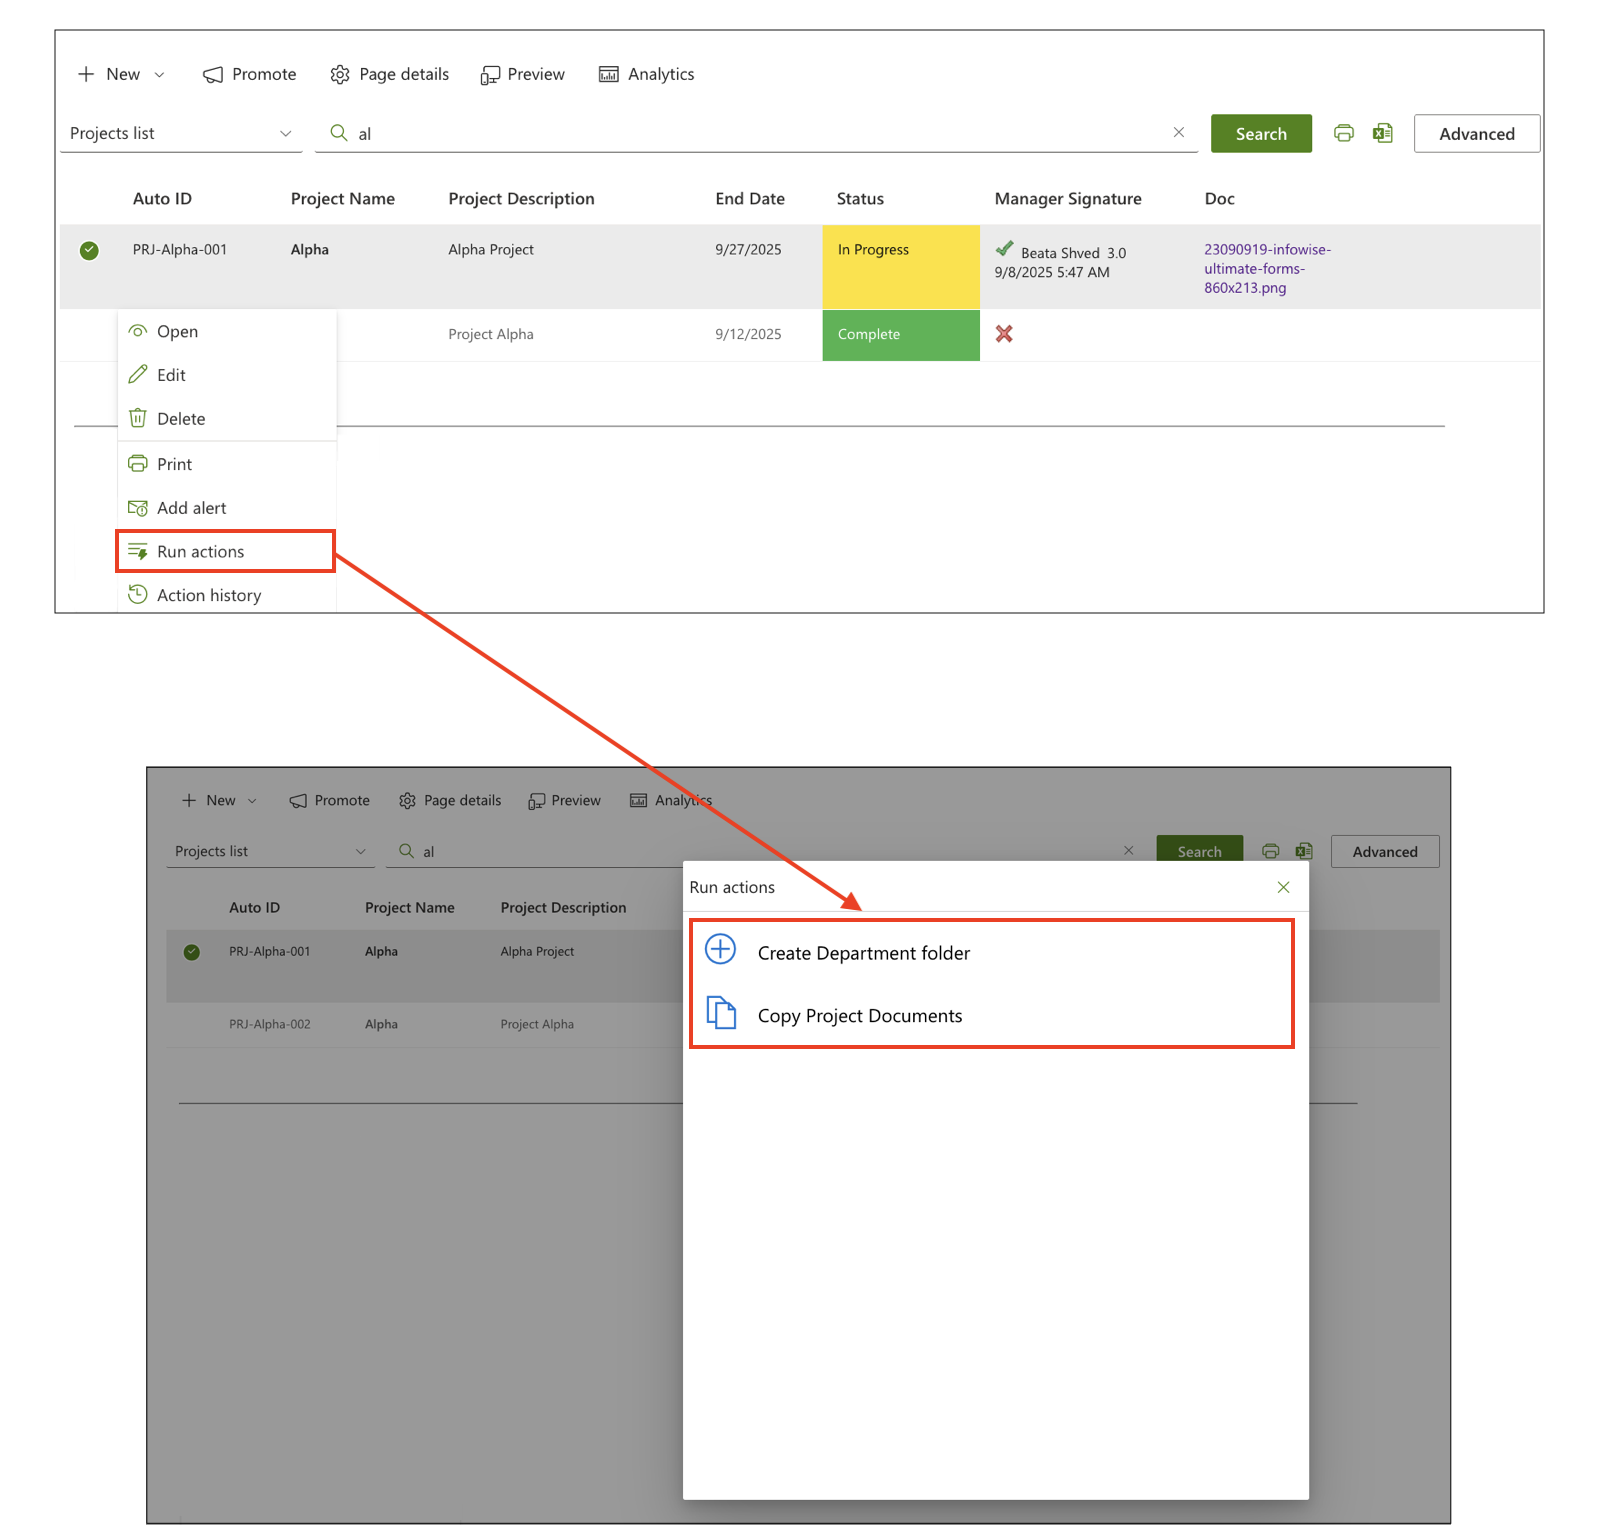
You can execute these actions without navigating to the item form.
Step 6: Sorting Results
Users can sort items by clicking column headers.
Example:
- Click Date column → results sort descending
- Click again → ascending
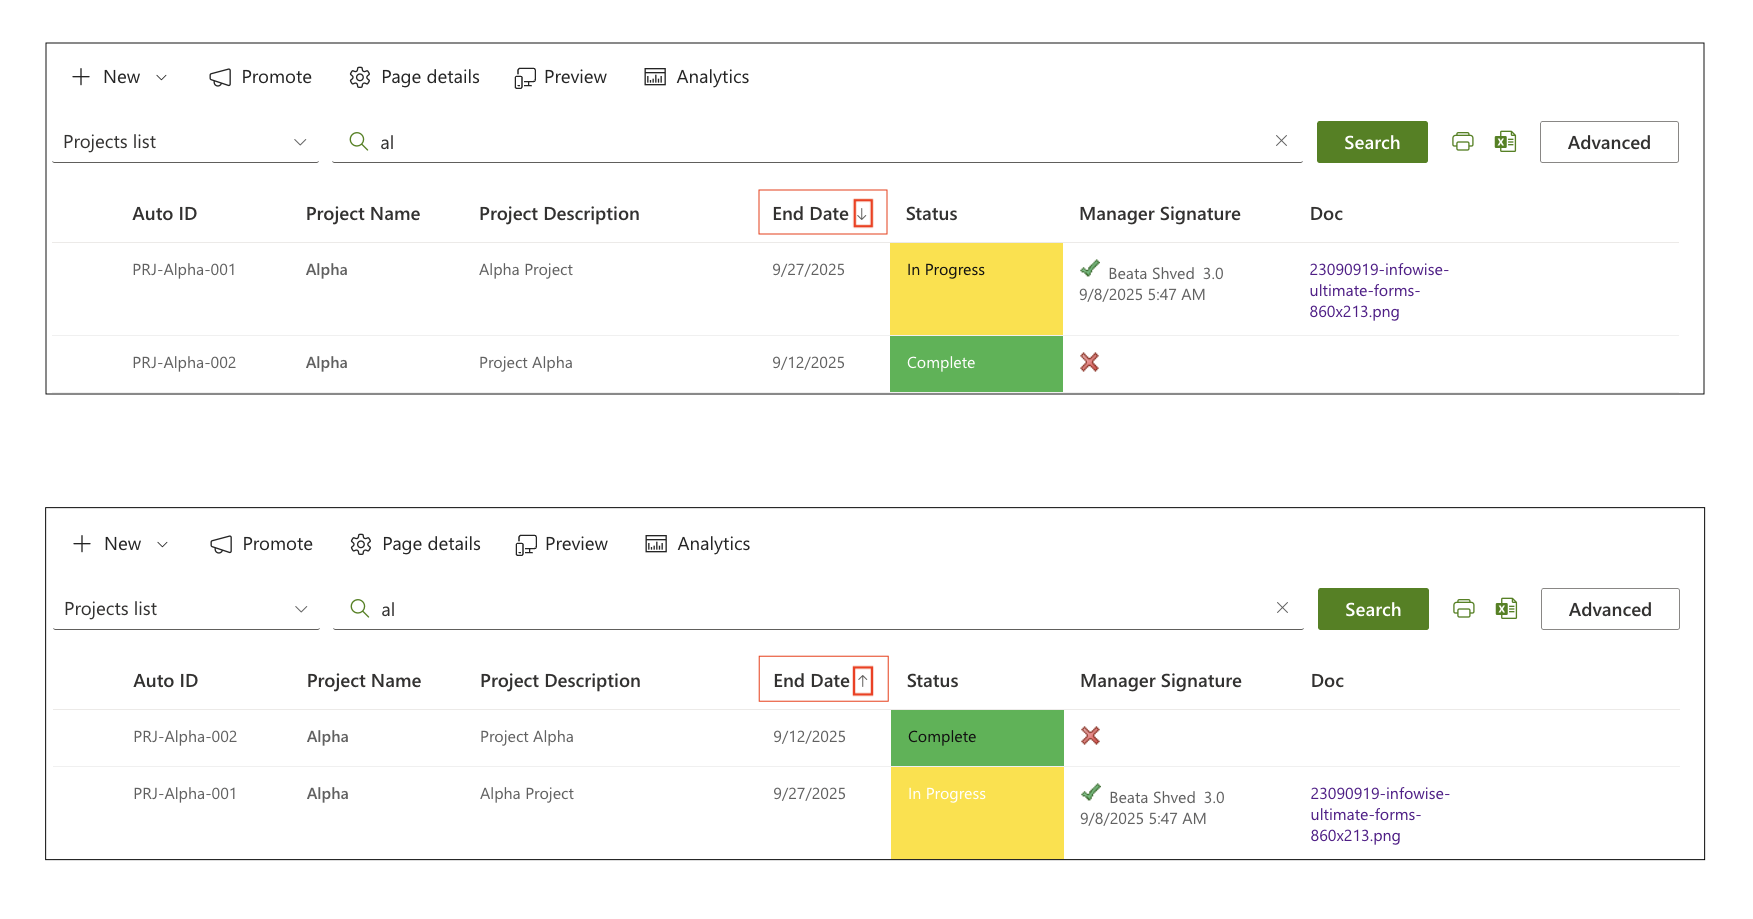
Sorting is per-list and resets when switching to another list.
Step 7: Pagination
If the profile is configured with paging (e.g., 5 items per page):
- Page navigation buttons appear at the bottom.
- Users can move to Next / Previous pages
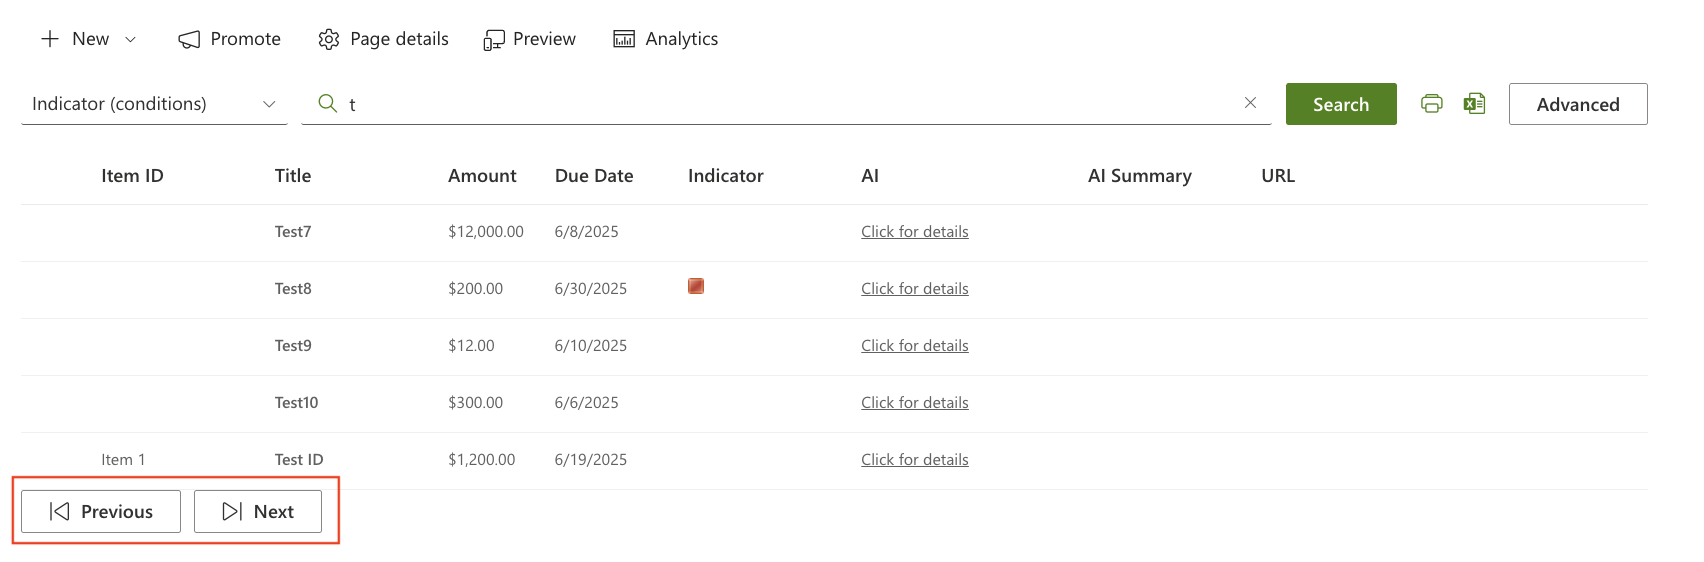
- "Unlimited" mode shows all results at once
Step 8: Exporting, Printing, and Downloading (If Enabled)
If these features were enabled in the profile:
Users may:
- Export results to Excel
- Print the current view
- Download documents

Summary
In this tutorial, you learned how to work with search results in the List Search web part