This tutorial explains how to create and configure Ultimate Forms: Counters in Microsoft 365 using Ultimate Forms.
You will prepare a sample list, create a Counters profile with multiple counters, and display those counters on a SharePoint page.
The tutorial uses a single, realistic example so you can clearly see how Counters work in practice and reuse the same data in advanced scenarios later.
Before You Start
Before creating Counters, prepare a SharePoint list with numeric data that can be summarized.
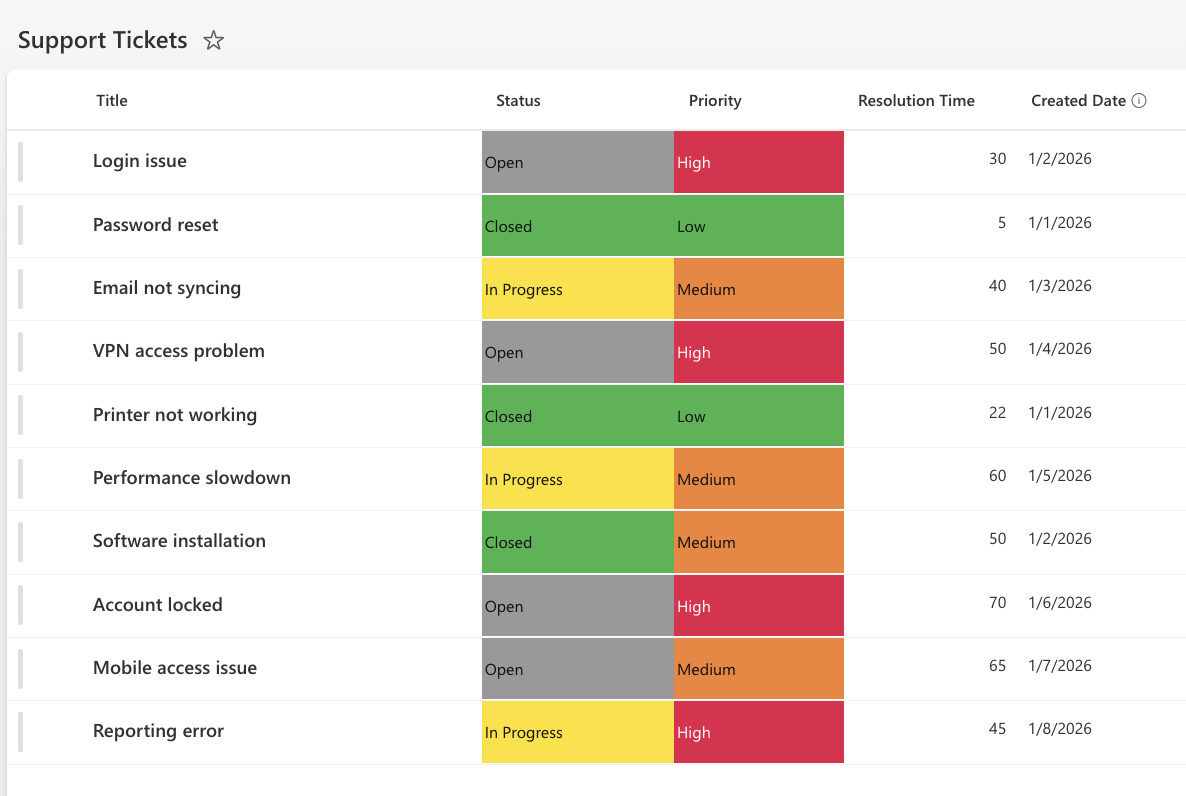
For this tutorial, we will use a Support Tickets scenario, which works well for demonstrating counts, averages and maximum values.
- Create the List
- Create a list named: Support Tickets
- Create the Following Columns:
Column name Type Notes Title Single line of text Ticket title Status Color Choice Open, In Progress, Closed Priority Color Choice Low, Medium, High Resolution Time Number Used for Average / Max counters Created Date Date Used later for trends - Add Sample Items:
Instructions
Step 1: Open Counters in Ultimate Forms
- Open your SharePoint list.
- Click Design to open Ultimate Forms.
- Select Counters.
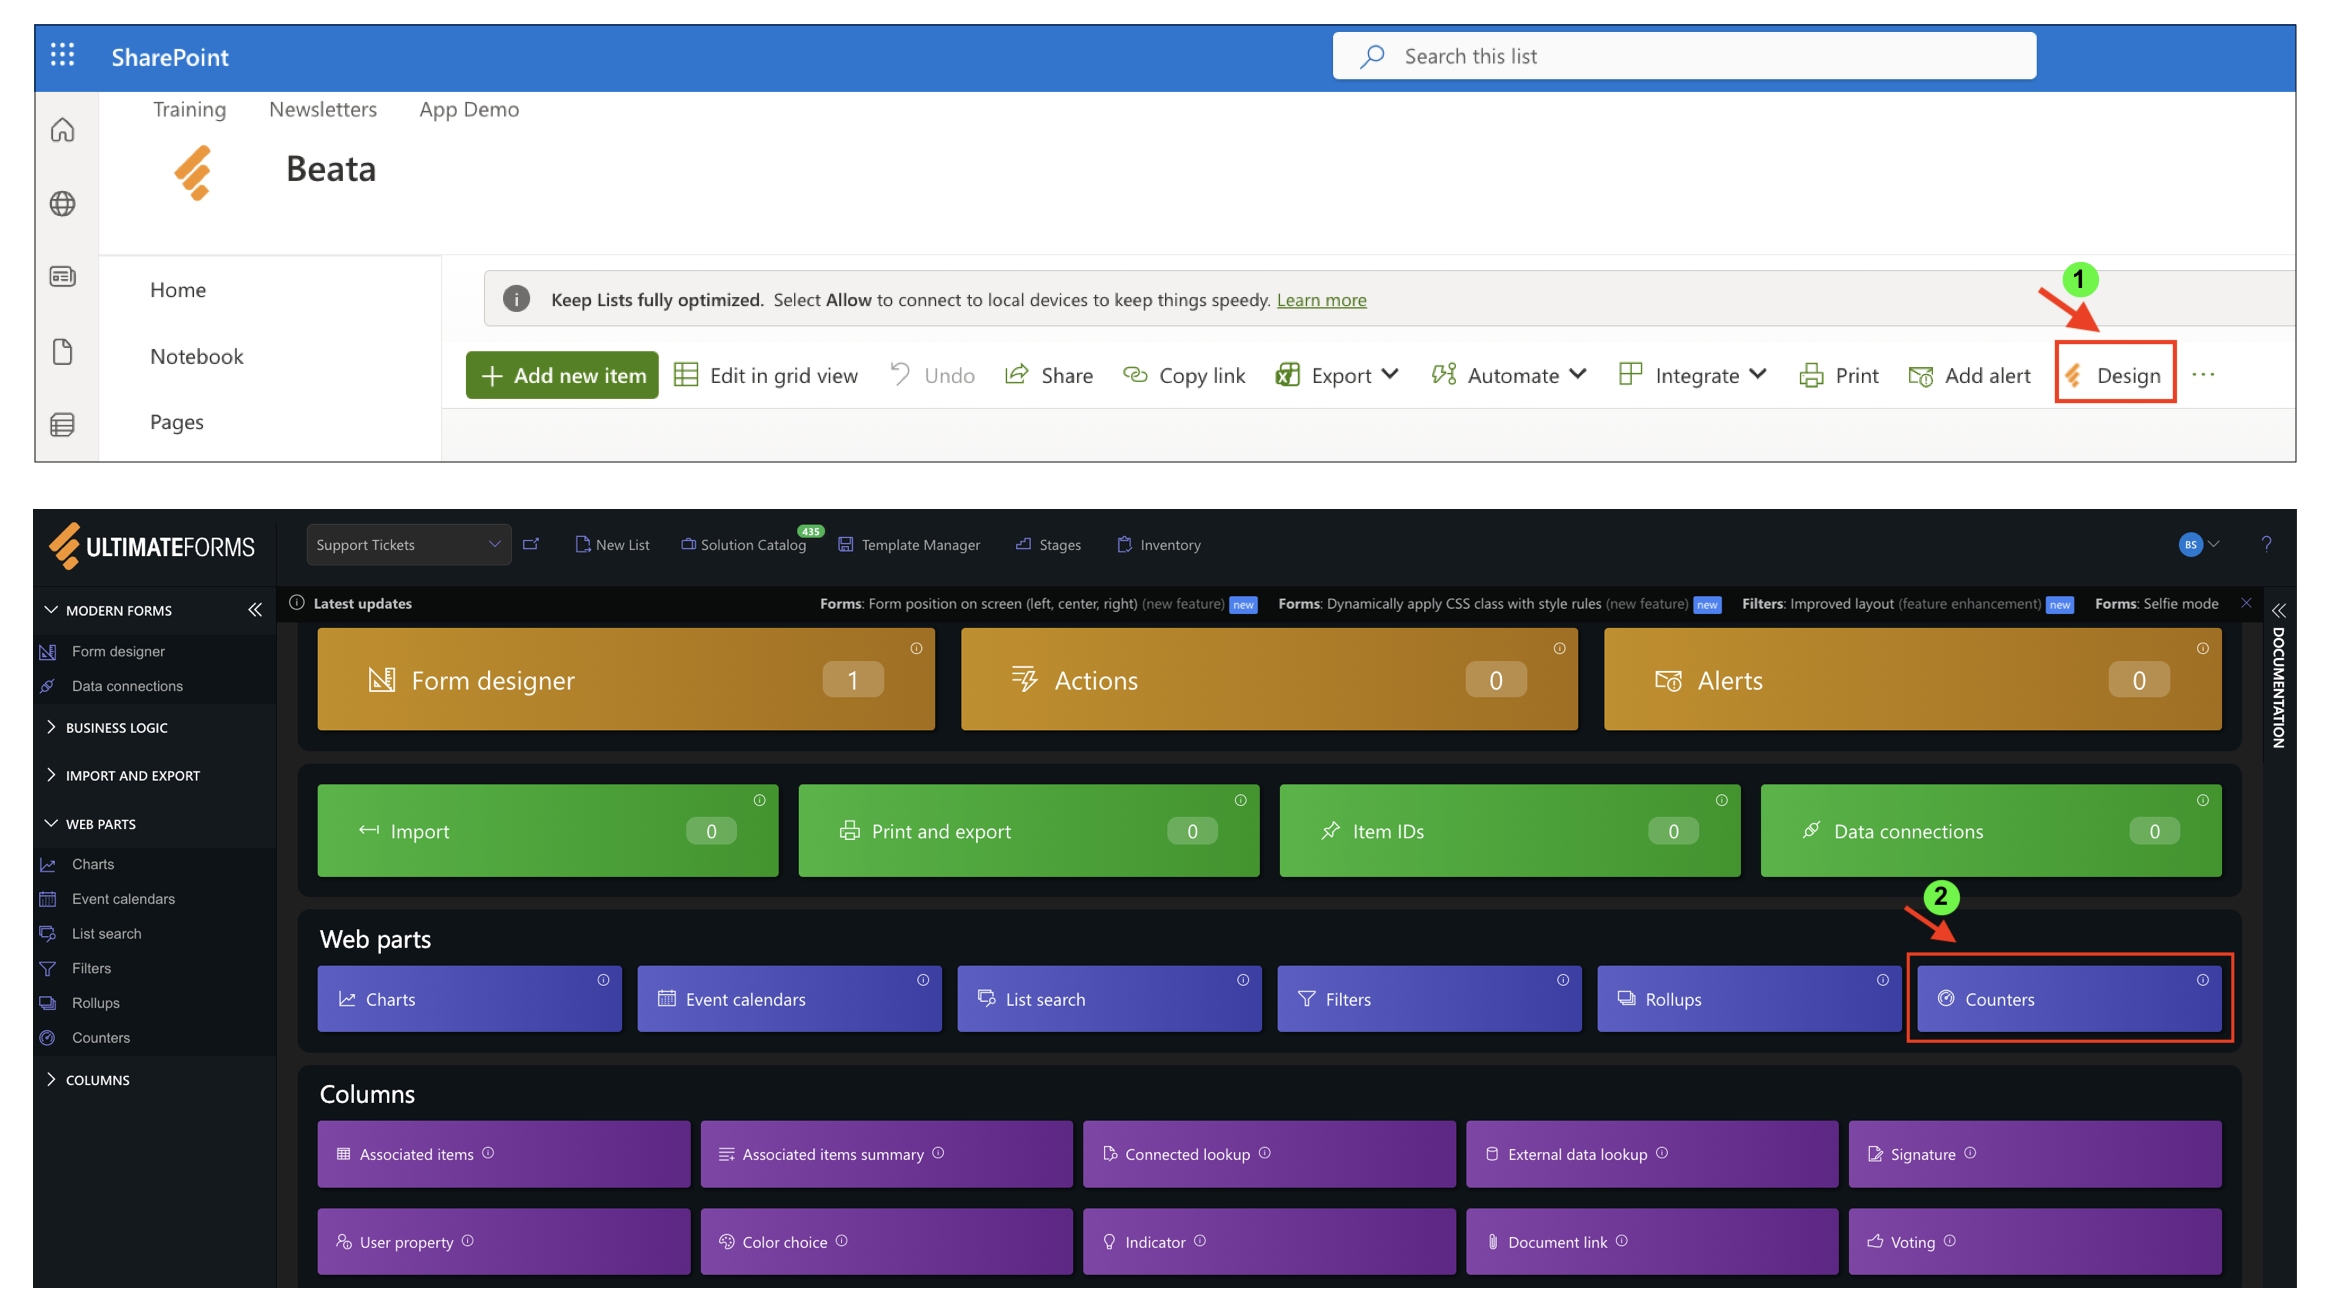
You will see the Counters profiles page with the option to create a new profile.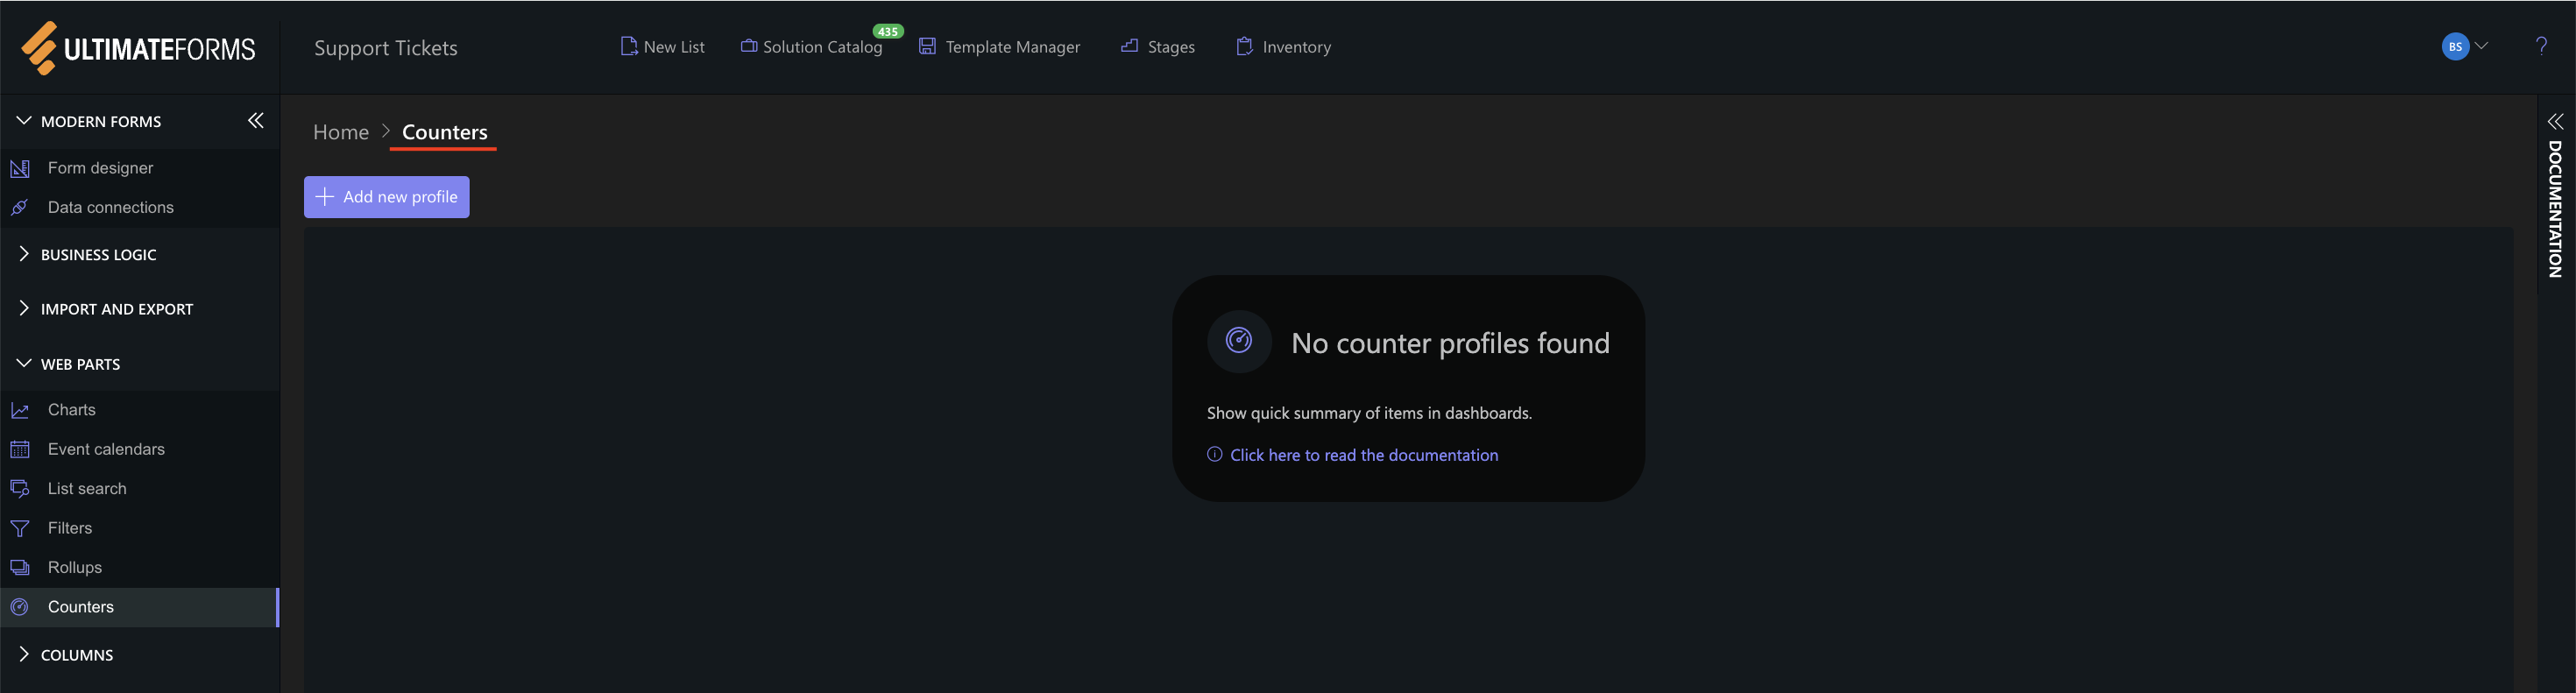
Step 2: Create a New Counters Profile
- Click Add new profile.
- In the General tab, configure the basic profile settings.
- Profile Title:
- Enter a clear name, for example: Support Tickets Counters
- List:
- Select the list: Support Tickets
- Profile Title:
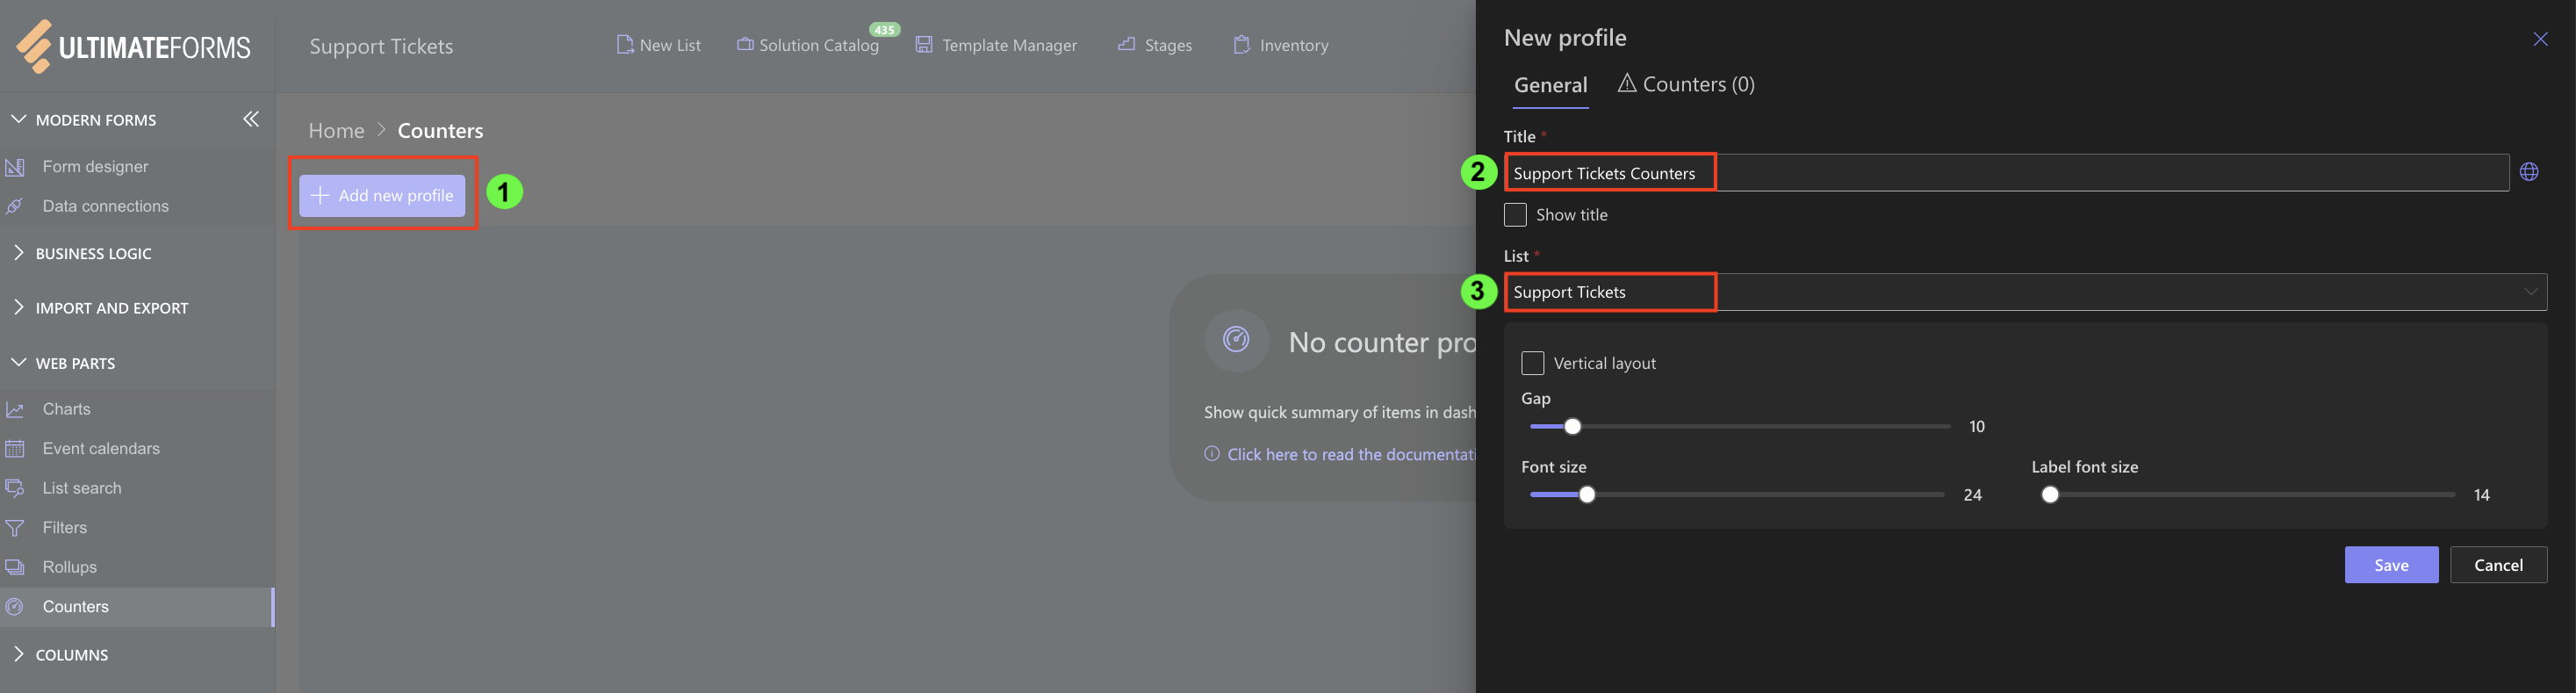
Step 3: Configure General Options
In the General tab, you can control how counters are displayed:
- Show title – optional
- Vertical layout – enable if you want counters stacked vertically
- Gap – controls spacing between counters
- Font size / Label font size – adjust for dashboard visibility

Step 4: Add Individual Counters
In this step, you will add several counters to the profile.
Each counter highlights a different metric from the Support Tickets list.
Counter 1: Open Tickets
- Open the Counters tab inside the profile.
- Configure the counter:
- Label: Open Tickets
- Column: ID
- Operator: Count
- Under Conditions, add:
- Status = Open
- (Optional) Choose a background color to visually highlight open tickets.
- Click Add to save the counter.

This counter answers the question: How many tickets still require attention?
Counter 2: Tickets In Progress
- Configure:
- Label: Tickets In Progress
- Column: ID
- Operator: Count
- Add a condition:
- Status = In Progress
- Click Add.
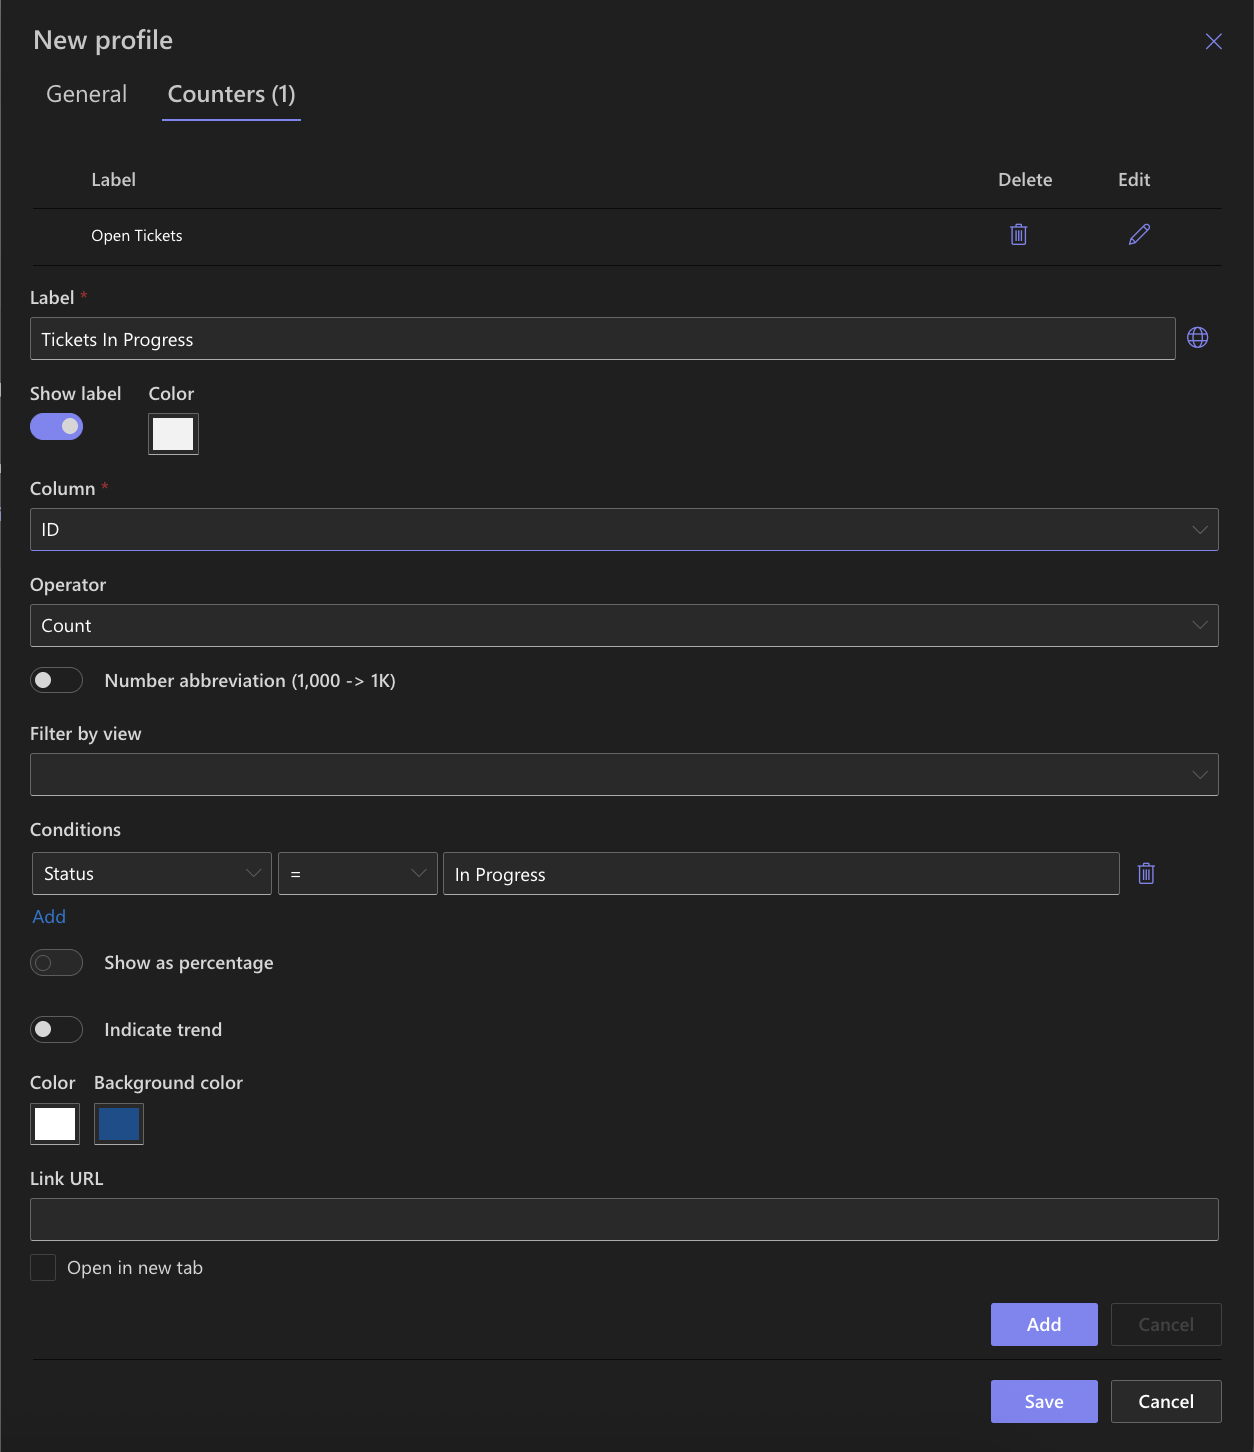
This counter helps monitor active workload.
Counter 3: Average Resolution Time
- Configure:
- Label: Avg. Resolution Time (hrs)
- Column: Resolution Time (Hours)
- Operator: Average
- (Optional) Add a condition:
- Status ≠ Open
(This focuses on tickets already handled.) - Click Add.
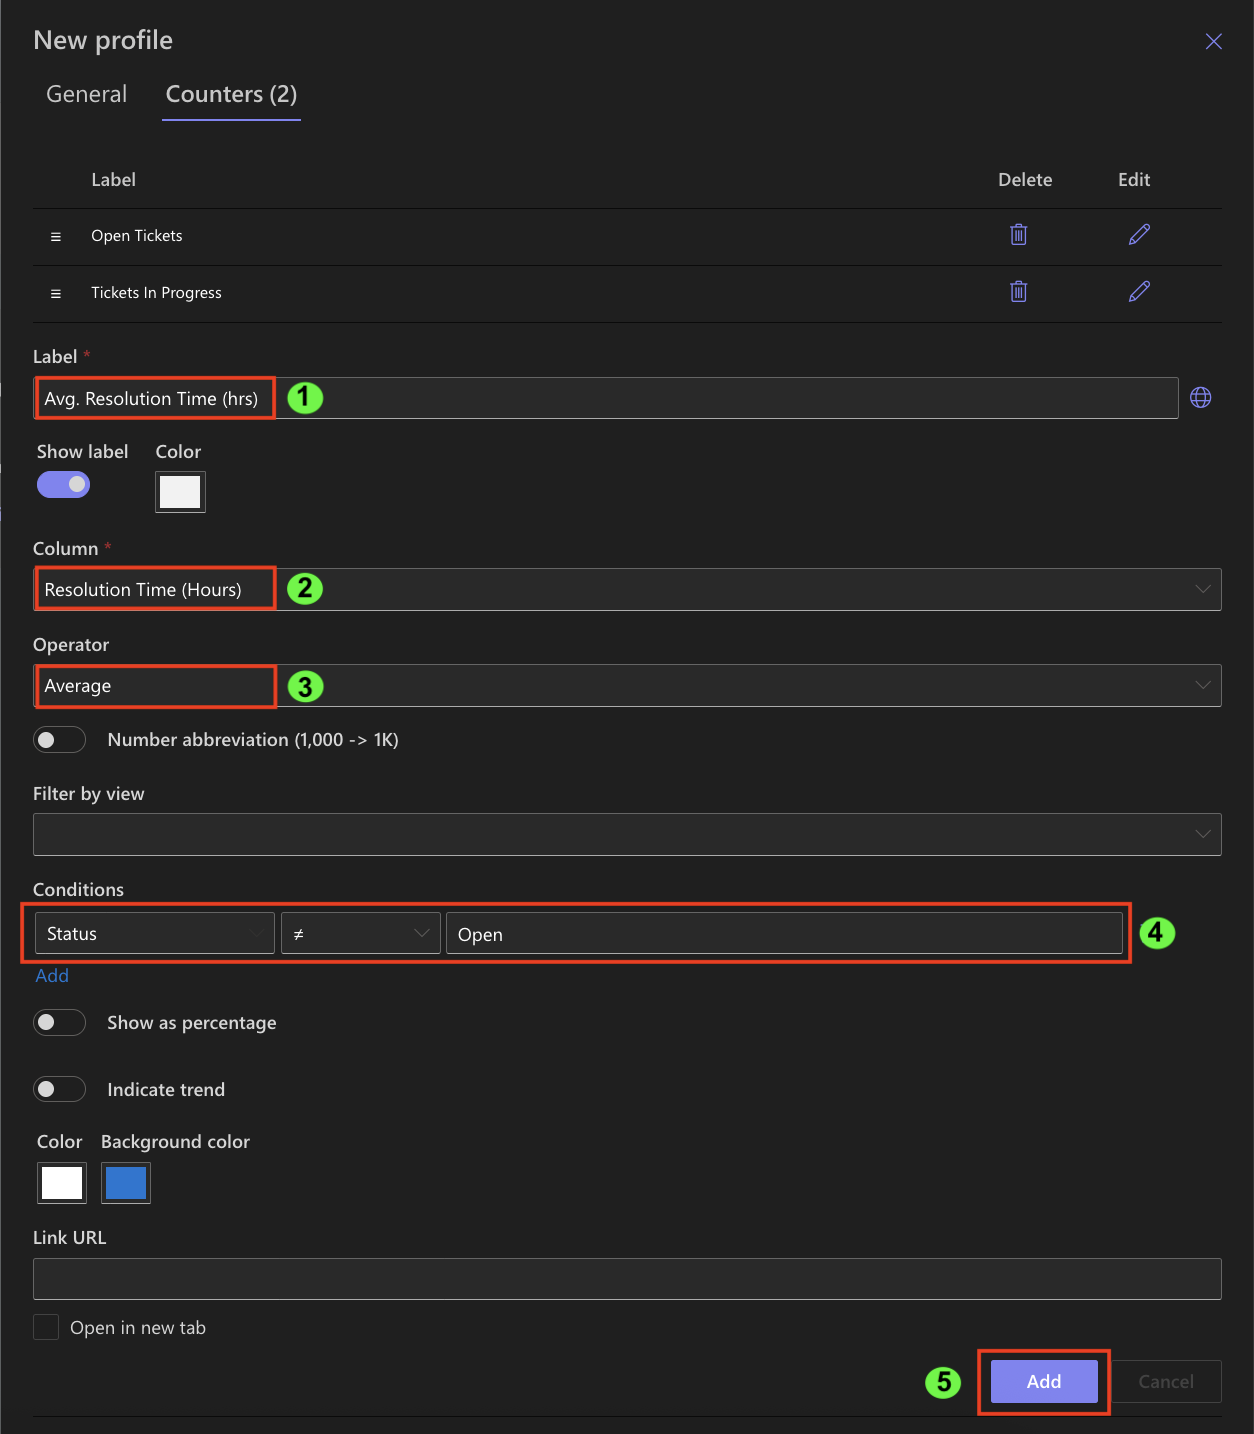
This counter provides insight into overall support efficiency.
Counter 4: Longest Resolution Time
- Configure:
- Label: Longest Resolution Time
- Column: Resolution Time (Hours)
- Operator: Maximum
- No conditions are required.
- Click Add.
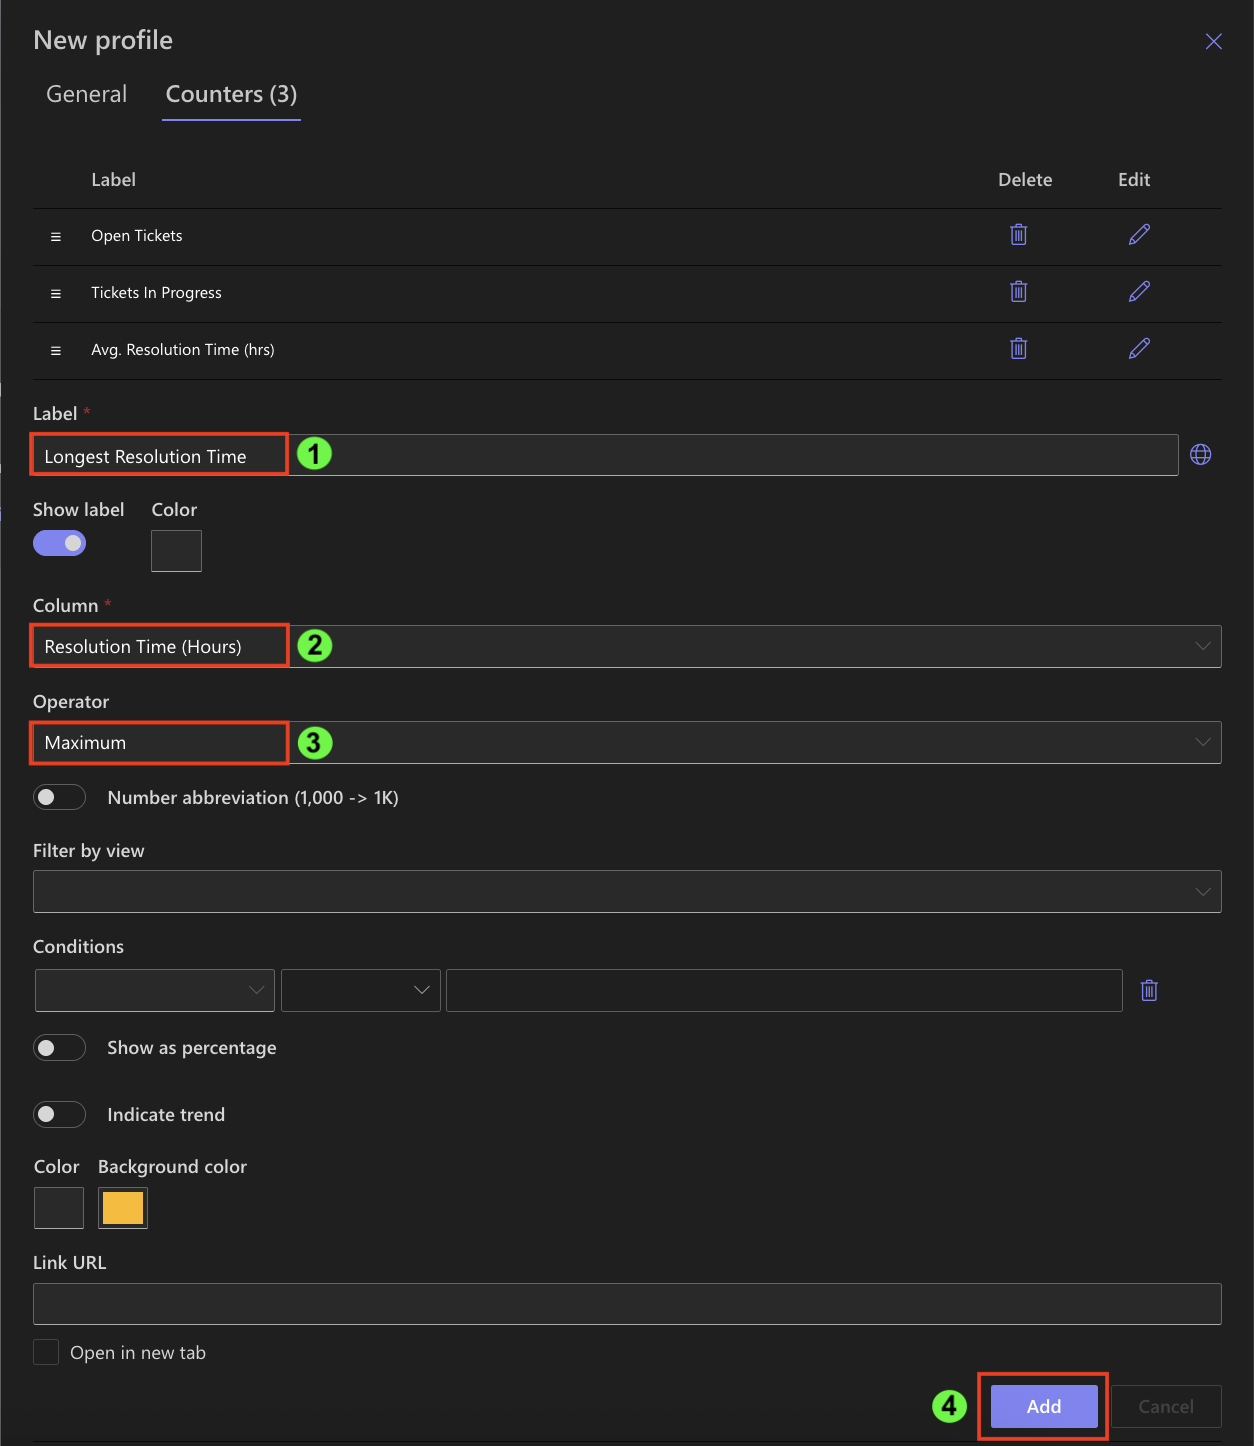
This counter helps identify extreme or problematic cases.
Step 5: Optional Enhancements
At this stage, you can optionally adjust how counters appear:
- Enable Number abbreviation (e.g., 1,000 → 1K)
- Customize text color or background color
- Turn counters into clickable links by providing a list view URL
- Example: a view filtered to Status = Open
These options improve readability and usability but do not affect the calculations.
Step 6: Save the Counters Profile
After adding all counters:
- Review the Counters list.
- Click Save.
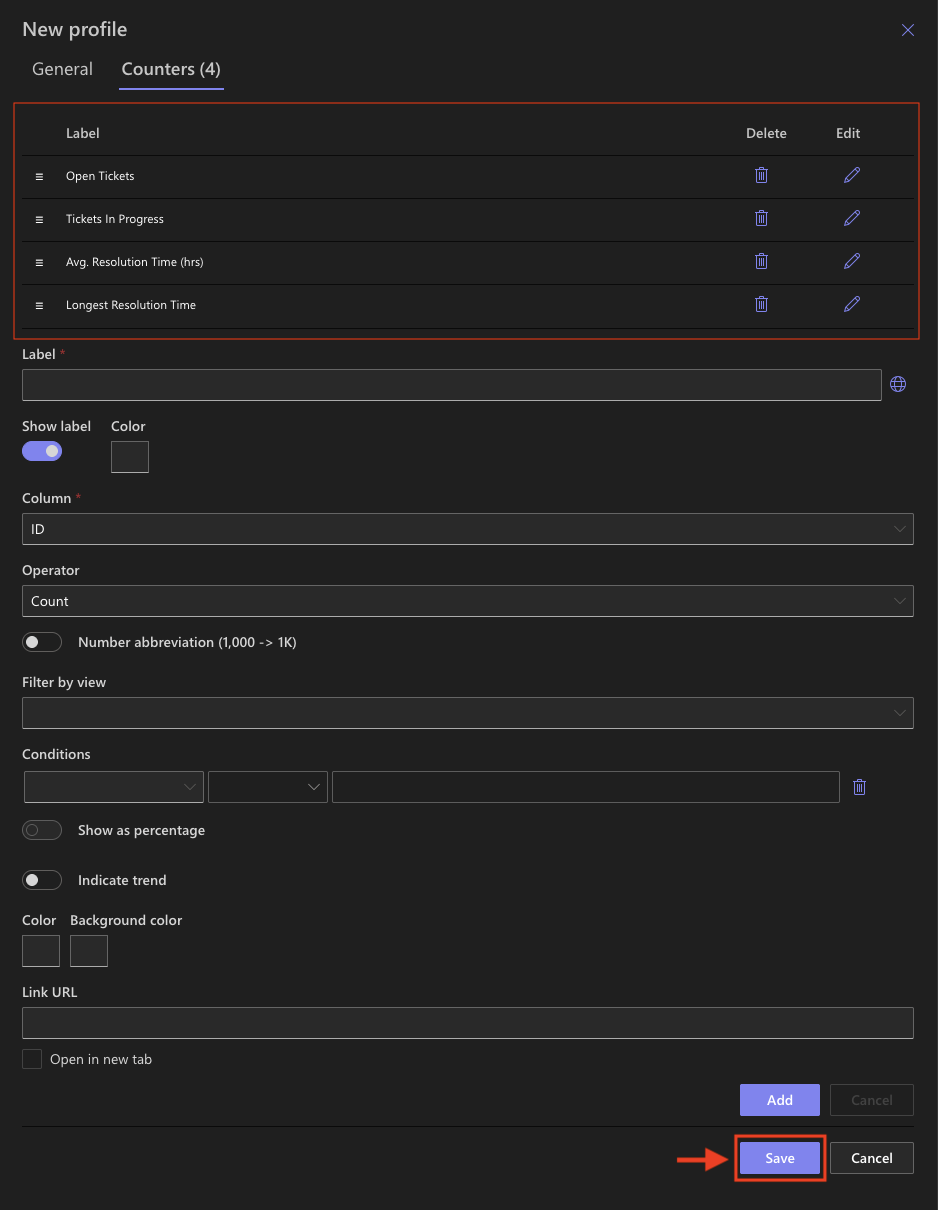
Your profile Support Tickets Counters is now ready to be used on a page.
Step 7: Add Counters to a Page
- Create a new SharePoint page.

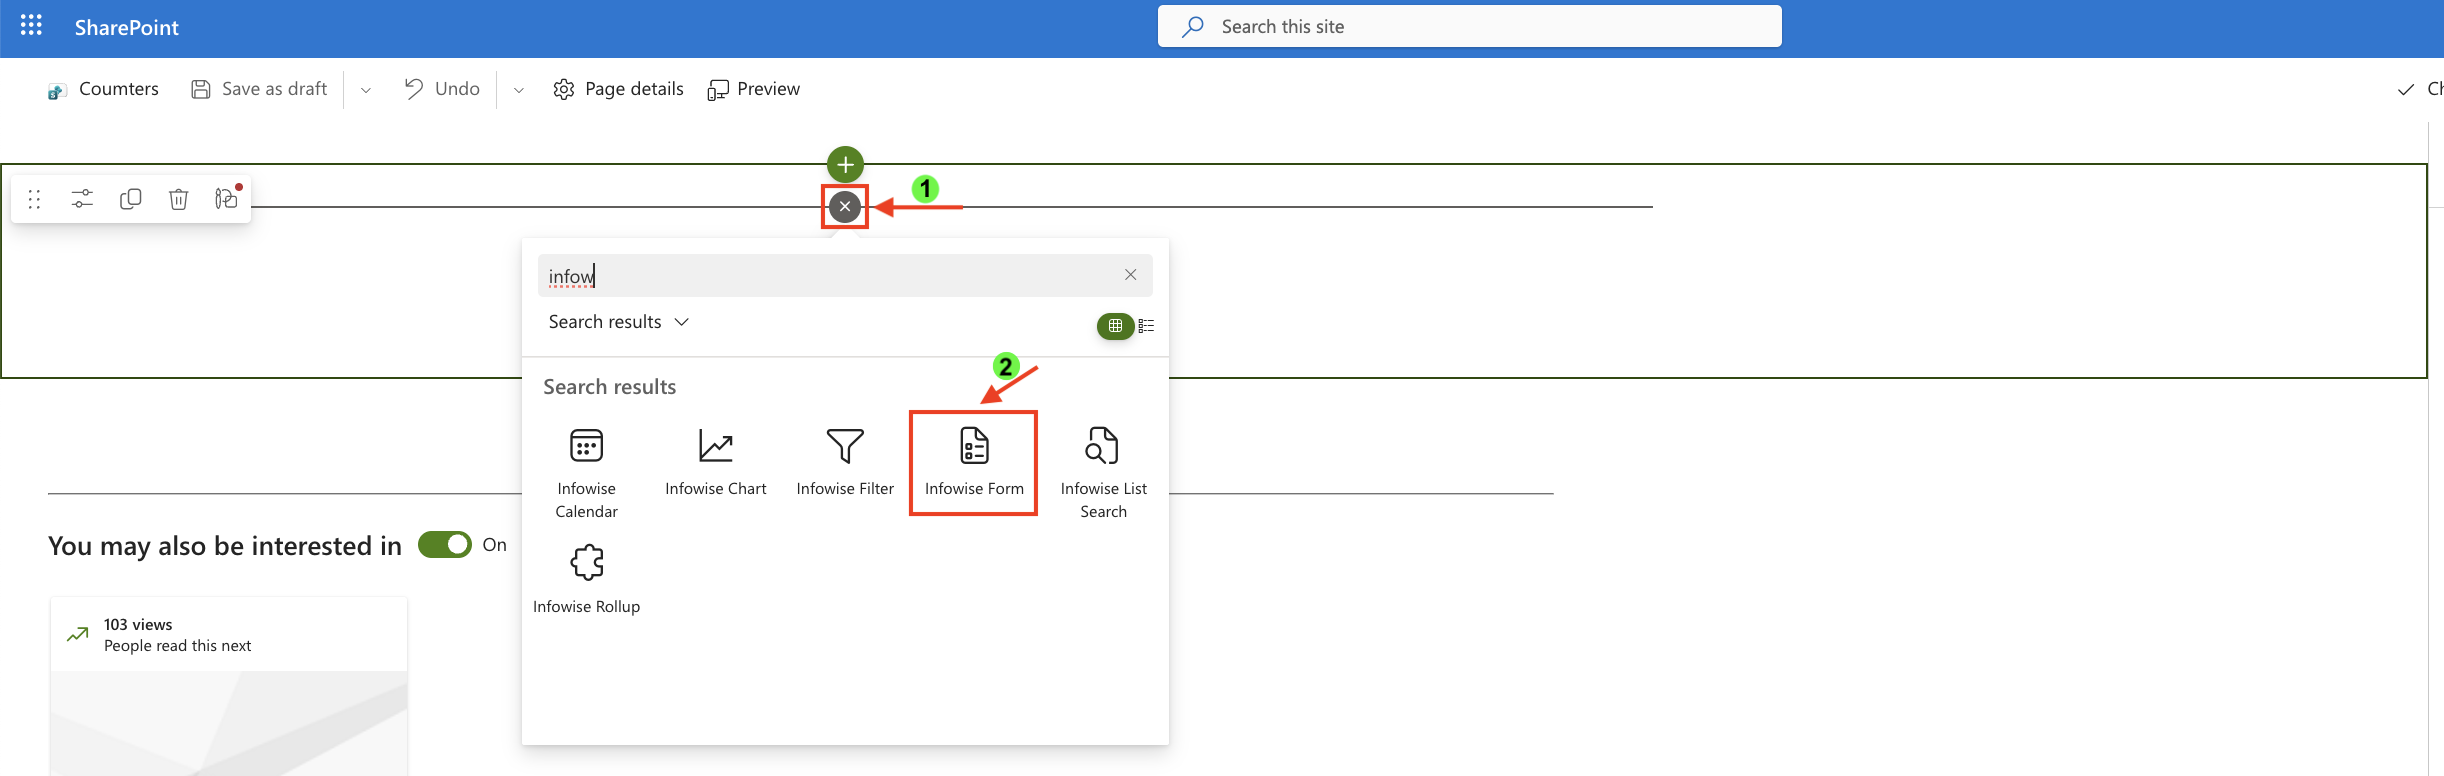
- Click the + button and add the Infowise Form web part.
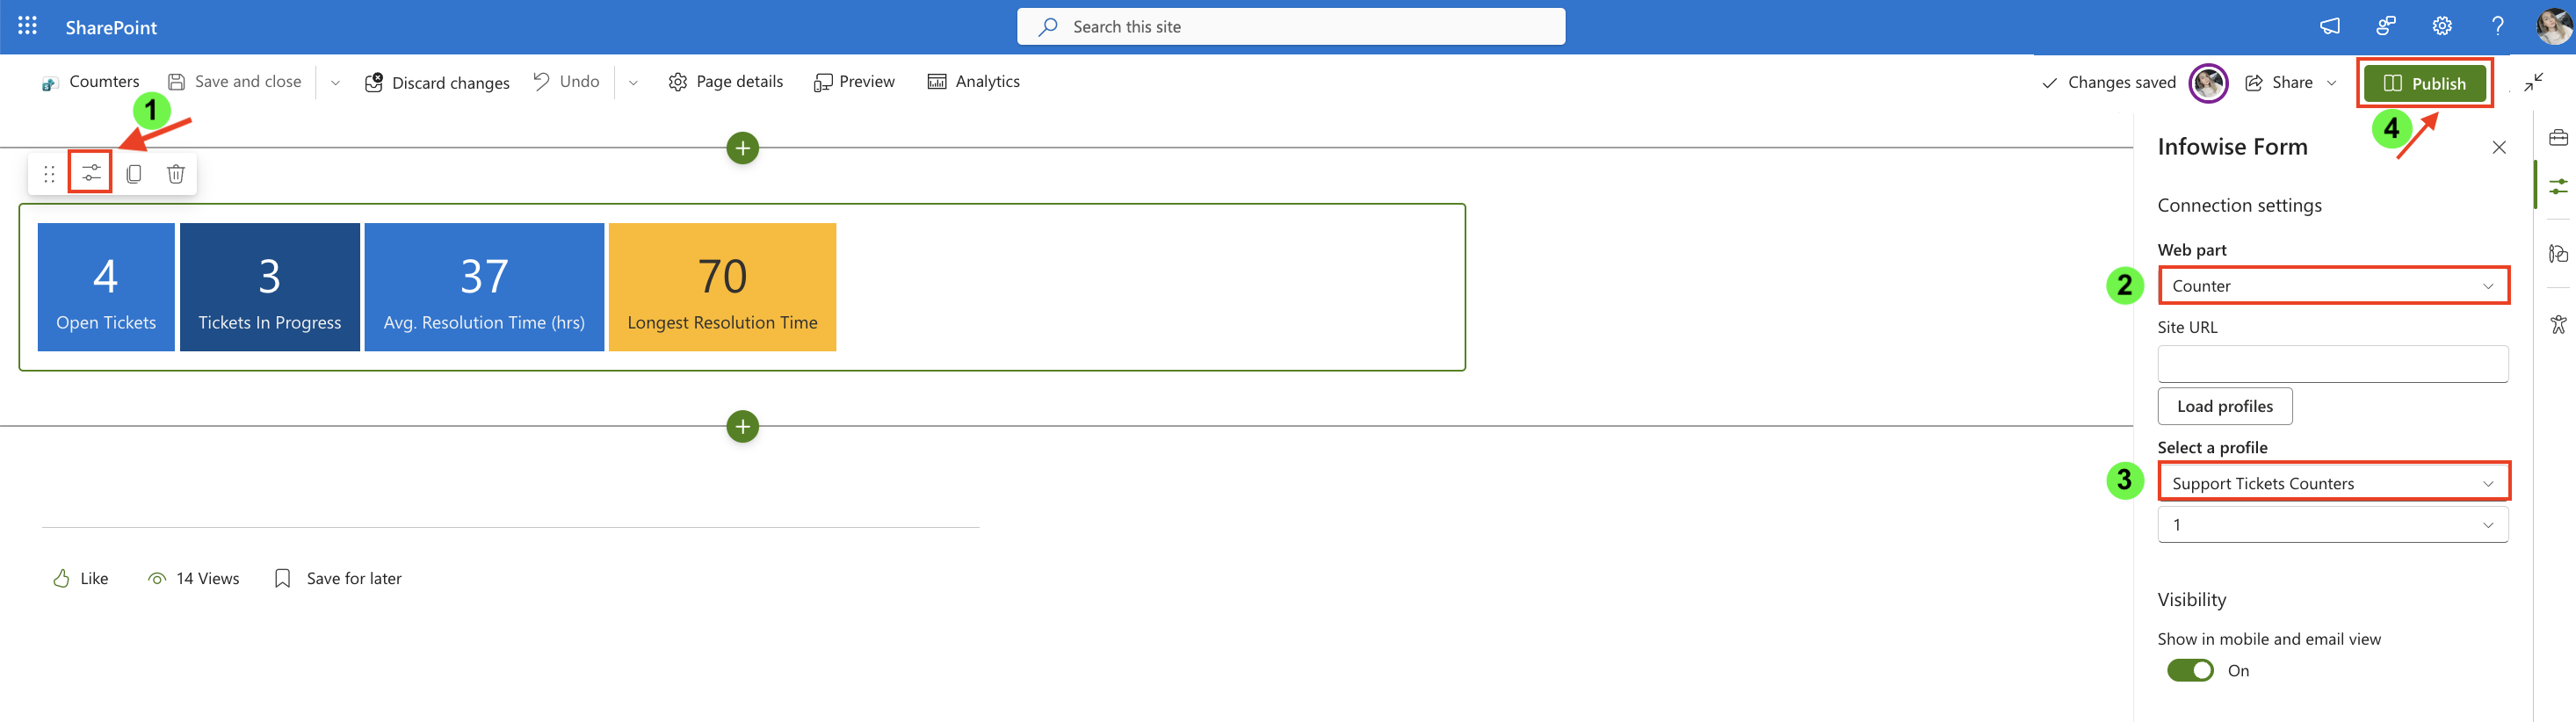
- Once added, click the Edit Properties.
- In the web part properties:
- Set Type to Counter.
- Select the profile Support Tickets Counters.
- Publish the page.
Step 8: Review Counters on the Page
After adding the Counters web part to the page and selecting the Support Tickets Counters profile, the counters are rendered immediately using live data from the list.
On the page, you can now see:
- Open Tickets
Displays the number of tickets with Status = Open. - Tickets In Progress
Shows how many tickets are currently being worked on. - Avg. Resolution Time (hrs)
Calculates the average resolution time based on the Resolution Time (Hours) column. - Longest Resolution Time
Highlights the highest resolution time recorded in the list.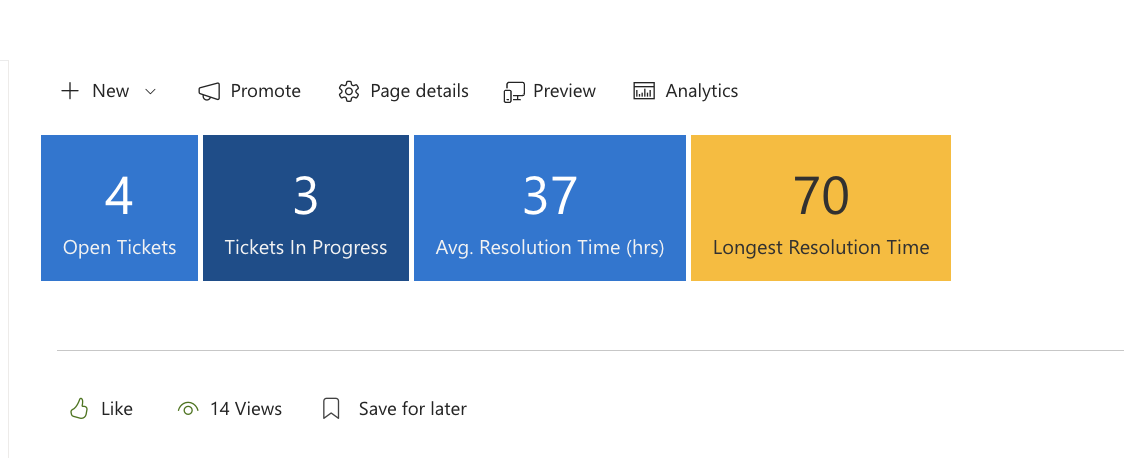
Each counter updates automatically when list items change.
This layout provides an at-a-glance overview of support workload and performance, making it easy to monitor key metrics directly from a SharePoint page.
Summary
In this tutorial, you created a simple Counters setup to understand how different counter types work in Ultimate Forms. Using a single, realistic Support Tickets example, you configured counters based on counts, averages, and maximum values, and displayed them on a SharePoint page.
This basic scenario is intentionally straightforward and focuses on core concepts rather than complex configurations. In the following tutorials, you will build on this foundation and explore more advanced Counters scenarios, including additional conditions, trends, percentages, and layout options for real dashboard use cases.