In this part of our ongoing form-building series using Infowise Ultimate Forms, we’ll expand the structure with logical fields and visual formatting. You’ll learn how to create choice-based columns like Priority and Status, apply color indicators, and enhance the layout with padding for a clearer form presentation. These steps make your form more interactive and user-friendly.
If you haven’t completed the earlier tutorials, start with Part 1 and Part 2. This guide builds directly on those foundations and sets the stage for even more advanced configurations in future lessons.
Instructions
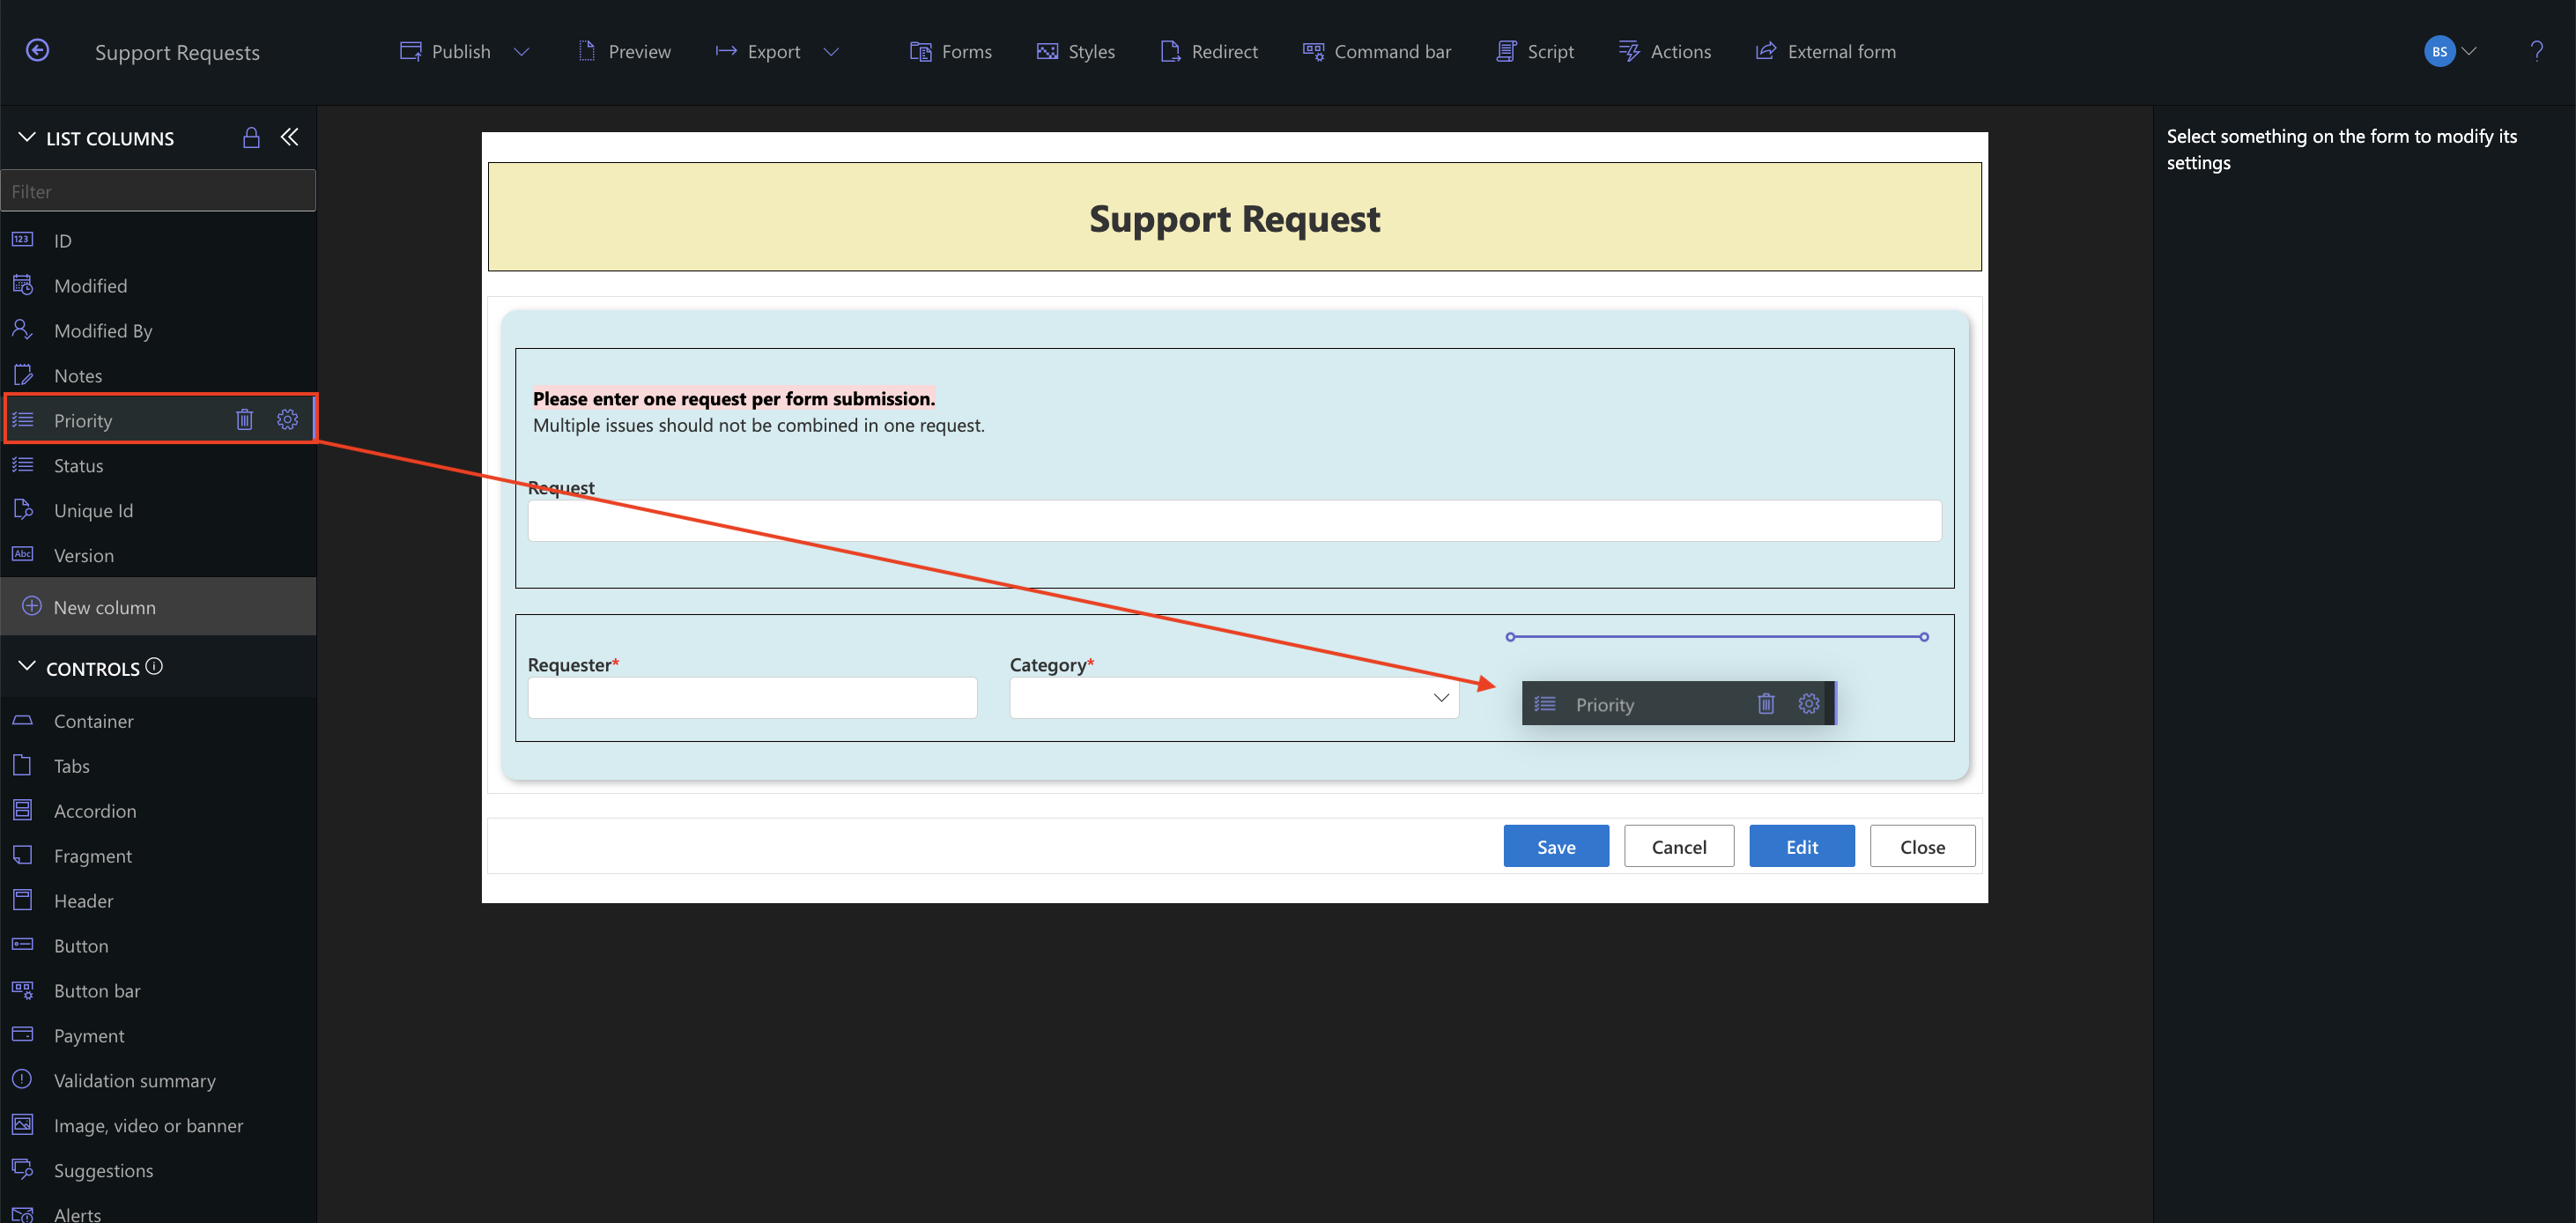
Step 1. Create a Priority Column
- Click New Column
- Choose Choice
- Title: Priority
- Enter choices:
- 1 High
- 2 Med
- 3 Low
- Set “Med” as the default value
- Set column as Required
- Save the column

- Drag the Priority column to the form canvas
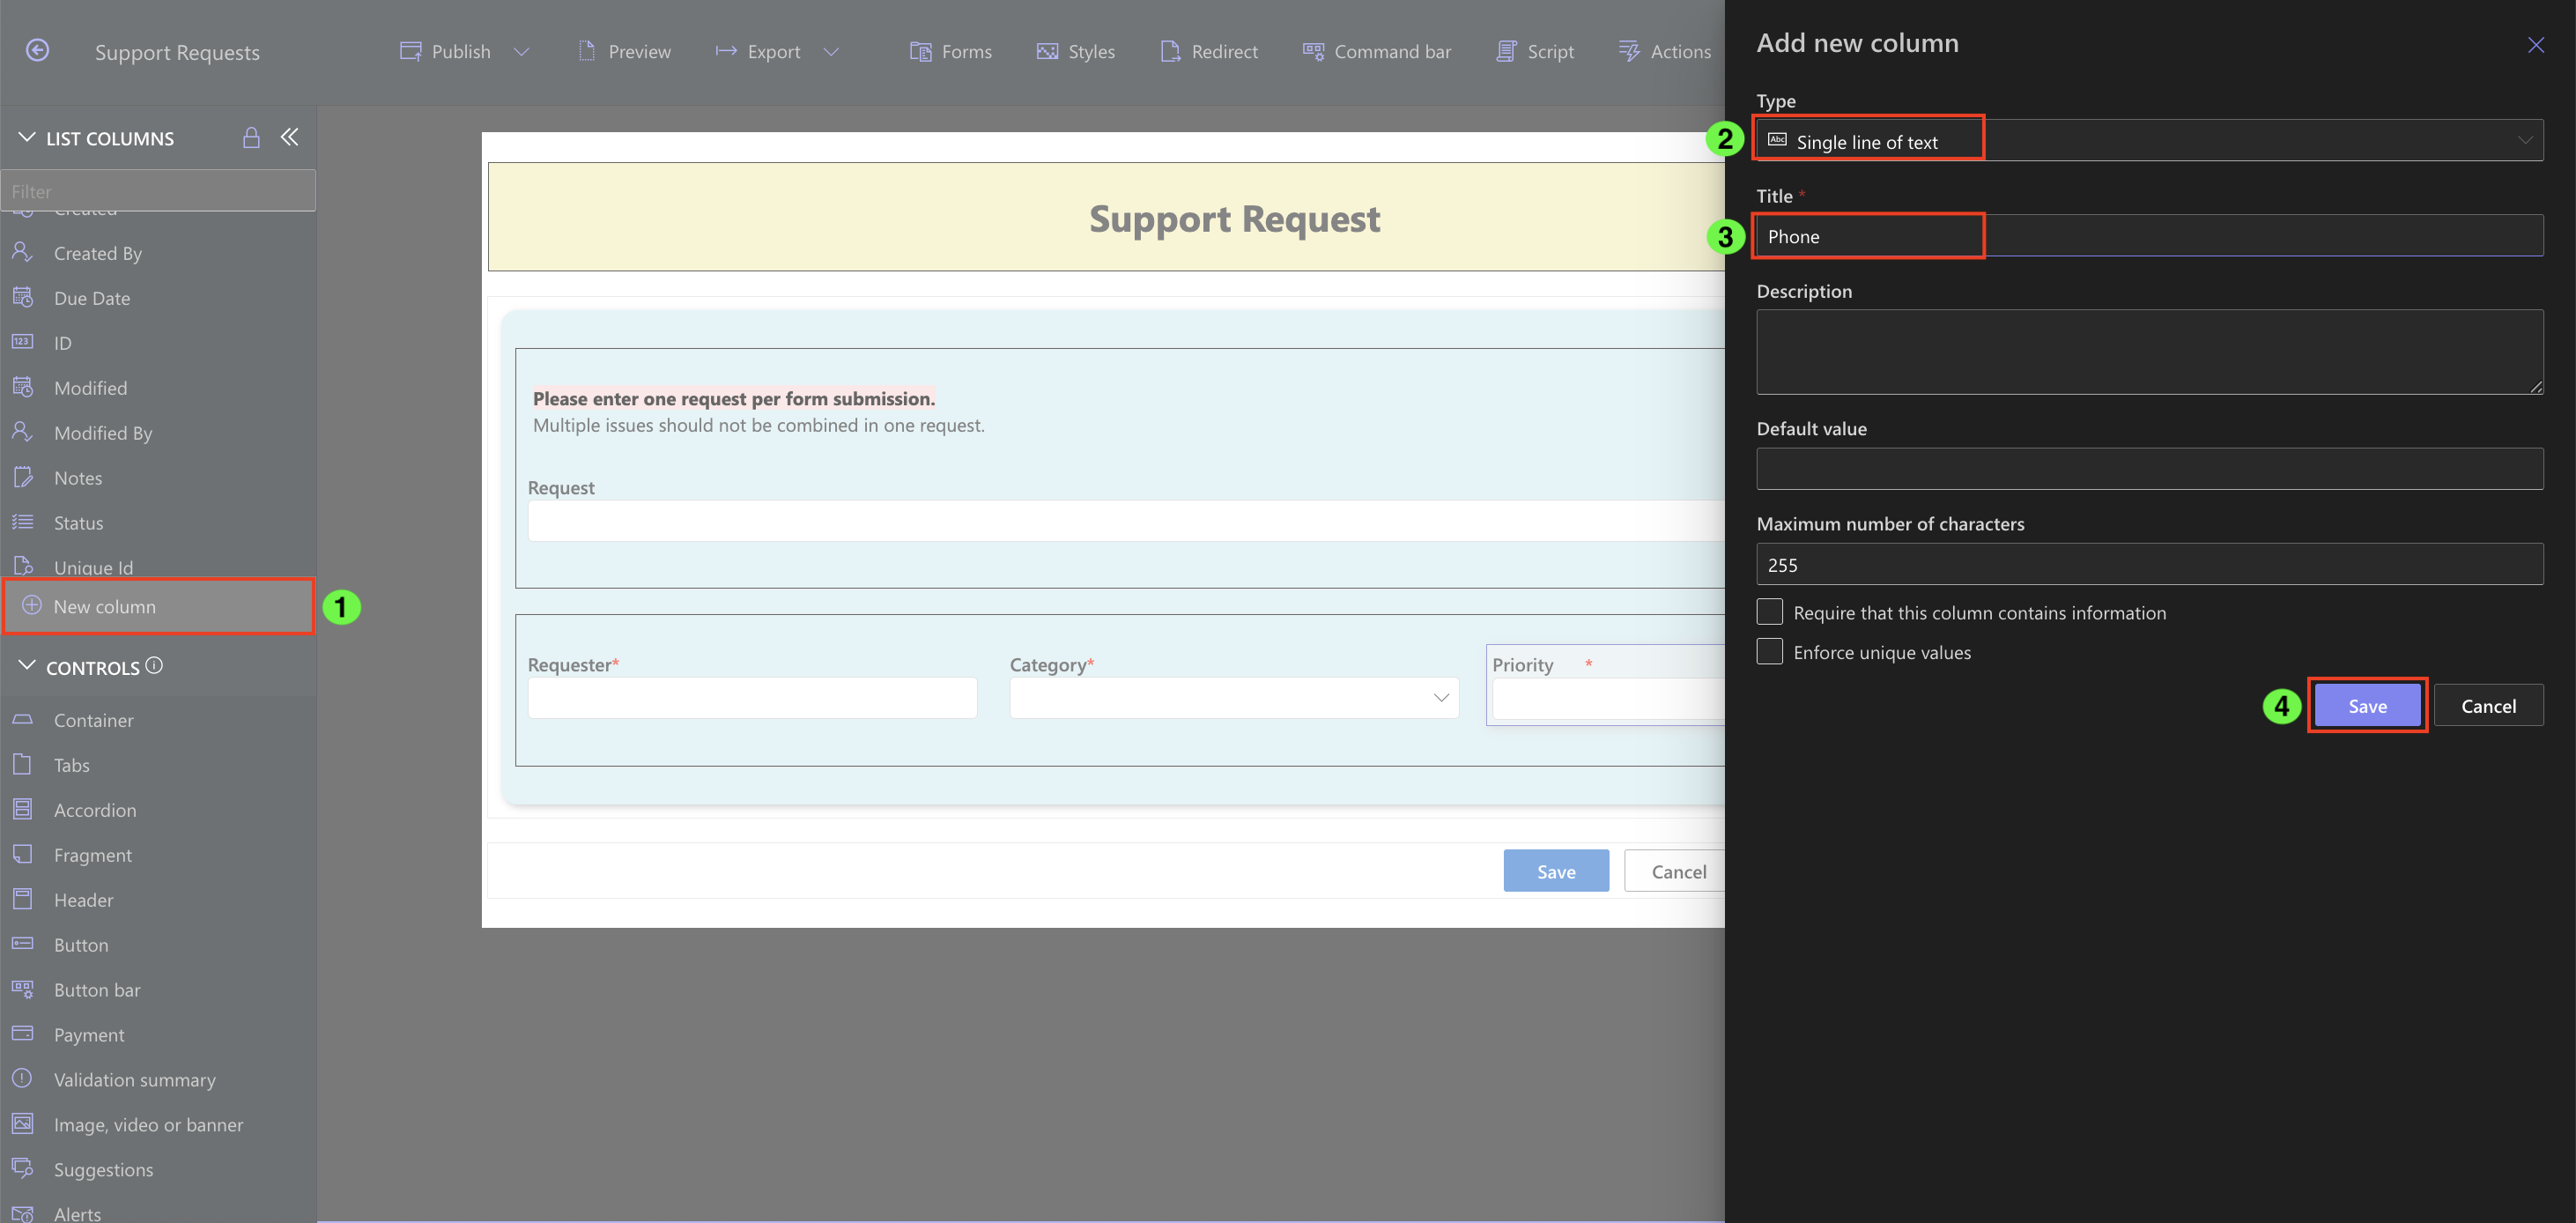
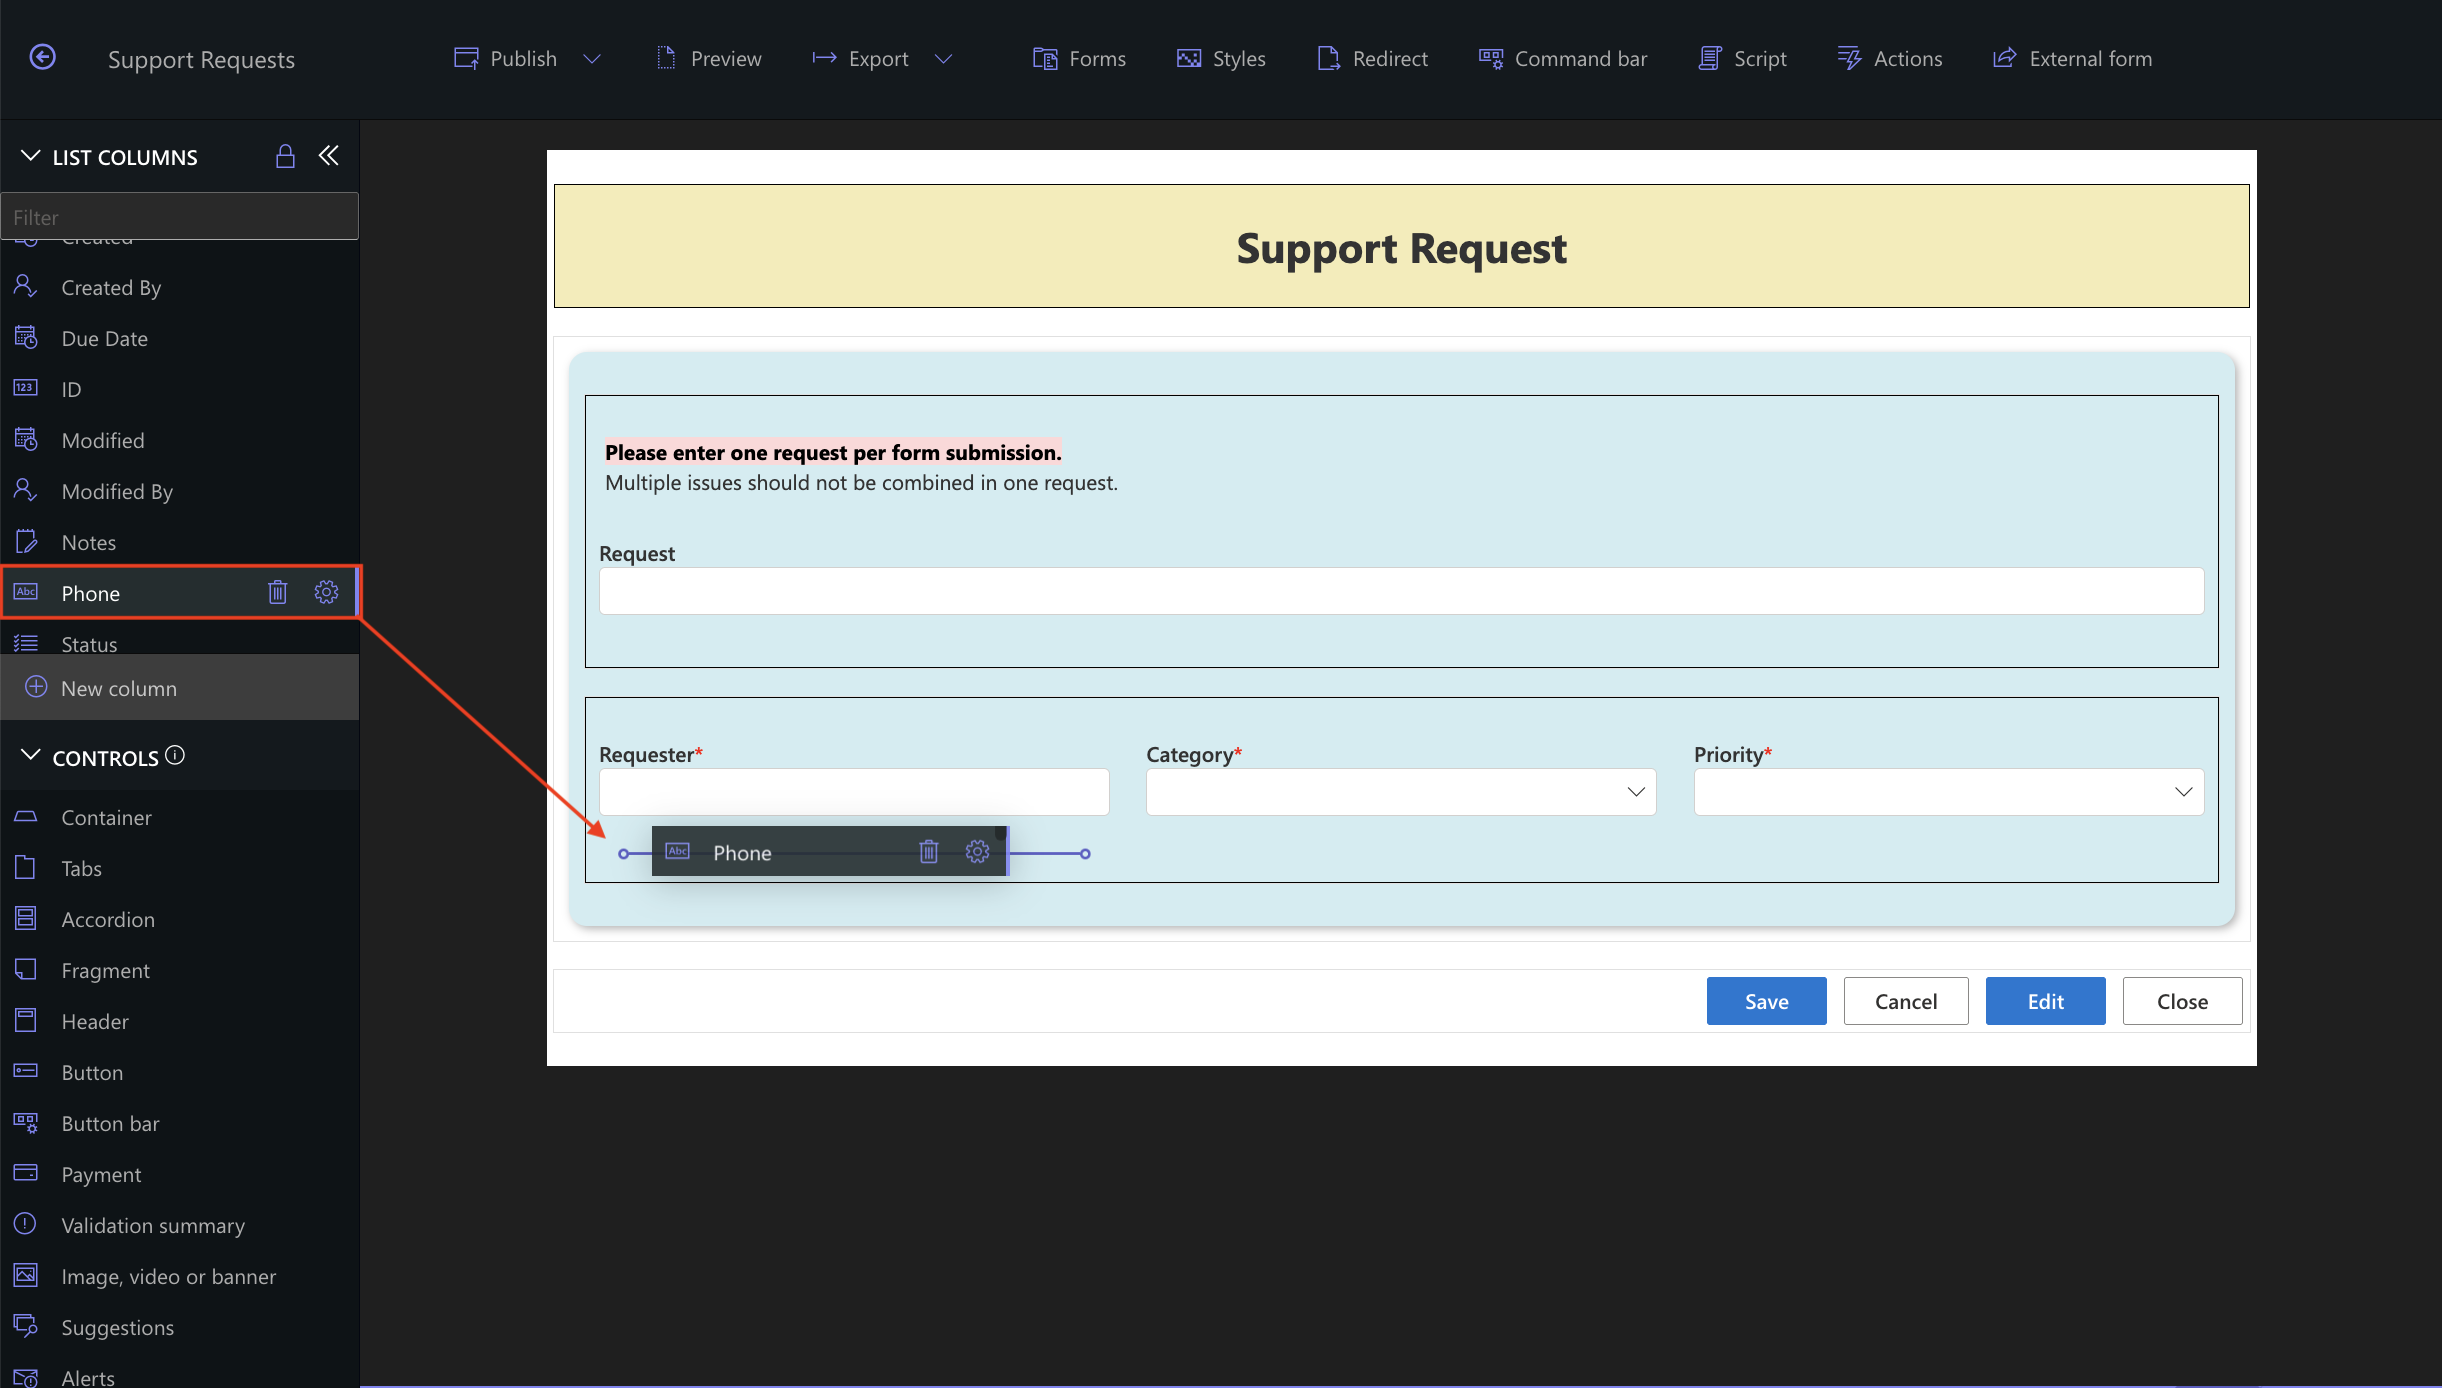
Step 2: Add a Phone Column
- Click New Column
- Choose Single Line of Text
- Title: Phone
- Save the column
- Drag the Phone column to the form canvas
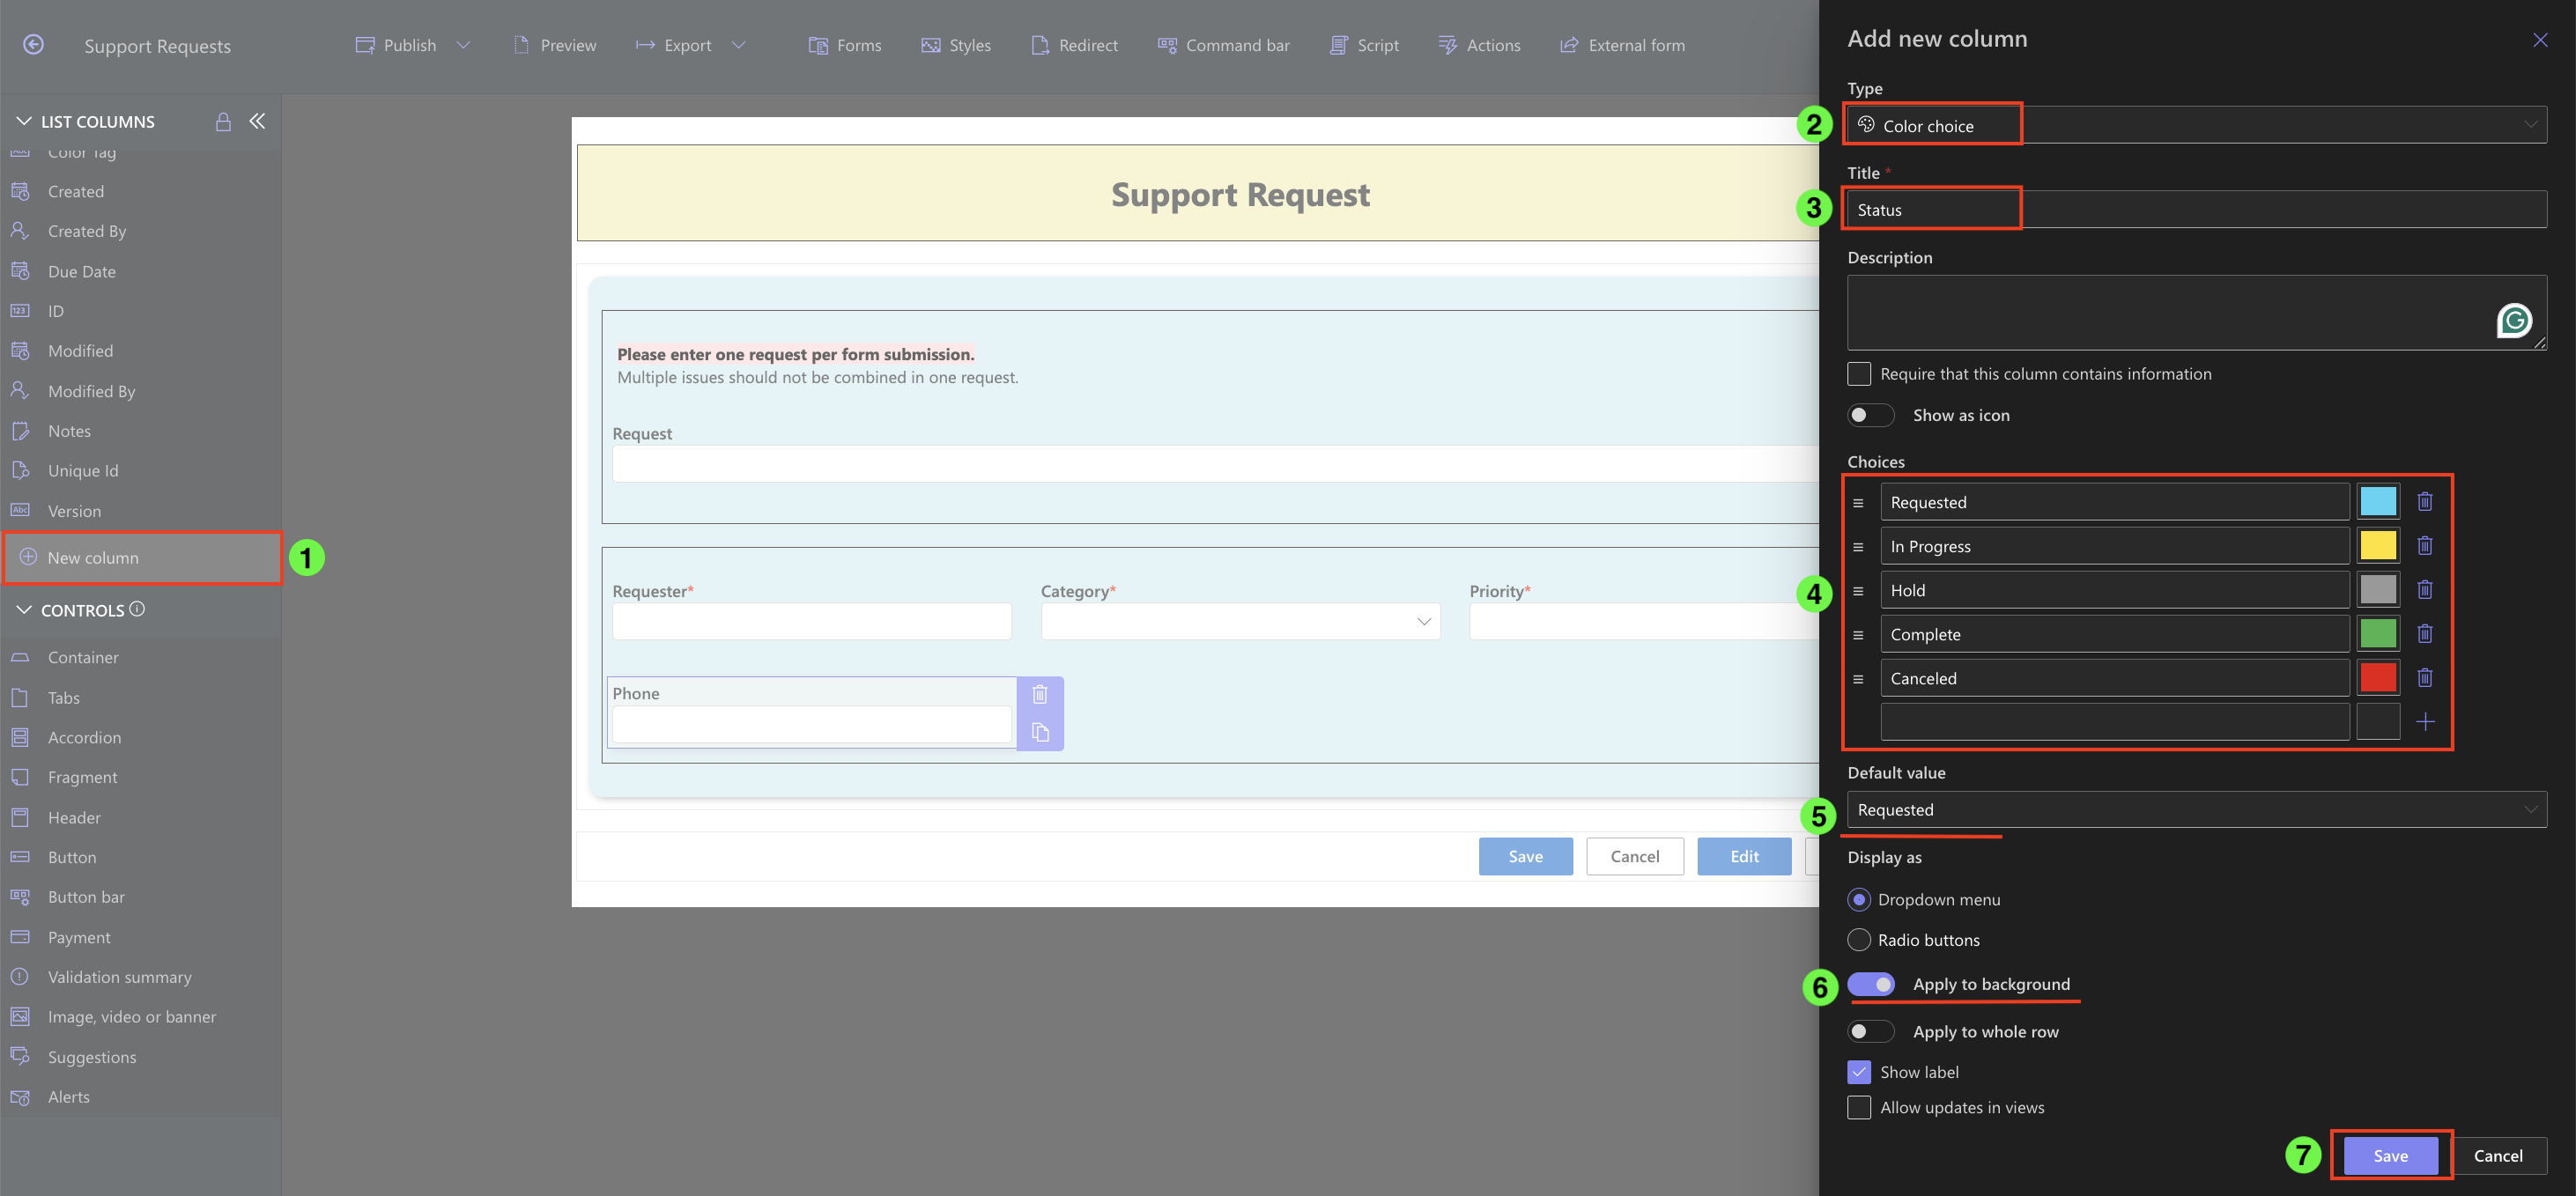
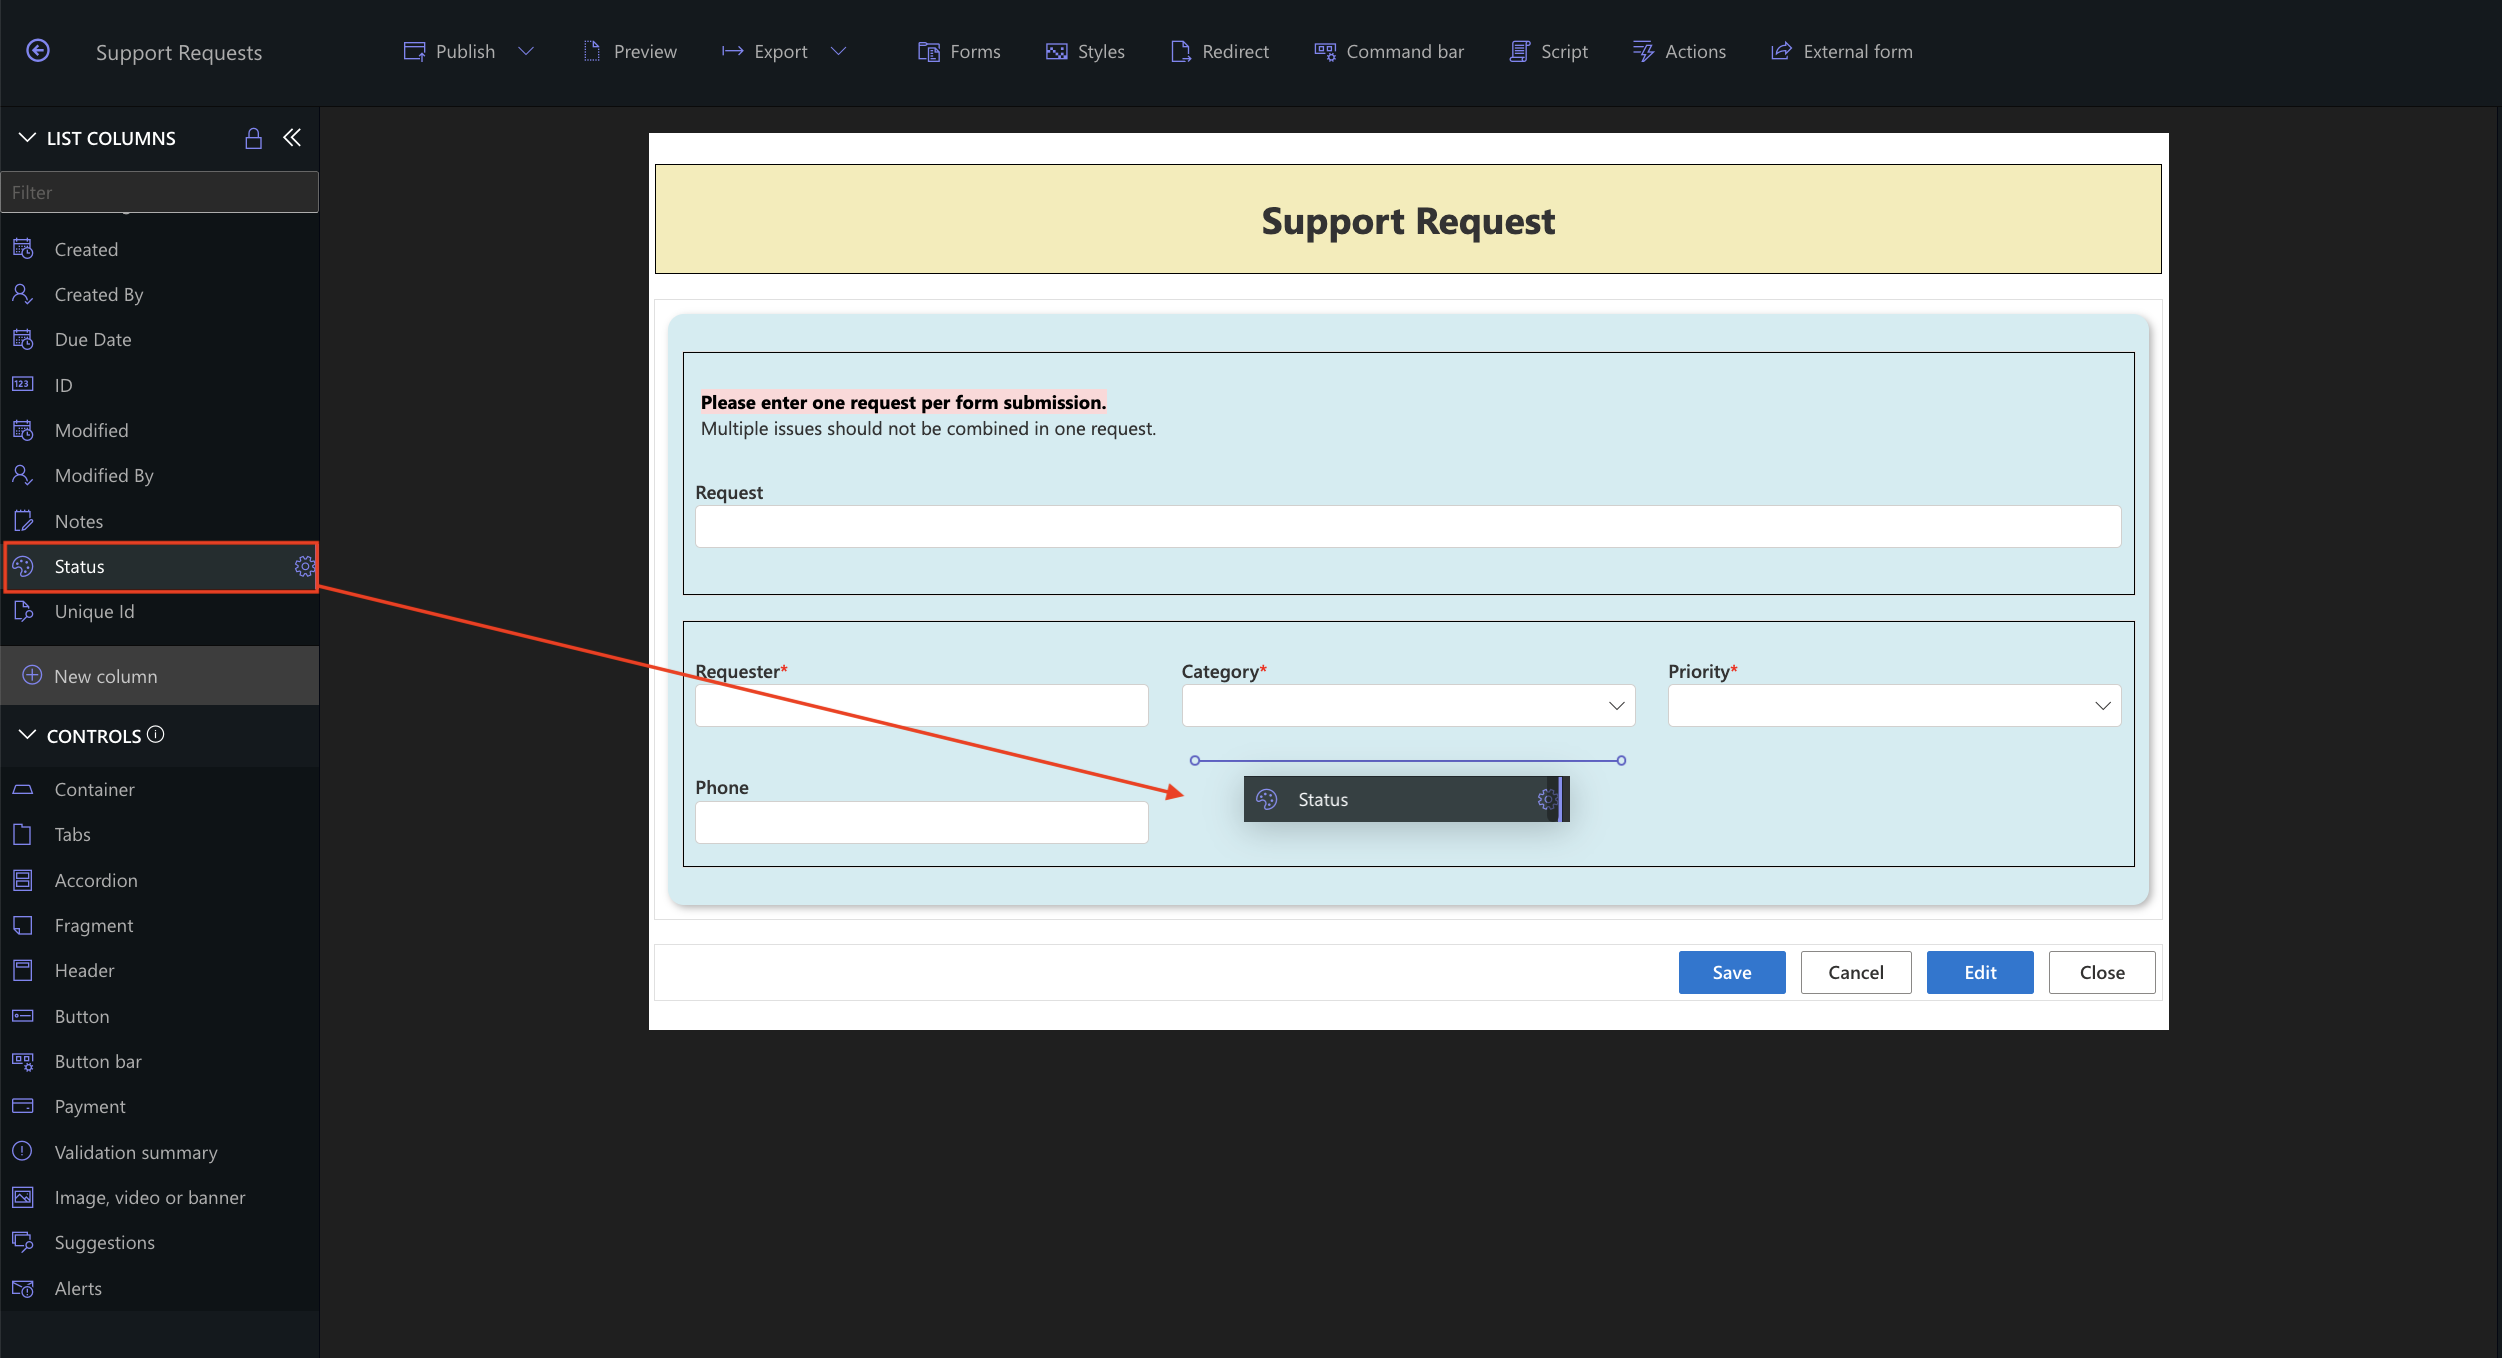
Step 3: Create a Color-Based Status Column
- Click New Column
- Choose Color Choice
- Title: Status
- Enter the following values and assign colors:
- 1 Requested (Default)
- 2 In Progress
- 3 Hold
- 4 Complete
- 5 Canceled
- Set as Required
- Apply style:
- Background coloring
- Disable “apply to whole row”
- Save the column
- Drag the Status column to the canvas
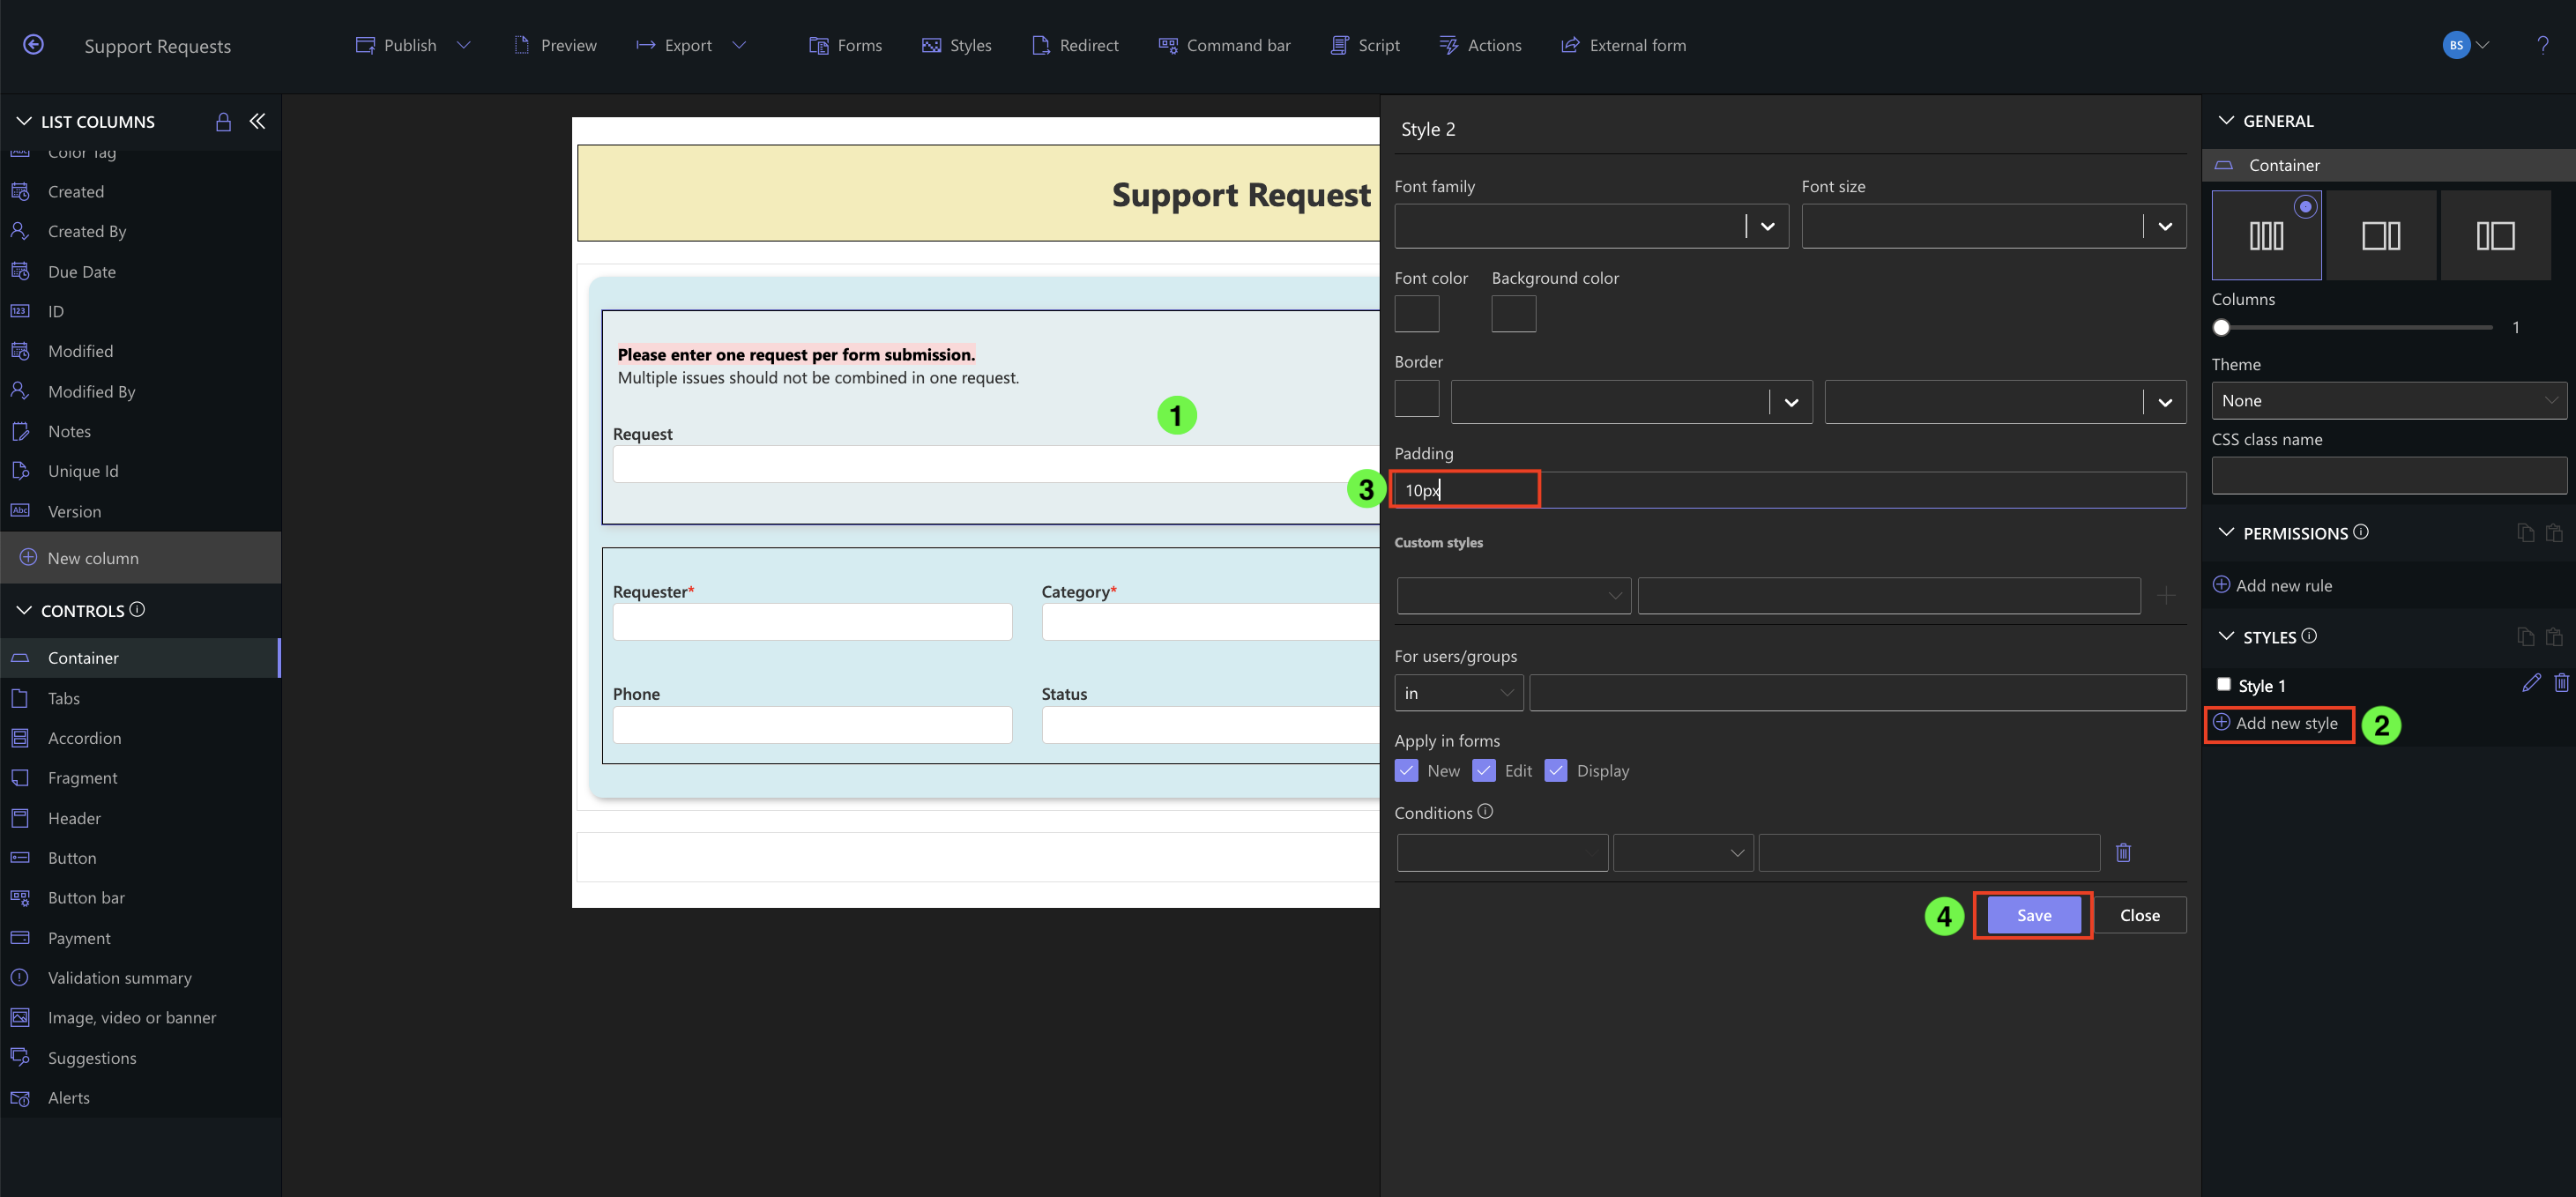
Step 4: Add Padding to Containers
- Select the first container
- Click Add new Style
- Set Padding to 10px
- Save
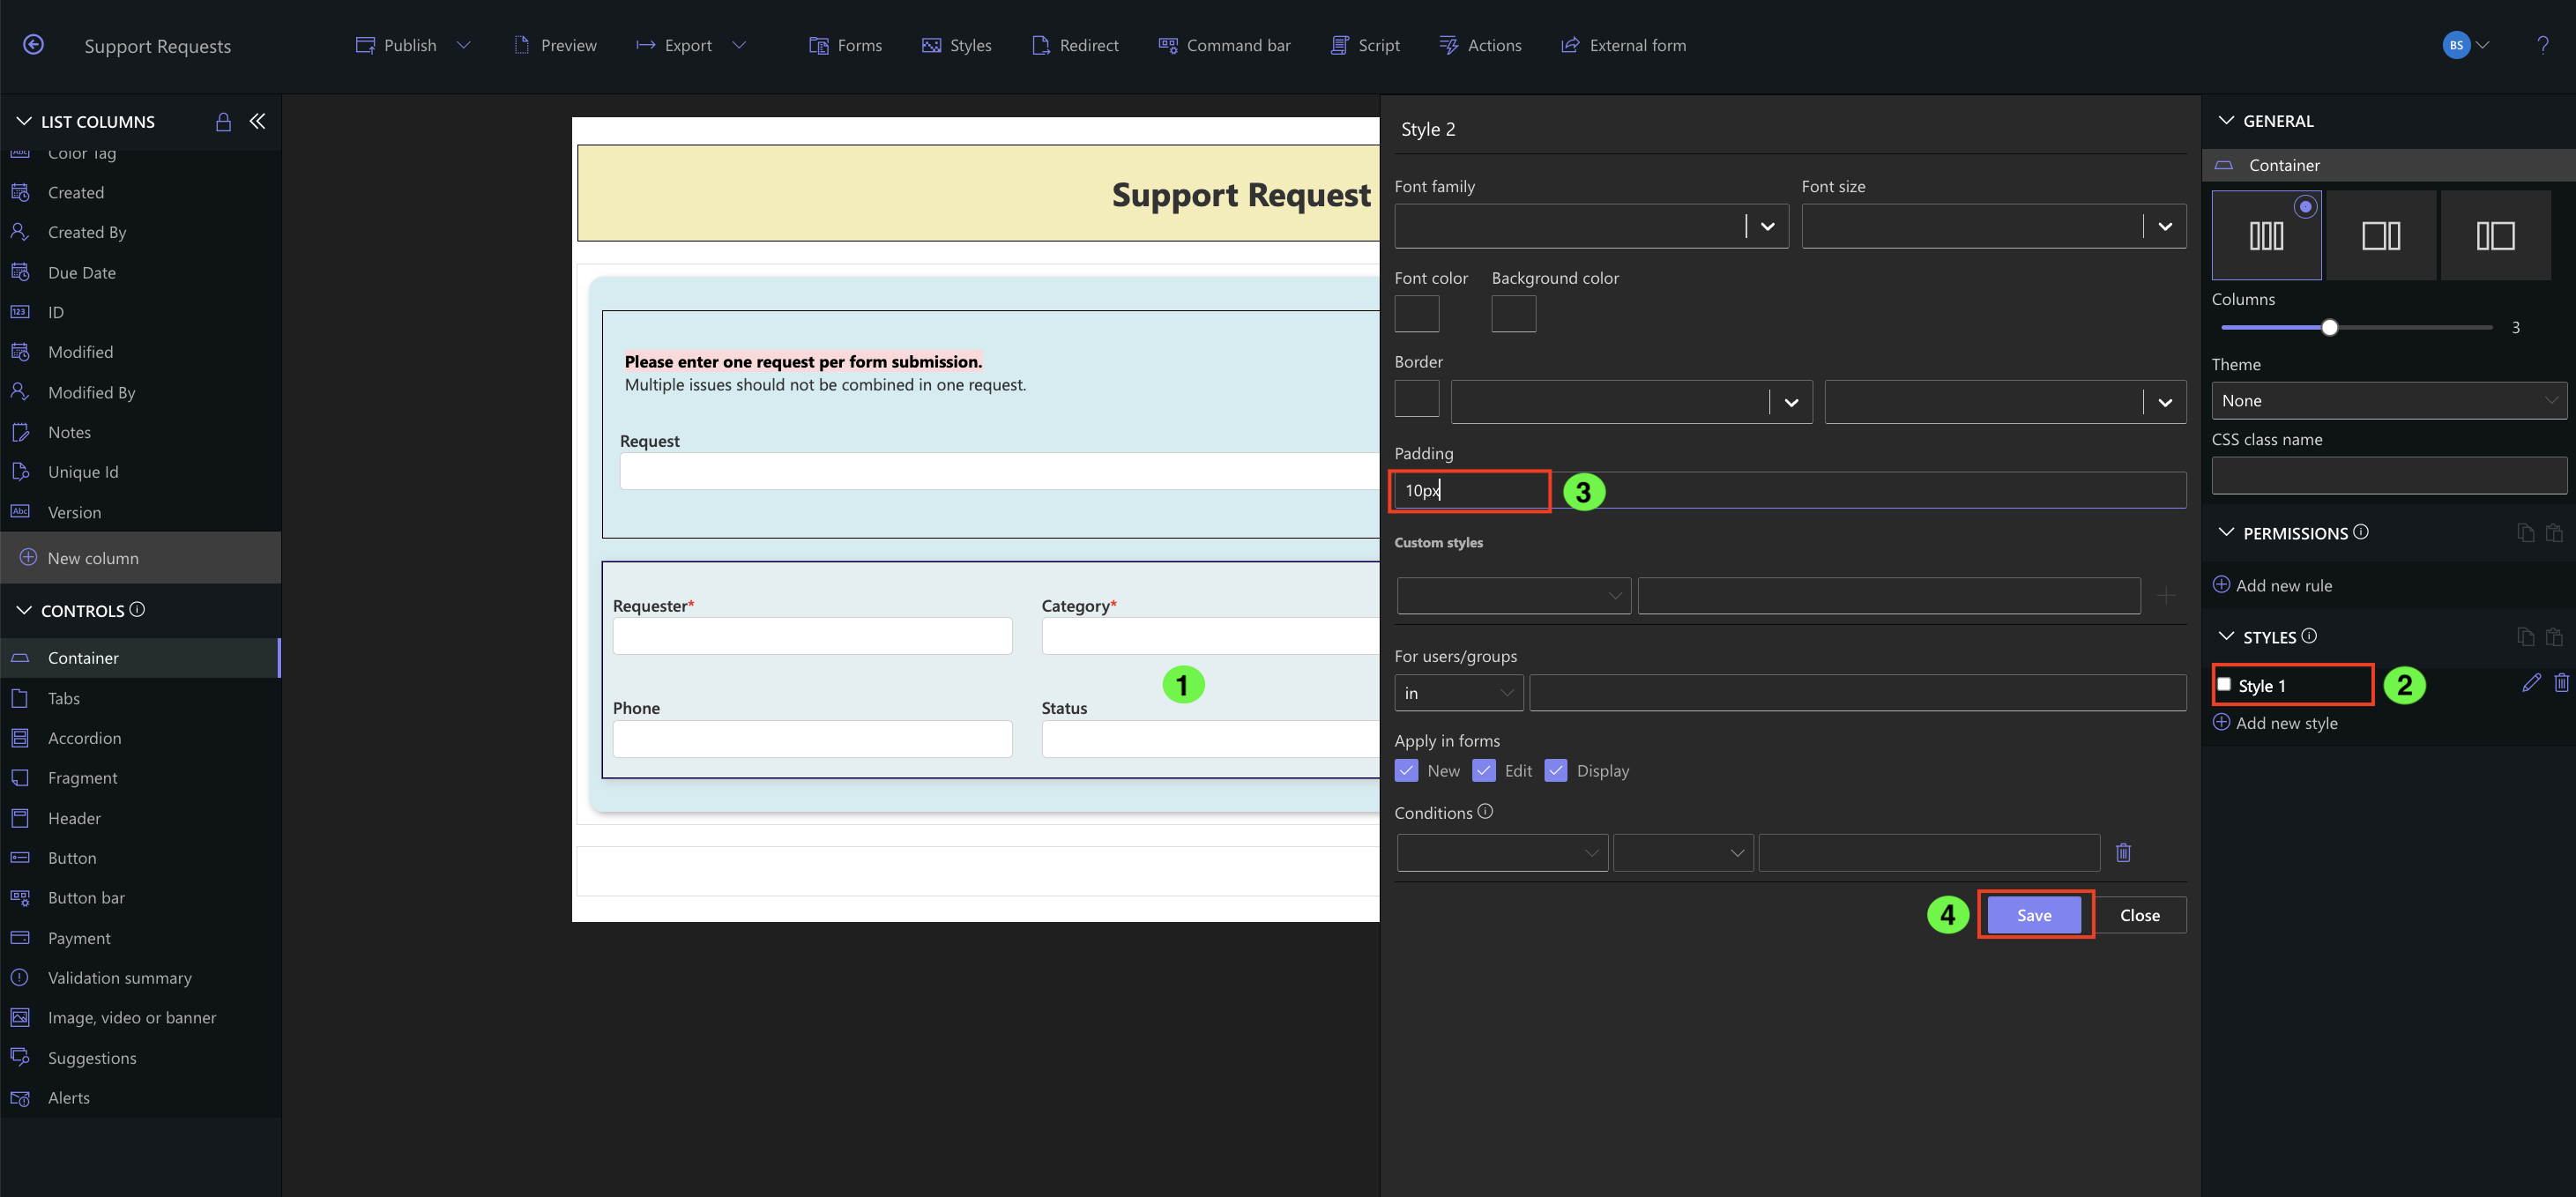
- Select the second container
- Click Add new Style
- Set Padding to 10px
- Save
Step 5: Final Steps
- Click Publish to save your form updates
- Click Support Requests (or your list name) to open the list view and test the form

Real Example: Prioritizing Support Tickets
Imagine you’re building a Help Desk Request form. Users submit support tickets with a priority level and current status. Using the Priority dropdown ensures the support team triages requests appropriately. The Status column allows color-coded tracking as the request progresses. Adding a Phone column ensures direct contact when needed. The layout styling makes the form clean and easy to navigate for users and administrators alike.
Summary
In Part 3, you’ve enhanced the form by adding logic-driven inputs, color-coded status indicators, and thoughtful styling. These elements make forms not only functional but also user-friendly.