When printing data from SharePoint, important context — like who printed it, when, and from which list — is often lost.
With parameters in Ultimate Forms: Print, you can automatically include this information in your header or footer, ensuring every printout is complete and traceable.
In this tutorial, you’ll learn how to add dynamic parameters (tokens) to your Print Template using a task list as an example.
Instructions
Step 1: Open the Print Template
- Go to your Tasks list.
- Click Design → Print and Export in the UltimateForms ribbon.
- Select an existing Print Template or click Add New Template.
- For this tutorial, choose Type → List (we’ll print multiple tasks).
- Select some columns you would like to include in your template or set Use columns defined in view.

Step 2: Add Parameters to the Header or Footer
- Open the Display tab of your Print Template.
- Locate the Header and Footer sections — these support both rich text and HTML.
- Paste any of the following parameters where you want them to appear:
- [[Me]] – name of the user performing printing
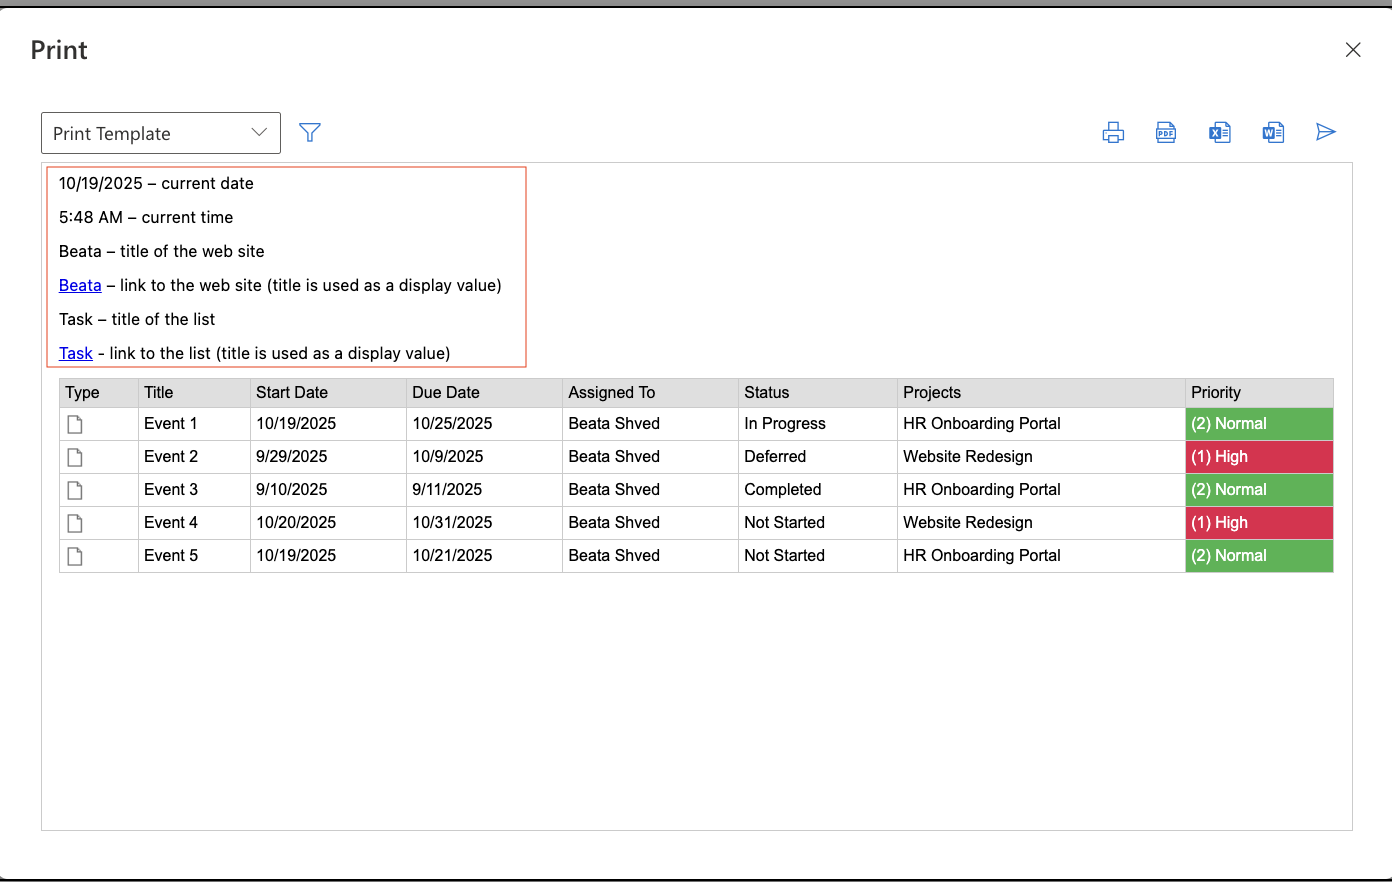
- [[Today]] – current date
- [[Now]] – current time
- [[WebTitle]] – title of the web site
- [[WebLink]] – link to the web site (title is used as a display value)
- [[ListTitle]] – title of the list
- [[ListLink]] - link to the list (title is used as a display value)
- [[ItemTitle]] – title of the item (can only be used in item templates)
- [[ItemLink]] – link to the item (title is used as a display value, can only be used in item templates)
- Click Save.

💡 Note: [[ItemTitle]] and [[ItemLink]] only work in Item-type templates, not List-type ones.
Step 3: Preview the Result
- Return to your Tasks list.
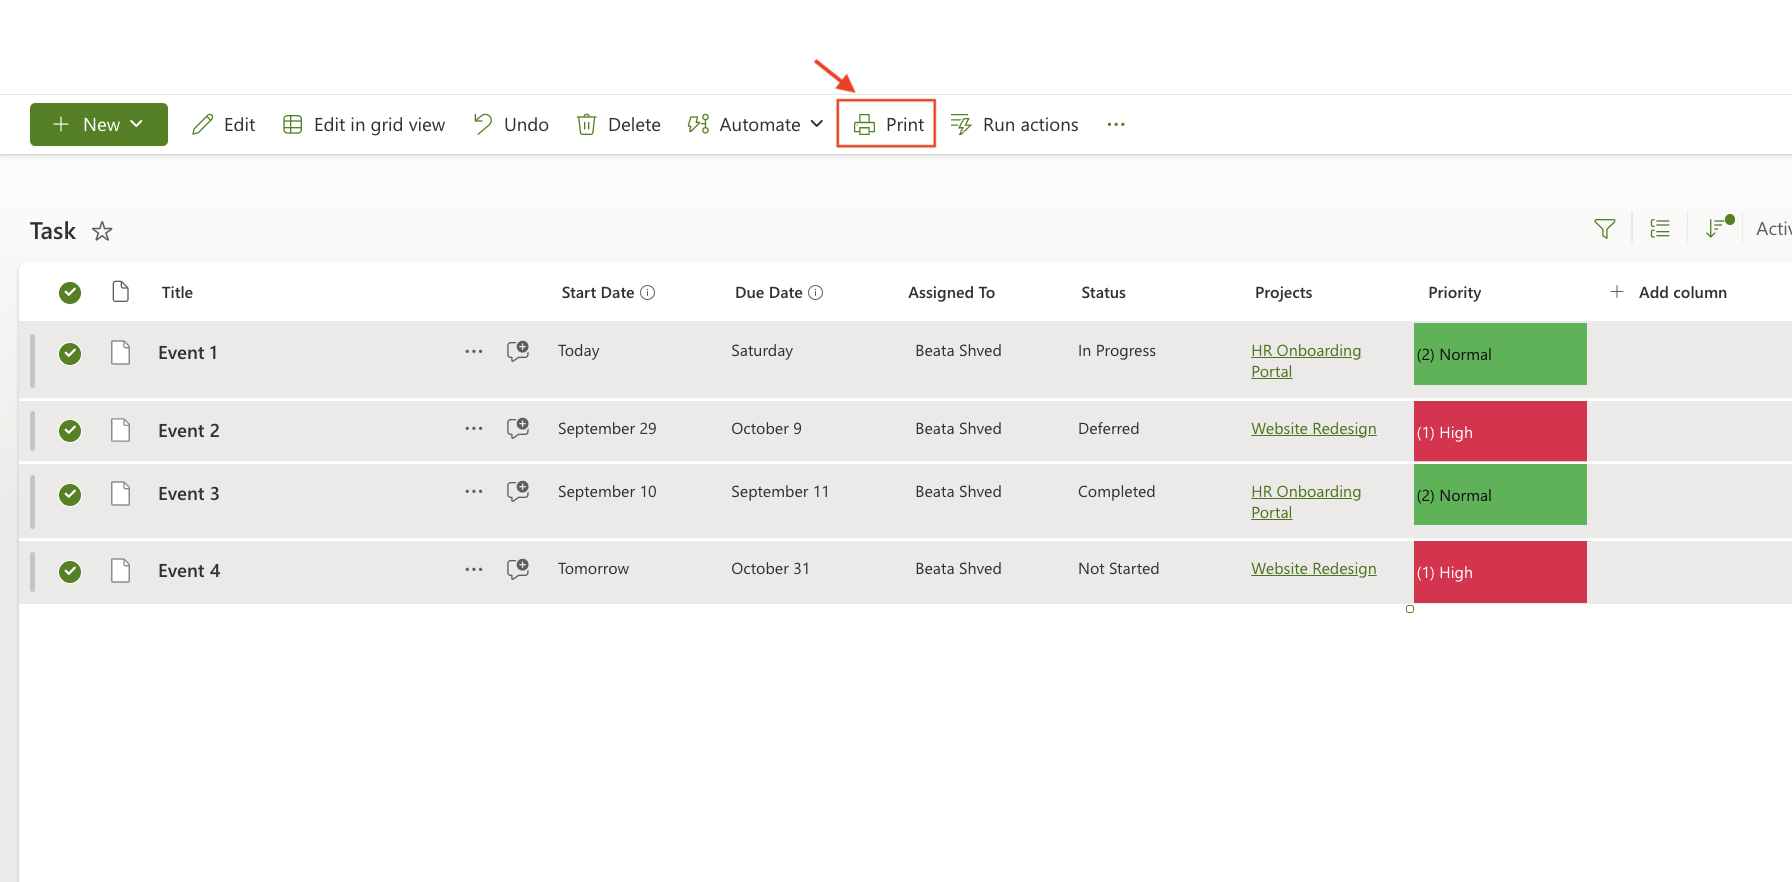
- Select items → click Print → choose your template.

- A preview window will open showing your parameters resolved into real values.

Summary
Keeping track of key details — such as when a document was printed, who printed it, and what the data source was — provides valuable context for every report or record.
With Infowise Ultimate Forms, this information can be automatically included in your printouts using simple parameters, ensuring every document is complete, traceable, and professional.