The Delete Items action in Ultimate Forms allows you to automatically delete list items or documents from SharePoint based on triggers and conditions. It's ideal for automating data cleanup, archiving workflows, or removing related child records when a parent item is deleted.
Thanks to the visual condition builder and trigger controls, this powerful action lets you keep your lists organized without manual cleanup—just be sure to test carefully.
Instructions
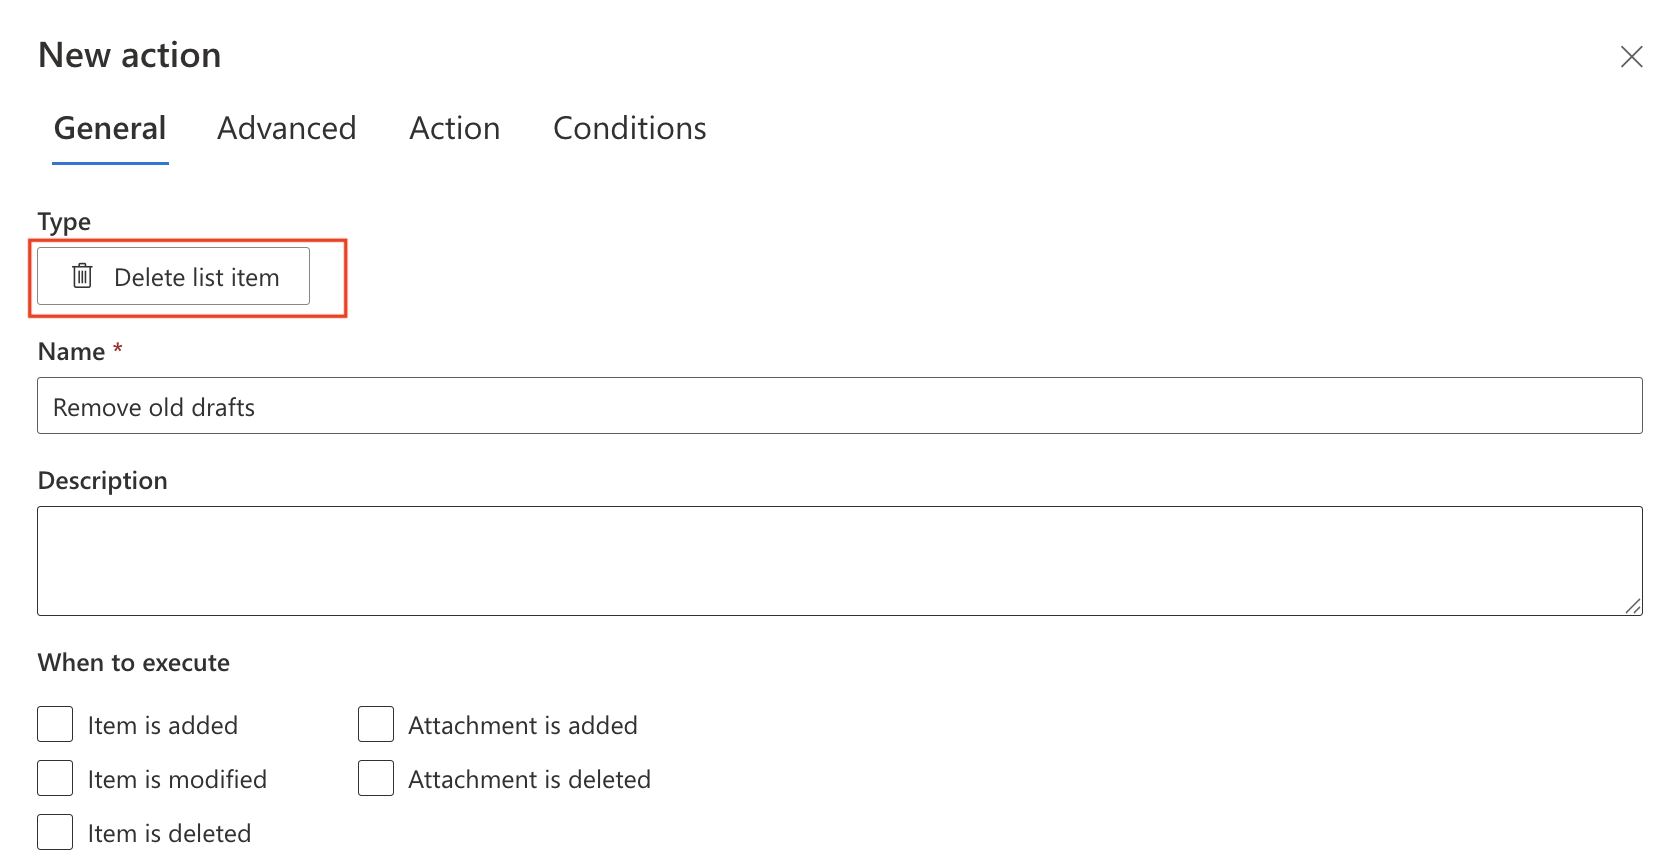
Step 1: Open the Actions Interface
- Go to your list or library.
- Open Ultimate Forms Design → Actions.
- Click New Action.
- Choose Delete List Item as the action type.
- Name your action, e.g., "Remove old drafts".
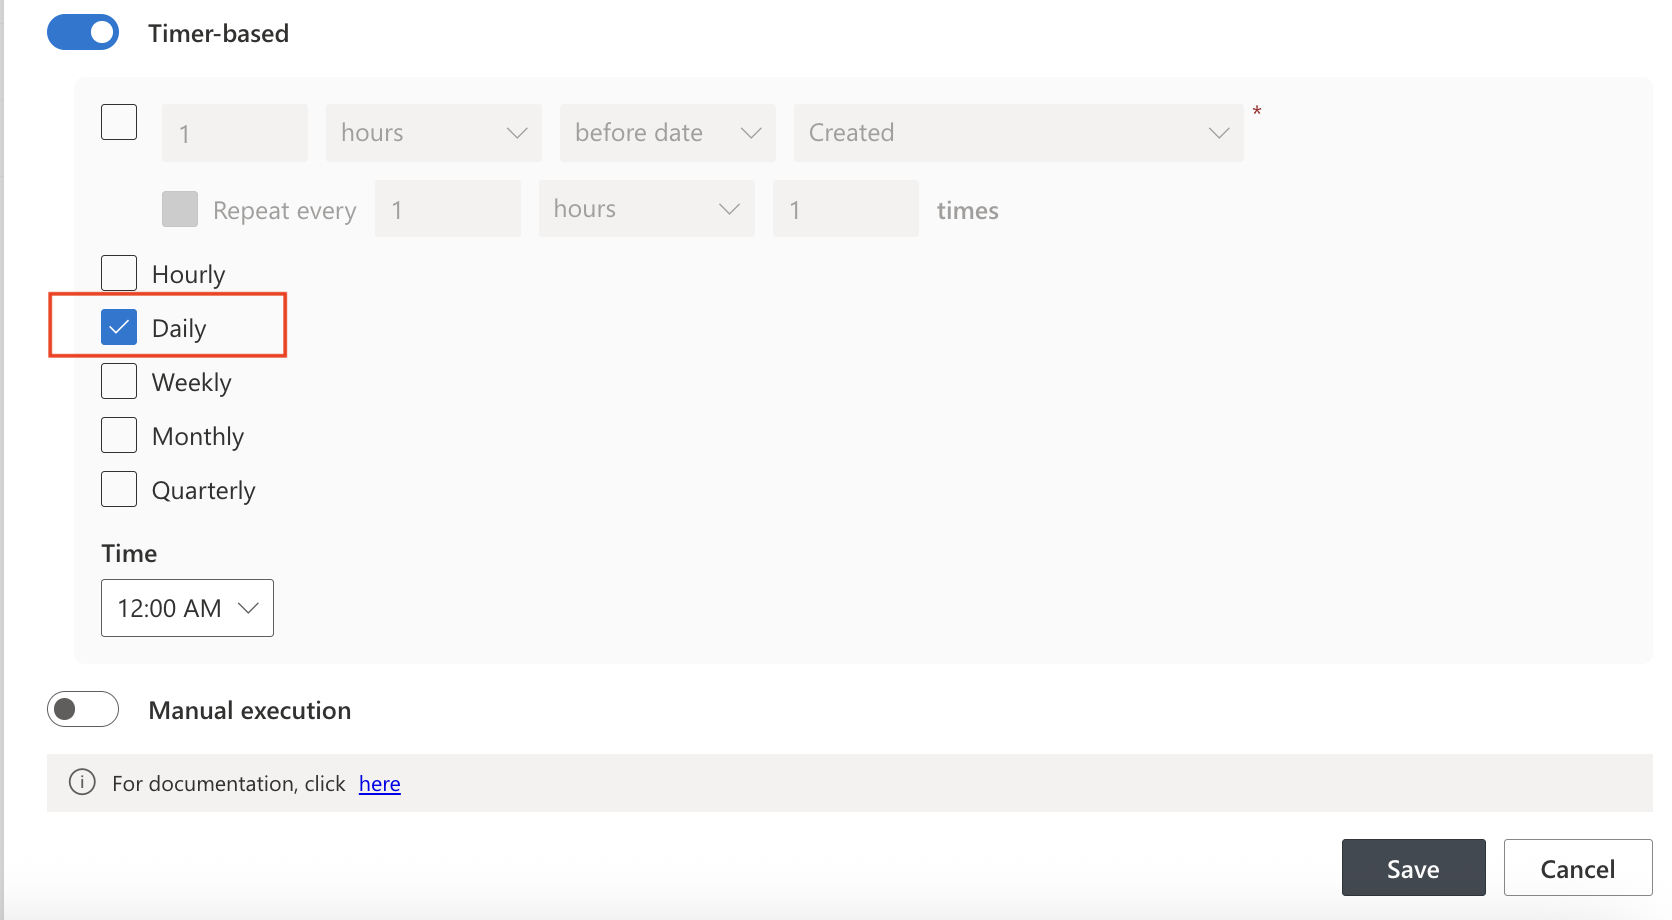
Step 2: Define Trigger
Choose when the deletion should happen:
- On item creation
- On item update
- On item deletion
- Manual execution
- On a schedule (timer-based)
Example: Run daily to clean up items older than 30 days.
Step 3: Select Target List
- Source: By default, this action applies to the current list item only. You will see the message: “The action applies to current item only.” This means you don’t need to configure the Source section unless you want to manually specify a different source.
- If needed, click Change to override the source.
- You can delete items from the current list or any other list in the site.


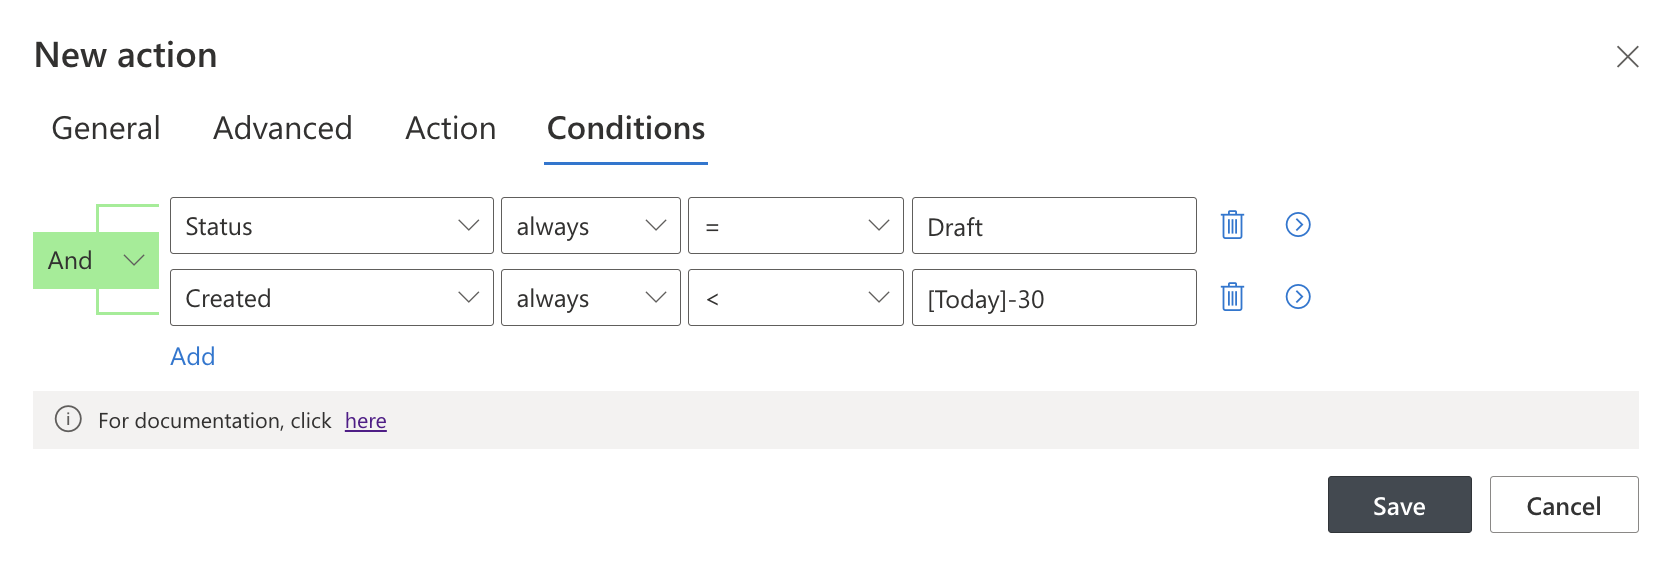
Step 4: Configure Conditions
- Use the modern visual condition tree to define exactly which items to delete.
Example: Delete items that are Draft and older than 30 days:
AND group
├── [Status] = Draft
└── [Created] < Today - 30
This ensures only the intended items are deleted.
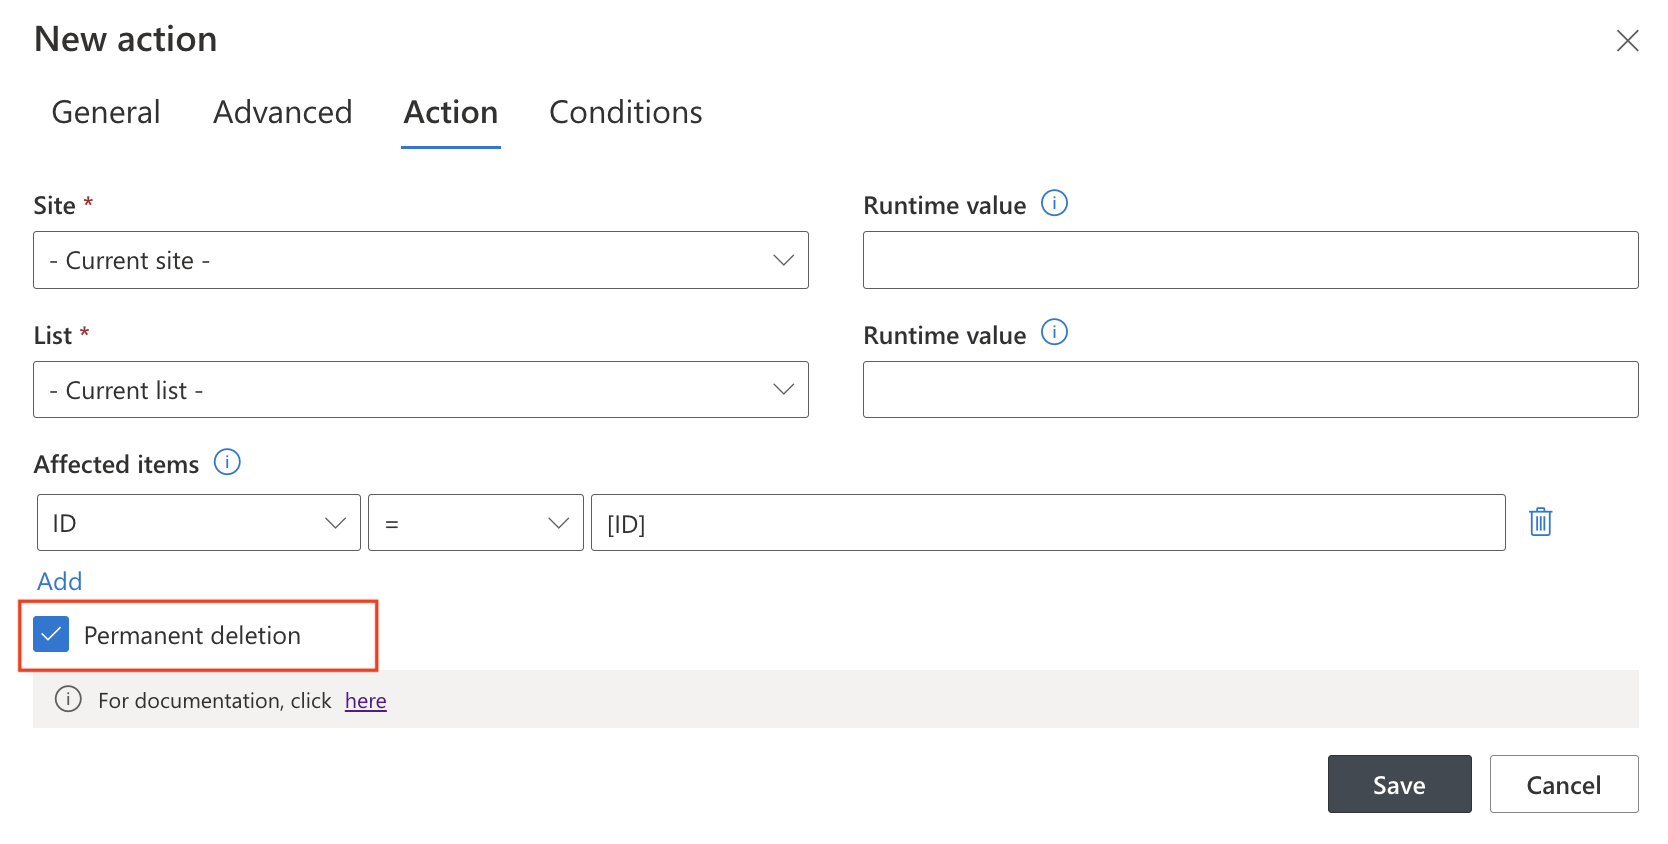
Step 5: Choose Deletion Type
At the bottom of the action configuration, you’ll find the checkbox:
- Delete permanently — if checked, items are deleted without going to the Recycle Bin (cannot be restored).
- If unchecked (default), deleted items will go to the Recycle Bin, from where they can be recovered if needed.
Recommendation: Leave this option unchecked during testing and in most use cases unless compliance requires permanent deletion.
Step 6: Save and Test
- Click Save to finish configuring the action.
- Test the action in a safe list or with test data.
- Check whether only the expected items are removed.
- If not set to permanent delete, confirm the items appear in the Recycle Bin.
Watch this quick video walkthrough from Infowise:
Tips & Best Practices
- Use clear, strict conditions to avoid unintended deletions.
- Test in a development list first—use test records and check Action History.
- For safety, combine Copy List Item (to archive) before Delete using an Action Group.
- Use Timer-triggered actions for periodic cleanup (e.g., delete old logs weekly).
- Use Action History to verify which items were deleted and when.
Related Tutorials
- Copy List Item Action – for archiving before deletion
- AND/OR Conditions – learn how to set up logic trees
- Action Groups – combine multiple actions for safety and flexibility
Summary
The Delete Items action helps automate routine cleanup tasks by removing items based on flexible logic and conditions. With the new visual interface, you can confidently control what gets deleted, when, and how—whether you're managing draft records, outdated data, or child items related to a deleted parent.
To ensure safety, always test with non-critical data, enable Recycle Bin recovery when appropriate, and monitor your action history. When used responsibly, this action keeps your SharePoint environments clean and efficient—without any coding.