In this lesson, we’ll expand your support form by adding a checkbox that allows internal team members to choose whether to send an email update when responding to a support request. This small but powerful addition gives you more control over notifications and makes your process smarter.
This is another step in building a real-life help desk solution with Infowise Ultimate Forms on SharePoint.
Make sure you’ve completed Part 6 before starting this part.
Instructions
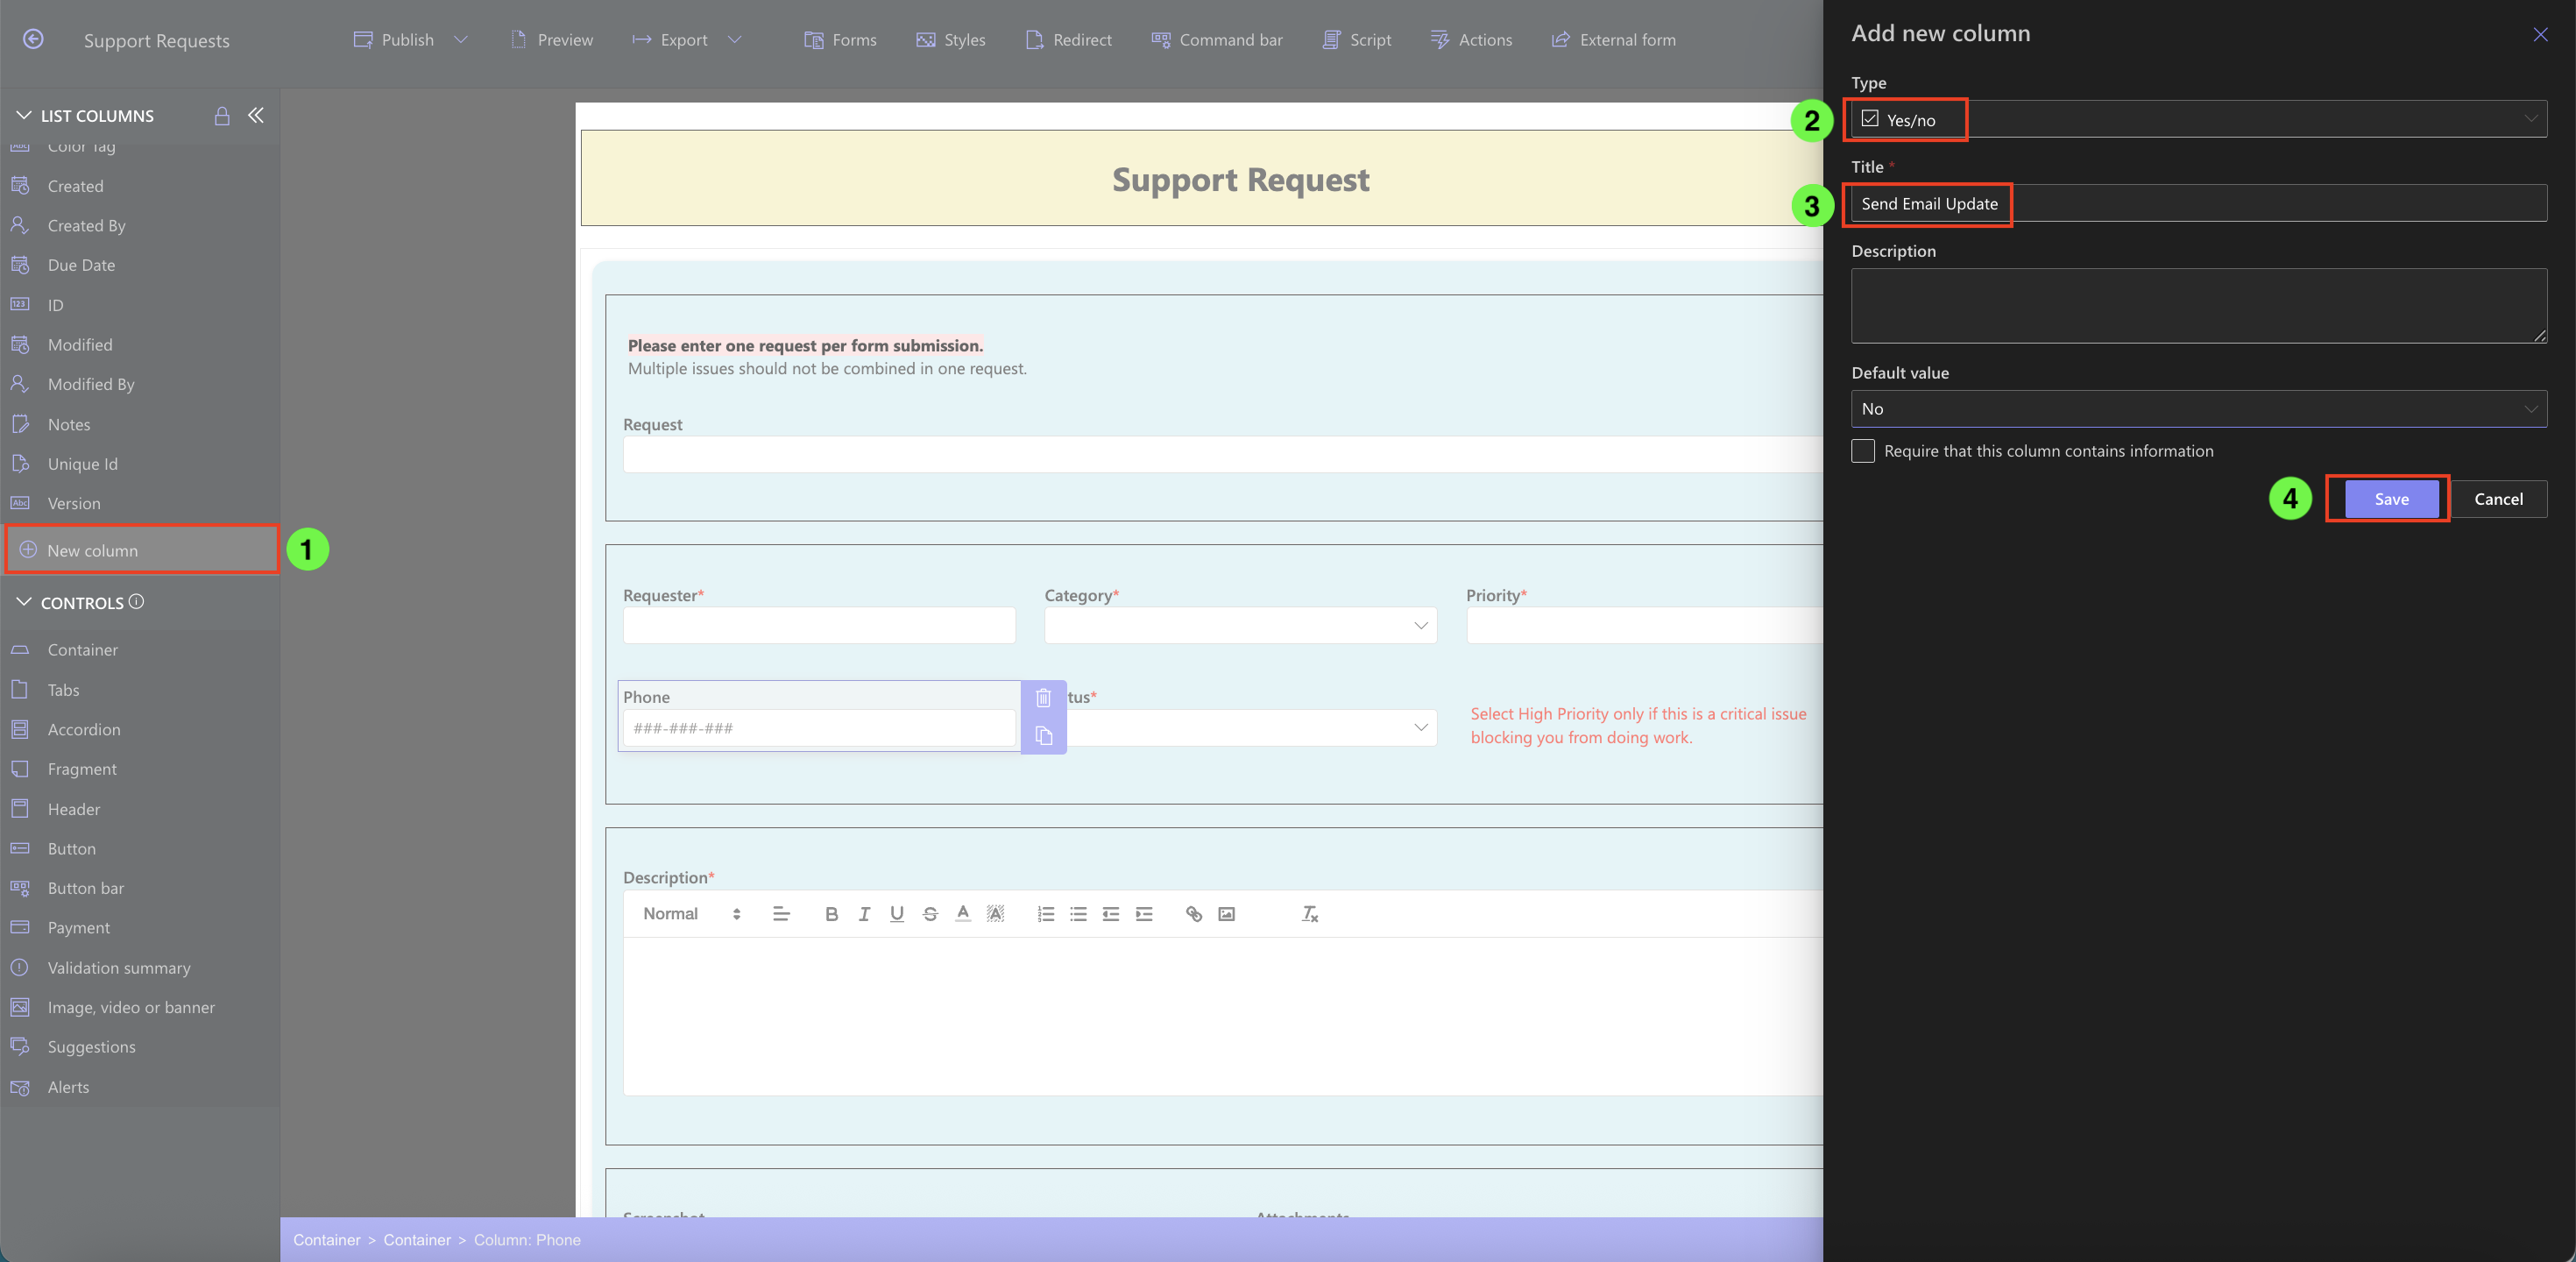
Step 1: Add a New Column
- Click New Column
- Select column type: Yes/No
- Title: Send Email Update
- Click Save
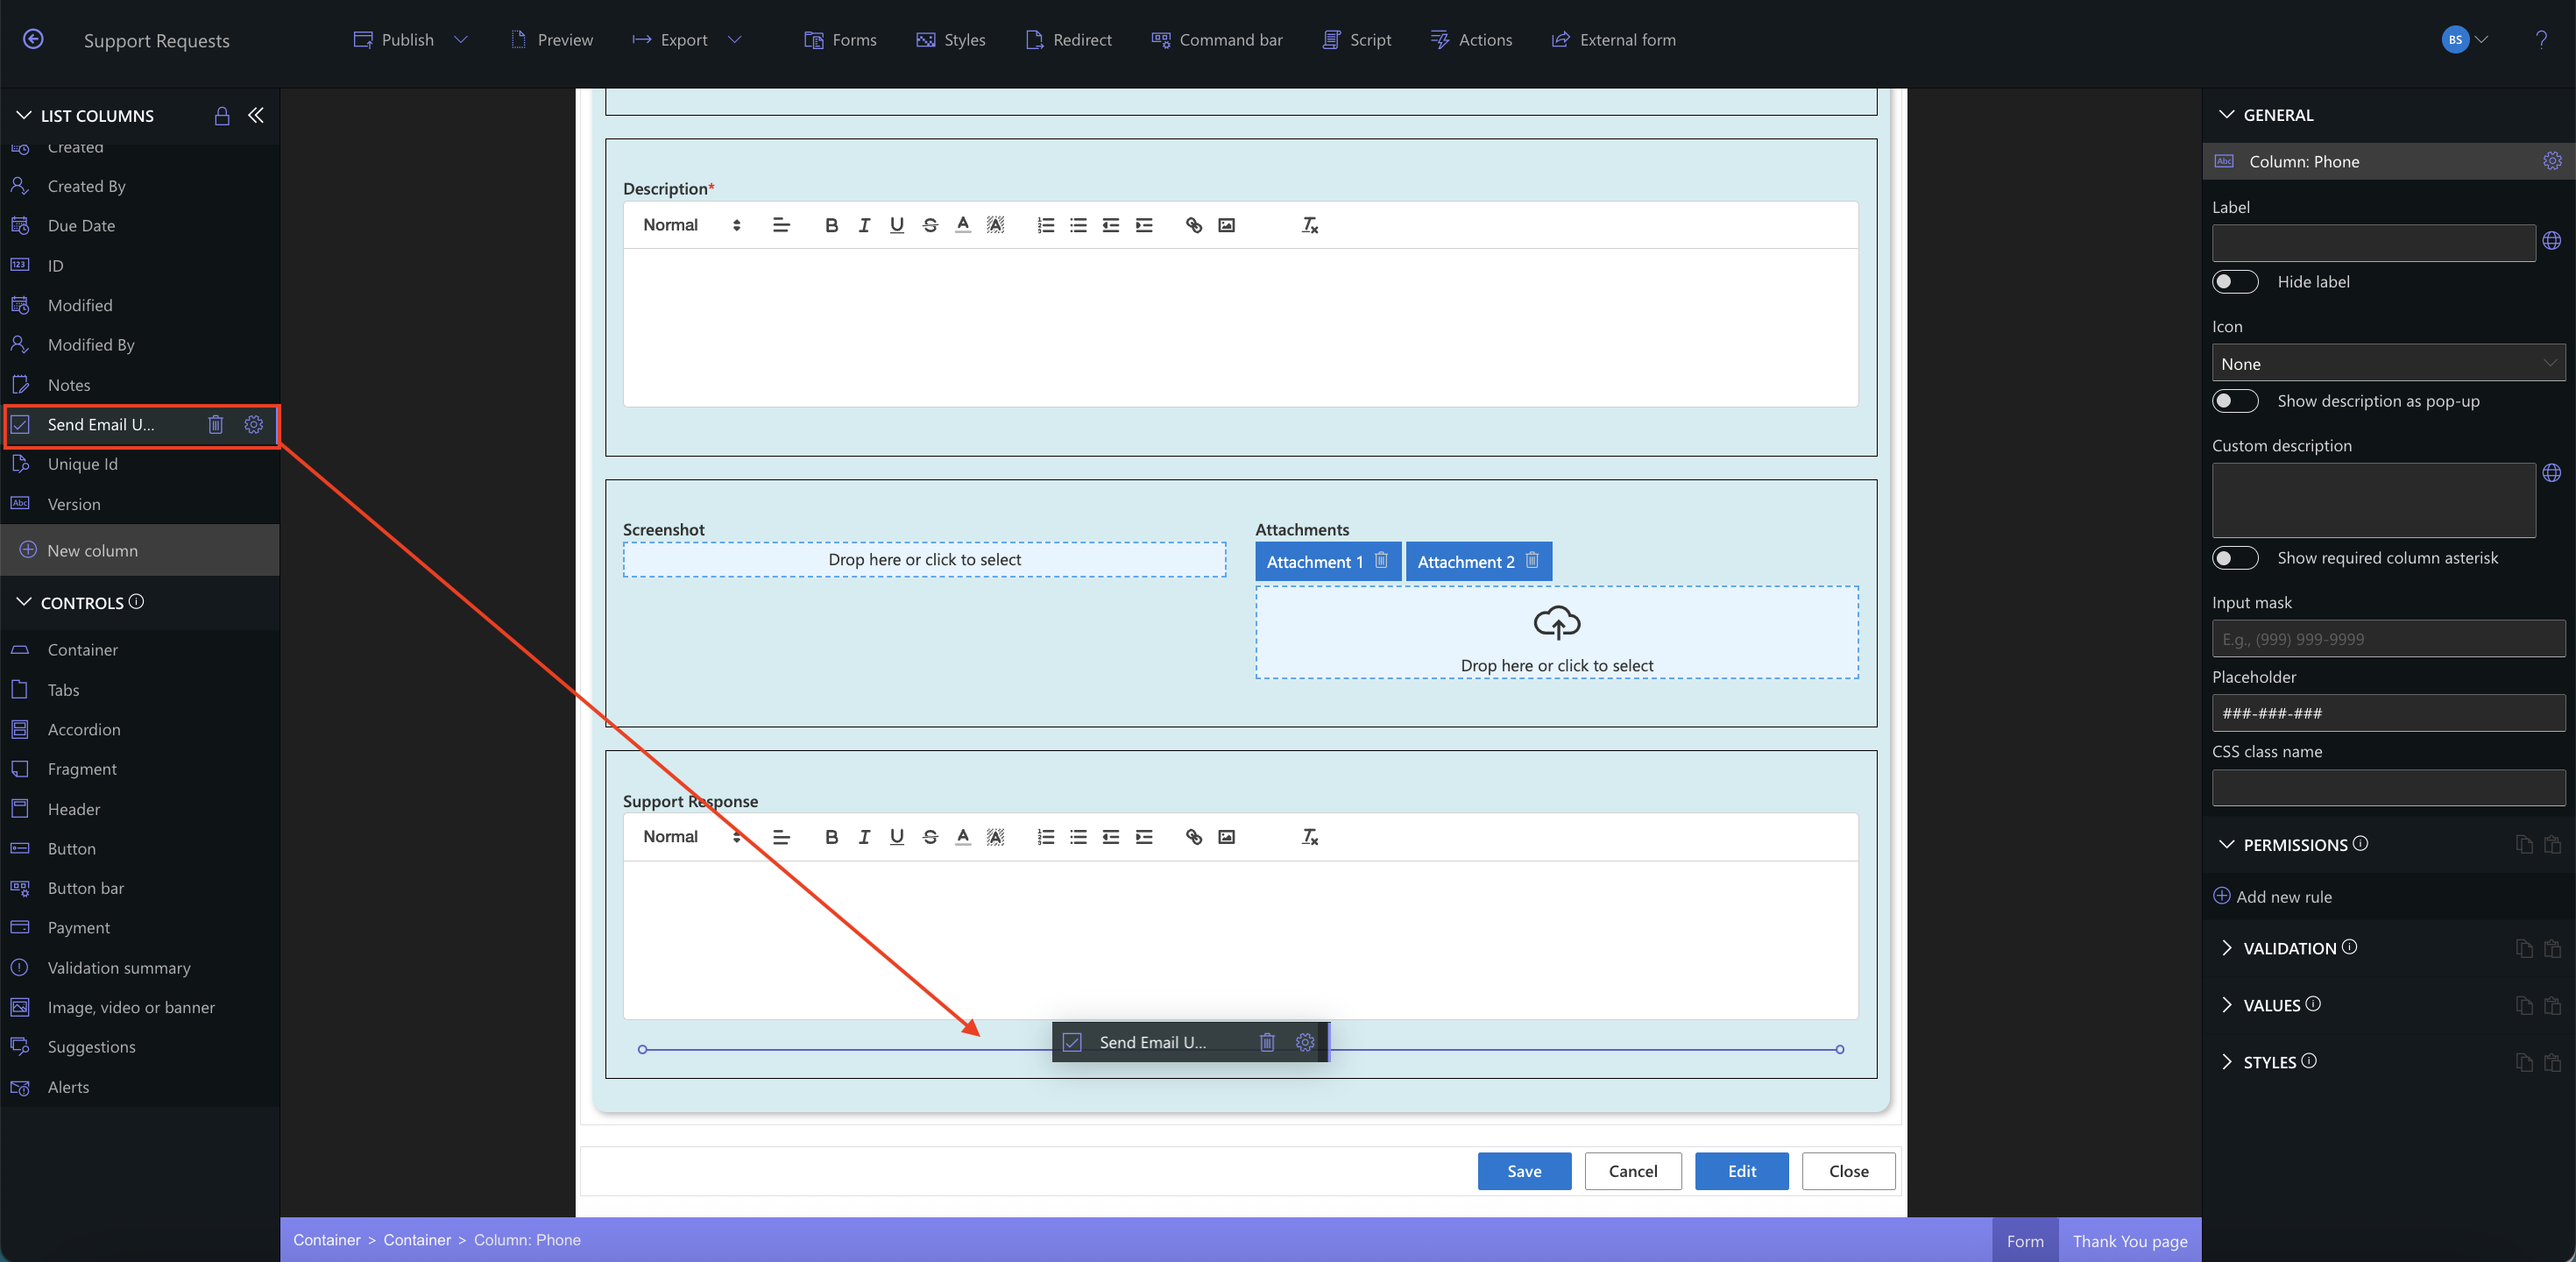
Step 2: Place the Column on the Form
- Drag the Send Email Update column right below the Support Response column in your form layout
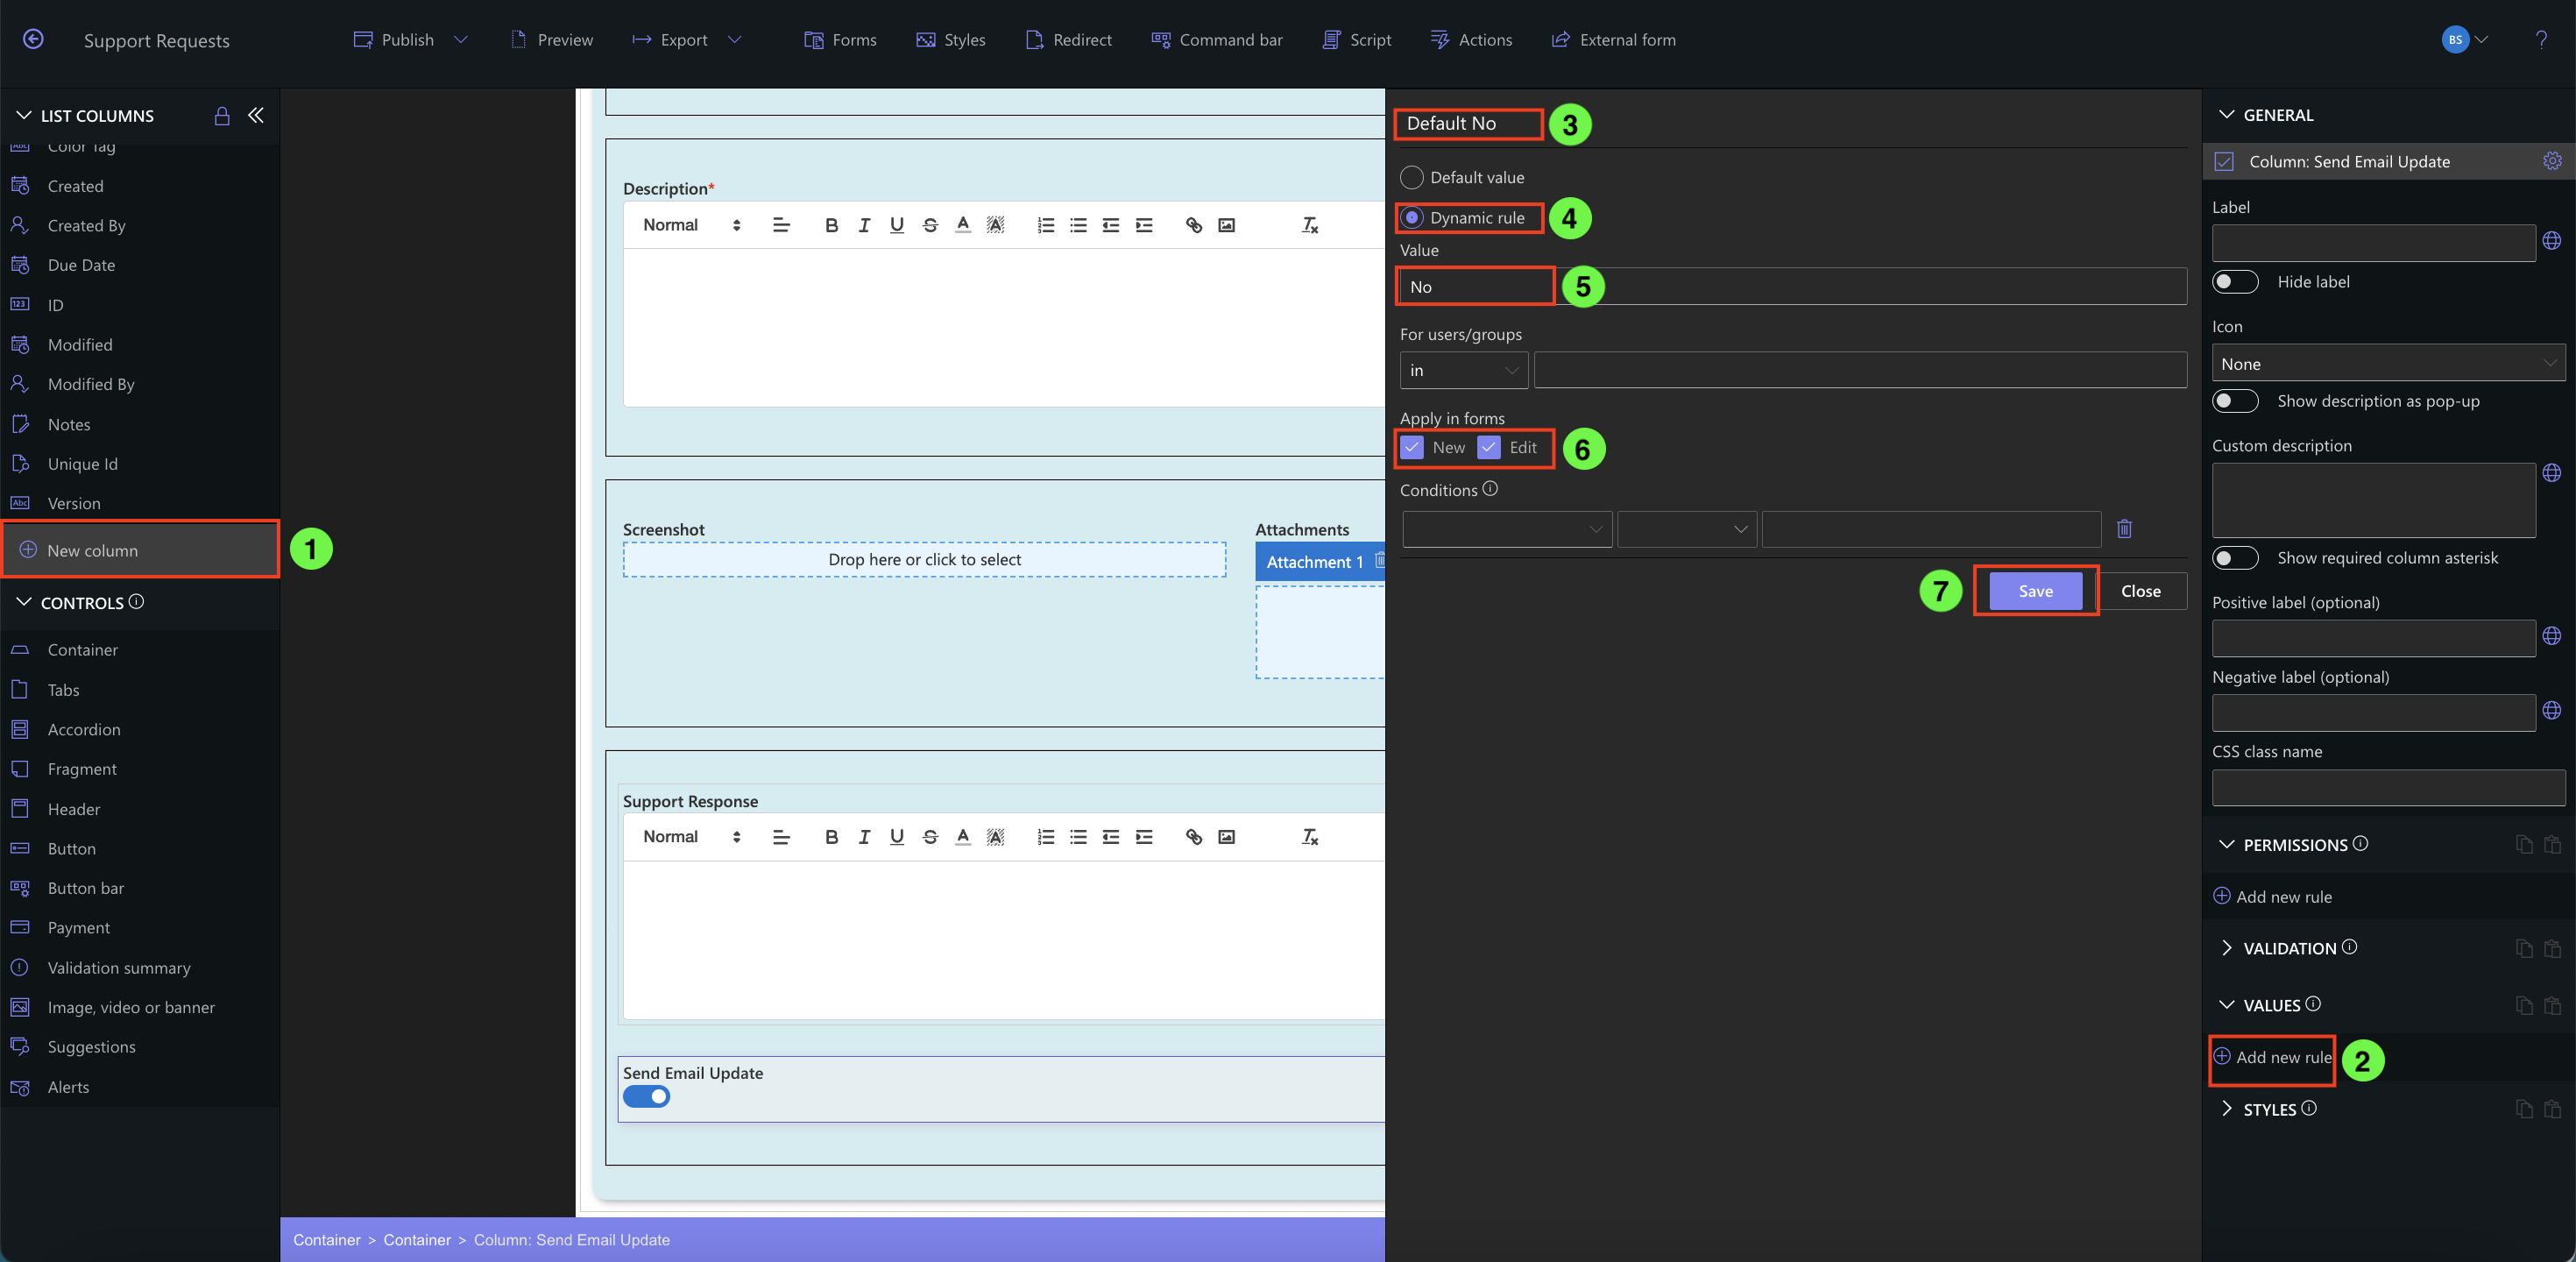
Step 3: Set a Default Value Rule
- Select the Send Email Update column
- Under Values, click Add new rule
- Rule name: Default No
- Type: Dynamic rule
- Value: No
- Apply rule to: New and Edit
- Click Save
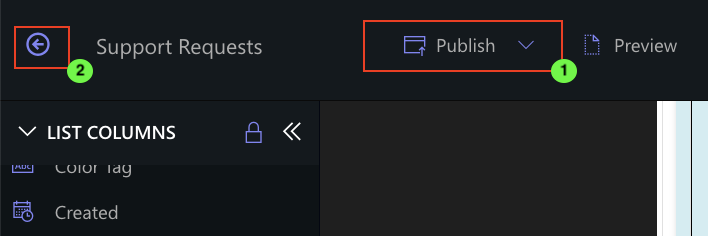
Step 4: Publish and Return to List
- Click Publish to save your changes
- After publishing, click the back arrow
Real Example: Add Control to Notifications
Let’s say your support team handles dozens of requests per day. In some cases, they might want to send an email update after writing a response—but not always. By adding the Send Email Update checkbox, you empower the team to control notifications without needing to manually remove or edit email alerts.
Later, you can use this column as a condition in an alerts so updates are only sent when this box is checked.
Summary
In this step, you’ve added a user-controlled switch to determine whether an email update should be sent after submitting a support response. This type of control improves the flexibility of your form and lays the groundwork for advanced workflows powered by Ultimate Forms: Actions and Ultimate Forms: Alerts.