In this part of our continuing form-building series using Infowise Ultimate Forms, we’ll move from structure to testing and begin enhancing the form with rich text input. You’ll learn how to insert a Multiple lines of text column using the rich text editor and test your form with live data. These are essential steps to make sure your layout works in real usage and supports proper data input.
Make sure you've completed Part 1, Part 2, and Part 3 before starting here.
Instructions
Step 1: Test Your Form with Dummy Data
- Go to your SharePoint list (e.g., Support Requests)
- Click the New button
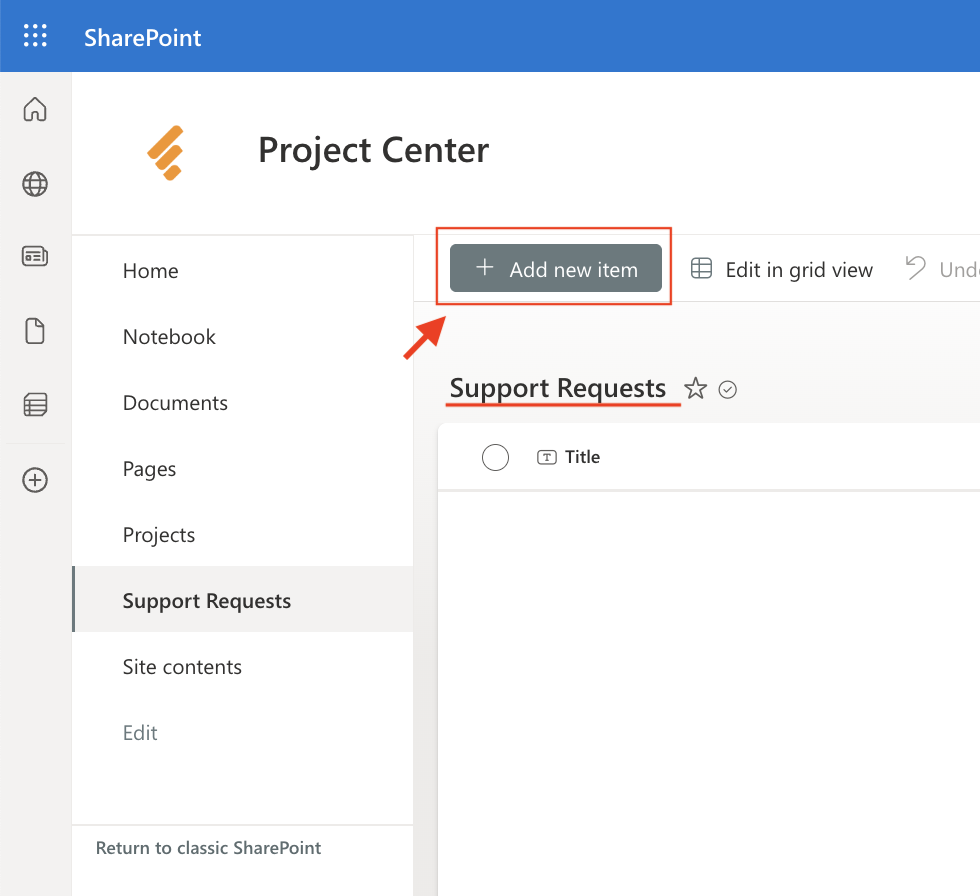
- Fill out the form with test data
- Click Save to submit the entry
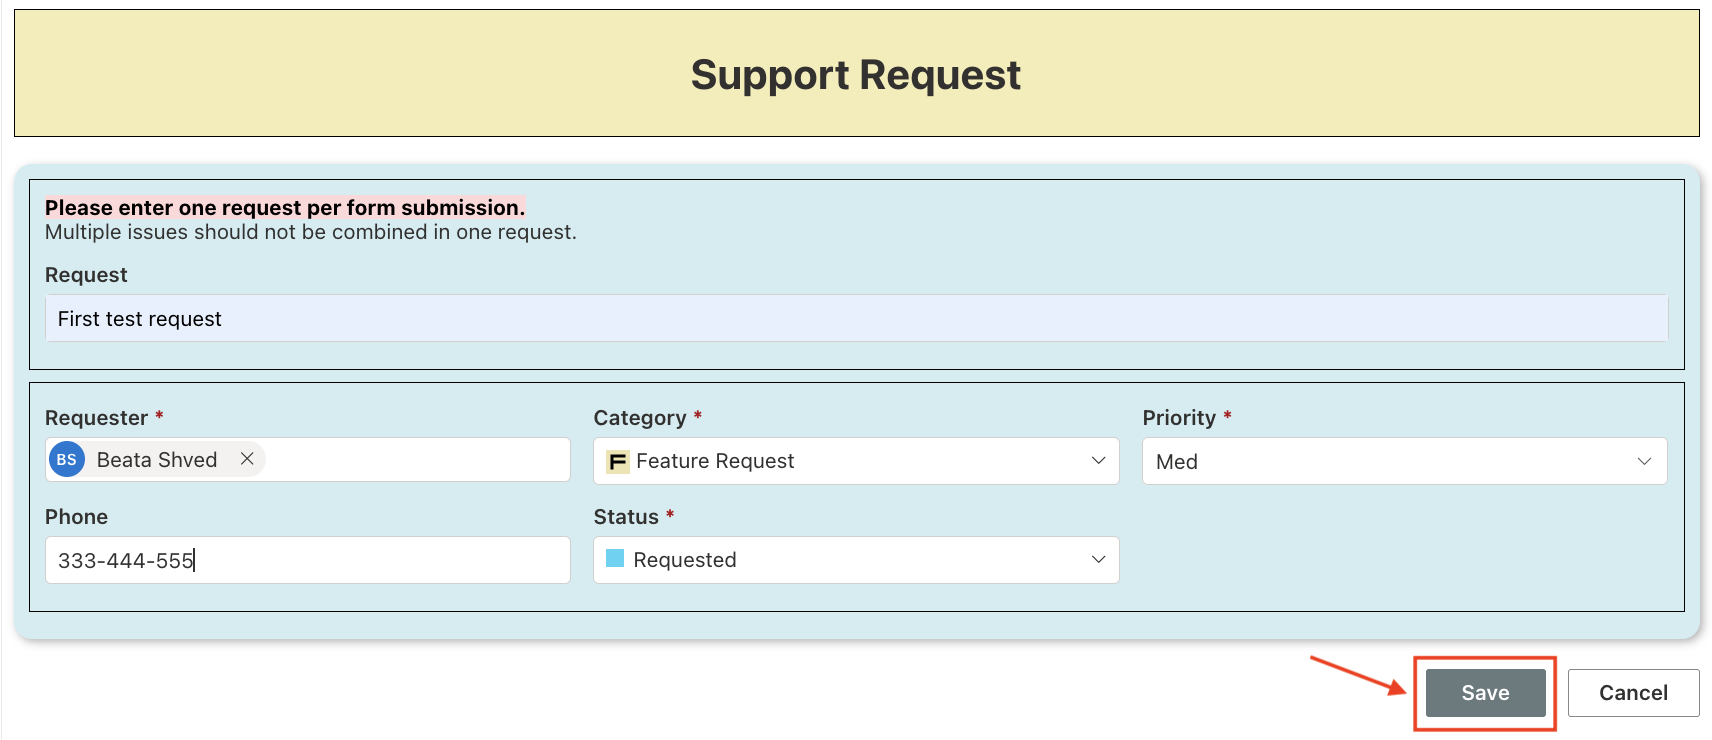
This step helps you see how your form behaves in action and how information is saved.
Step 2: Add a New Description Column
- Return to Form Designer
- Scroll to the bottom container on your form
- Click Copy to duplicate the container
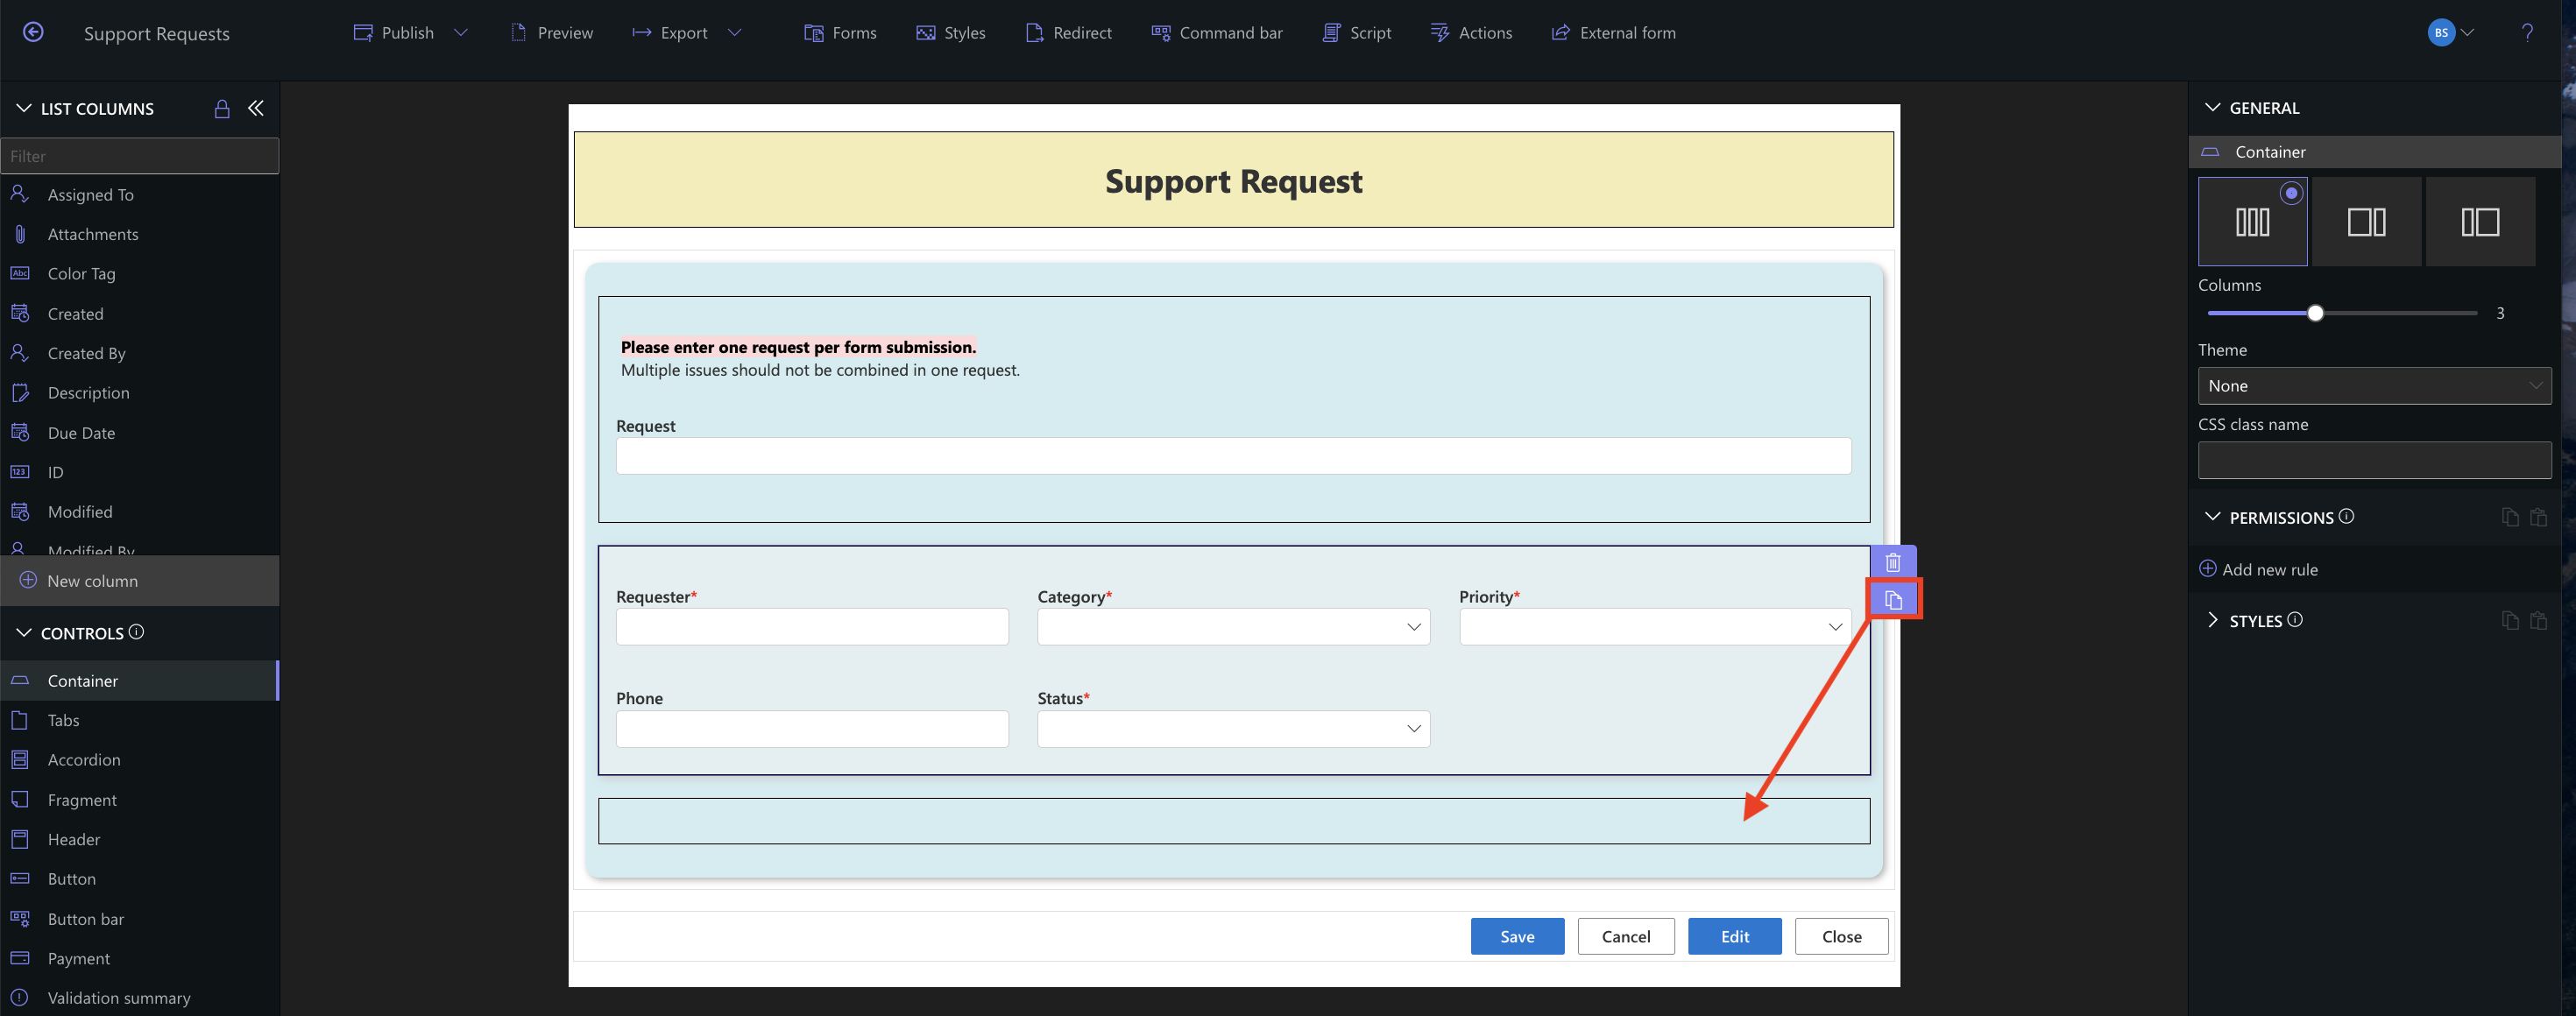
- Set the Columns for the new container to 1

Step 3: Create the Description Column
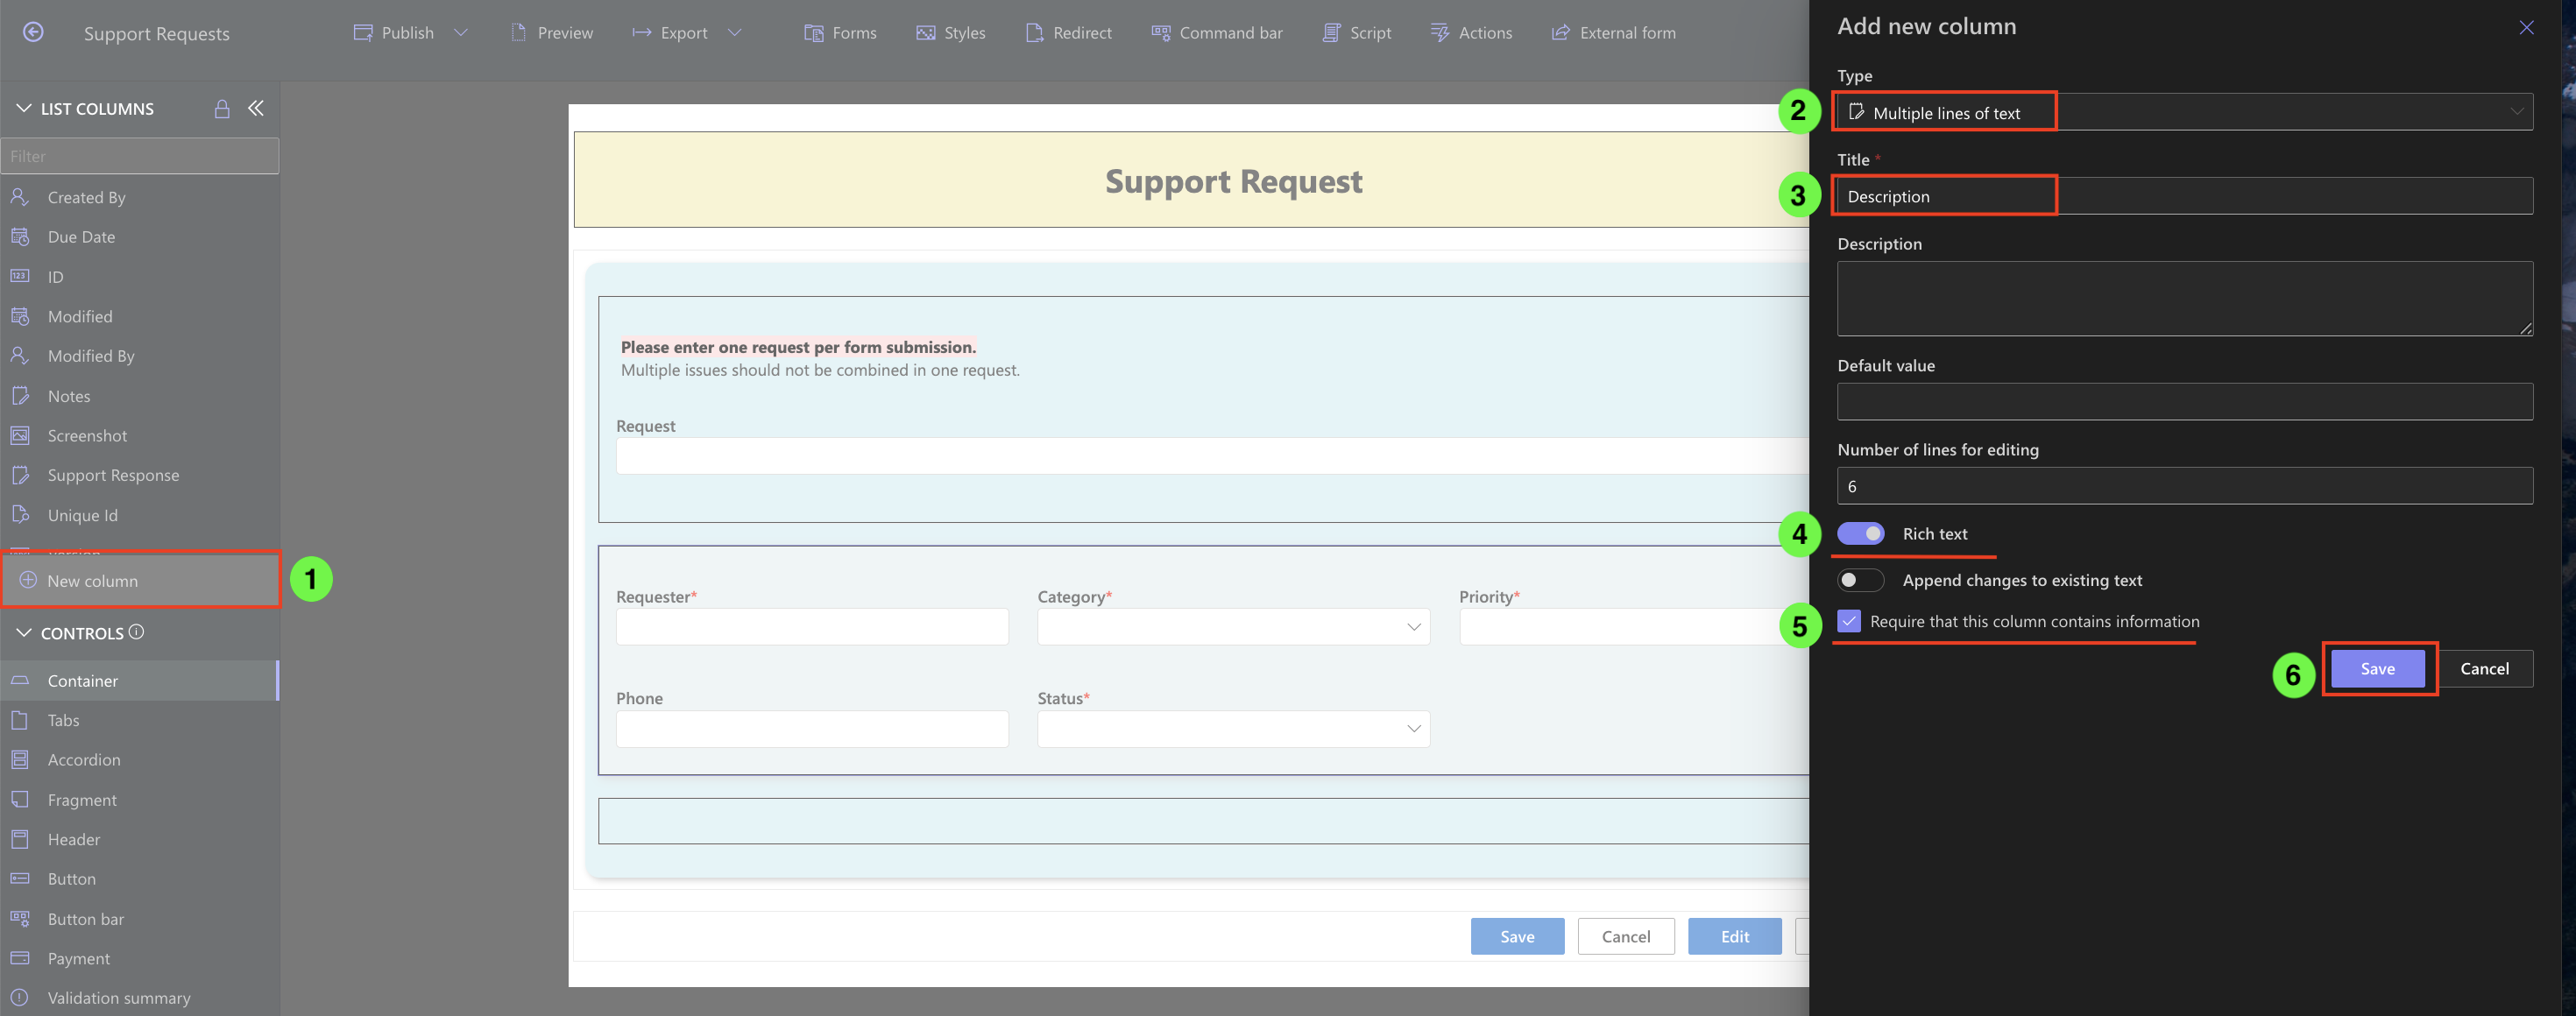
- Click New Column
- Choose Multiple lines of text
- Title: Description
- Enable Rich text mode
- Set the column as Required
- Click Save
Step 4: Add the Description Column to the Form
- Drag the newly created Description column into the new container
- Ensure it is displayed in full width due to the 1-column layout
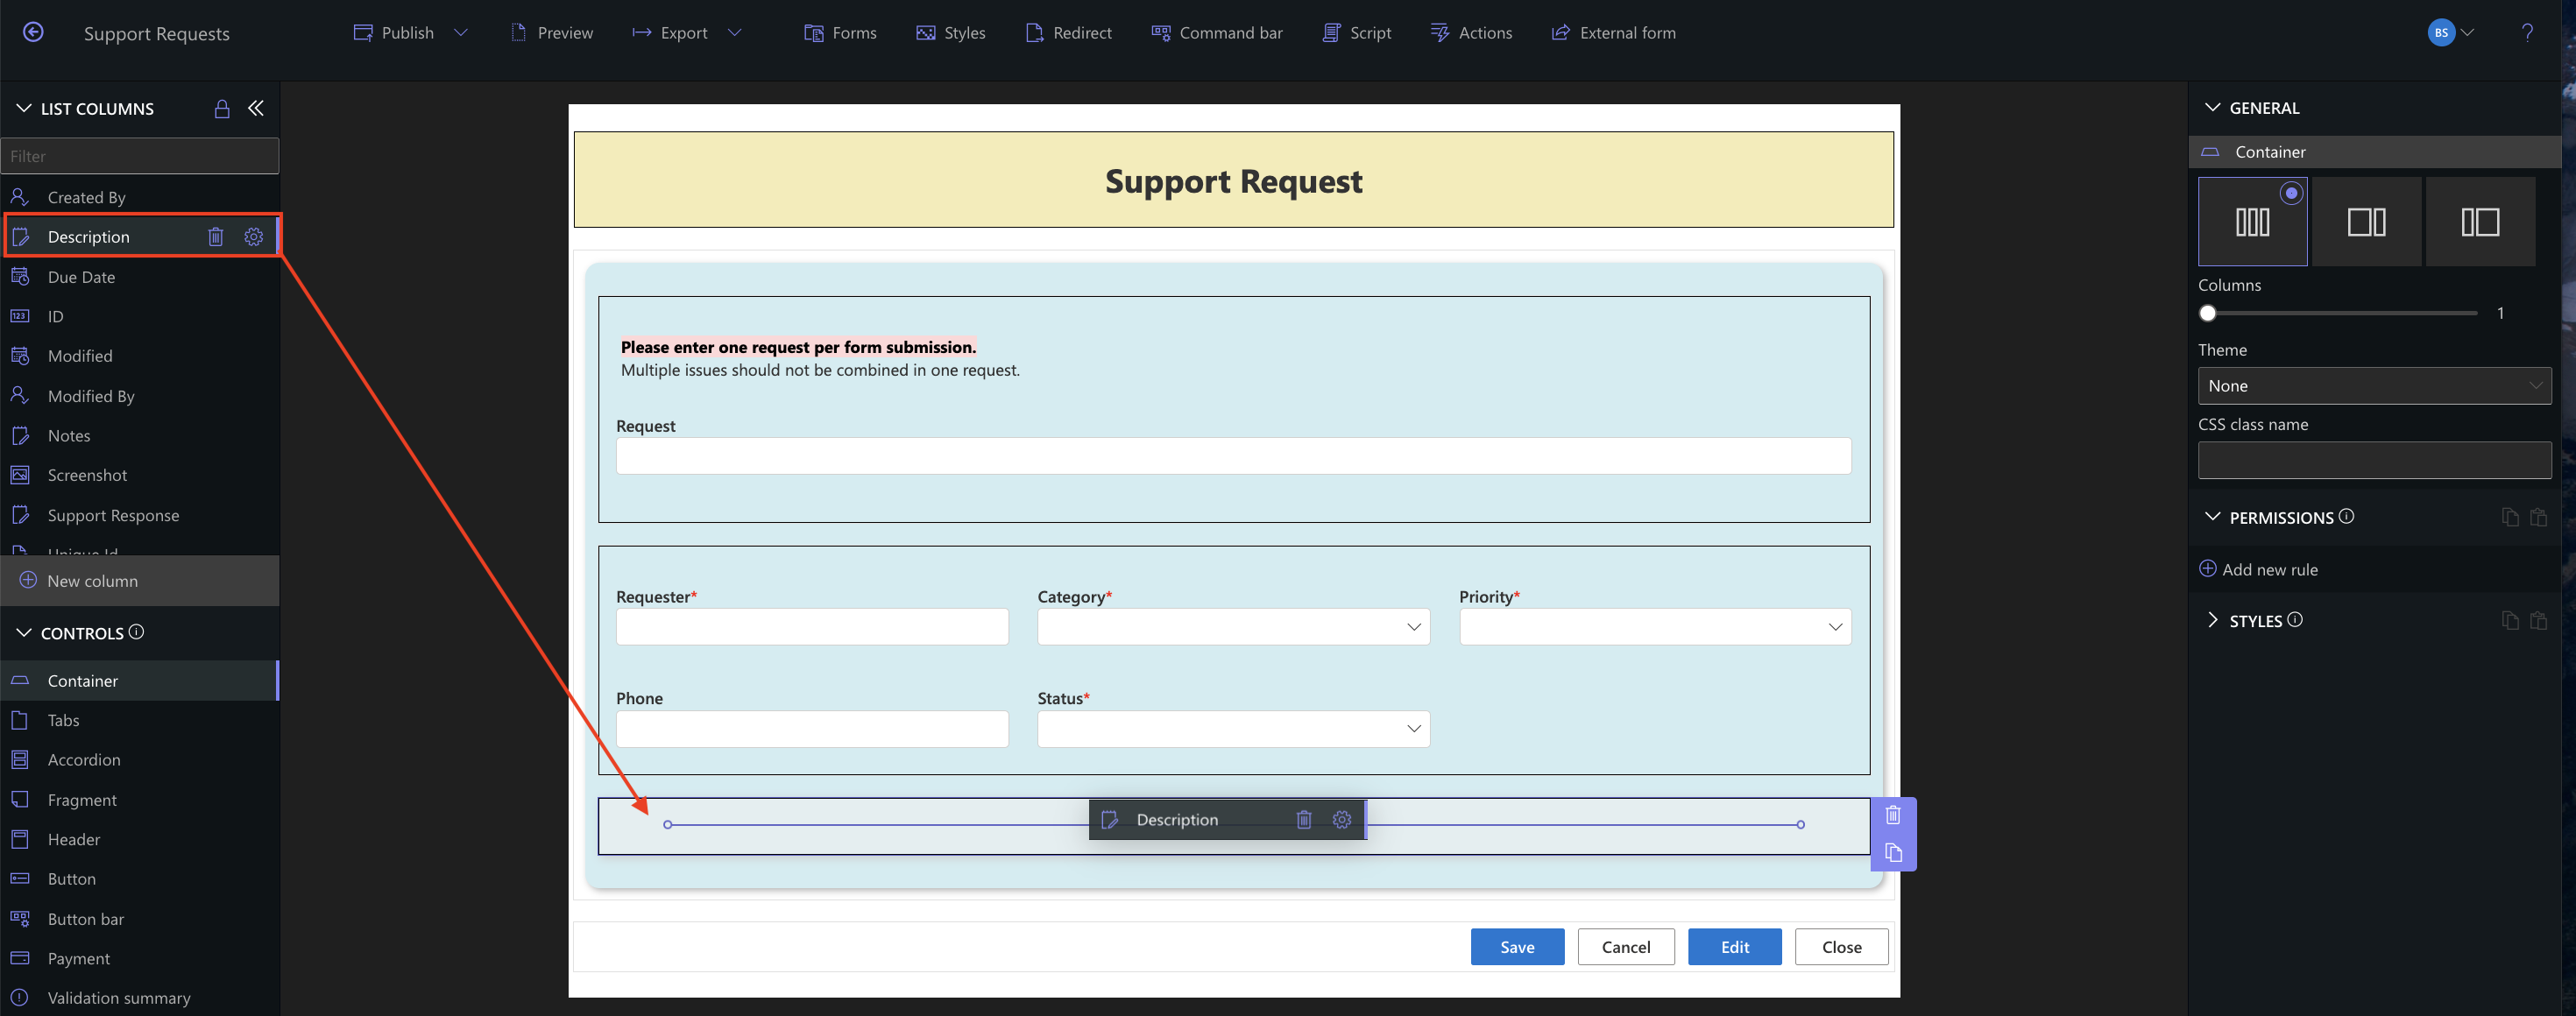
Using a rich text column like Description allows users to provide more detailed input with formatting options.
Real Example: IT Support Form
Imagine a Help Desk form where staff need to describe technical issues in detail. The Description column enables them to explain problems clearly, with formatting like bold or bullet points. Testing the form with dummy data helps confirm the layout flows correctly and users aren’t missing any required inputs.
Summary
In Part 4, you tested your form with live data and added a Description column using the Multiple lines of text column type with rich formatting. These steps help make your form functional in real-world scenarios and easier for users to engage with.