The Infowise Event Calendar is a powerful companion to any custom SharePoint list.
It allows you to combine events from multiple data sources — including SharePoint lists and Microsoft Exchange calendars — into one dynamic, interactive display.
Unlike the basic SharePoint calendar, Event Calendar lets you:
- Combine unlimited data sources from different sites or mailboxes.
- Color-code events by category or data source.
- View events in multiple layouts: Compact, Month, Gantt, and more.
In this tutorial, we’ll walk through setting up an Event Calendar profile in SharePoint Online and connecting it to a sample Tasks list.
Instructions
Step 1: Prepare the List (Data Source)
To start, you’ll need a SharePoint list that includes date columns — for example, a Tasks list.
The standard Tasks list already includes:
- Title (Single line of text)
- Start Date (Date and Time)
- Due Date (Date and Time)
You can also add optional columns like Category (Choice) , Assigned To (Person/Group) or Description (Multiple lines of text).
Add a few sample items to the list — this will make testing your calendar easier.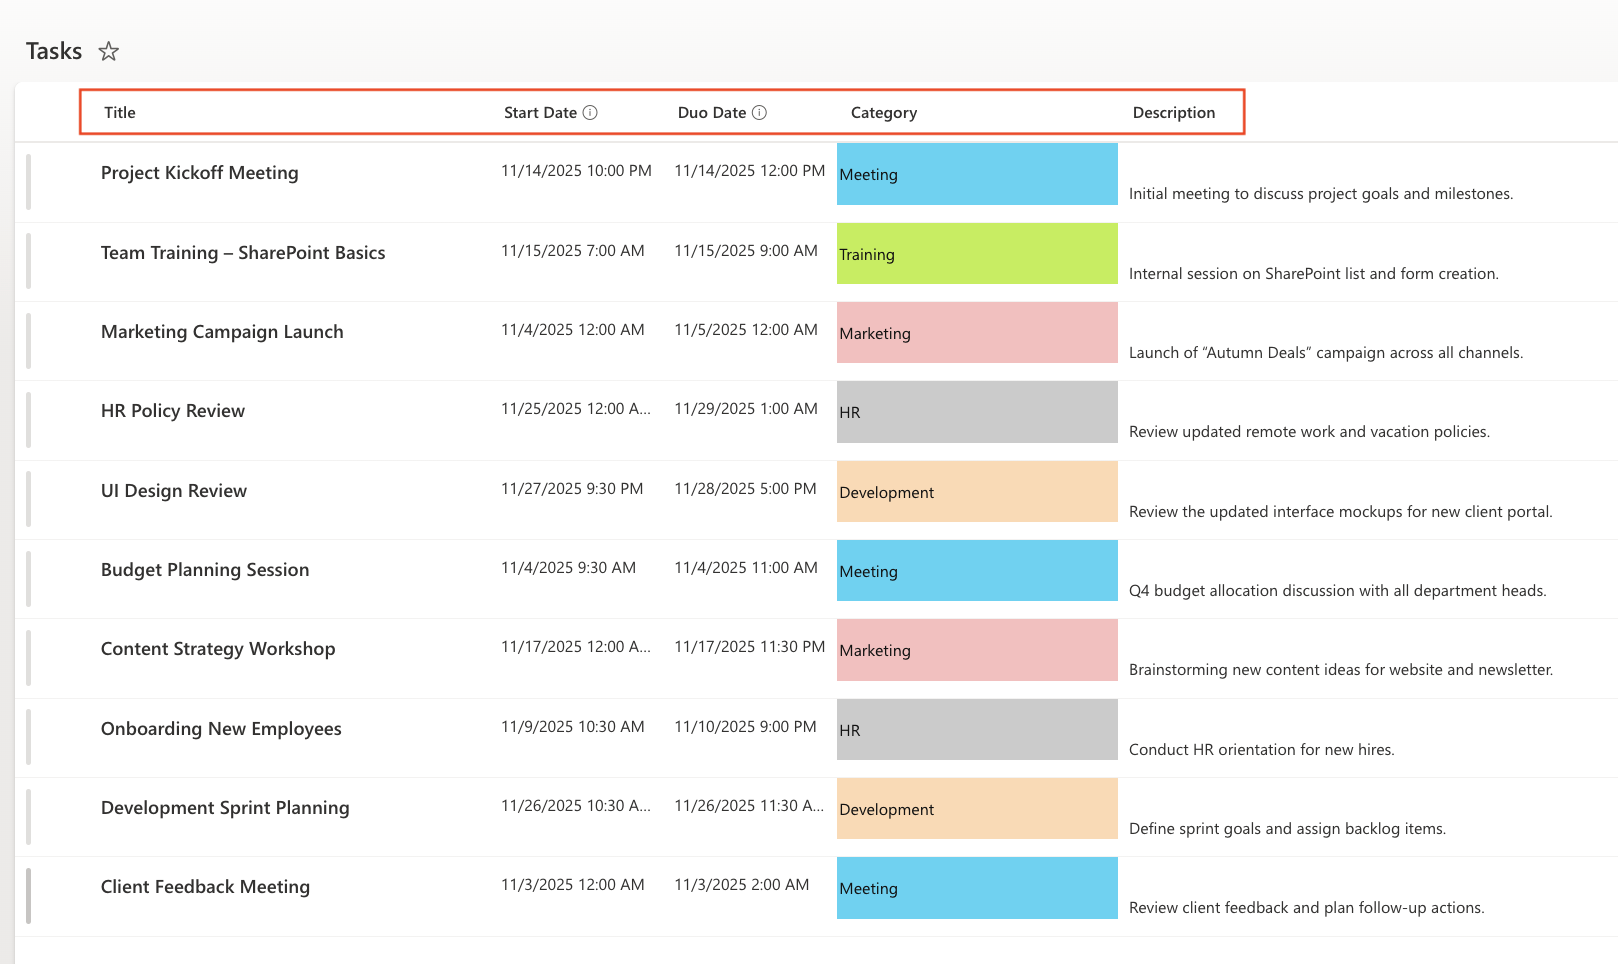
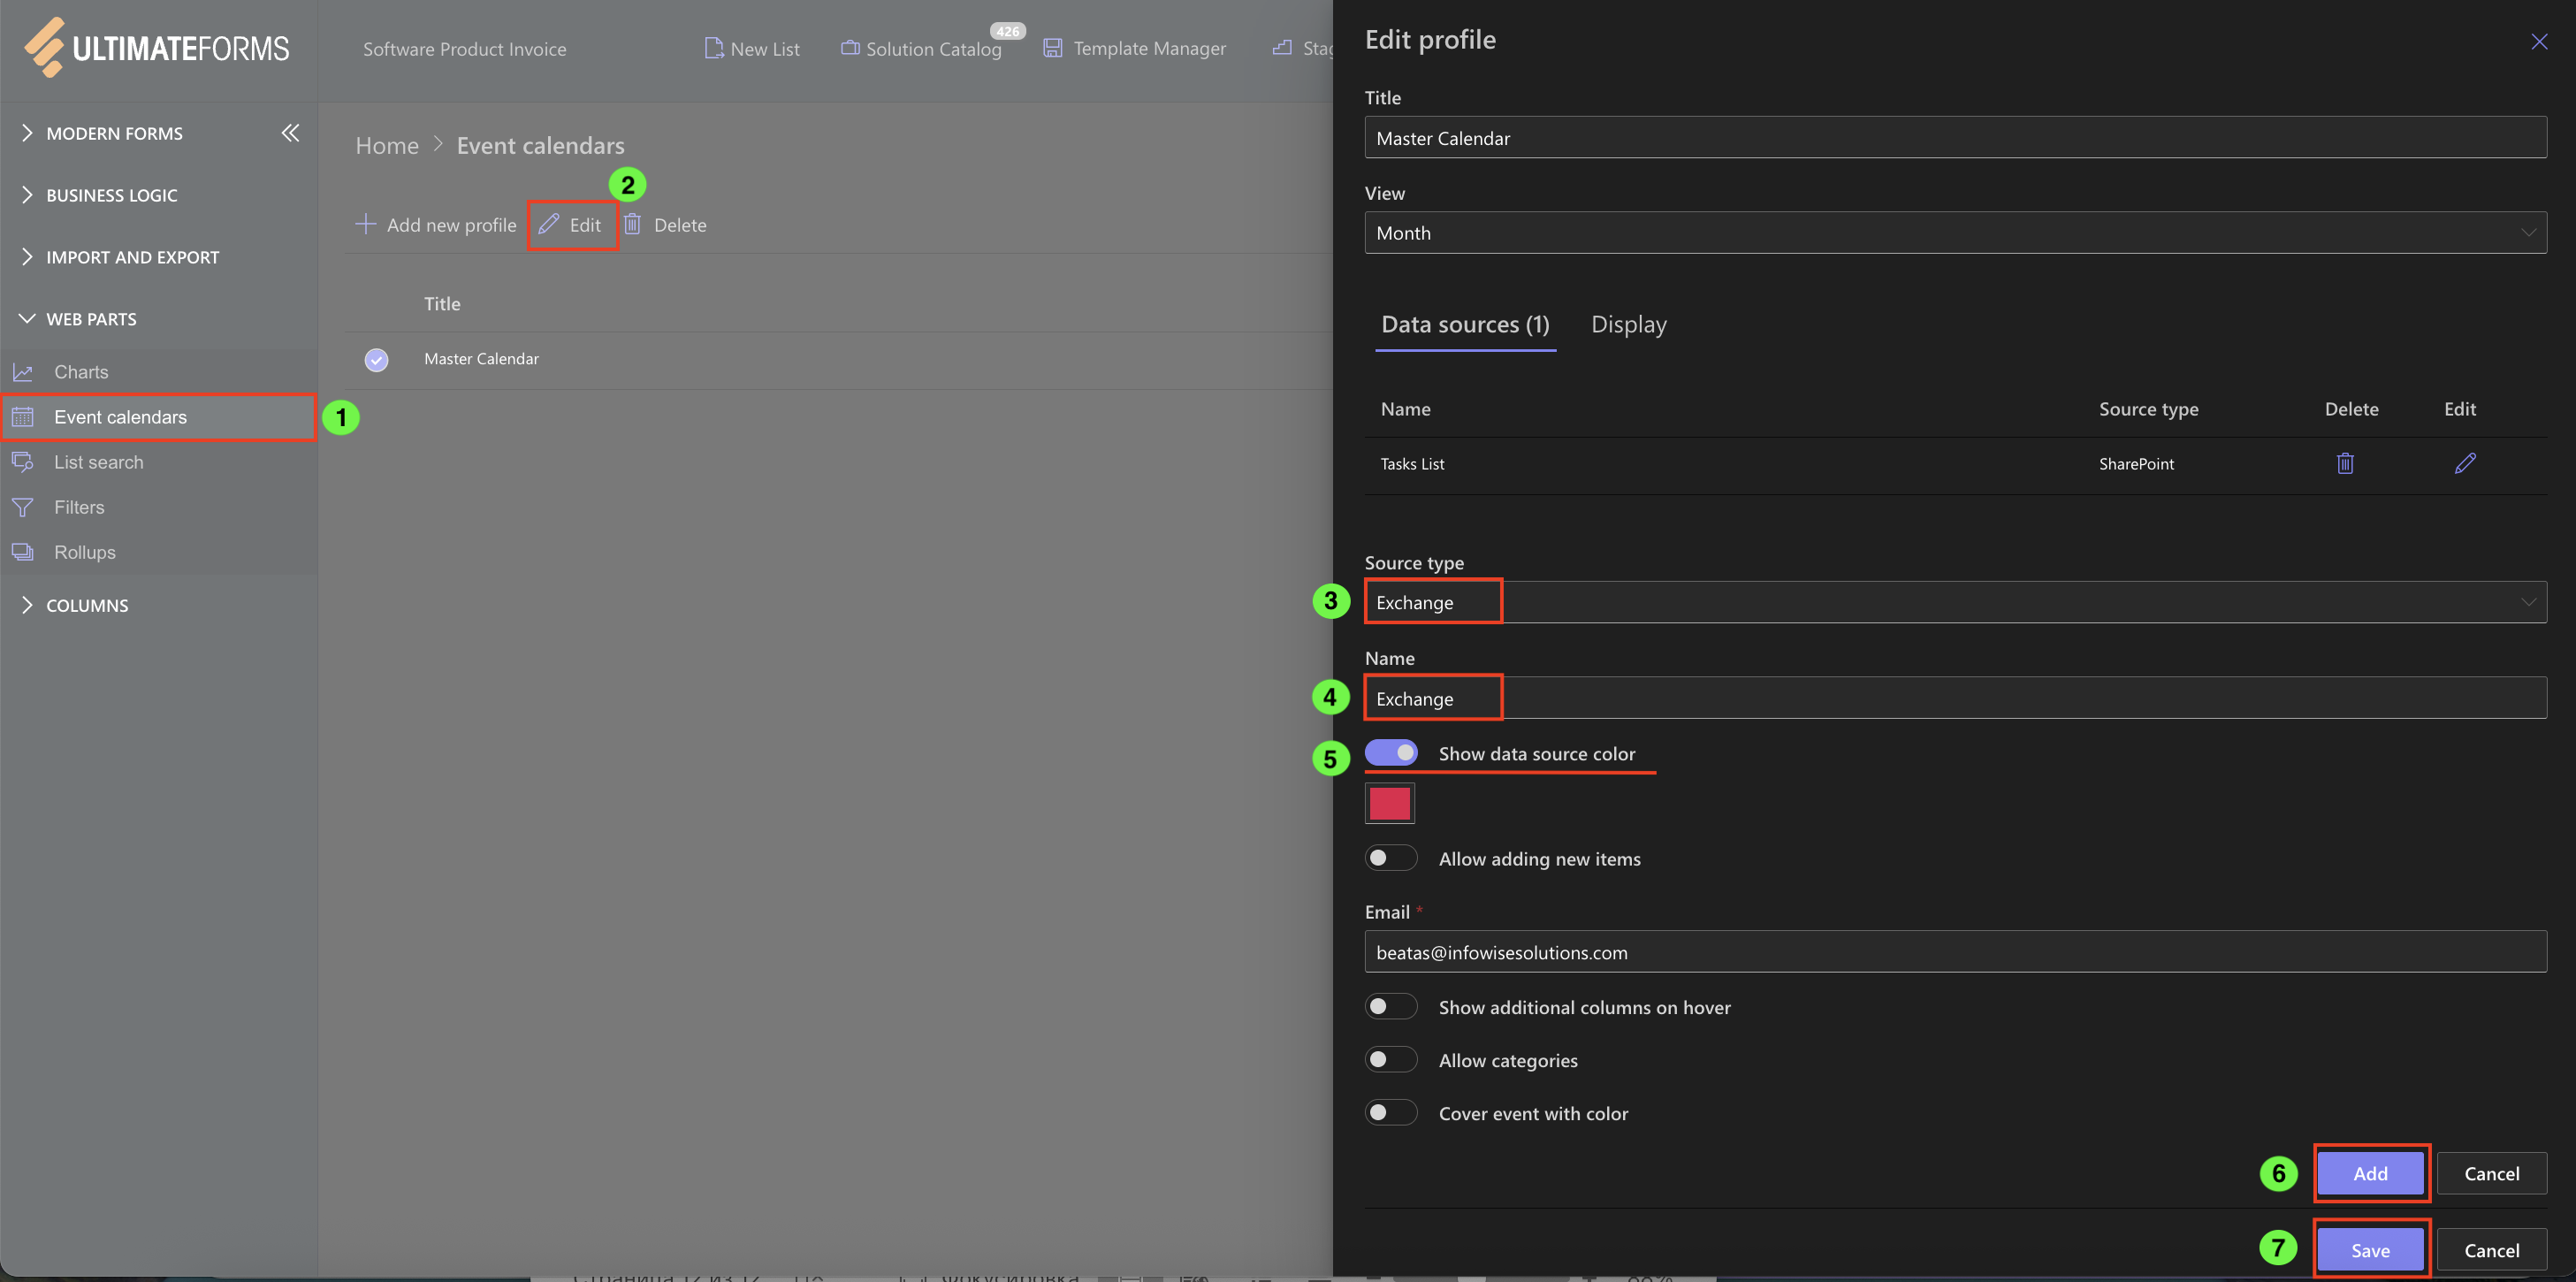
Step 2: Create an Event Calendar Profile
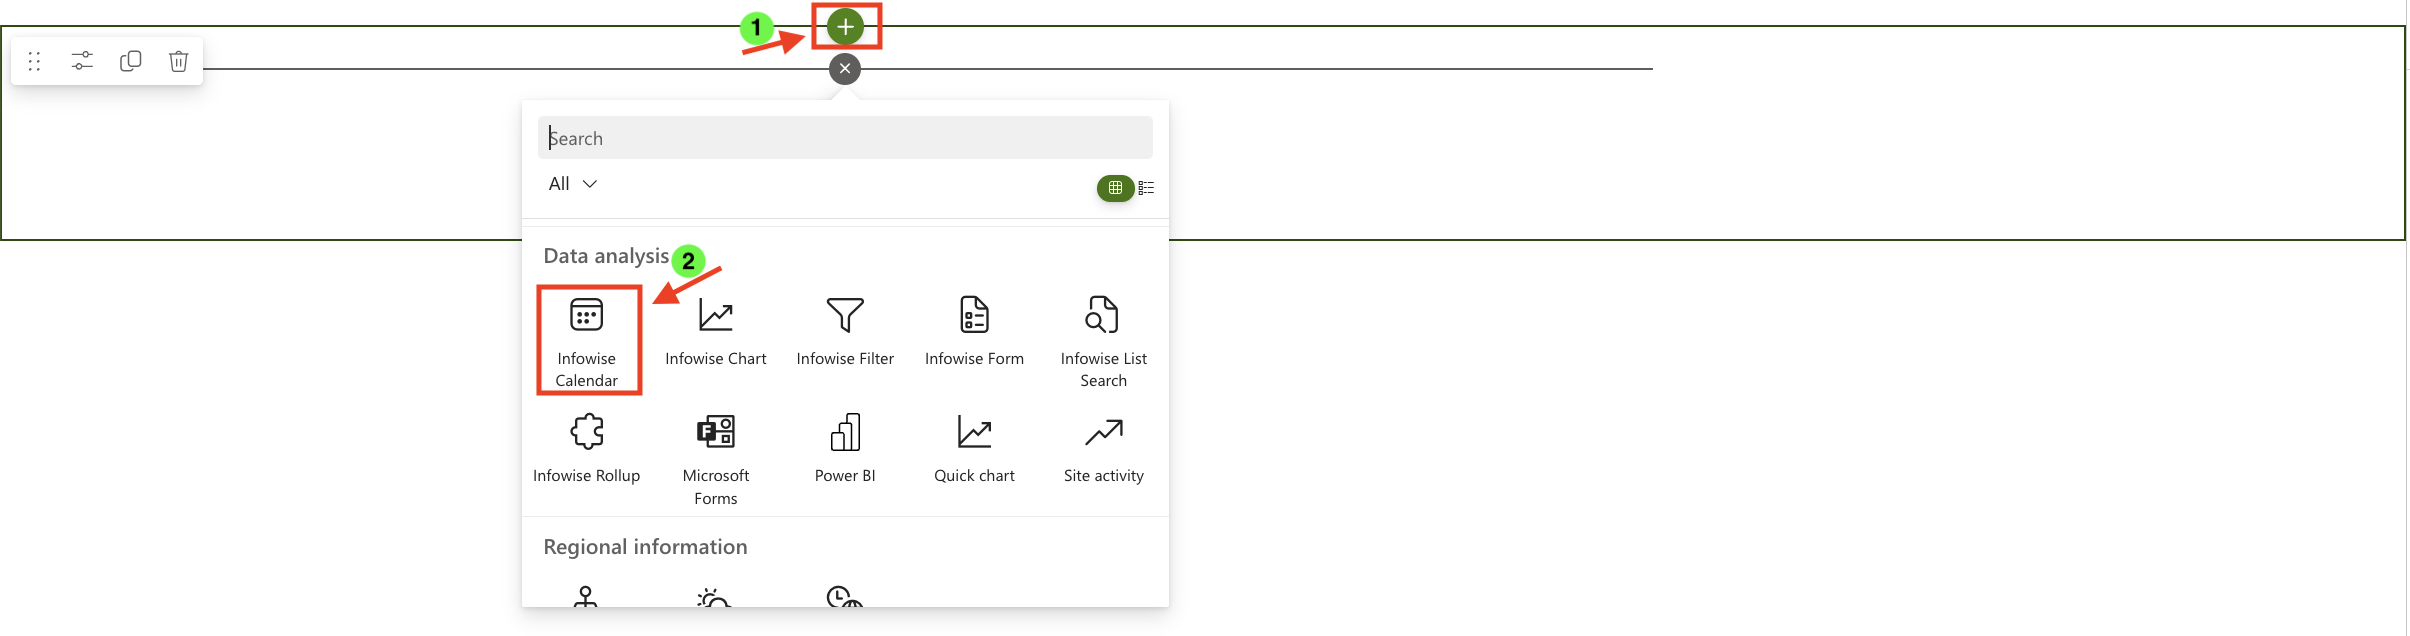
- Open your Tasks list.
- Click Design → Web Parts → Event Calendar → Add new profile.
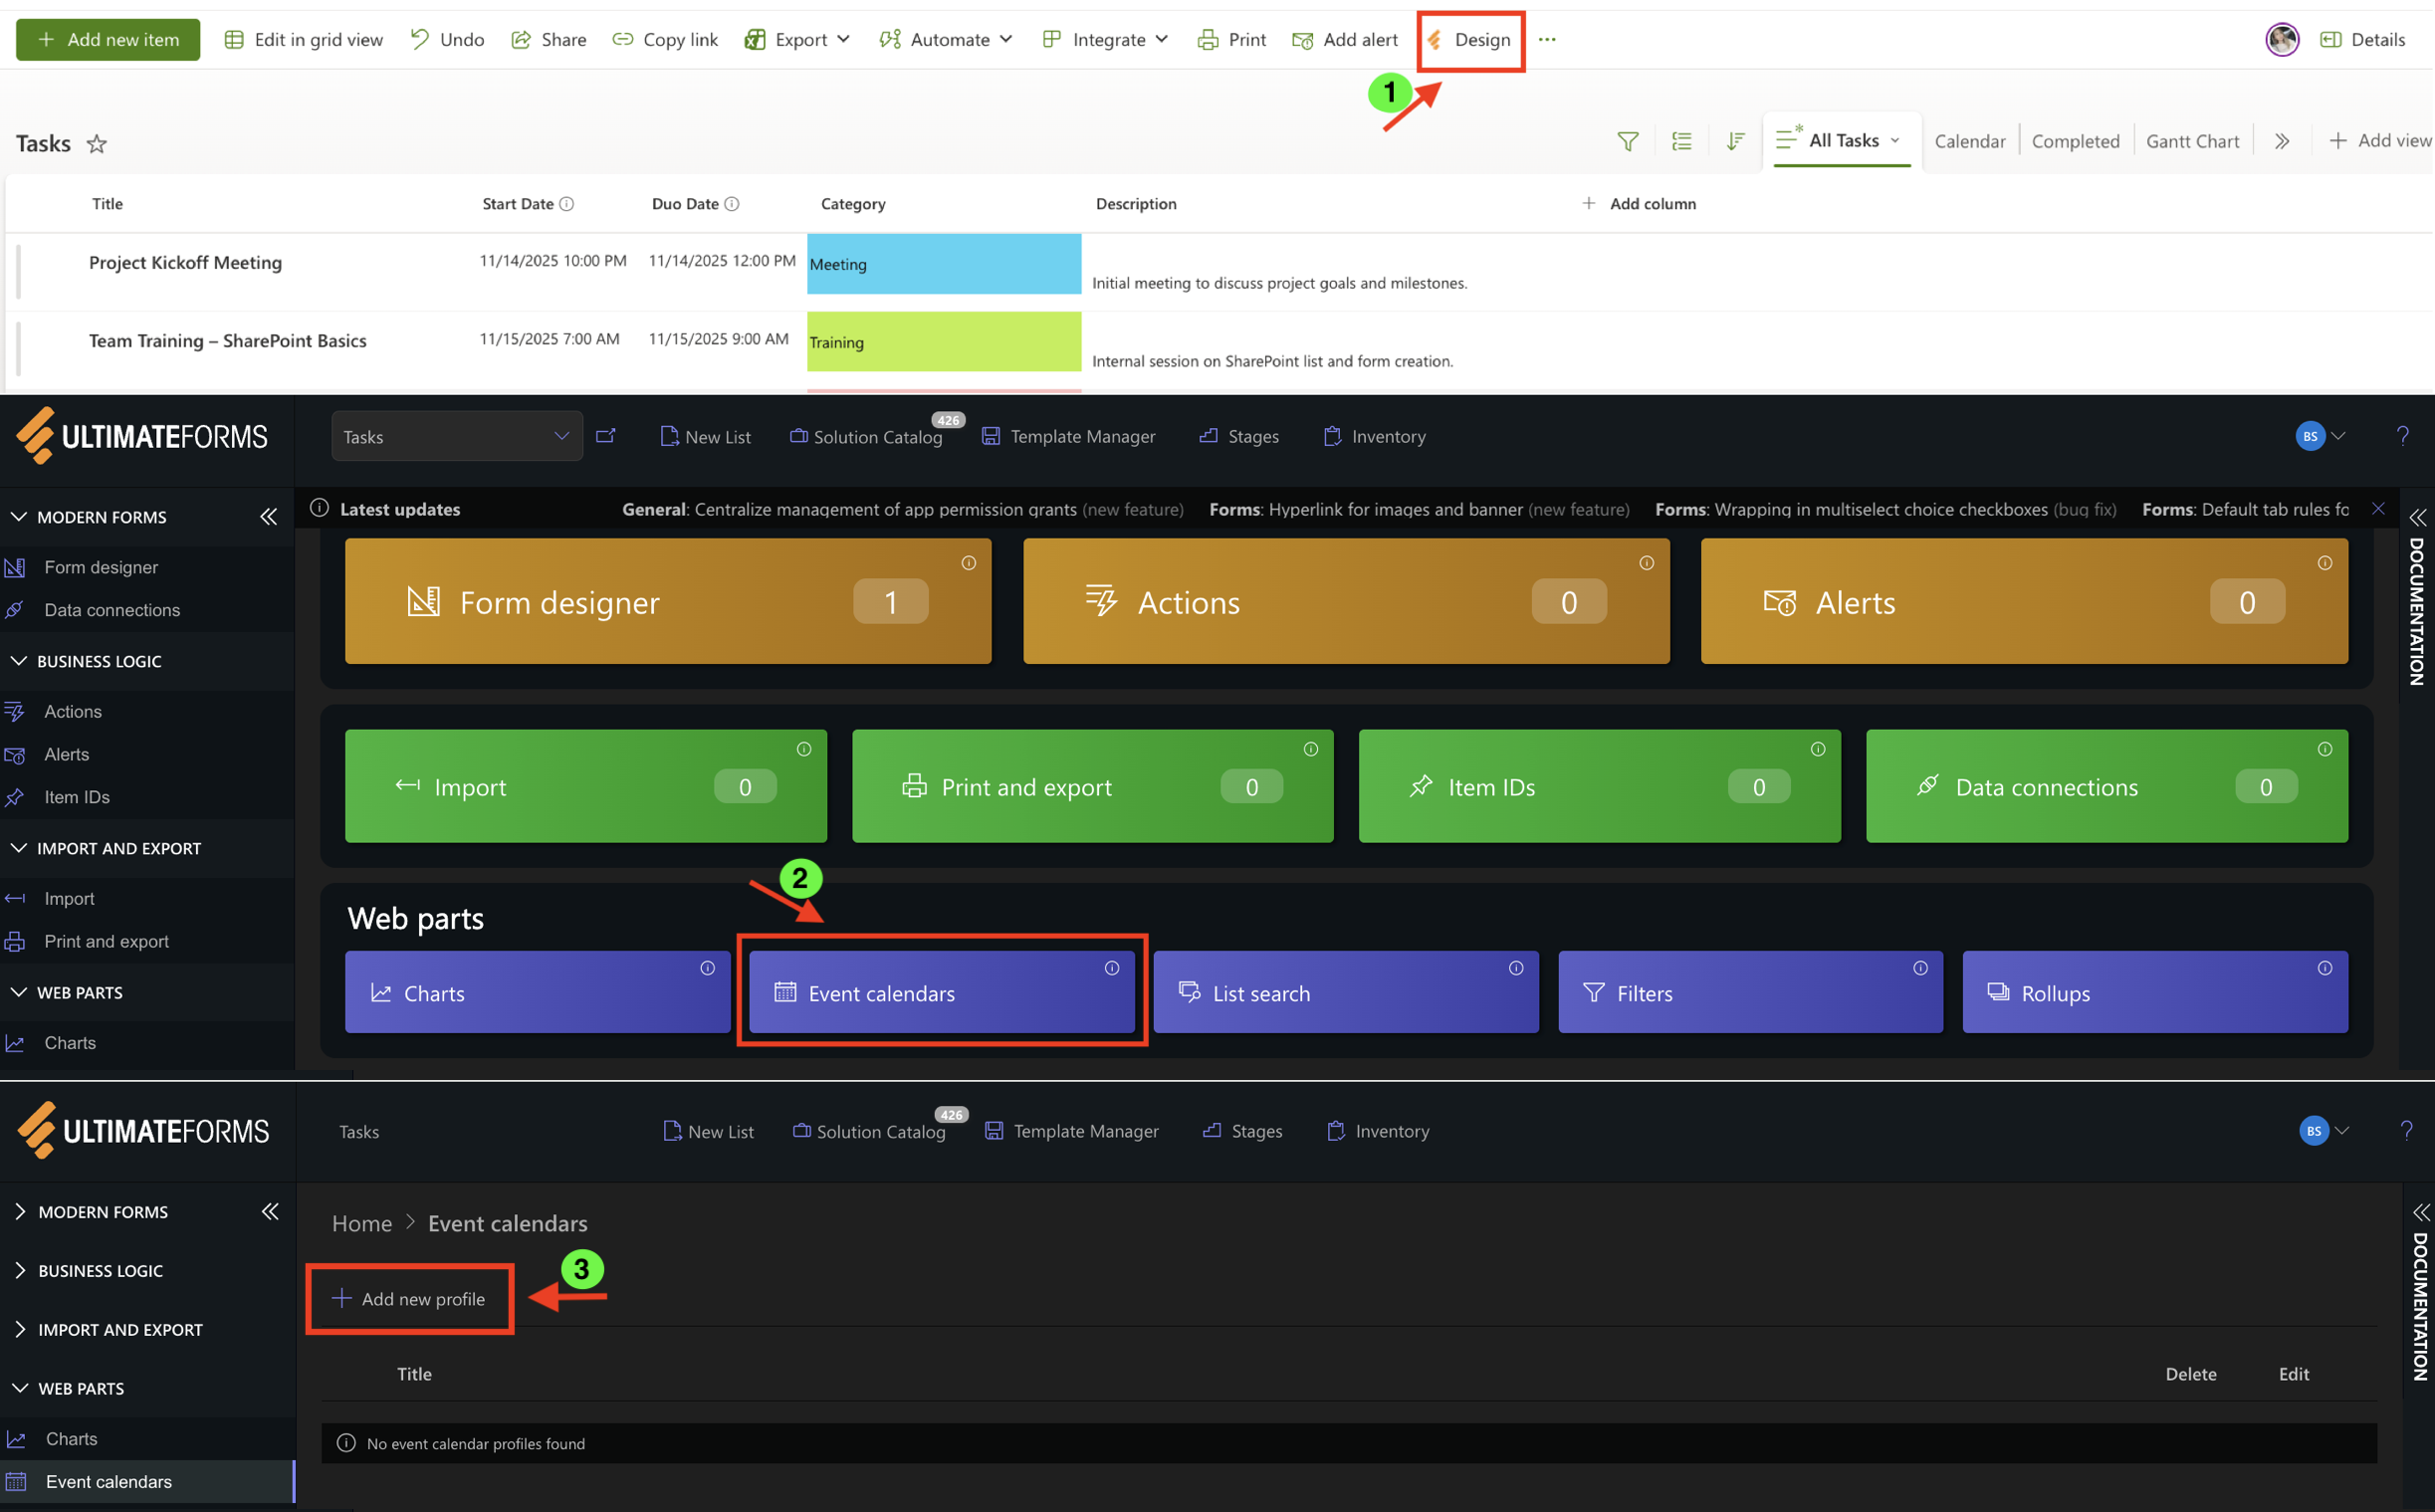
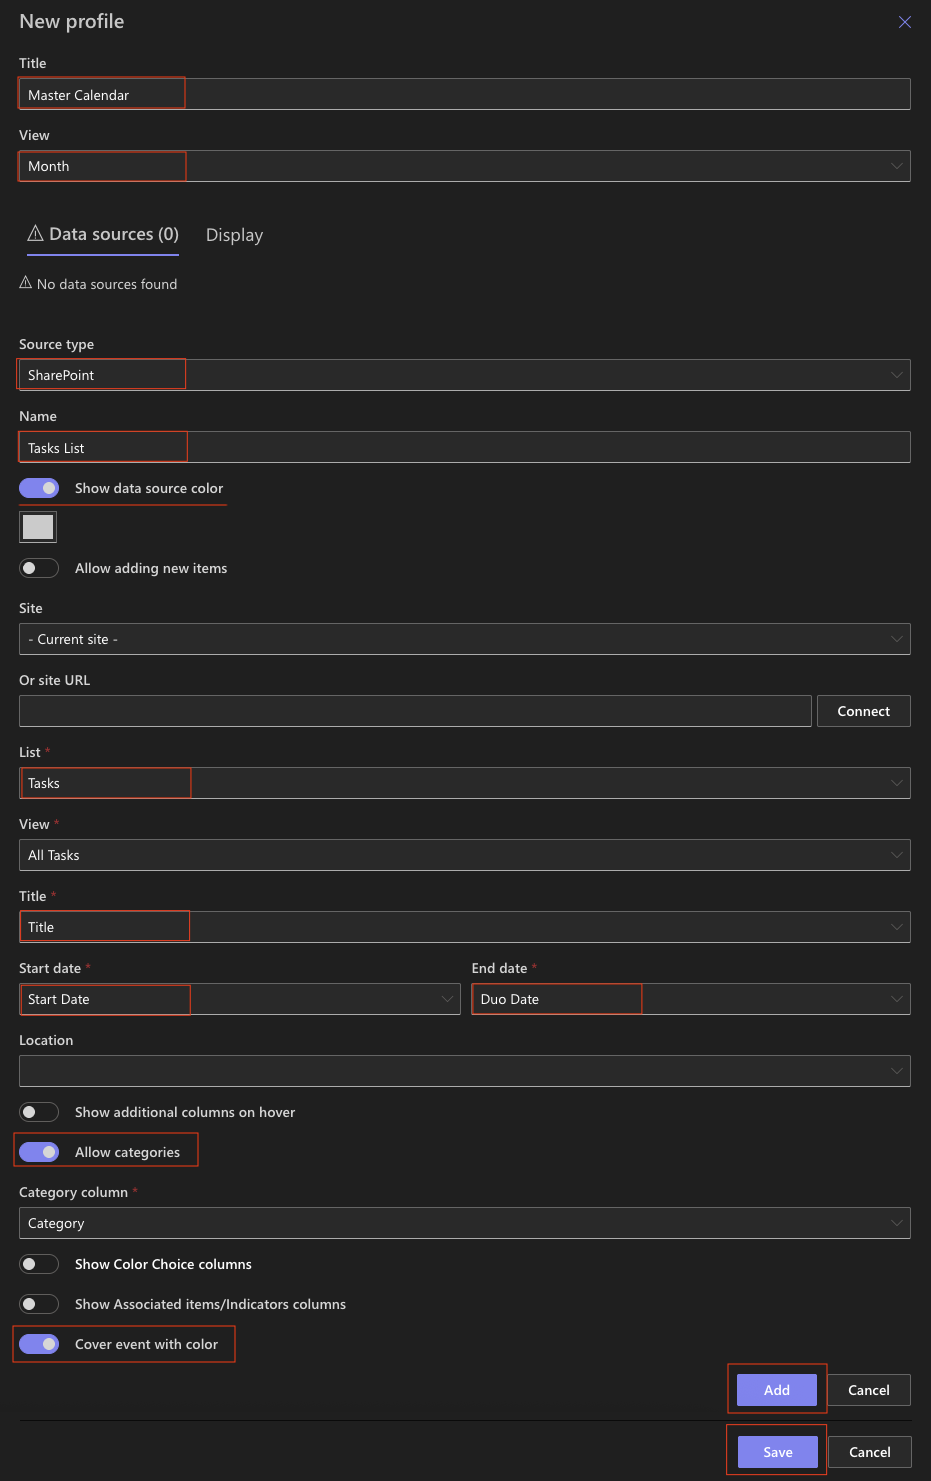
- In the configuration window, enter:
- Profile Title: Master Calendar
- Default View: Month
- Under Data Sources, fill in the following fields:
- Source Type: select SharePoint
- Data Source Name: Tasks List
- Site URL: Current site
- List Name: Tasks
- View: All Tasks
- Title Field: Title
- Start Date: Start Date
- End Date: Due Date
- (Optional) Category: Category
- Color: Select a color from the dropdown or input a HEX code.
- Set Cover event with color
- Click Add → Save Profile.
Your new Calendar Profile will appear in the list of profiles.
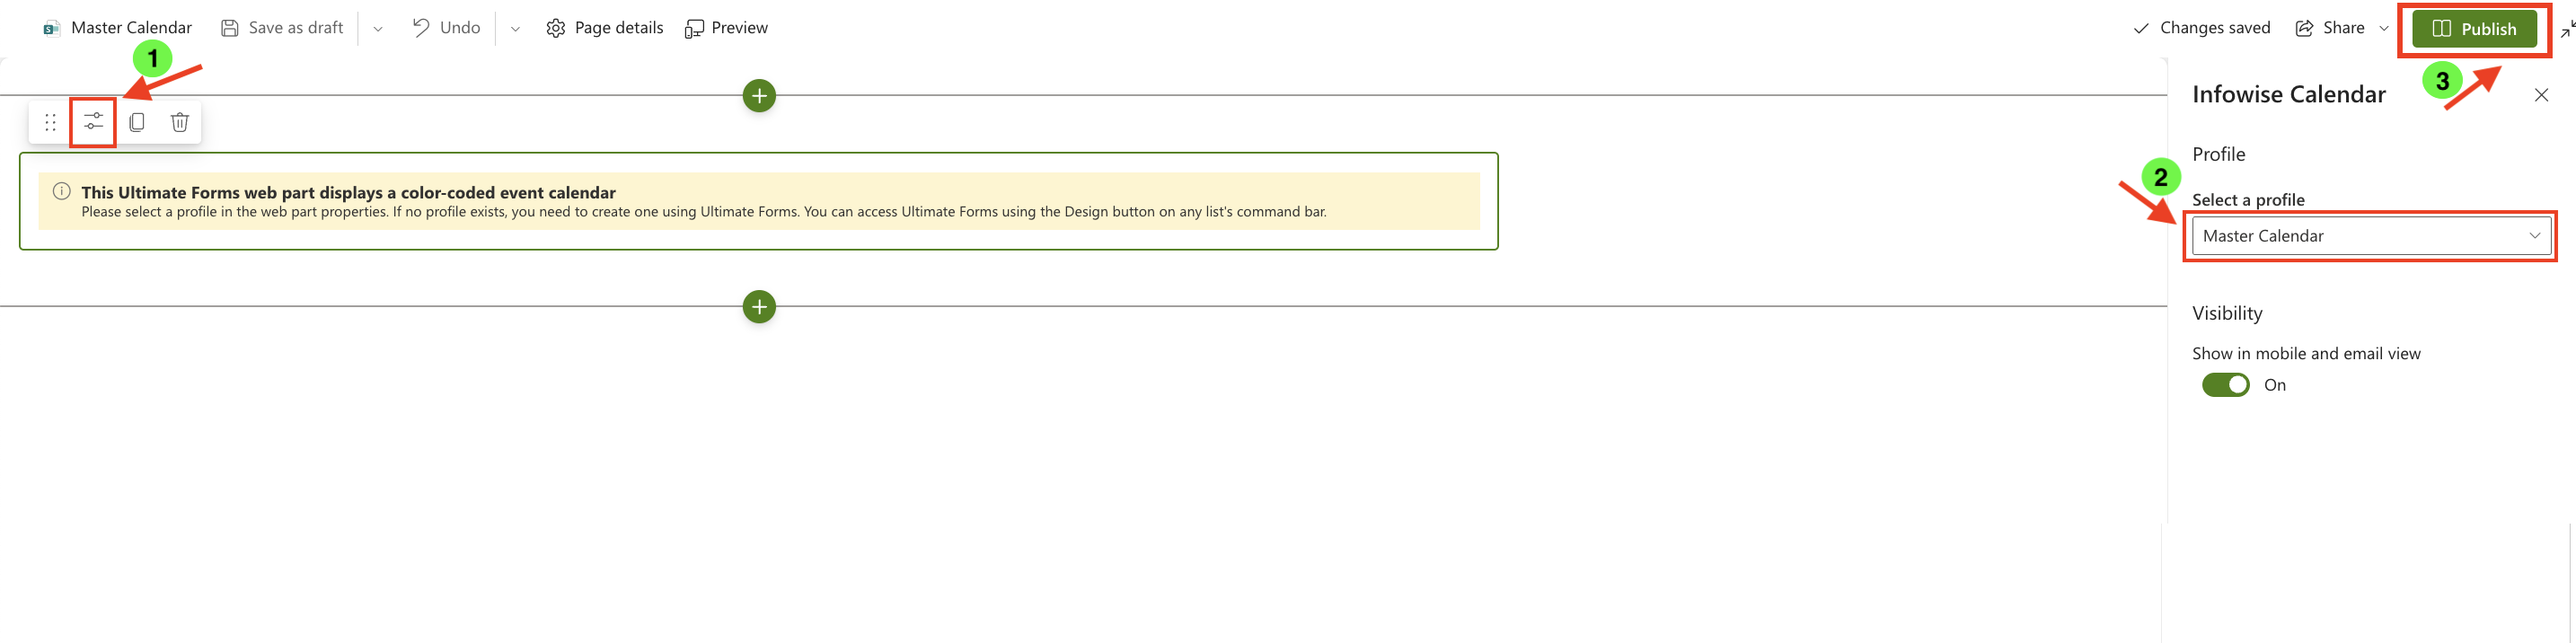
Step 3: Add the Web Part to a Page
- Create a new modern page (for example, Master Calendar).
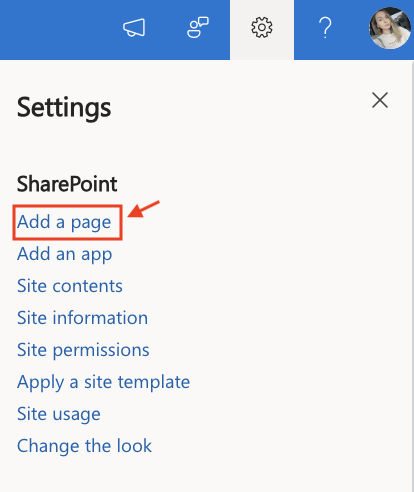
- Click the + button and add the Infowise Calendar web part.
- Once added, click the Edit Properties.
- In Web Part Properties, select the calendar profile you just created (Master Calendar).
- Click Publish to confirm your settings.
Step 4: Test the Display and Views
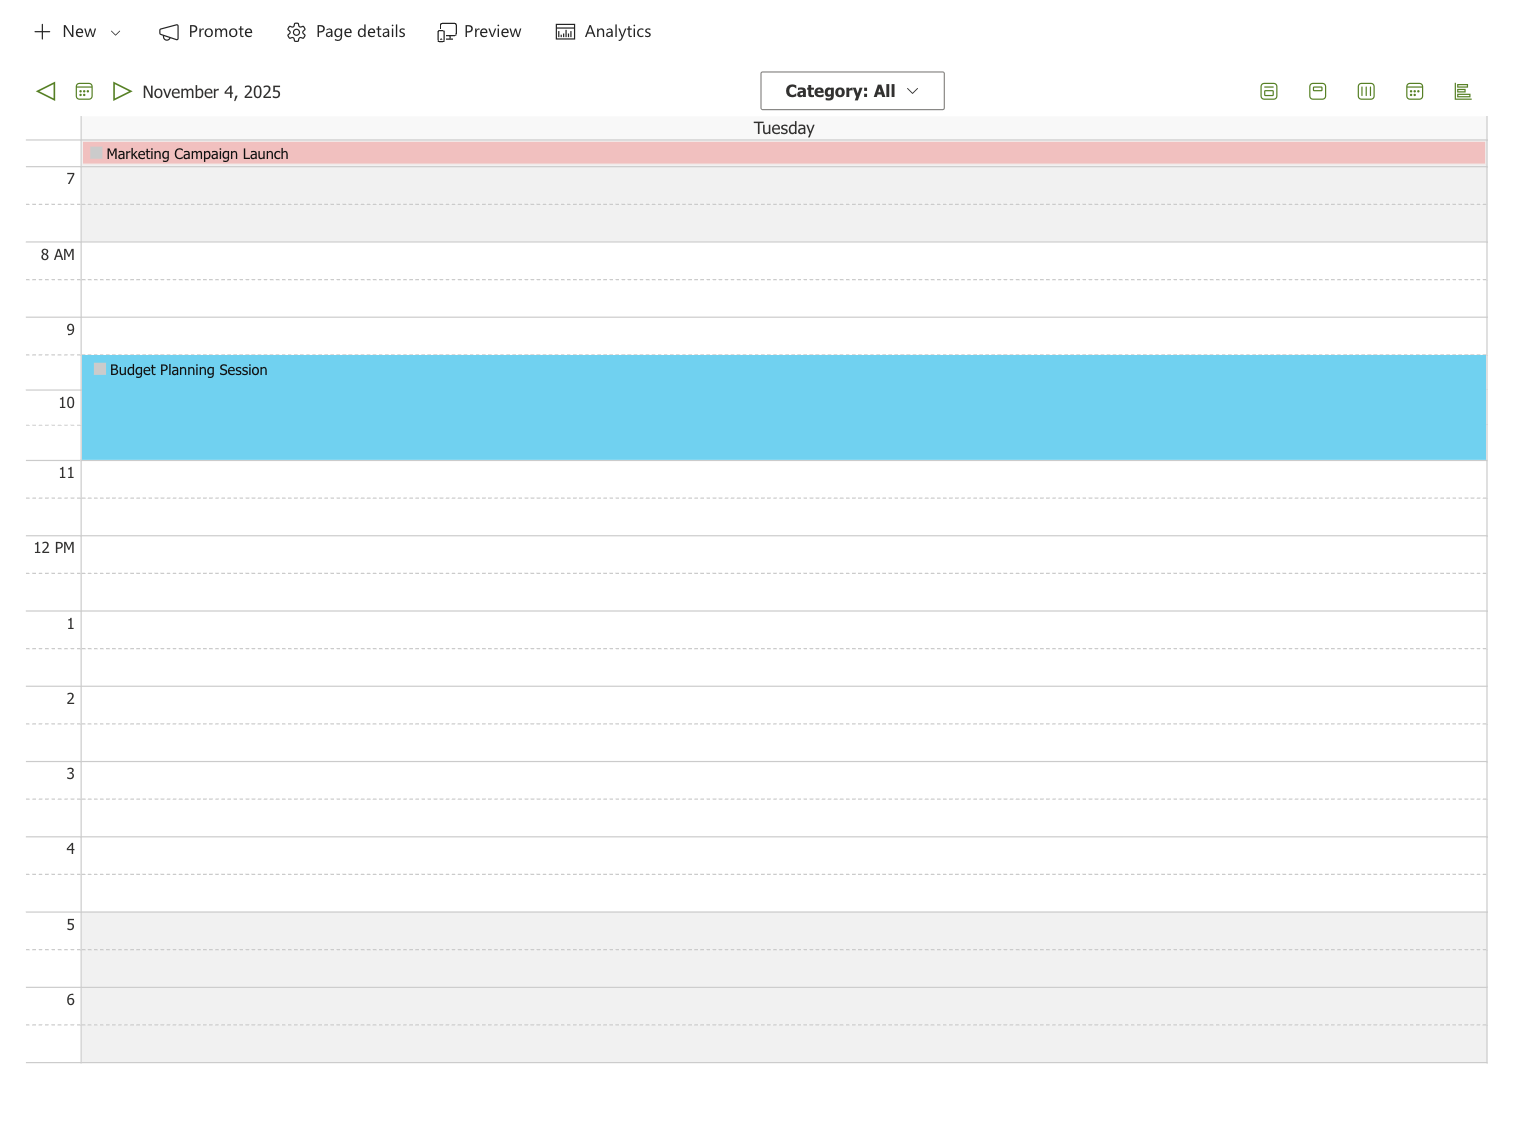
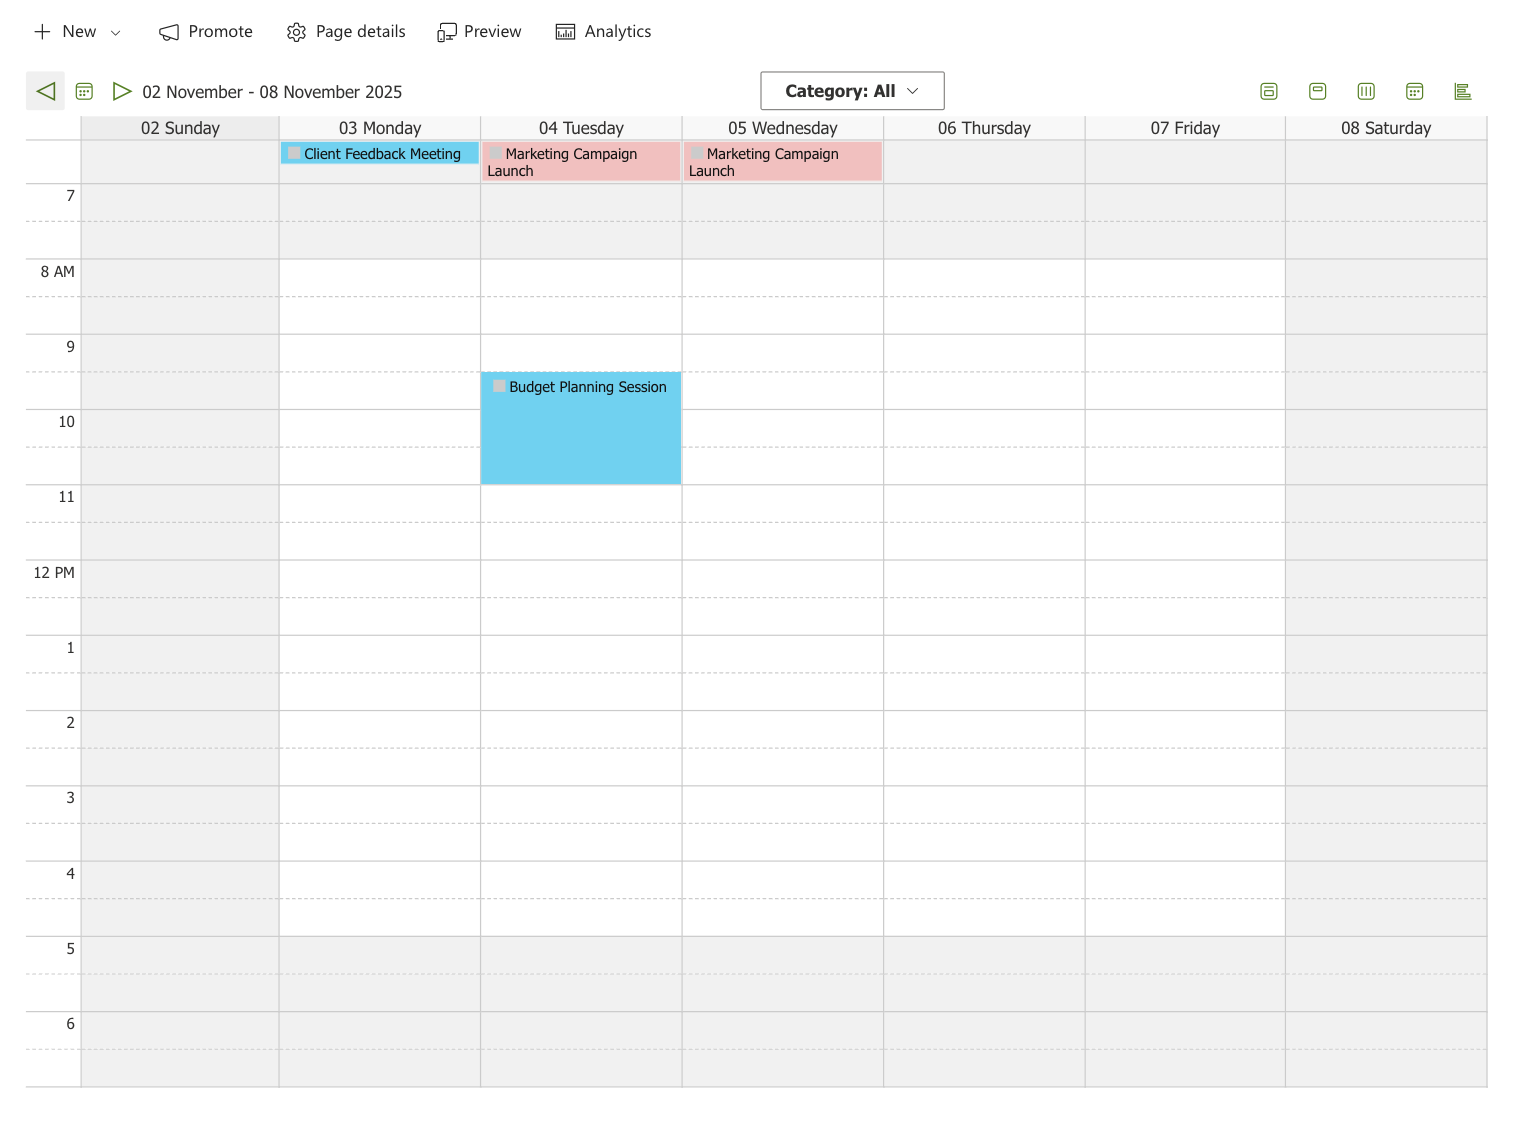
After applying your profile, your calendar should now display all tasks as events — each one color-coded according to its Category field.
The color is automatically taken from the Color Choice values you set up in your list, making it easy to visually group events by type (for example, Meeting = blue, Training = green, Marketing = pink).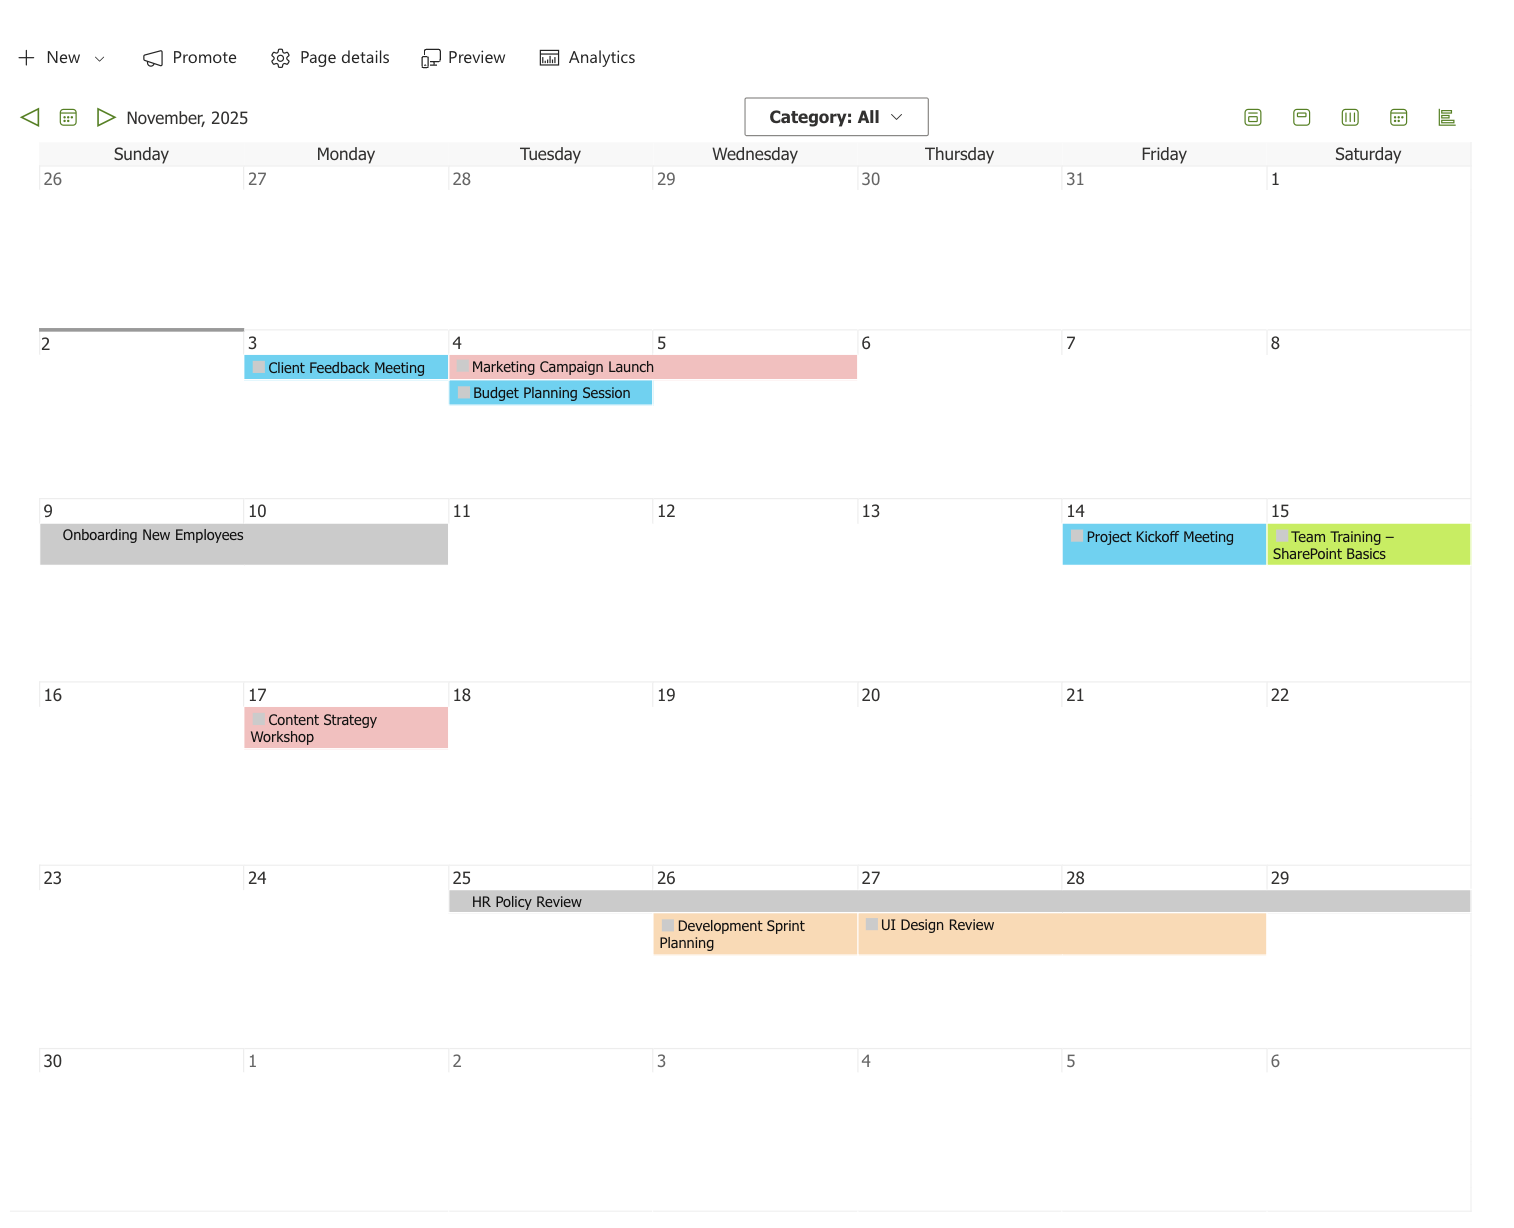
You can also filter events using the Category filter located above the calendar:
- Select a specific category to view only related events.

- Choose “All” to show every event again.

The top-right view selector lets you switch between: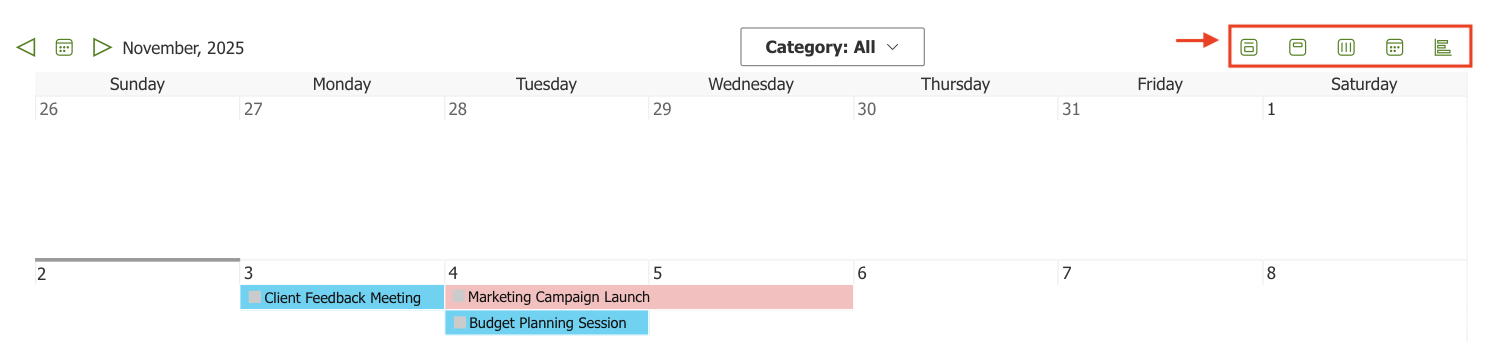
- Day - shows events scheduled for a single day in a detailed hourly timeline.
- Week - displays all events for the current week, grouped by day.
- Month - presents a traditional calendar grid with all events for the month.
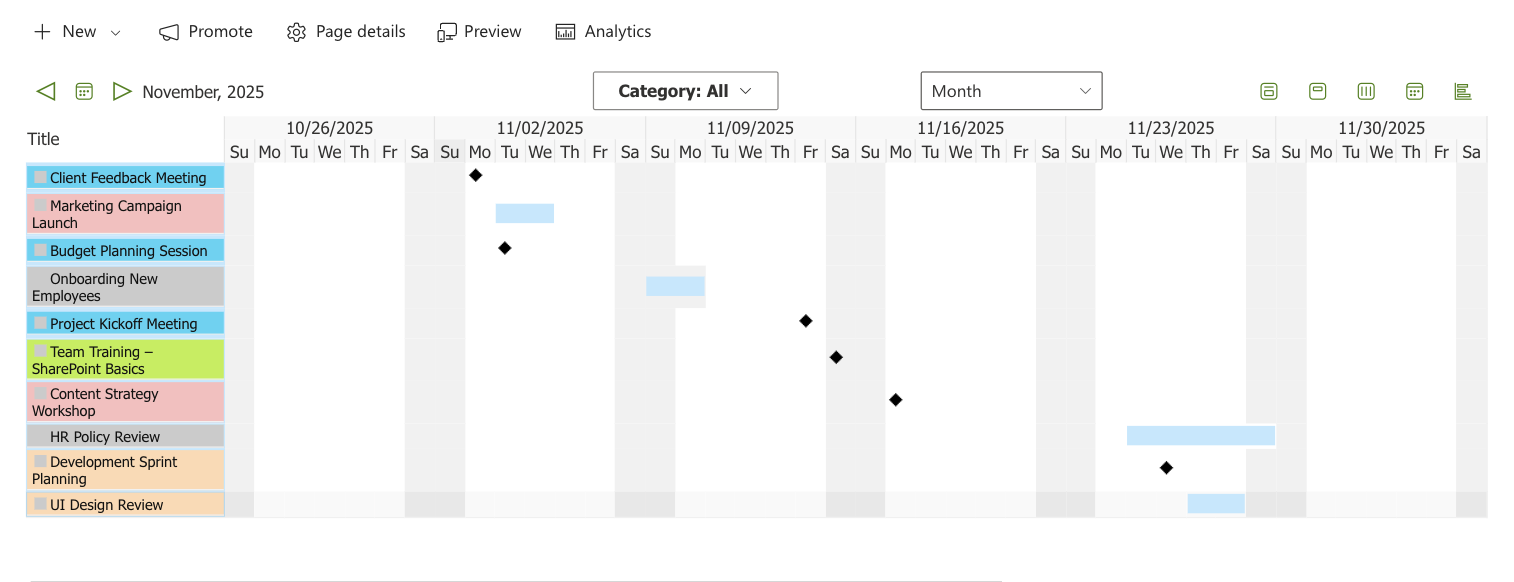
- Gantt - visualizes events as bars on a timeline, ideal for tracking project durations.
Step 5: (Optional) Add Exchange Calendar
You can also display events from Microsoft Exchange side-by-side with SharePoint lists.
- Return to Ultimate Forms → Event Calendar → Edit Profile.
- Under Data Sources, fill in the following fields:.
- Type → Exchange.
- Set:
- Source Type → Exchange
- Name: Exchange
- Set Show data source color
- Email: your Exchange account address (auto-filled by default).
- Click Add → Save Profile.
When you return to your page youe can see that the Exchange Calendar event not only showed on our Infowise Events Calendar Plus, but it kept the distinct colors to correspond with each data source just like we setup.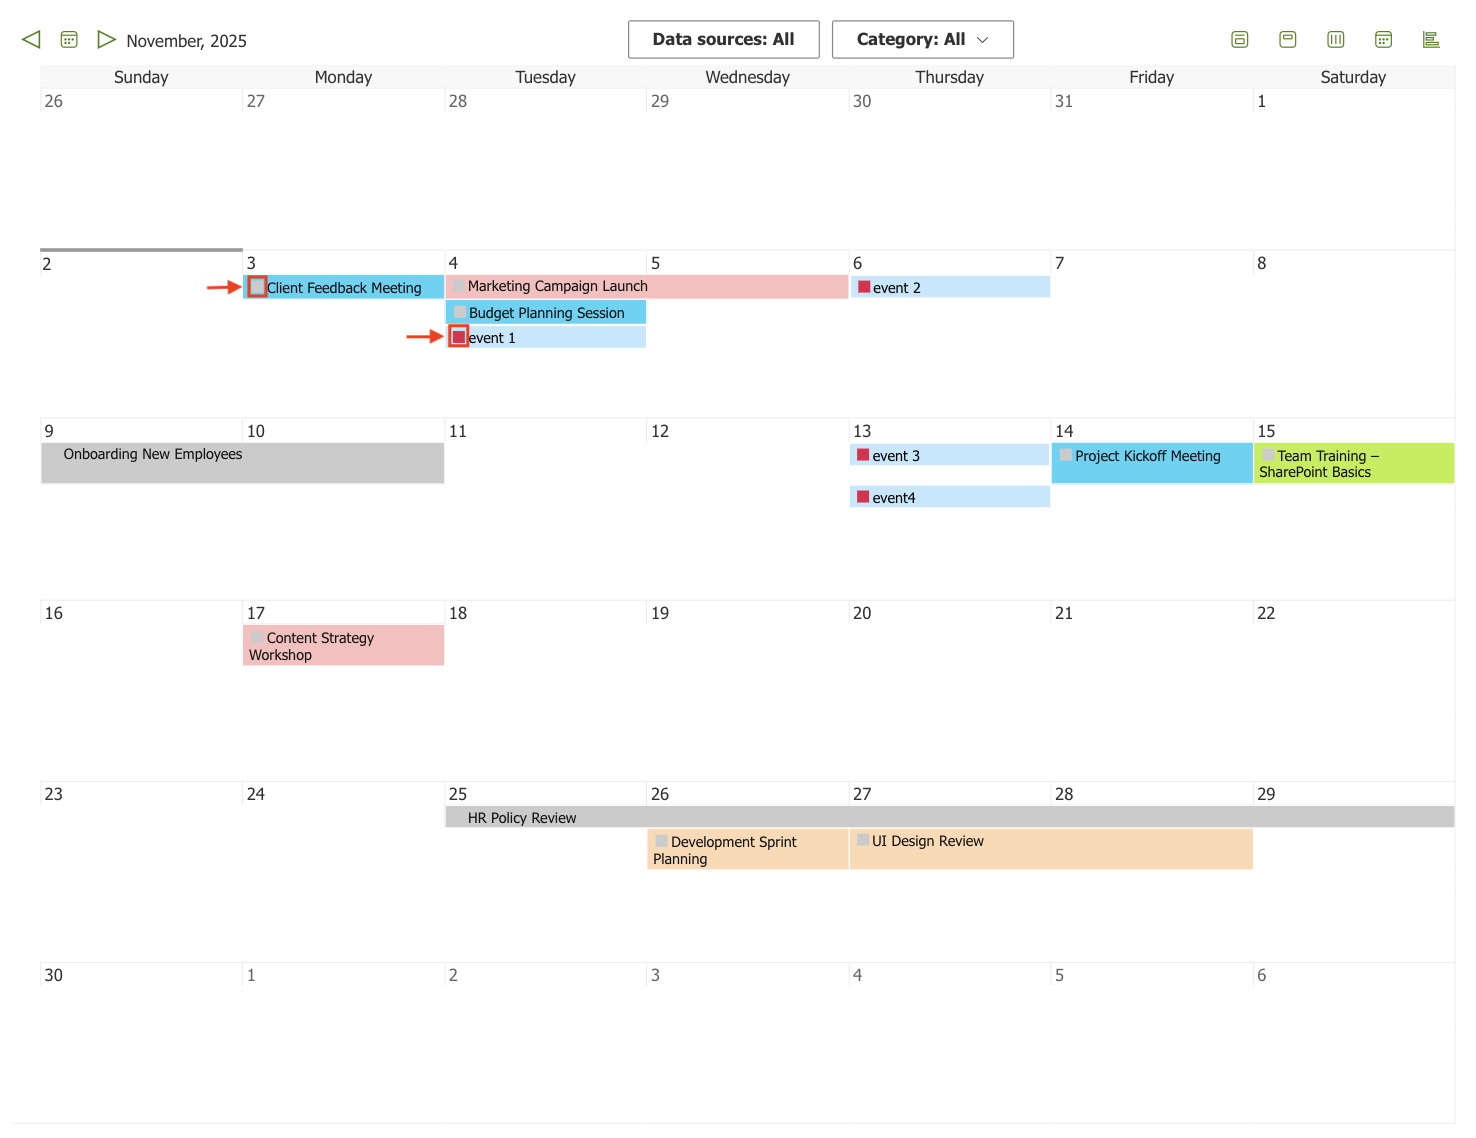
Watch this quick video walkthrough from Infowise:
Summary
You’ve successfully set up your first Event Calendar web part in SharePoint Online.
By connecting a list and configuring key fields, you can display events in a modern, color-coded calendar view that’s interactive and easy to navigate.