Sometimes you need a printout that looks exactly like a branded document — for example, an invoice, purchase order, or contract.
With UltimateForms: Print, you can link your SharePoint list directly to a Microsoft Word template (DOCX) and automatically fill it with live data.
This tutorial shows how to:
- Connect a Word file as a print layout
- Use dynamic tags (placeholders) such as [[ColumnName]]
- Generate professional Word documents from SharePoint data automatically
Instructions
Step 1: Prepare Your List
We’ll use a simple Invoices list as an example.
Create or open a list with the following columns:
- Invoice Number (Item Ids)
- Client (Single line of text)
- Client Address (Single line of text)
- Client Email (Single line of text)
- Client Phone (Single line of text)
- Invoice Date (Date and Time)
- Due Date (Date and Time)
- Invoice Line Items (Associated items)
- Invoice Total (Associated items summary)

These columns will correspond to placeholders in your Word document.
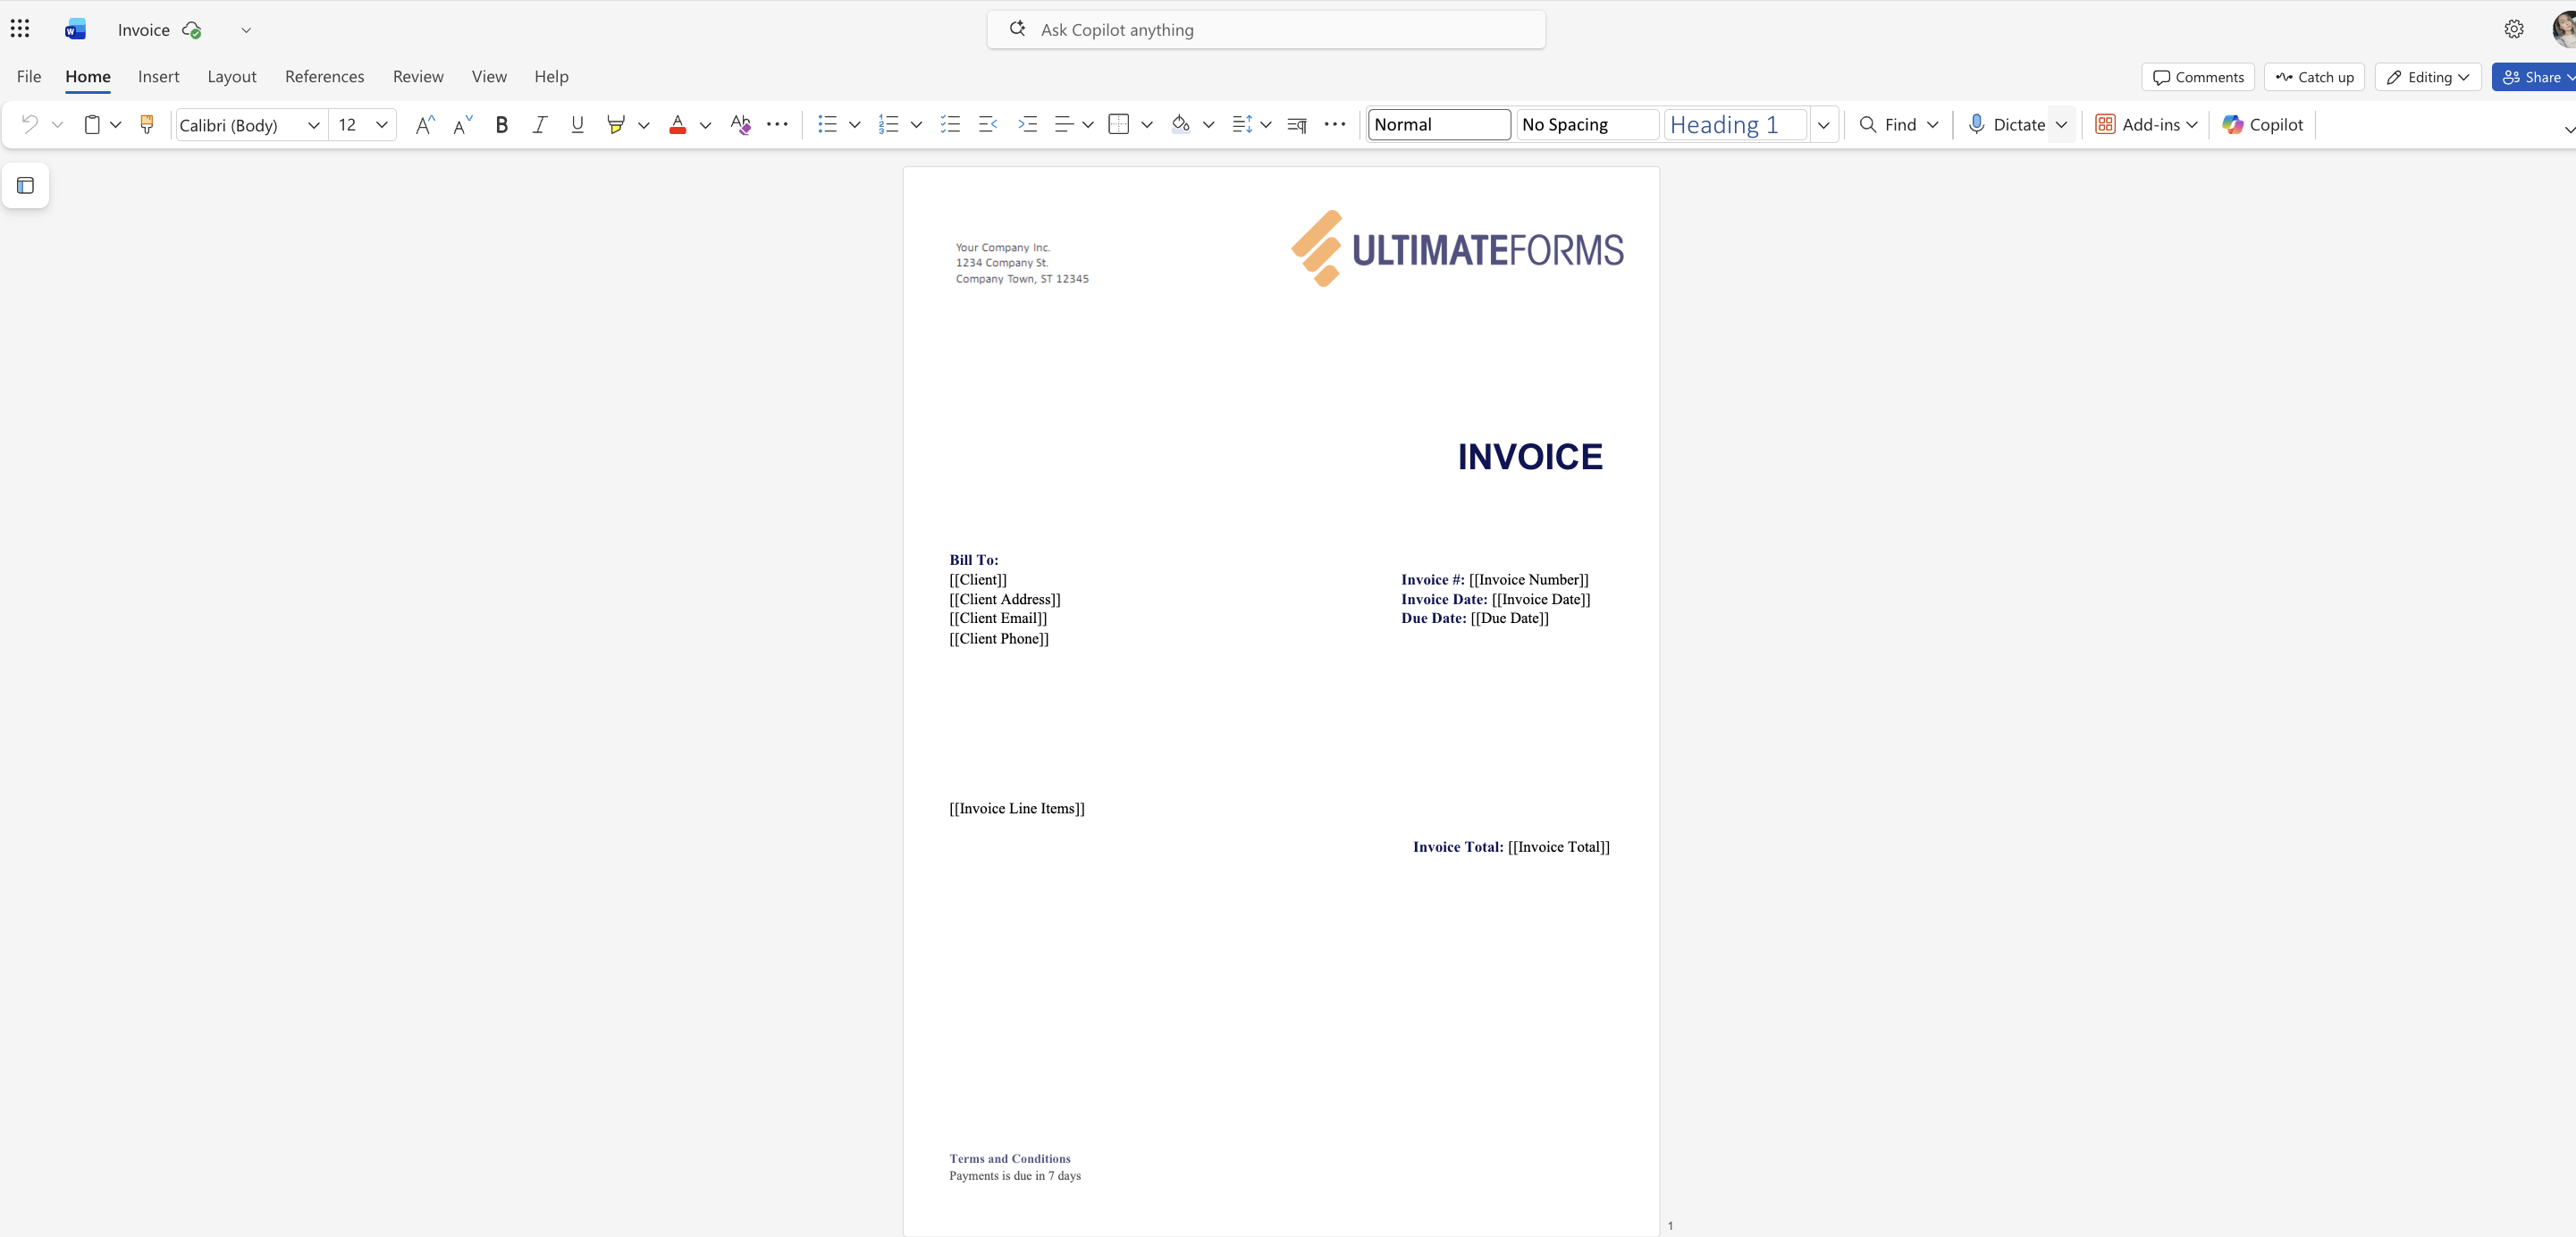
Step 2 : Create a Word Template
- Open Microsoft Word and create a blank document.
- Insert text, company logo, and formatting as desired.
- Wherever you want SharePoint data to appear, insert a dynamic tag using double square brackets:
- Invoice #: [[Invoice Number]]
- Client: [[Client]]
- Client Addres: [[Client Addres]]
- Client Email: [[Client Email]]
- Client Phone: [[Client Phone]]
- Invoice Date: [[Invoice Date]]
- Due Date: [[Due Date]]
- Invoice Line Items: [[Invoice Line Items]]
- Invoice Total: [[Invoice Total]]
- Each tag must exactly match the internal column name in SharePoint.
- Save the file as Invoice.docx.
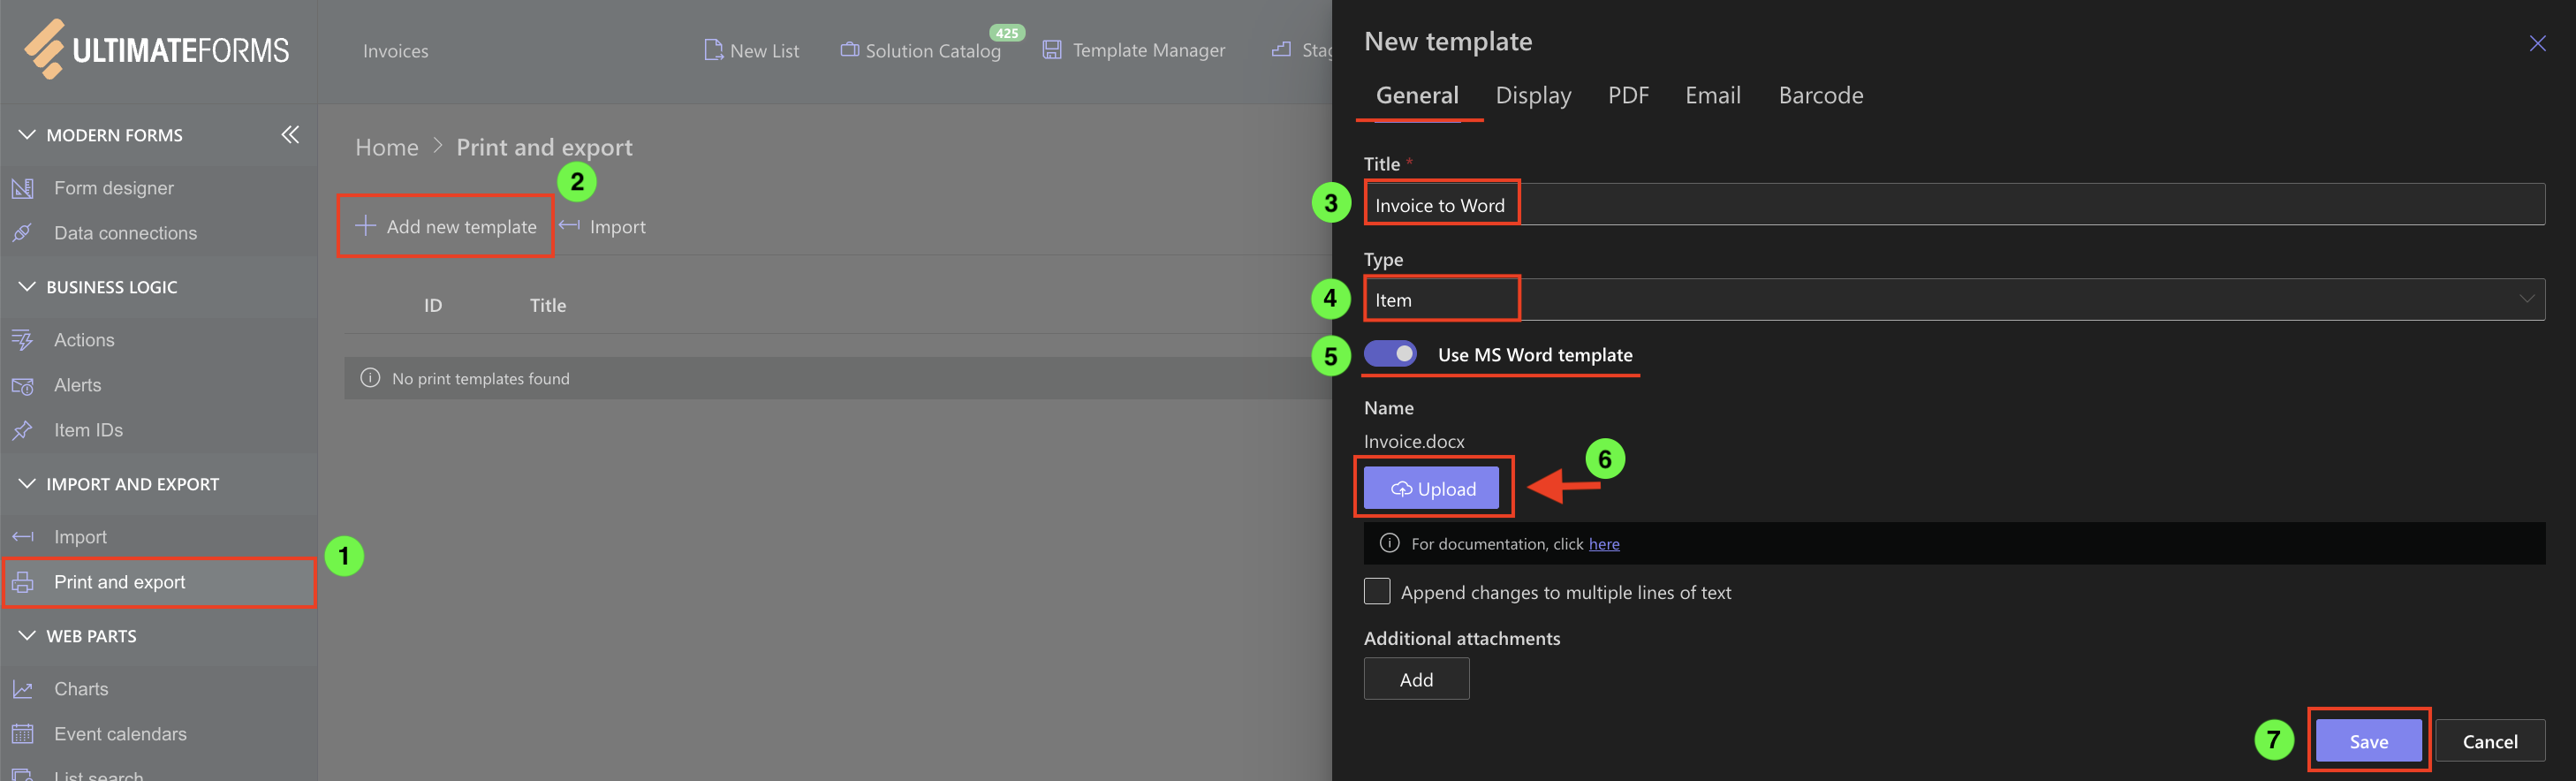
Step 3: Configure Print Template in UltimateForms
- Open your Invoices list.
- Go to Design → Print and Export.
- Click Add New Template or edit an existing one.
- Set:
- Template Title: Invoice to Word
- Type: Item (prints one record at a time)
- Check Use MS Word Template.
- Upload your Invoice.docx file.
- Click Save.
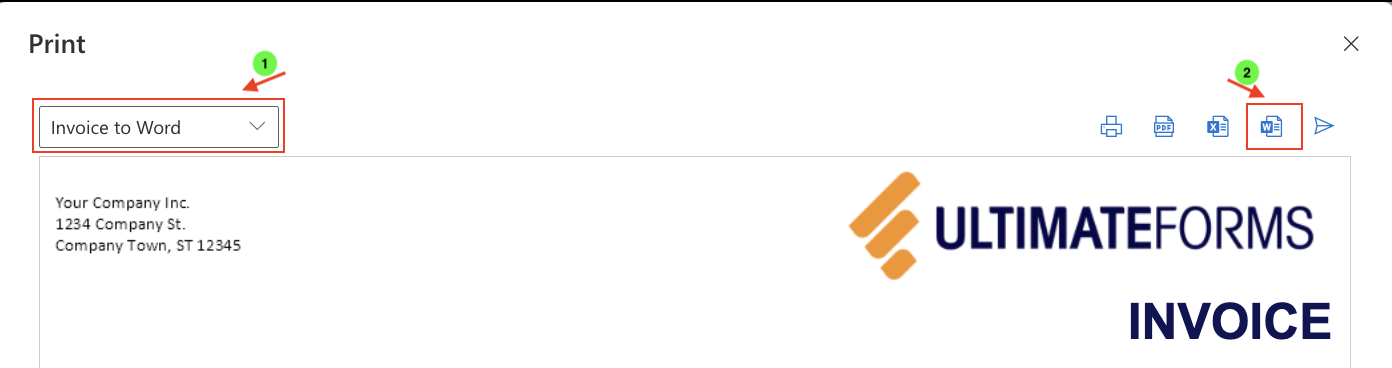
Step 4: Generate and Test the Output
- Return to your Invoices list
- Choose an item you want to print and click Print

- Choose Invoice to Word (the template you created).
- In the print preview, click the Word icon to generate and download the filled document.
- UltimateForms will merge your SharePoint data into the Word template.
- The file will download automatically to your computer as a fully formatted document.
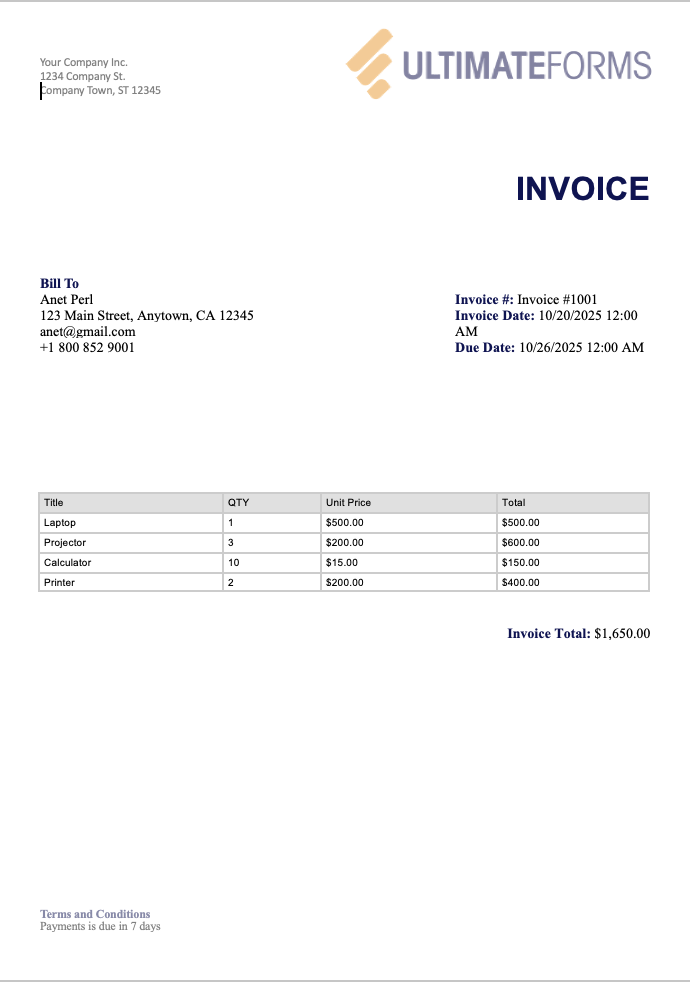
- Open the downloaded file in Microsoft Word to review that:
- All placeholders were correctly replaced with list values.
- Formatting, logo, and layout remain intact.
- Currency, date, and text columns display correctly.
Step 5: Export as PDF (Optional)
If you prefer, you can export the generated Word document as a PDF directly after printing.
This allows you to keep a shareable, read-only copy of your generated file.
Summary
Printing to Word with UltimateForms: Print gives you a quick way to turn SharePoint items into polished business documents using your own templates and dynamic tags.