Tracking changes to SharePoint items is critical in many business scenarios. Whether you need to audit changes, capture comments, or build a changelog, a history section helps keep a clear, readable record of updates made over time.
In Infowise Ultimate Forms, you can create a dynamic History section by appending text to a dedicated column using the Update list Item action. This approach ensures that new entries are always added to the bottom (or top) of the log while preserving previous content.
Instructions
Step 1: Add a History Column
- Go to your SharePoint list or library
- Add a new Multiple lines of text column
- Name it History (or similar)
- Enable Rich Text = Yes
- Add a tab control in Form Designer, create a History tab, and add the newly created History column.
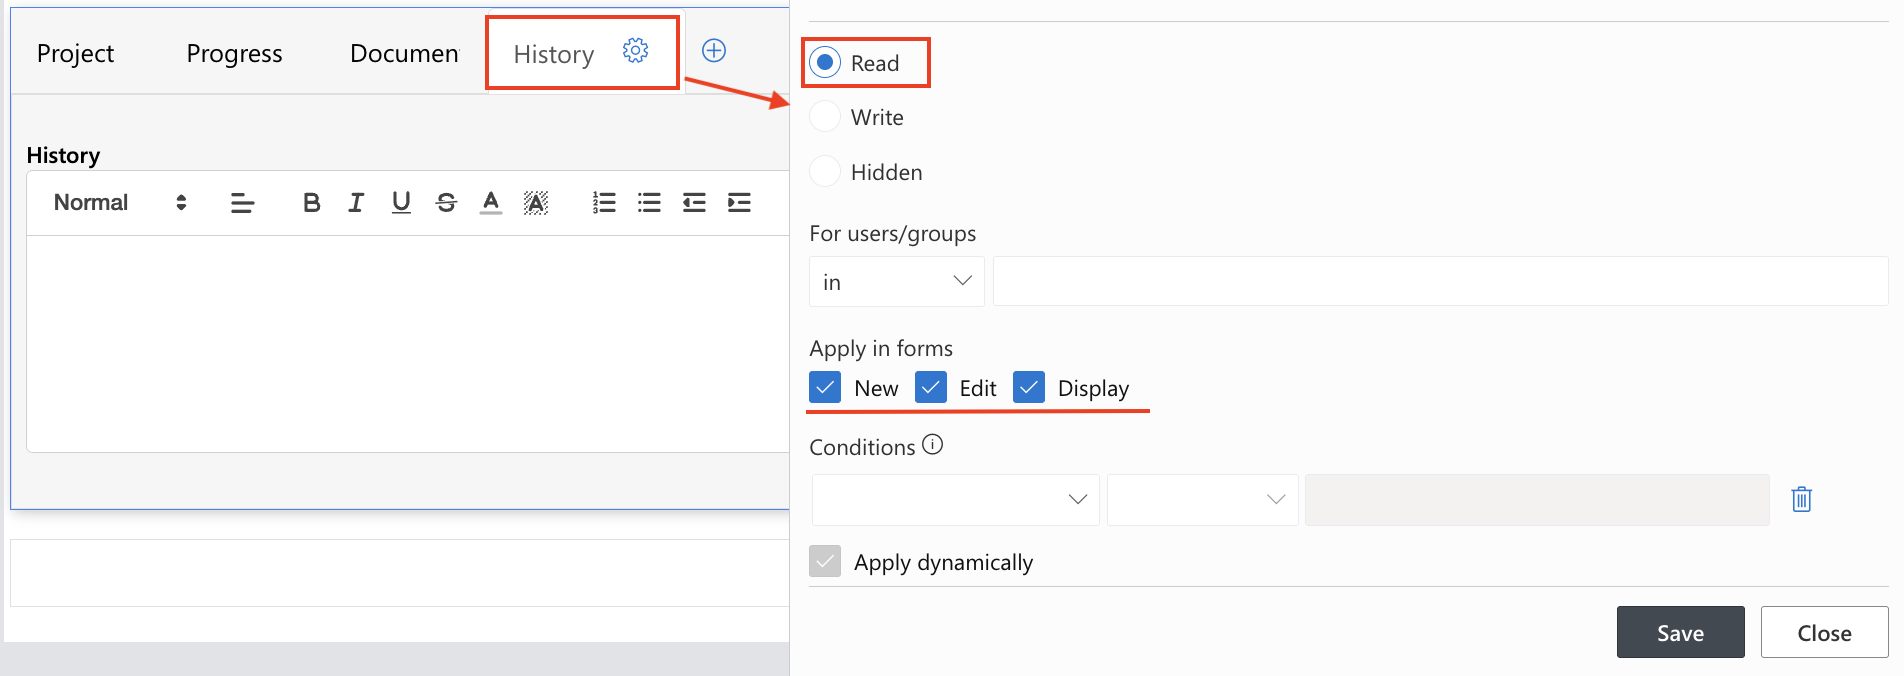
- Using permissions settings, set the History column as read-only.
Step 2: Create an Action to Append to the History Column
- Open Ultimate Forms for the list
- Go to Business Logic > Actions
- Click Create a New Action (type: Update list item)
- Set up the action:
- Title: Add to History
- Run On Event: Modified
Step 3: Set the Update Formula
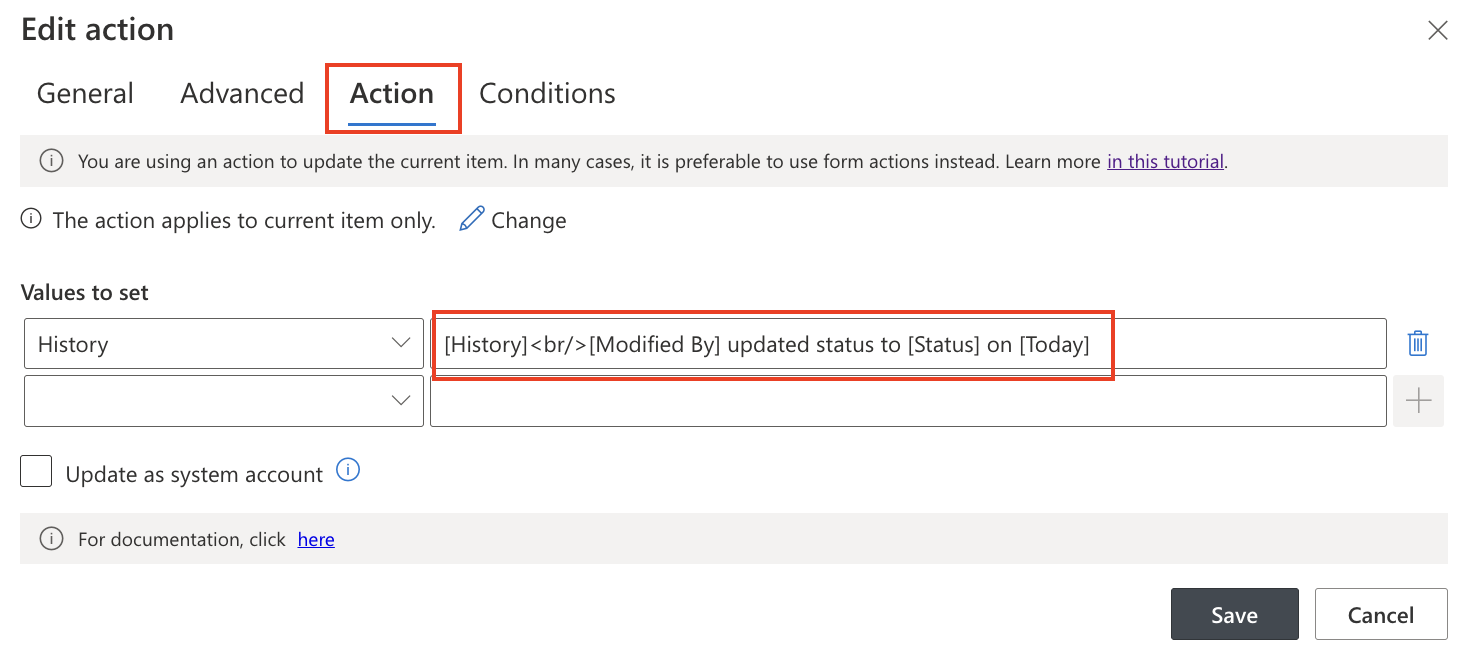
Under the Value to Set, set the update formula for the History Log column.
Example formula:
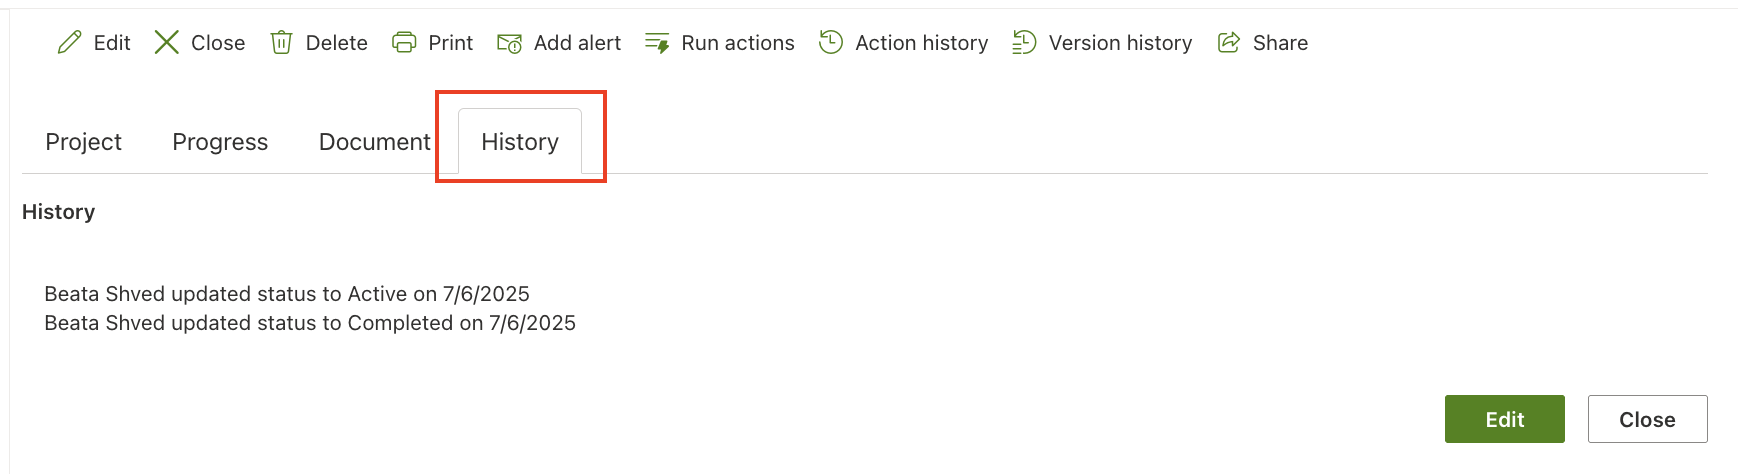
[History]<br/>[Modified By] updated status to [Status] on [Today]
This appends a new line at the bottom, preserving the previous log.
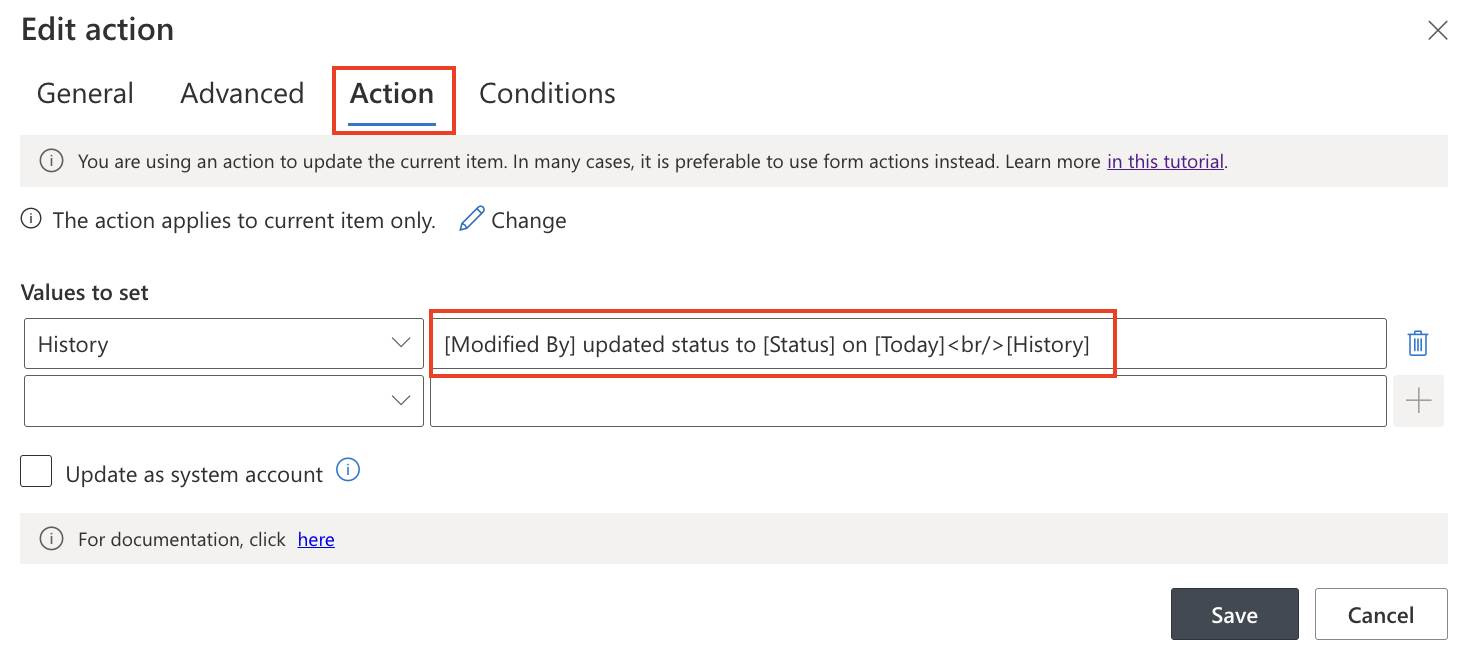
If you want to prepend the new entry at the top (most recent first), use:
[Modified By] updated status to [Status] on [Today]<br/>[History]
You can include more columns as needed, for example:
[History]<br/>[Modified By] changed Assigned To to [Assigned To] on [Today]
Example Use Case
A project manager wants to track when team members update the task status or reassign it to another person.
By configuring a History column and using the formula:
[History]<br/>[Modified By] changed Status to [Status] and Assigned To [Assigned To] on [Today]
…you now capture an audit trail of critical column changes directly within the list item — with no additional configuration.
This allows:
- Better transparency
- Easier troubleshooting
- Internal audit readiness
Tips & Best Practices
- Use <br/> to separate entries clearly within the text
- Use [Today] or [Modified] to include the date/time of the change
- Include [Modified By] to identify who made the update
- Use after change conditions to limit the action only to specific column updates (e.g., when Status actually changes)
- Set the column as read-only in the form UI to prevent manual edits
- Use Tabs and Layouts to show the History column in a collapsible section
Summary
A History Section is a powerful tool to track important updates on your SharePoint items. With Ultimate Forms, you can build this functionality using a simple Update List Item action that appends log entries automatically. This setup ensures transparency and helps maintain clean internal communication and tracking — without relying on external audit logs.