SMS messaging is often used for customer communication, notifications, approvals, and service requests. By integrating Twilio with Import, incoming and outgoing text messages can be automatically stored in SharePoint.
This allows organizations to track SMS communication, build reporting dashboards, and even incorporate text messages into business processes.
In this tutorial, you will configure an Import Profile that imports Twilio messages into a SharePoint list.
Instructions
Before You Start
You will need:
- A Twilio account
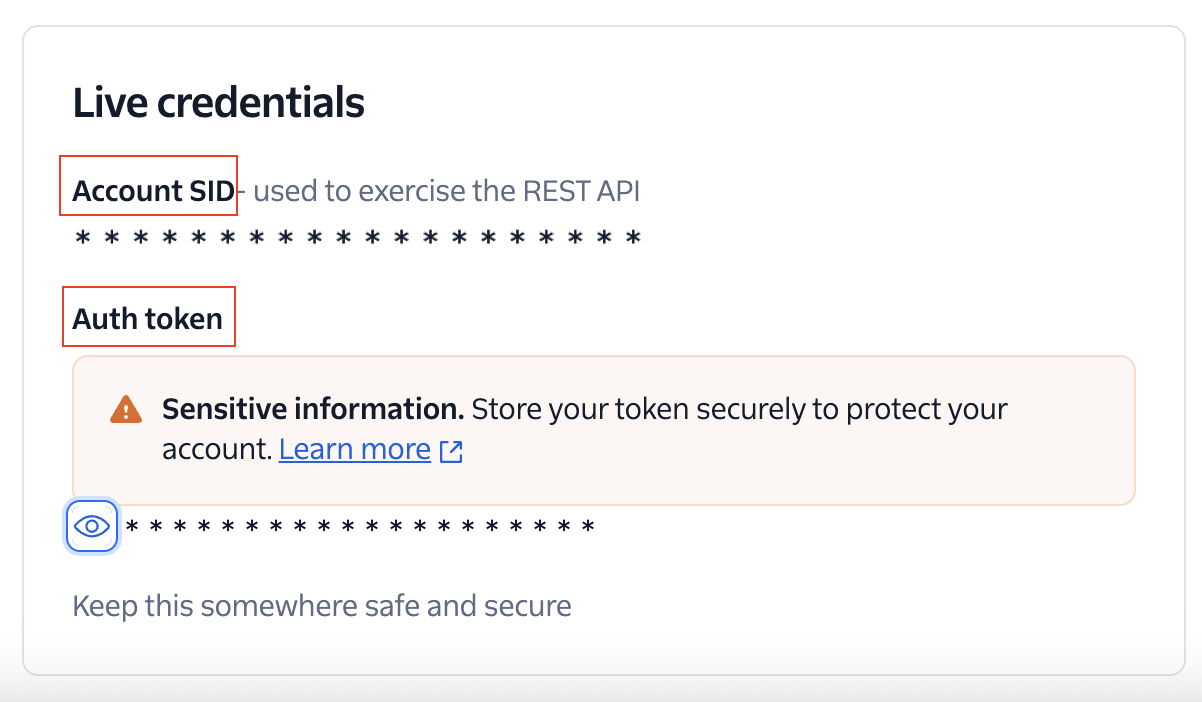
- Twilio Account SID
- Twilio Auth Token
- Sign into Twilio. If you don't have an account yet, create one.
- Go to Settings and scroll down to API Credentials section. You are going to use Account SID and Auth token.
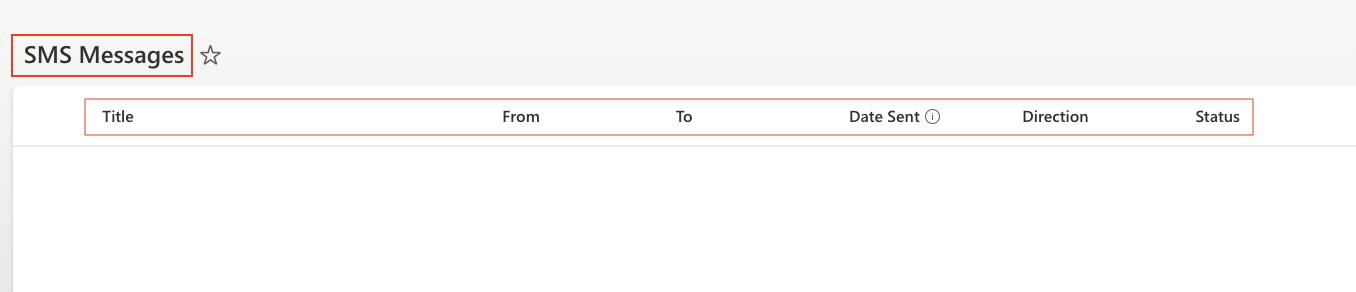
- Create a SharePoint list named: SMS Messages with columns:
- Title - Single line of text
- From - Single line of text
- To - Single line of text
- Date Sent - Date and Time
- Direction - Single line of text
- Status - Single line of text
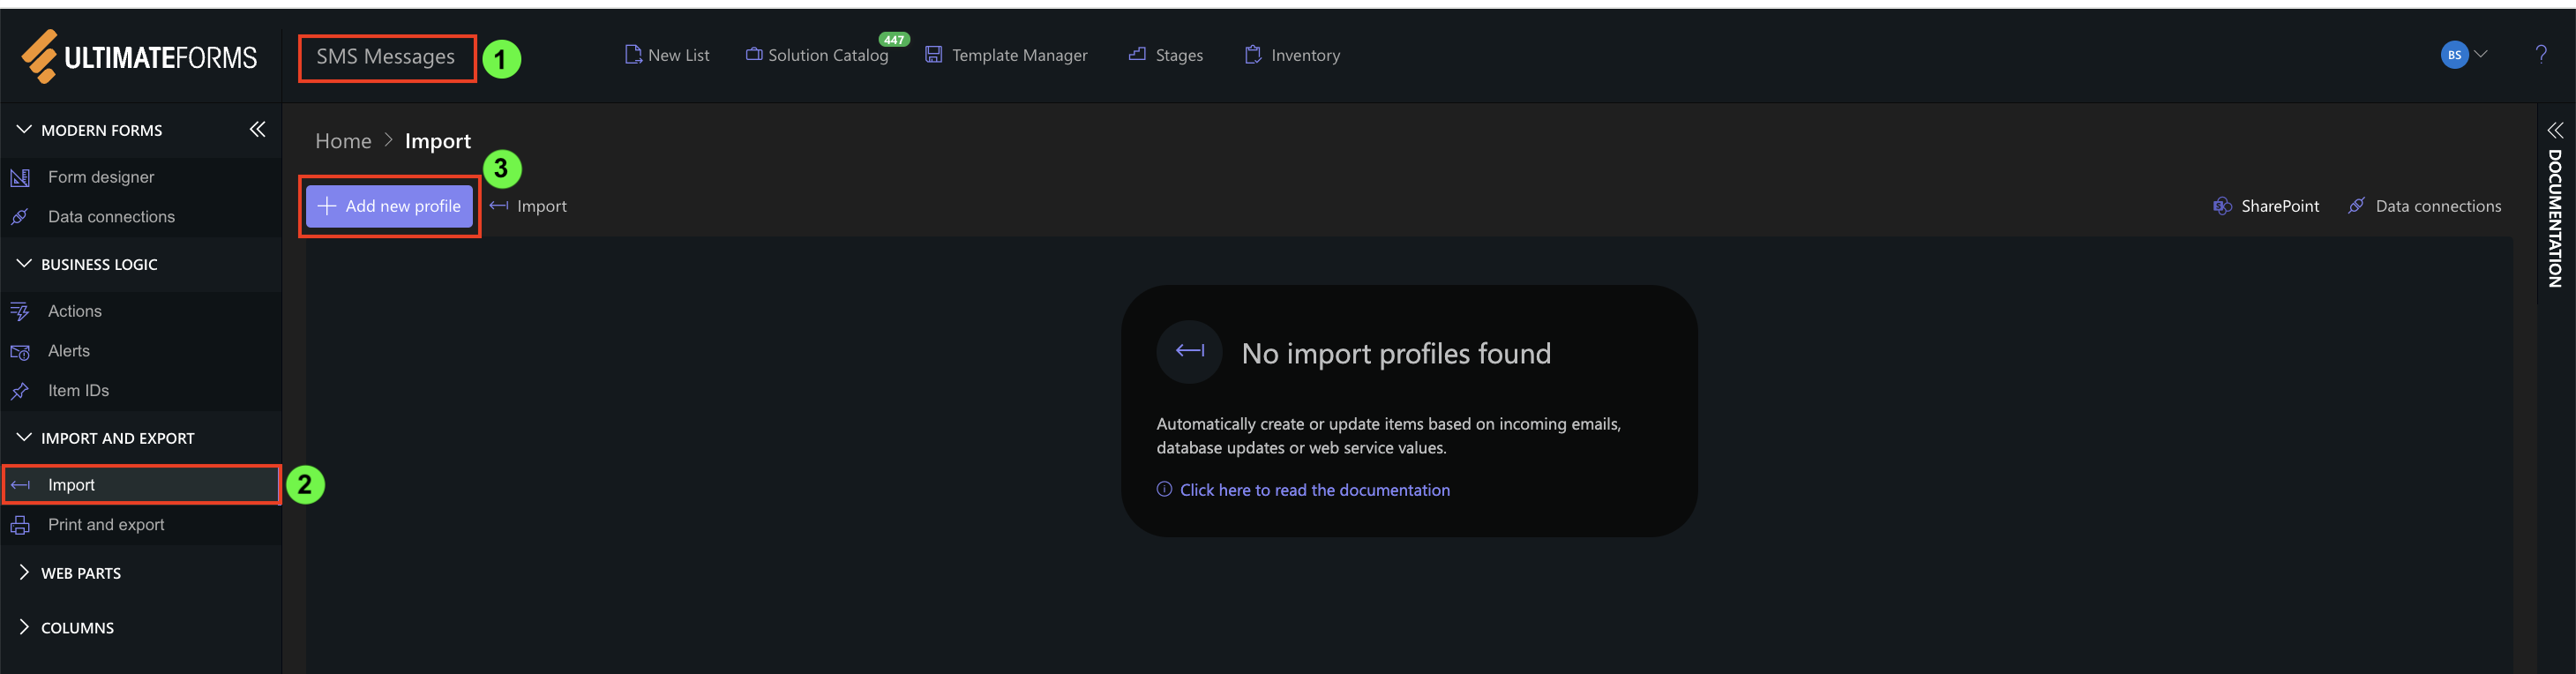
Step 1: Open Import Settings
- Open the SMS Messages list
- Click Design
- Select Import
- Click Add new profile
Step 2: Configure General Settings
Configure the profile:
- Title: Twilio SMS Import
- Start Date: Select a date before the messages you want to import
- Polling Frequency: Immediately (or as required)
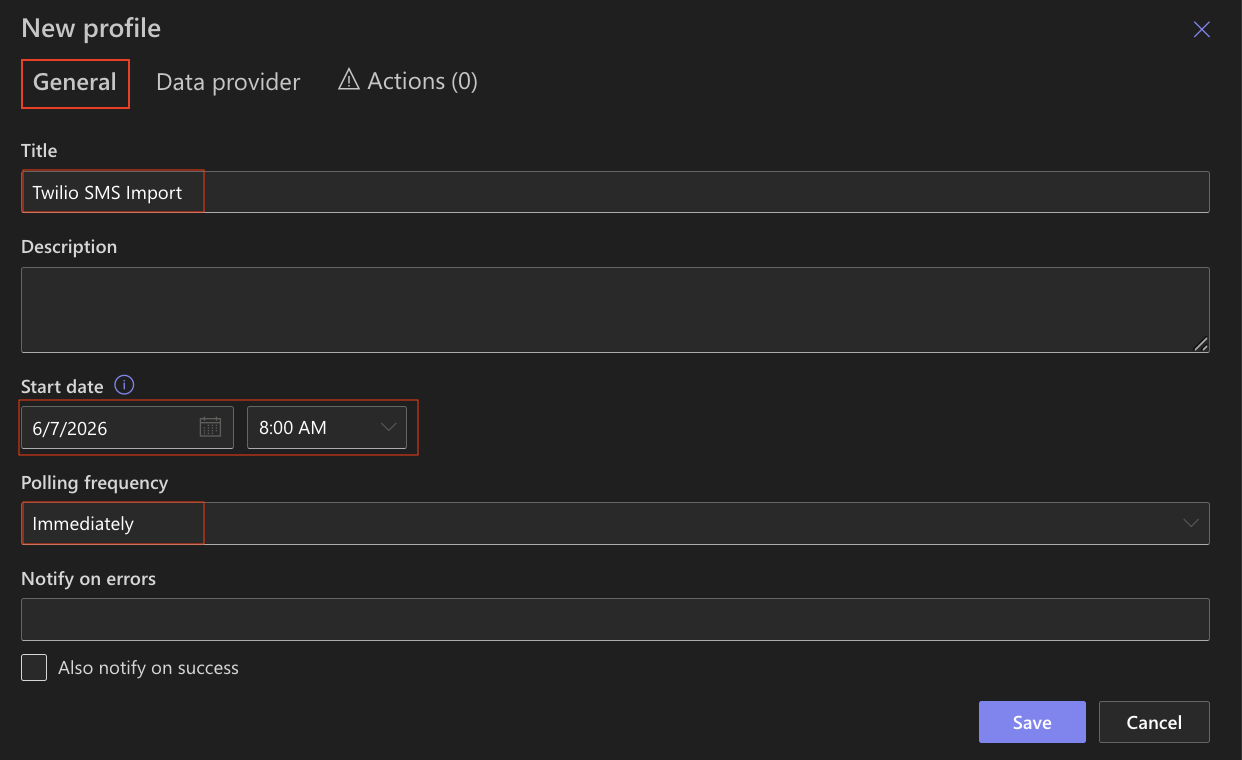
Note: The Start Date determines which messages are included during the first import.
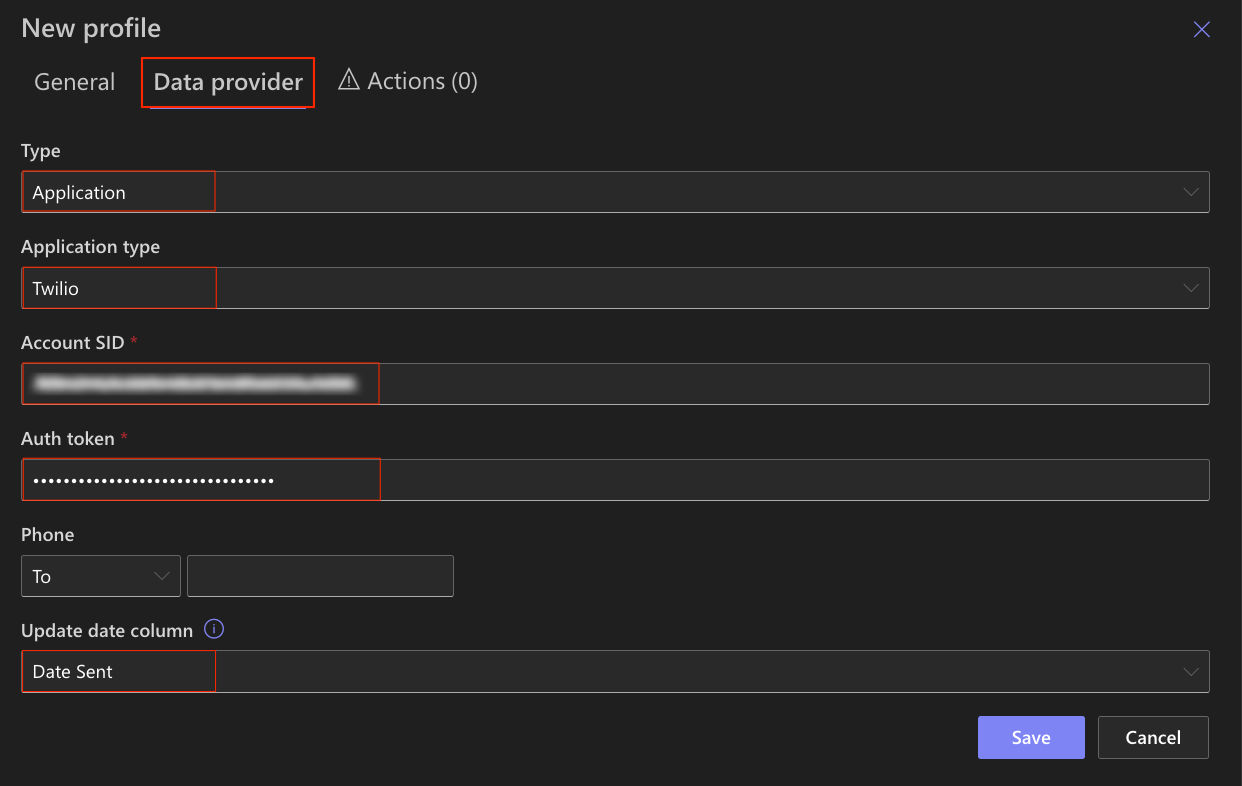
Step 3: Configure Twilio Provider
- Open the Data Provider tab
- Configure:
- Type: Application
- Application Type: Twilio
Enter:
- Account SID
- Auth Token
- Update date column - Default
Optional:
- Phone - You can limit the import to message only sent or received from a specific phone number. I'm leaving this field empty.
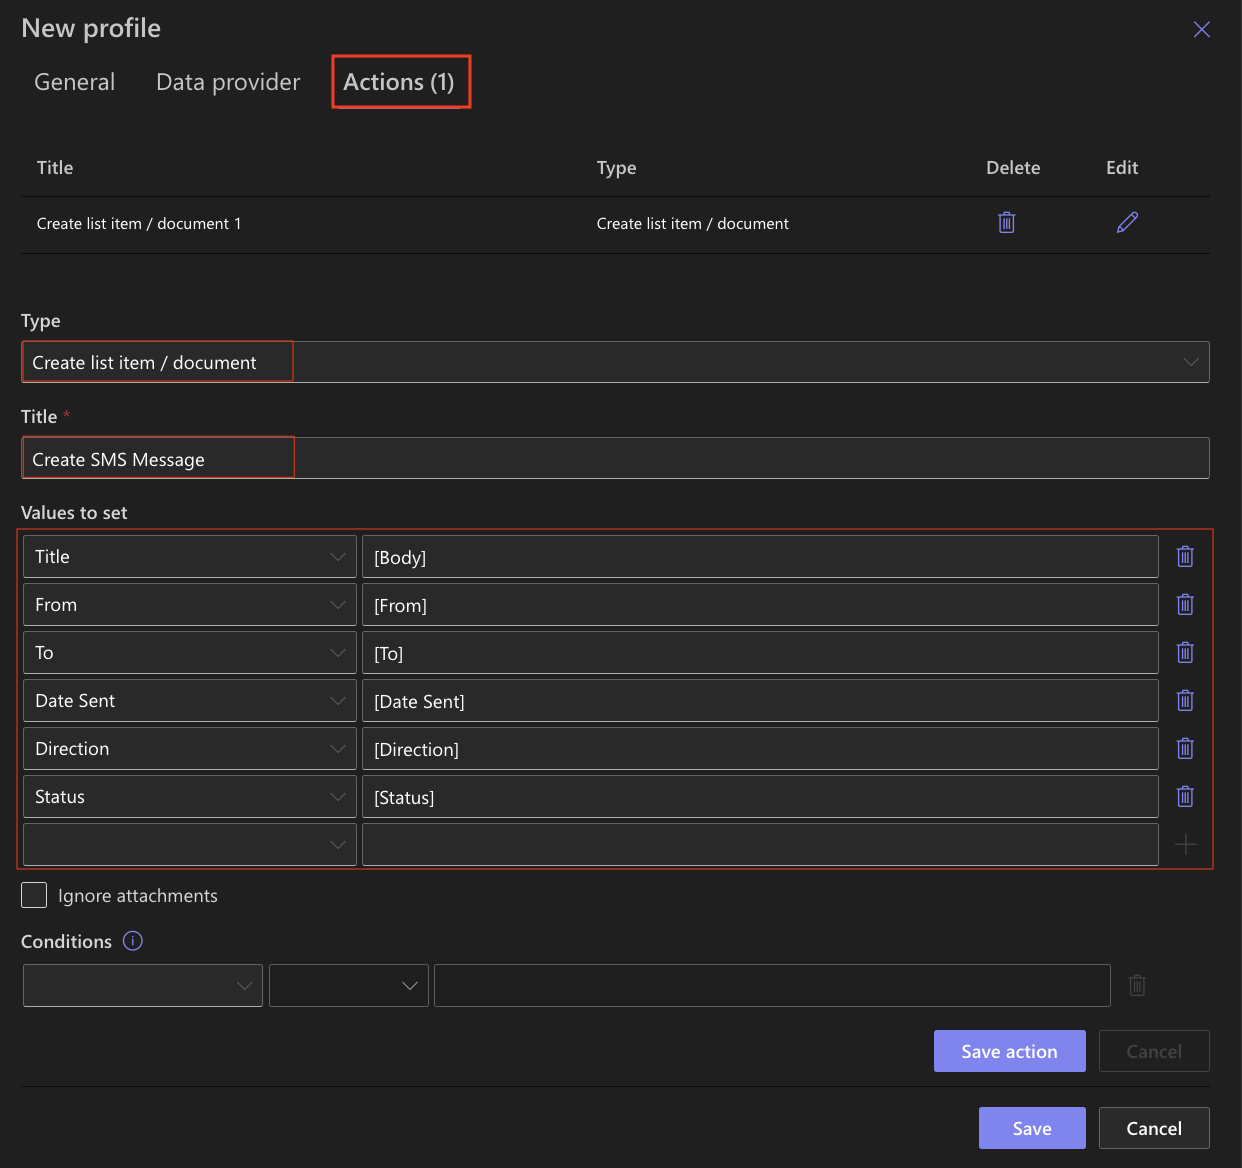
Step 4: Configure Action
- Open the Actions tab
- Select Create list item / document
- Title: Create SMS Message
- Value to set:
-
- Body → Title
- From → From
- To → To
- Date Sent → Date Sent
- Direction → Direction
- Status → Status
- Save action
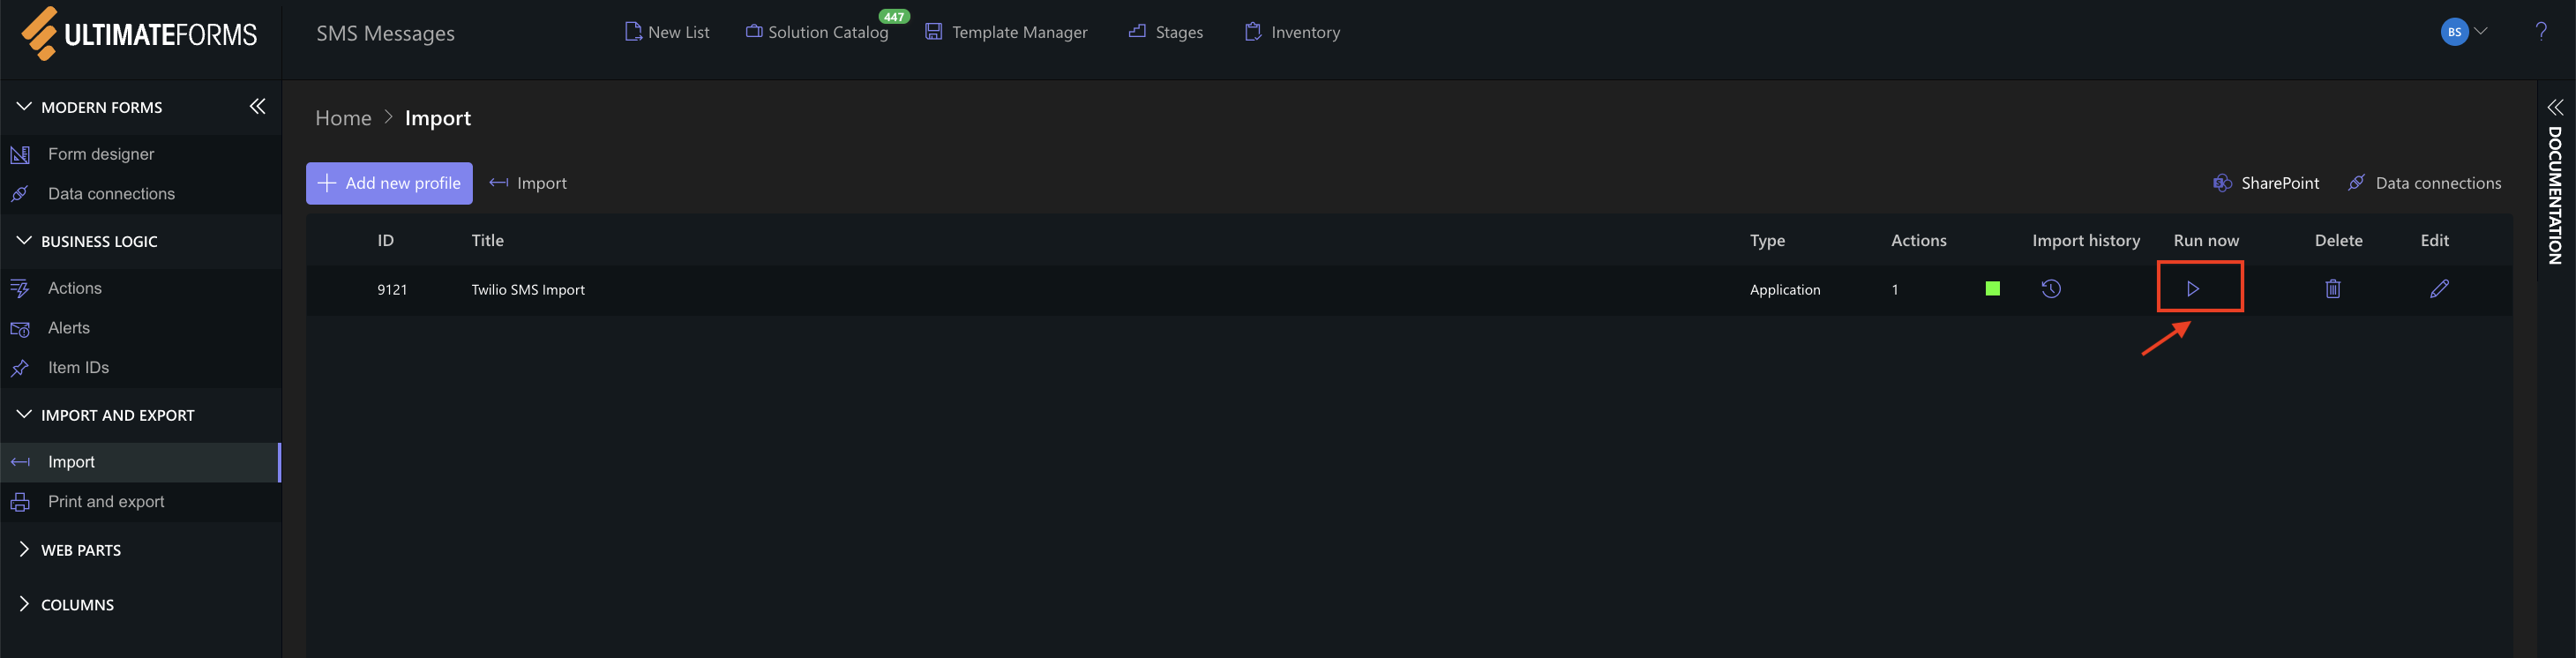
Step 5: Save and Run the Profile
- Save the profile
- Click Run Now or wait for the scheduled execution
Step 6: View Import History
After running the profile, you can review the import execution details.
- Open Import
- Select your import profile
- Click Import History
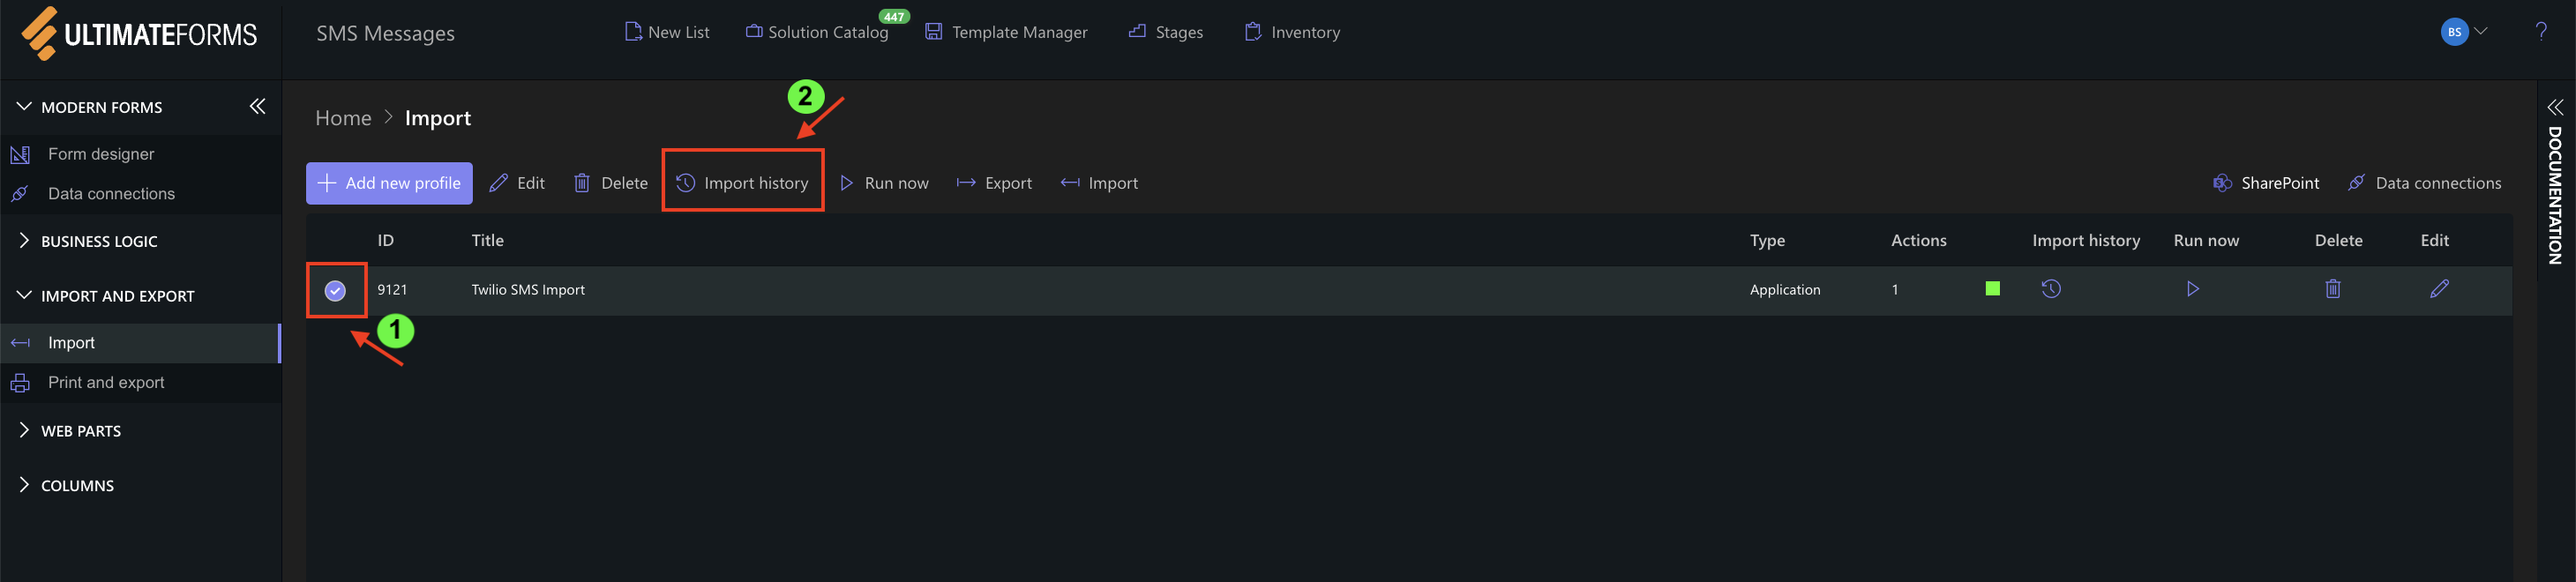
The history window displays information about each import execution, including:
- Execution date and time
- Import status
- Actions performed
- Detailed messages about the import process
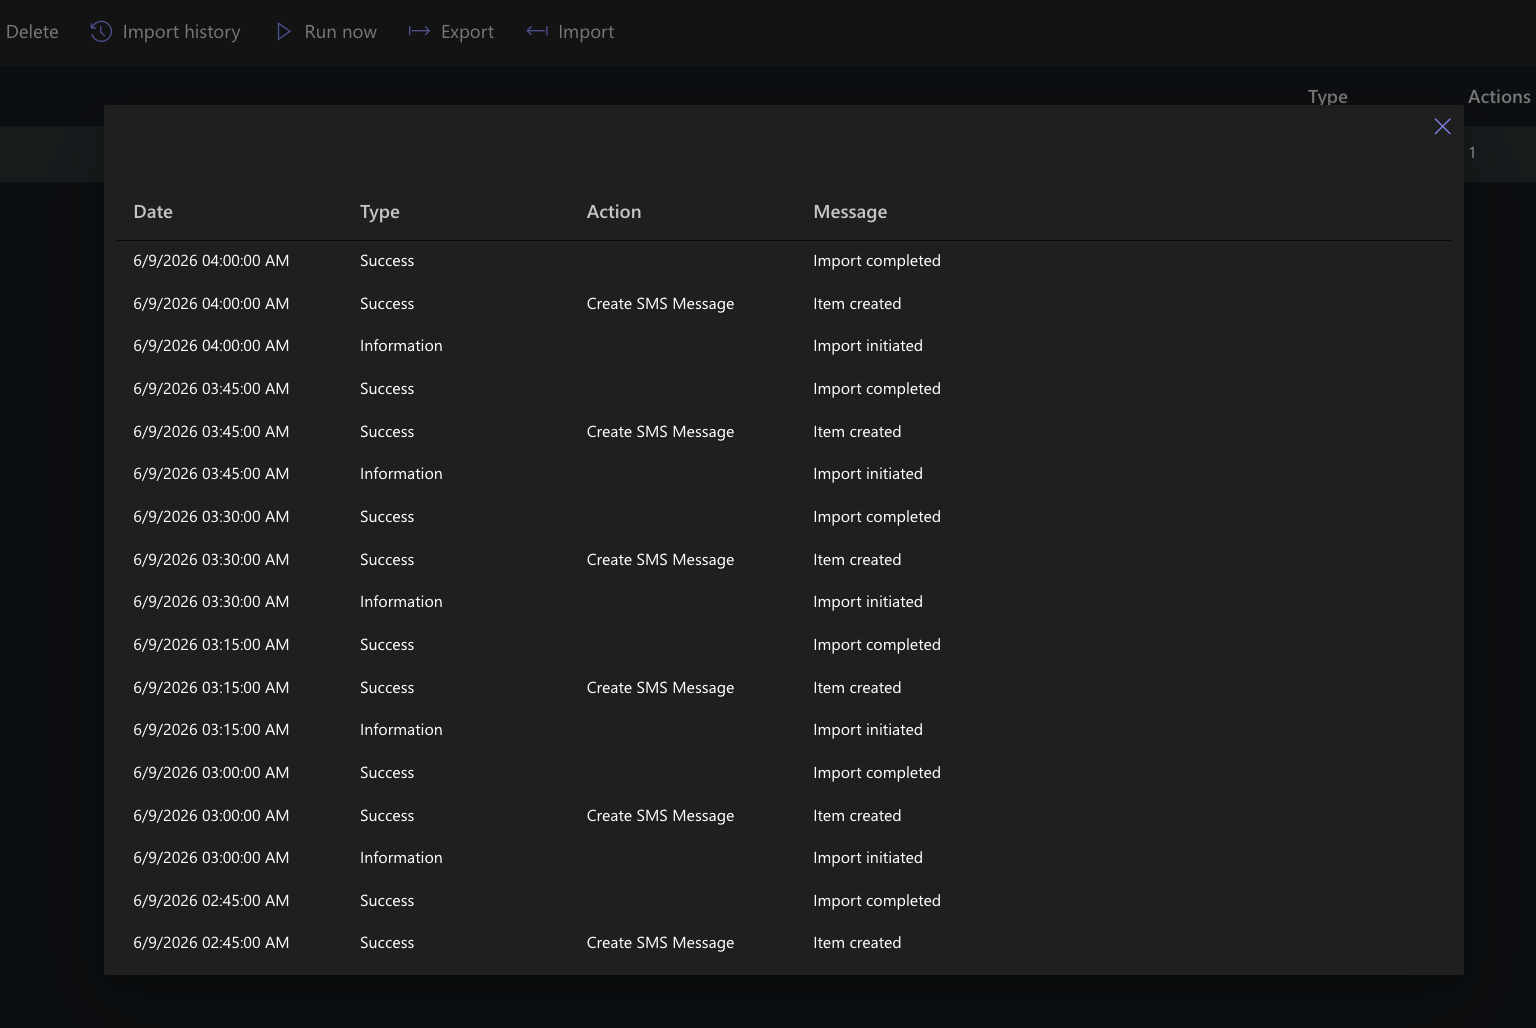
In this example, you can see that the import was initiated, the Create SMS Message action was executed, and a new item was successfully created.
Import History is useful for monitoring profile activity, verifying successful imports, and troubleshooting issues when imports do not behave as expected.
Step 8: Verify Results
After the import completes:
- Open the SMS Messages list
- Verify that messages have been imported successfully
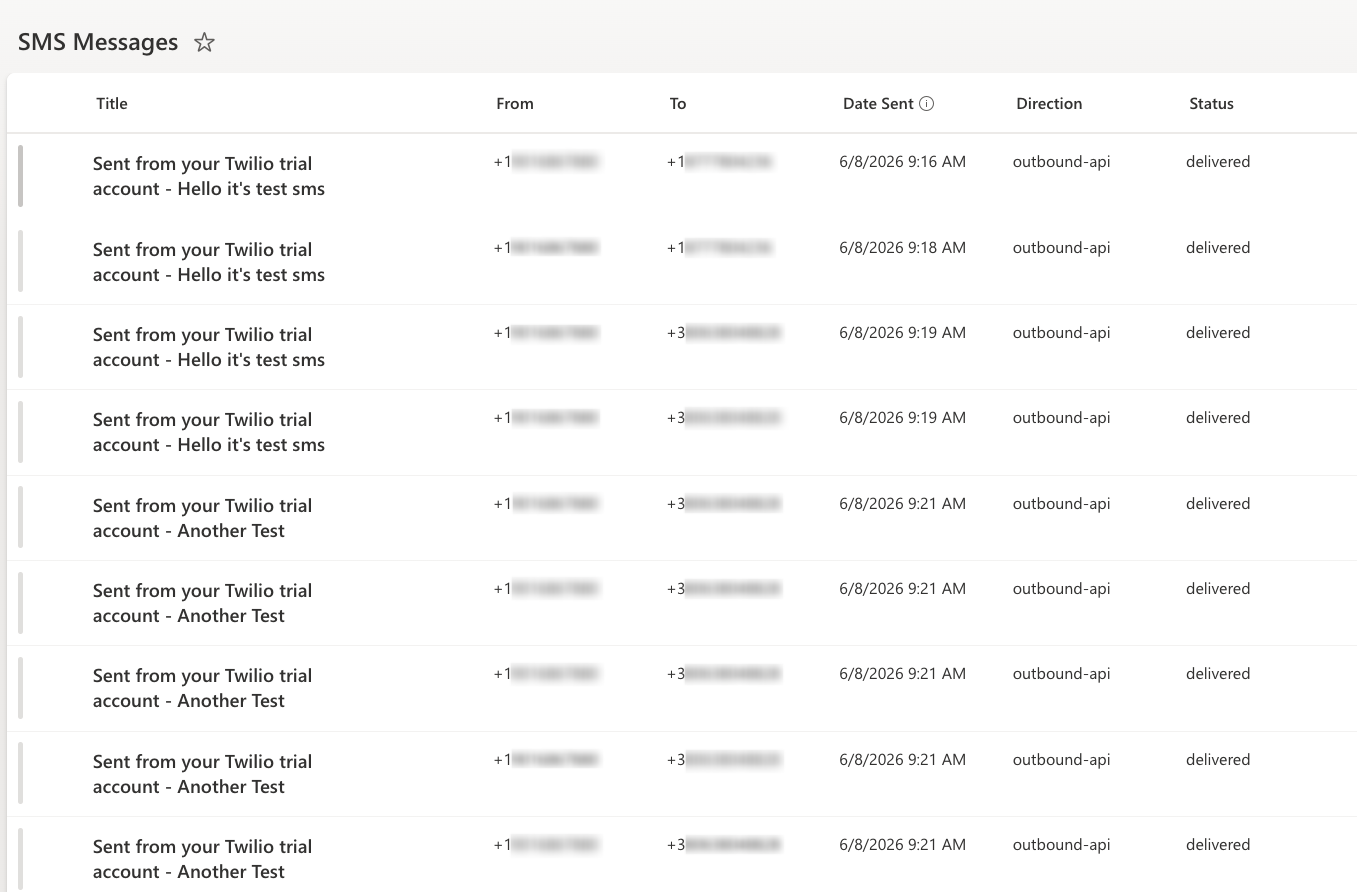
Result
Twilio SMS messages are automatically imported into SharePoint and stored as list items.
This provides a centralized location for tracking SMS communication and enables integration with SharePoint business processes.
Summary
You learned how to configure Import to retrieve SMS messages from Twilio and automatically create SharePoint items.
This approach can be used for communication tracking, approvals, customer service workflows, and other SMS-driven business processes.