Ultimate Forms automates SharePoint business processes through actions: small, configured units of work that run when items change, on a schedule, or at the click of a button. There are action types for updating and creating data, sending communications, managing permissions, calling external systems, and printing documents. Each is configured in the browser, with conditions deciding when it runs. This guide catalogs the action types by what they do, then walks the five steps of setting one up.
If you have ever monitored a workflow at midnight or debugged one nobody documented, this is the simpler path.
Why actions instead of workflows
I have spent years automating processes in SharePoint, and one project made the case better than any comparison chart. A manufacturing company needed its invoice approval process automated. Timely approvals, minimal manual touches.
Built on traditional SharePoint workflows, it demanded extensive coding and constant monitoring. Bottlenecks appeared. Fixing them meant more code.
Rebuilt on Ultimate Forms actions, the same process became configuration. An invoice arrives and the status is set. The approver gets an email with the amount in the subject line. On approval, the record updates and the next notification fires. Each step is one action, readable in plain settings, owned by the people who run the process. That difference is the whole argument.
The action catalog
Ultimate Forms offers a comprehensive suite of action types. Here they are, grouped by the job they do.
Working with data:
- Update List Item. Automatically update fields in one or more list items. The workhorse: status changes, stamped dates, cascading updates.
- Create List Item. Generate new items based on the current item's values. New project, new task set.
- Delete List Item. Remove items from any list in the site collection.
- Copy List Item. Duplicate items or documents to a new location.
- Manage Attachments. Copy, move, or delete attachments between list items and document libraries.
- Edit Images. Resize, crop and manipulate images in document libraries
- Calculate Summary. Compute or check values of specific columns across items.
- Generate Associated Items. Automatically create associated items, the parent-child pattern.
Structure and security:
- Create List or Site. Generate new lists or sites within the site collection. Project provisioning without a request to IT.
- Manage Permissions. Adjust permissions for sites, lists, folders, or items. Lock a record on submission; open it on return.
Communication:
- Send Email. Automated notifications to recipients, driven by conditions and item values.
- Manage Exchange. Create, update, or delete calendar events based on item values.
Integration:
- Call Application or Service. Perform web service calls using list item values, including triggering Power Automate flows.
- Manage database data. Execute stored procedures in any database.
- Manage Entra ID /Active Directory. Create and manage users and groups in Entra ID or Active Directory.
- Manage Teams. Create or updates teams and channel. Sends messages to channels or chats. Microsoft 365 only.
- Manage Planner. Create or update items in Microsoft Planner. Microsoft 365 only.
- Run PowerShell. Execute PowerShell scripts. Note: not available in the Microsoft 365 app.
- Run Workflow. Execute workflows assigned to list items, for coexistence with what you already have.
- Initiate Import. Triggers an Import profile execution.
Output:
- Print List Items. Produce printouts and documents from items, including consolidated PDF reports.
Orchestration:
- Action Group. Combine multiple actions to run sequentially as one unit, with loop support for repeating work across ranges of dates or numbers. Details in Discover the Power of Action Groups.
Setting up your first action
Five steps take you from an ordinary list to an automated one.
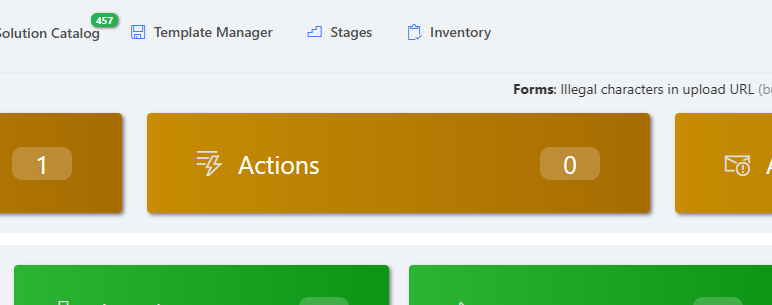
Step 1: Open the action settings. Navigate to Ultimate Forms via the list's Design command bar button and select Actions.
Step 2: Define the action. Click on Add new action. Next choose the action type, say, Update List Item (default) or Send Email. Configure what it does: which columns, which values, which recipients. Values can come straight from the current item, so the email names the actual requester and the actual amount.
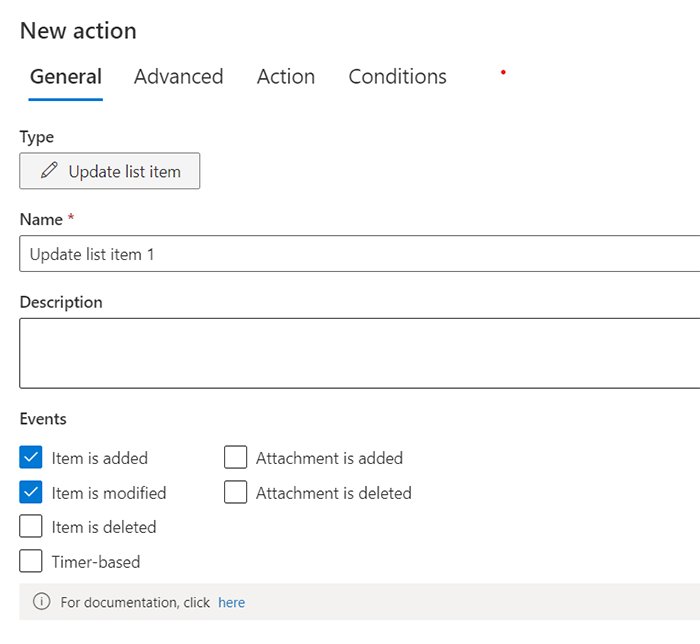
Step 3: Set the events and conditions. Define when the action executes. On item creation. On modification. When a specific column changes to a specific value. Conditions are where precision lives: "status changed to Approved and amount above 5,000" is as easy to express as "new item." Actions can also run on a schedule or manually from a button, which covers reminders, escalations, and on-demand operations.
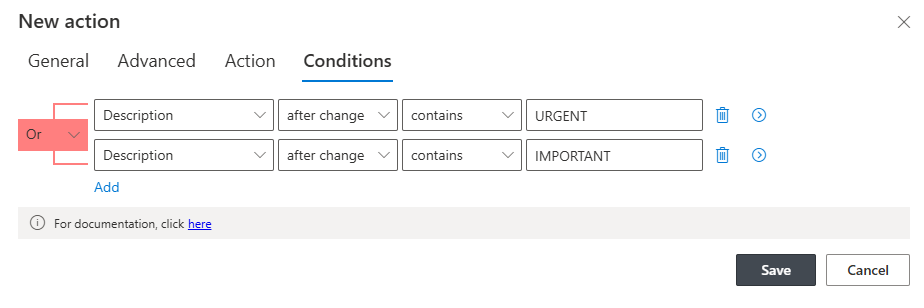
Step 4: Test and monitor. Trigger the action and confirm the result. Then keep an eye on Action History, the execution log stored by your action column. Every run is recorded with its outcome. When someone asks "did the notification go out?", the answer is a lookup, not a guess.
Habits that keep automation healthy
A few practices, learned the consultant's way, make the difference between automation that helps and automation that surprises.
Name actions for their business meaning. "Notify approver on submission" beats "Email 2" forever. Keep one action per job, and chain jobs with action groups; small actions are testable, reusable, and readable. Put escalations on timers rather than hoping someone notices, the scheduled action patterns cover hourly through monthly. And when a step must complete within the save itself, know the synchronous options.
Above all, start with one process. The invoice approval. The request intake. Automate its three most manual steps, run it for two weeks, and let the results recruit the next process. Extensive ranges of tools matter less than the first bottleneck you remove, and with actions, removing it is an afternoon.
Frequently asked questions
Add your comment