
What are Actions?
The Actions component of Ultimate Forms is an easy-to-use alternative to workflows and Power Automate. It allows you to implement advanced business logic without being an expert in workflow design. SharePoint automation does not have to remain strictly in the realm of dedicated developers.
Unlike the traditional SharePoint workflow, you do not need to set up complicated flowcharts to add automation to your business processes. You just set up a series of independent actions. Each action has its own triggers and conditions. You don’t need to worry about dependencies, states, or other SharePoint workflow details.
This makes it easier for non-technical users. You simply select the action type that matches what you are trying to do, configure it and save. You do not need to do anything beyond that. Actions offer a simple and approachable way to implement SharePoint business processes.
Action triggers
Actions have a variety of triggers that activate them:
- Events - actions are executed when items are added, update or deleted in your lists or document libraries
- Timer - actions are executed according to a date (for instance, 2 days before due date).
- Manual - actions are triggered by users via buttons on forms and/or list views
In all action triggers, you can use the values from the list item in the action configuration. Consider for instance that you are setting a Full Name column value to a combination of First Name and Last Name columns. The action will read the values of the two latter column from the list item. It will then combine them and then store the result in the Full Name column.
Introduction to parameters
Manual actions take it one more step further. They can request additional information from the user at the time of execution. When the user clicks on a button to run the action, the action shows a form with additional details to enter.
As an action creator, you can optionally define one or more such parameters. You can then use their values in exactly the same way as the regular column values. For example, you can enter the value of a parameter into the list item's column. A common example of such action could be settings the status of the item.
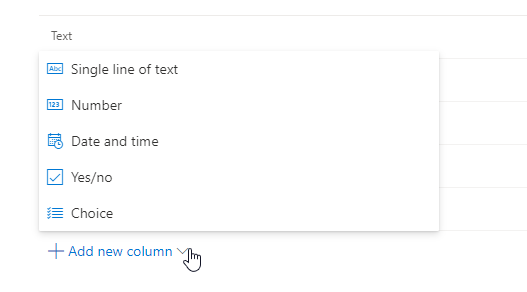
We support the following parameter data types:
- Text - free text input
- Number - any number or currency
- Date - date, and optionally, time
- Yes/no - checkmark for entering yes/no values
- Choice - selection from a number of predefined text choices
- Lookup - looks up values from a list
- Person or group - select one or more user or group
What is great about it is that the parameters behave just like regular columns. You can set default values, make them required and so on.
Let's see an example
- Start configuring a new action. The simplest and most common action type would be Update list items action that updates one or more items in a list/document library
- Enable Manual mode for the action.
- Notice Parameters section there, let's create a few parameters.
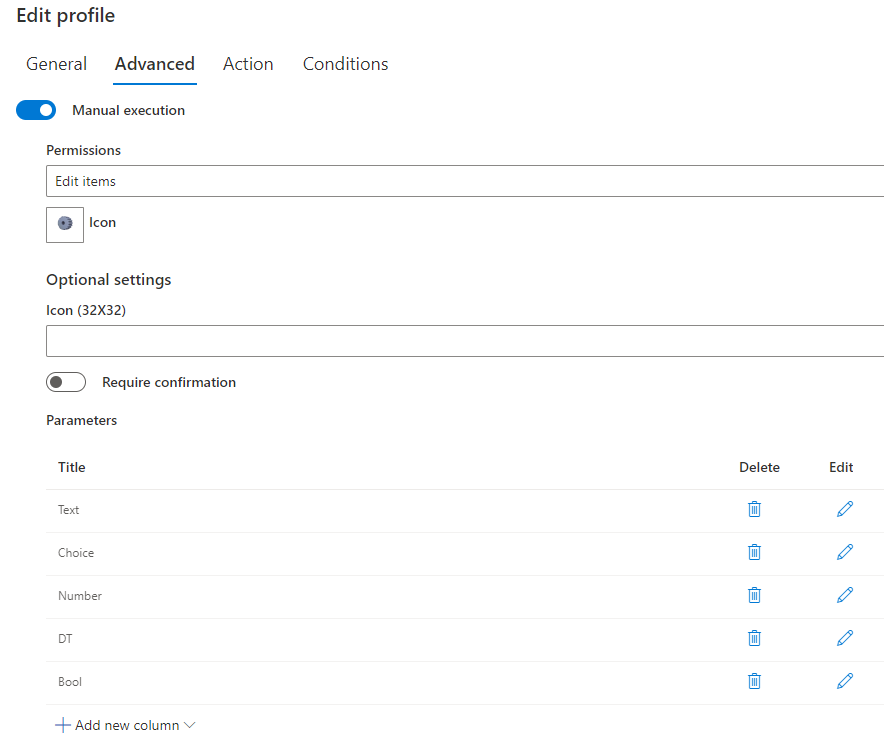
- Clicking on Add new column will reveal the selection of supported column types. Parameters are identical in their definition to columns and you configure them in the same way. The only difference is that we store them inside the action definition and do not add them to the list itself.
- Once you click on the desired type, we will display a column configuration form. You will see that it's basically identical to the column configuration form in the list. We chose to do it this way to make it easier and more intuitive to create parameters.
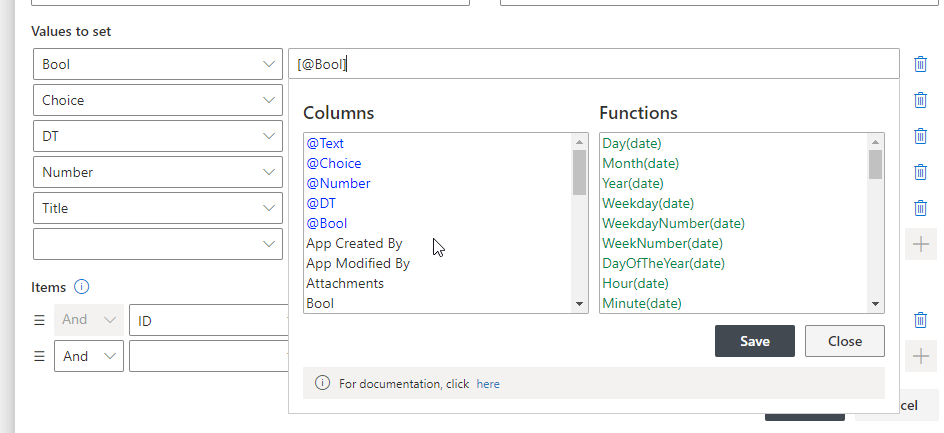
- Once you've configured all the parameters you want, you can use them for mapping of column values you want to update. Your parameters will appear first, in blue, with @ character preceding their name. Note that you can use them just as you would any other column, so feel free to use calculations or functions.
Testing the parameters
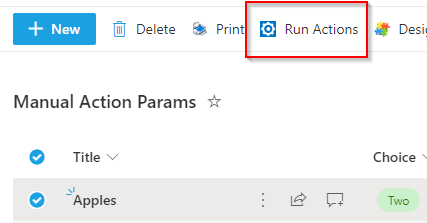
- Once your action is configured and saved, it's time to trigger it manually. You can do it from a button on the form or from the toolbar of both forms and list views. When triggered from a list view, make sure to select one or more items first, to make the button appear. Here how it would appear on a modern form:

- And here is the same button on a list view, notice that I selected an item in the view:
- Once I click on the button, a pop-up showing a selection of manual actions configured on the list is presented:
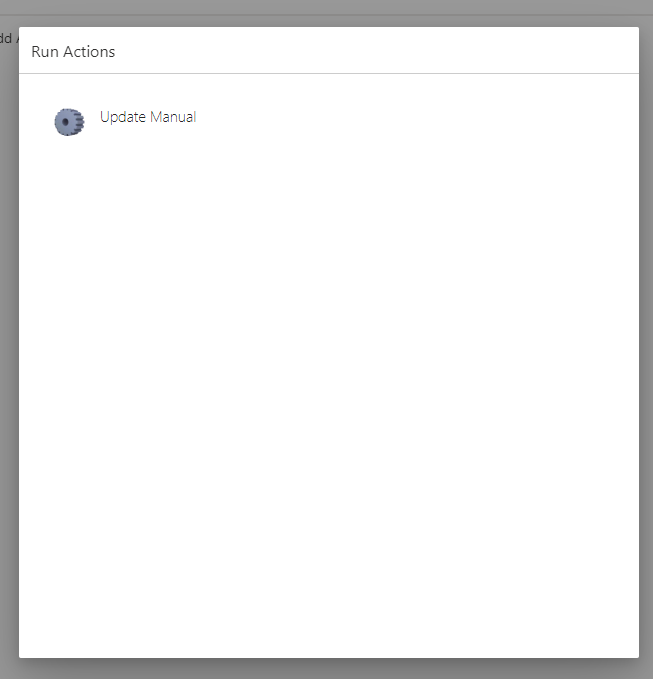
- When there are no parameters associated with the executed action, it will start right away upon the click. If however your action has parameters, we will generate and display an entry form:
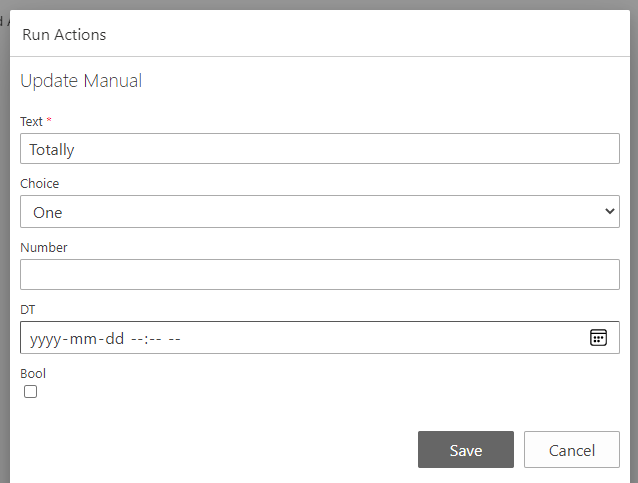
- Note how the value 'Totally' comes pre-filled via the default value setting of the parameter.
- Fill in your desired values and click on Save. It will then trigger the action with these values. Note that if you do not provide a value for a parameter, we will use an empty value to set in the action. We will not ignore the parameter. So it makes sense to make your parameters required if an empty value is not an option.
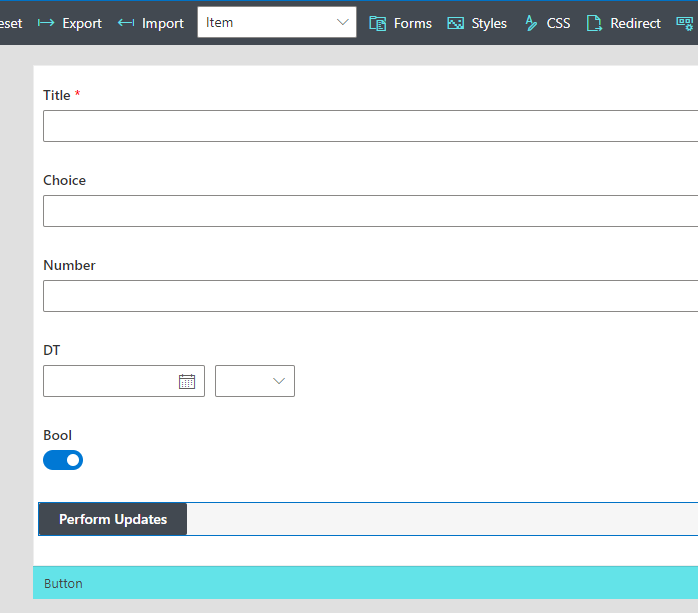
Buttons in forms
Instead of using toolbar buttons, you can embed buttons inside the body of the form. Users can then trigger your action directly from those buttons. I recommend it as a better and more user-friendly approach!
- Go to Form Designer and drag a new button onto your form.
- Click on it and set its settings inside the configuration pane on the righthand side of the screen.

- Give it a meaningful label, then set the button type to Trigger action and select your action from the list. Once you completed configuring the button, simply publish the form.
- Proceed to opening an item for display, then click on the action button. A floating form will be generated and displayed:
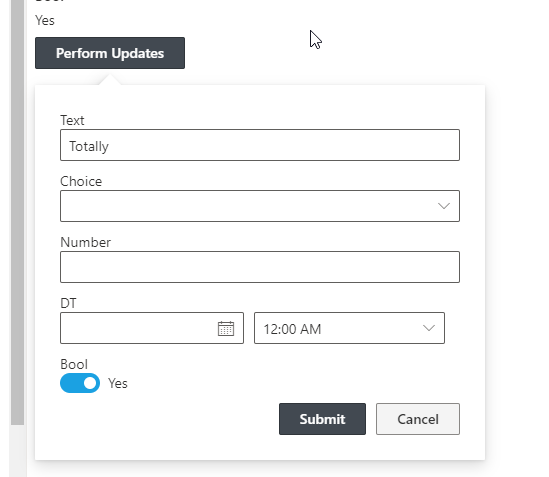
- Enter your values, then click on Submit. The action will be queued for execution and you will be presented with real time progress indication.
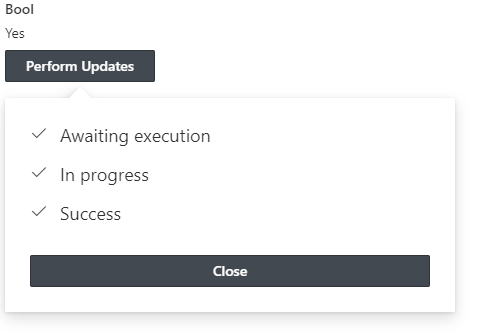
You will be happy to know that this method will reload the item after the action is completed. This means any updates are instantly available to the user to serve as a visual feedback to action execution.
In conclusion
As you can see, there is a multitude of the possibilities here. I can suggest several ideas:
- Perform bulk updates on multiple items
- Interact with external applications (such as submit information into a database)
- Implement one click approval by setting multiple column values at once.
The feature adds an extra layer of separation of concerns. This can work well with the business process you want to automate.