This tutorial walks you through setting up the Event Calendar web part in a classic SharePoint environment, creating a data source, and displaying your events directly on a page.
Instructions
Step 1: Prepare the Data Source
To begin, create or choose a list that contains date-based records.
We’ll use a Tasks list for this example.
Create a Tasks List
Include these columns:
- Title – Single line of text
- Start Date – Date and Time
- Due Date – Date and Time
- Category – Choice (Meeting, Training, Marketing, HR, Development)
Add about 10 sample items so you’ll have visible events on the calendar.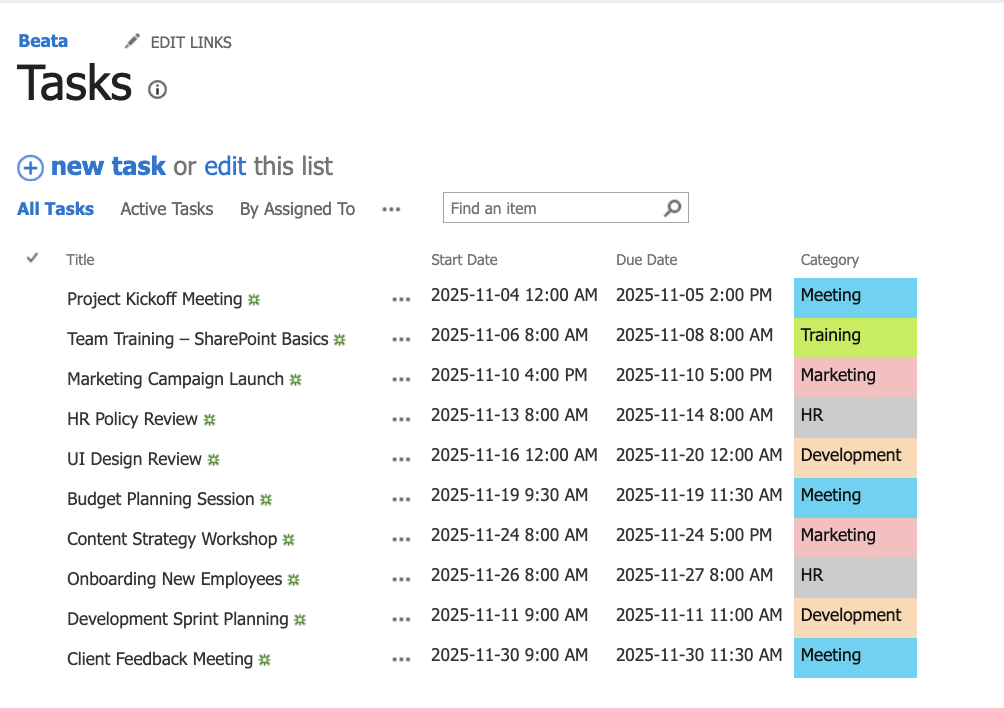
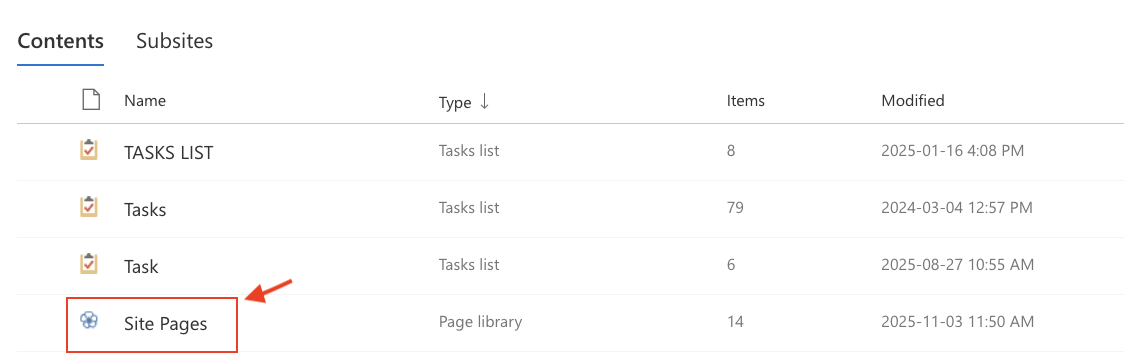
Step 2: Add a New Wiki Page
- Go to Site Contents → Site Pages.
- Click New → Wiki Page.

- Enter a name, e.g., Calendar, and click Create.

- At the top ribbon, select the Insert tab.
- Click Web Part → Infowise → Infowise Event Calendar Plus → Add.

The web part will appear on your new page.
Step 3: Configure the Web Part
Now let’s connect the calendar to your Tasks list.
- Click the small Edit Web Part.
The settings panel will open on the right.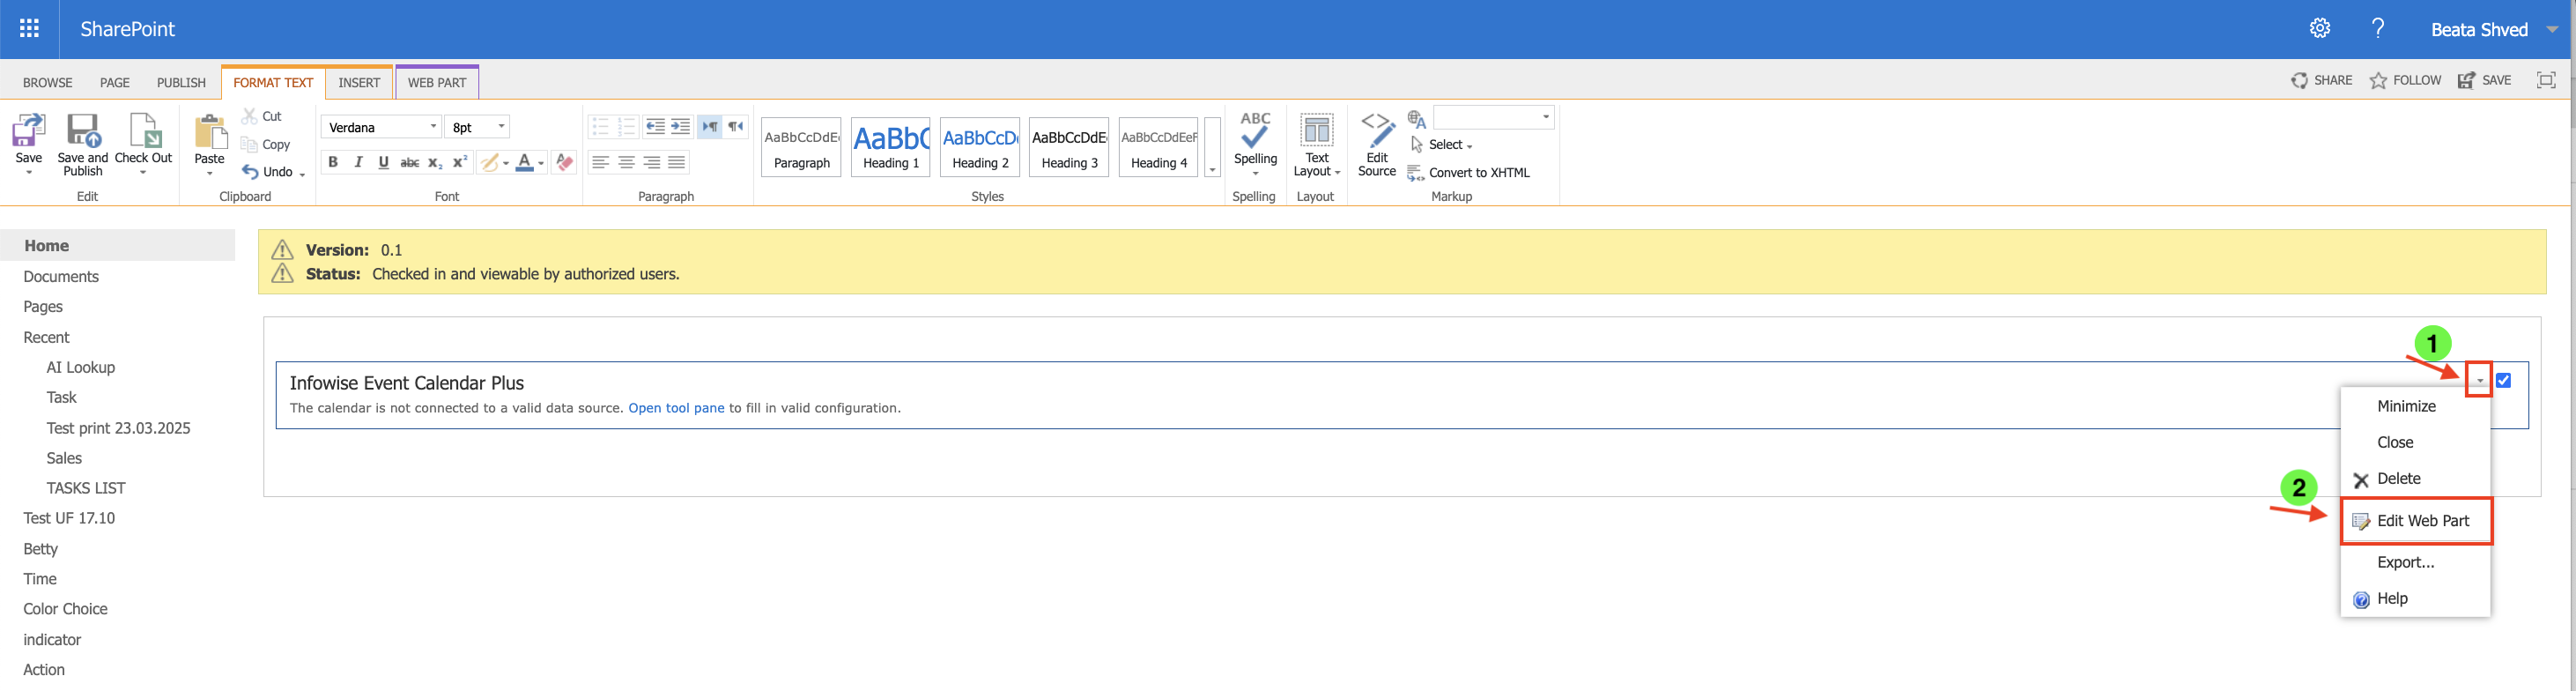
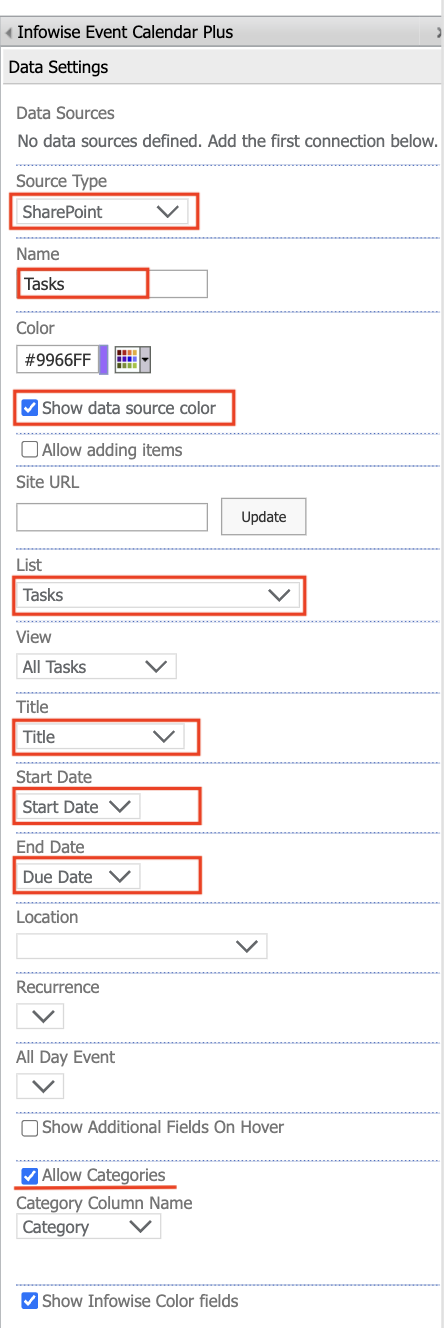
- Under Data Settings, choose:
- Source Type: SharePoint
- Name: Tasks
- Color: Pick a color for this list.
- Tick Show data source color.
- Leave Site URL empty to use the current site,
- Select your Tasks list from the List dropdown.
- Map the columns:
- Title → Title
- Start Date → Start Date
- End Date → Due Date
- (Optional) Tick Allow Category → Category
Step 4: Configure View Settings
Scroll down to the View Settings section.
Recommended configuration:
- Calendar Type: Month
- Allow filter by data source: ✔️
- Show Category Selector: ✔️ (to enable category filtering above the calendar)
- Allow Gantt View: ✔️ (adds a timeline option)
- Show event hour in Month view: ✔️
- Maximum rows in Month view: 6
- Show “New” button: ✔️

These options define how users interact with the calendar and what extra tools are available for filtering or navigating.
Step 5: Apply and Save
- Click OK → Apply → Save and Publish Page.
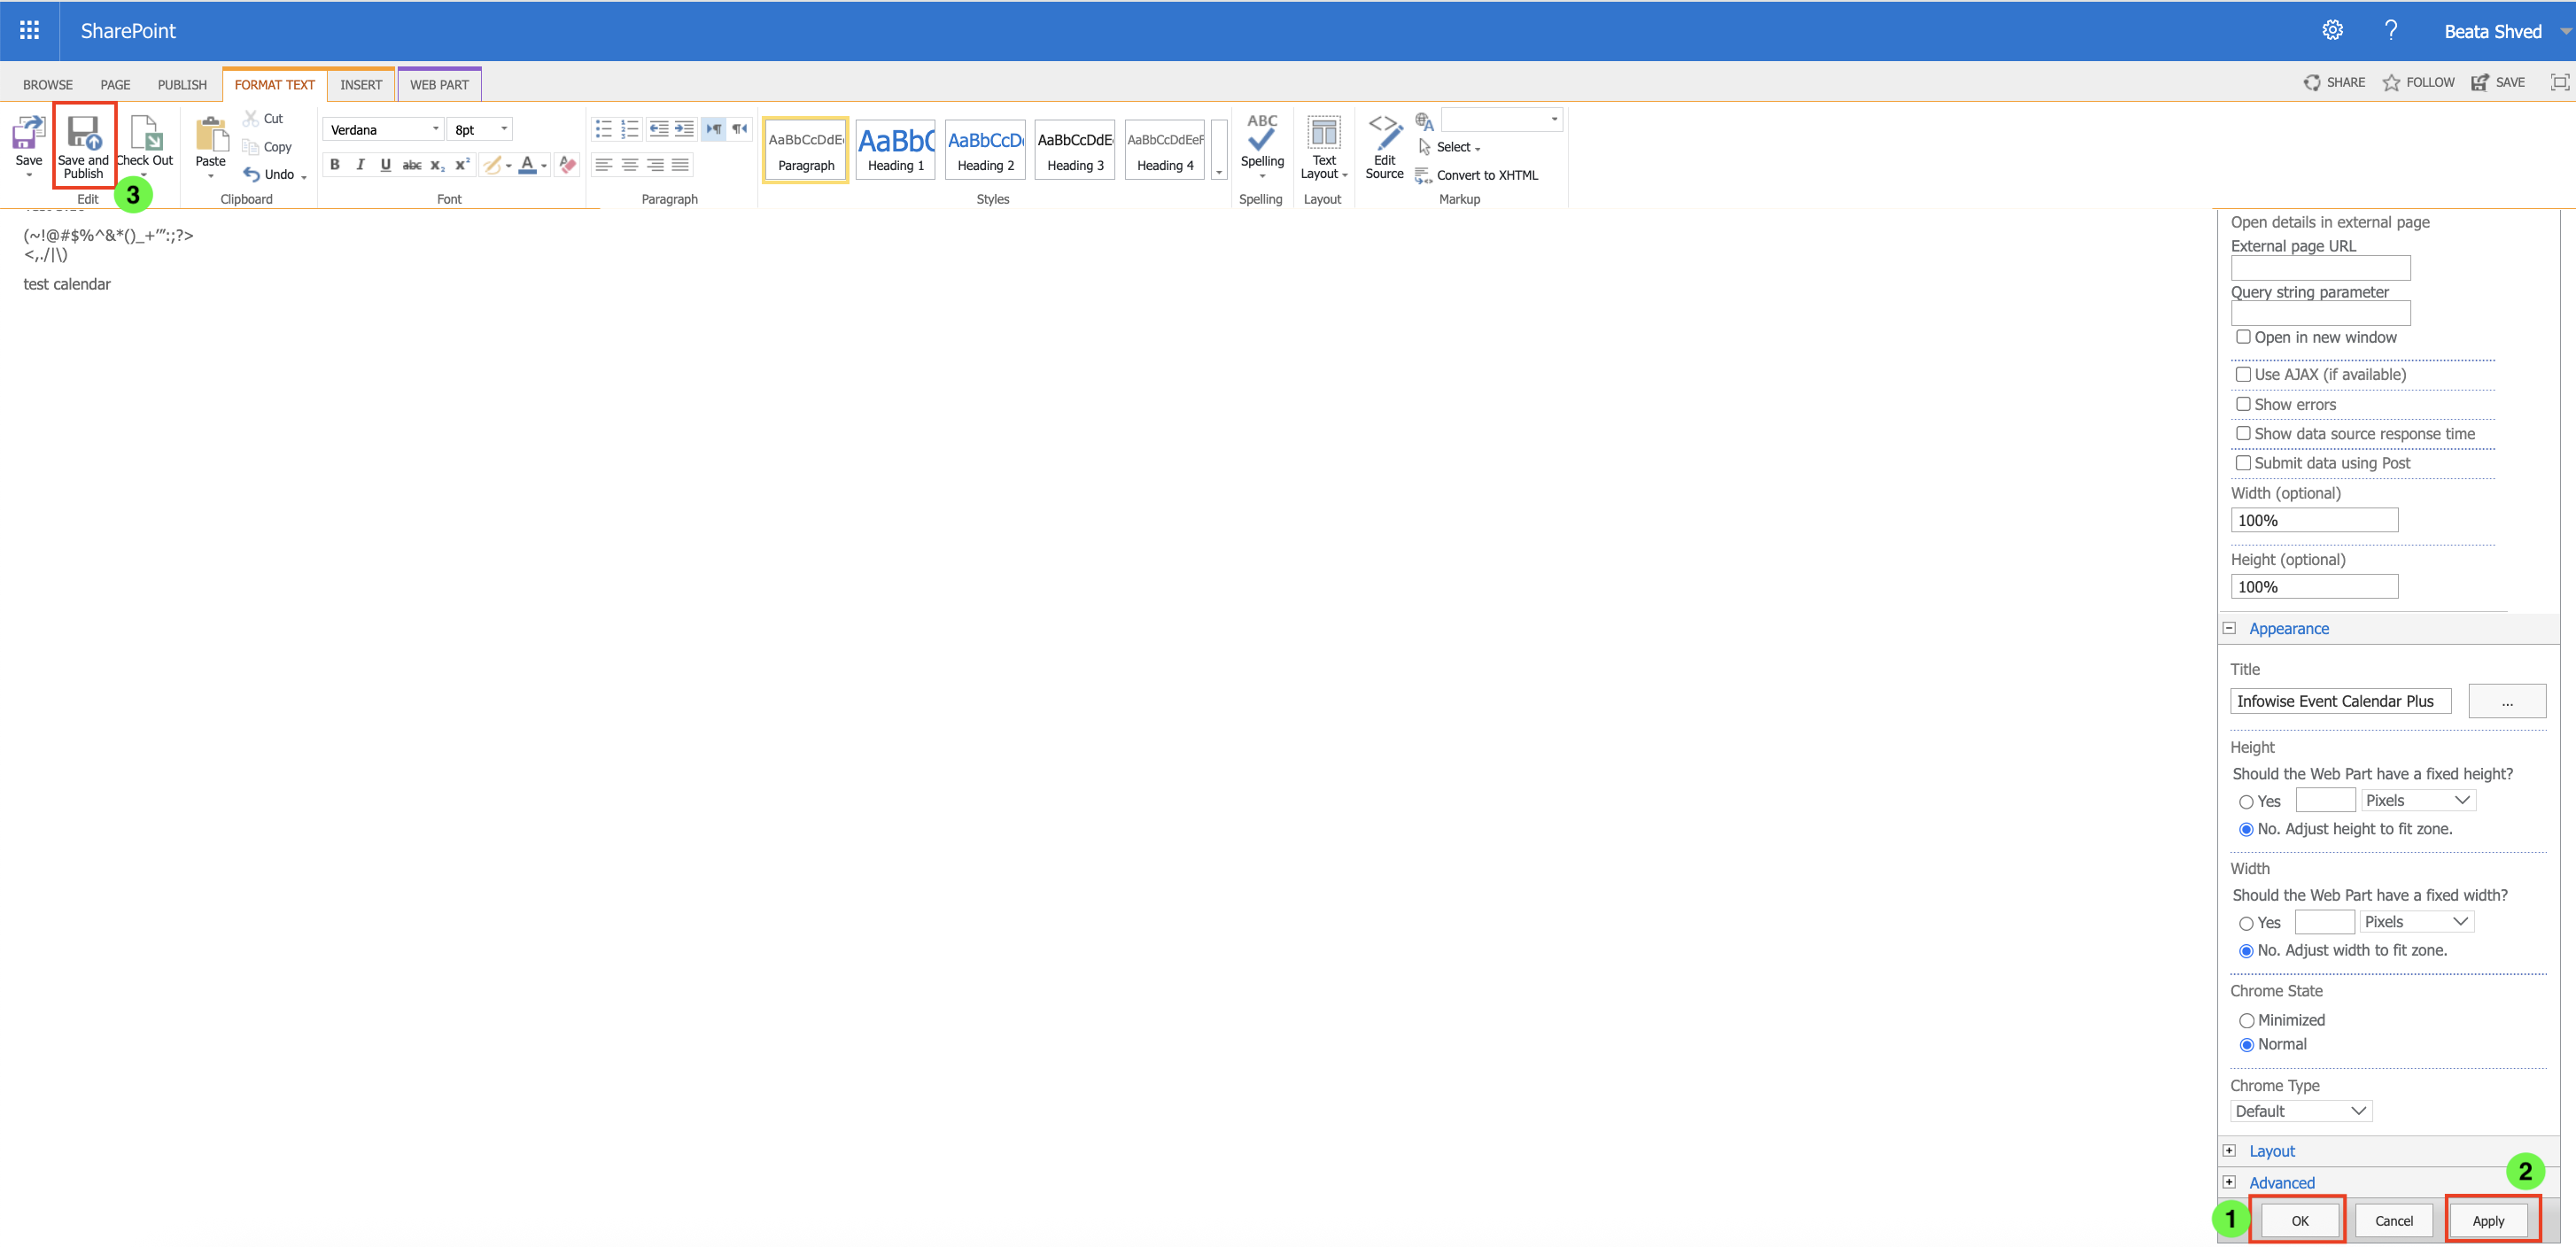
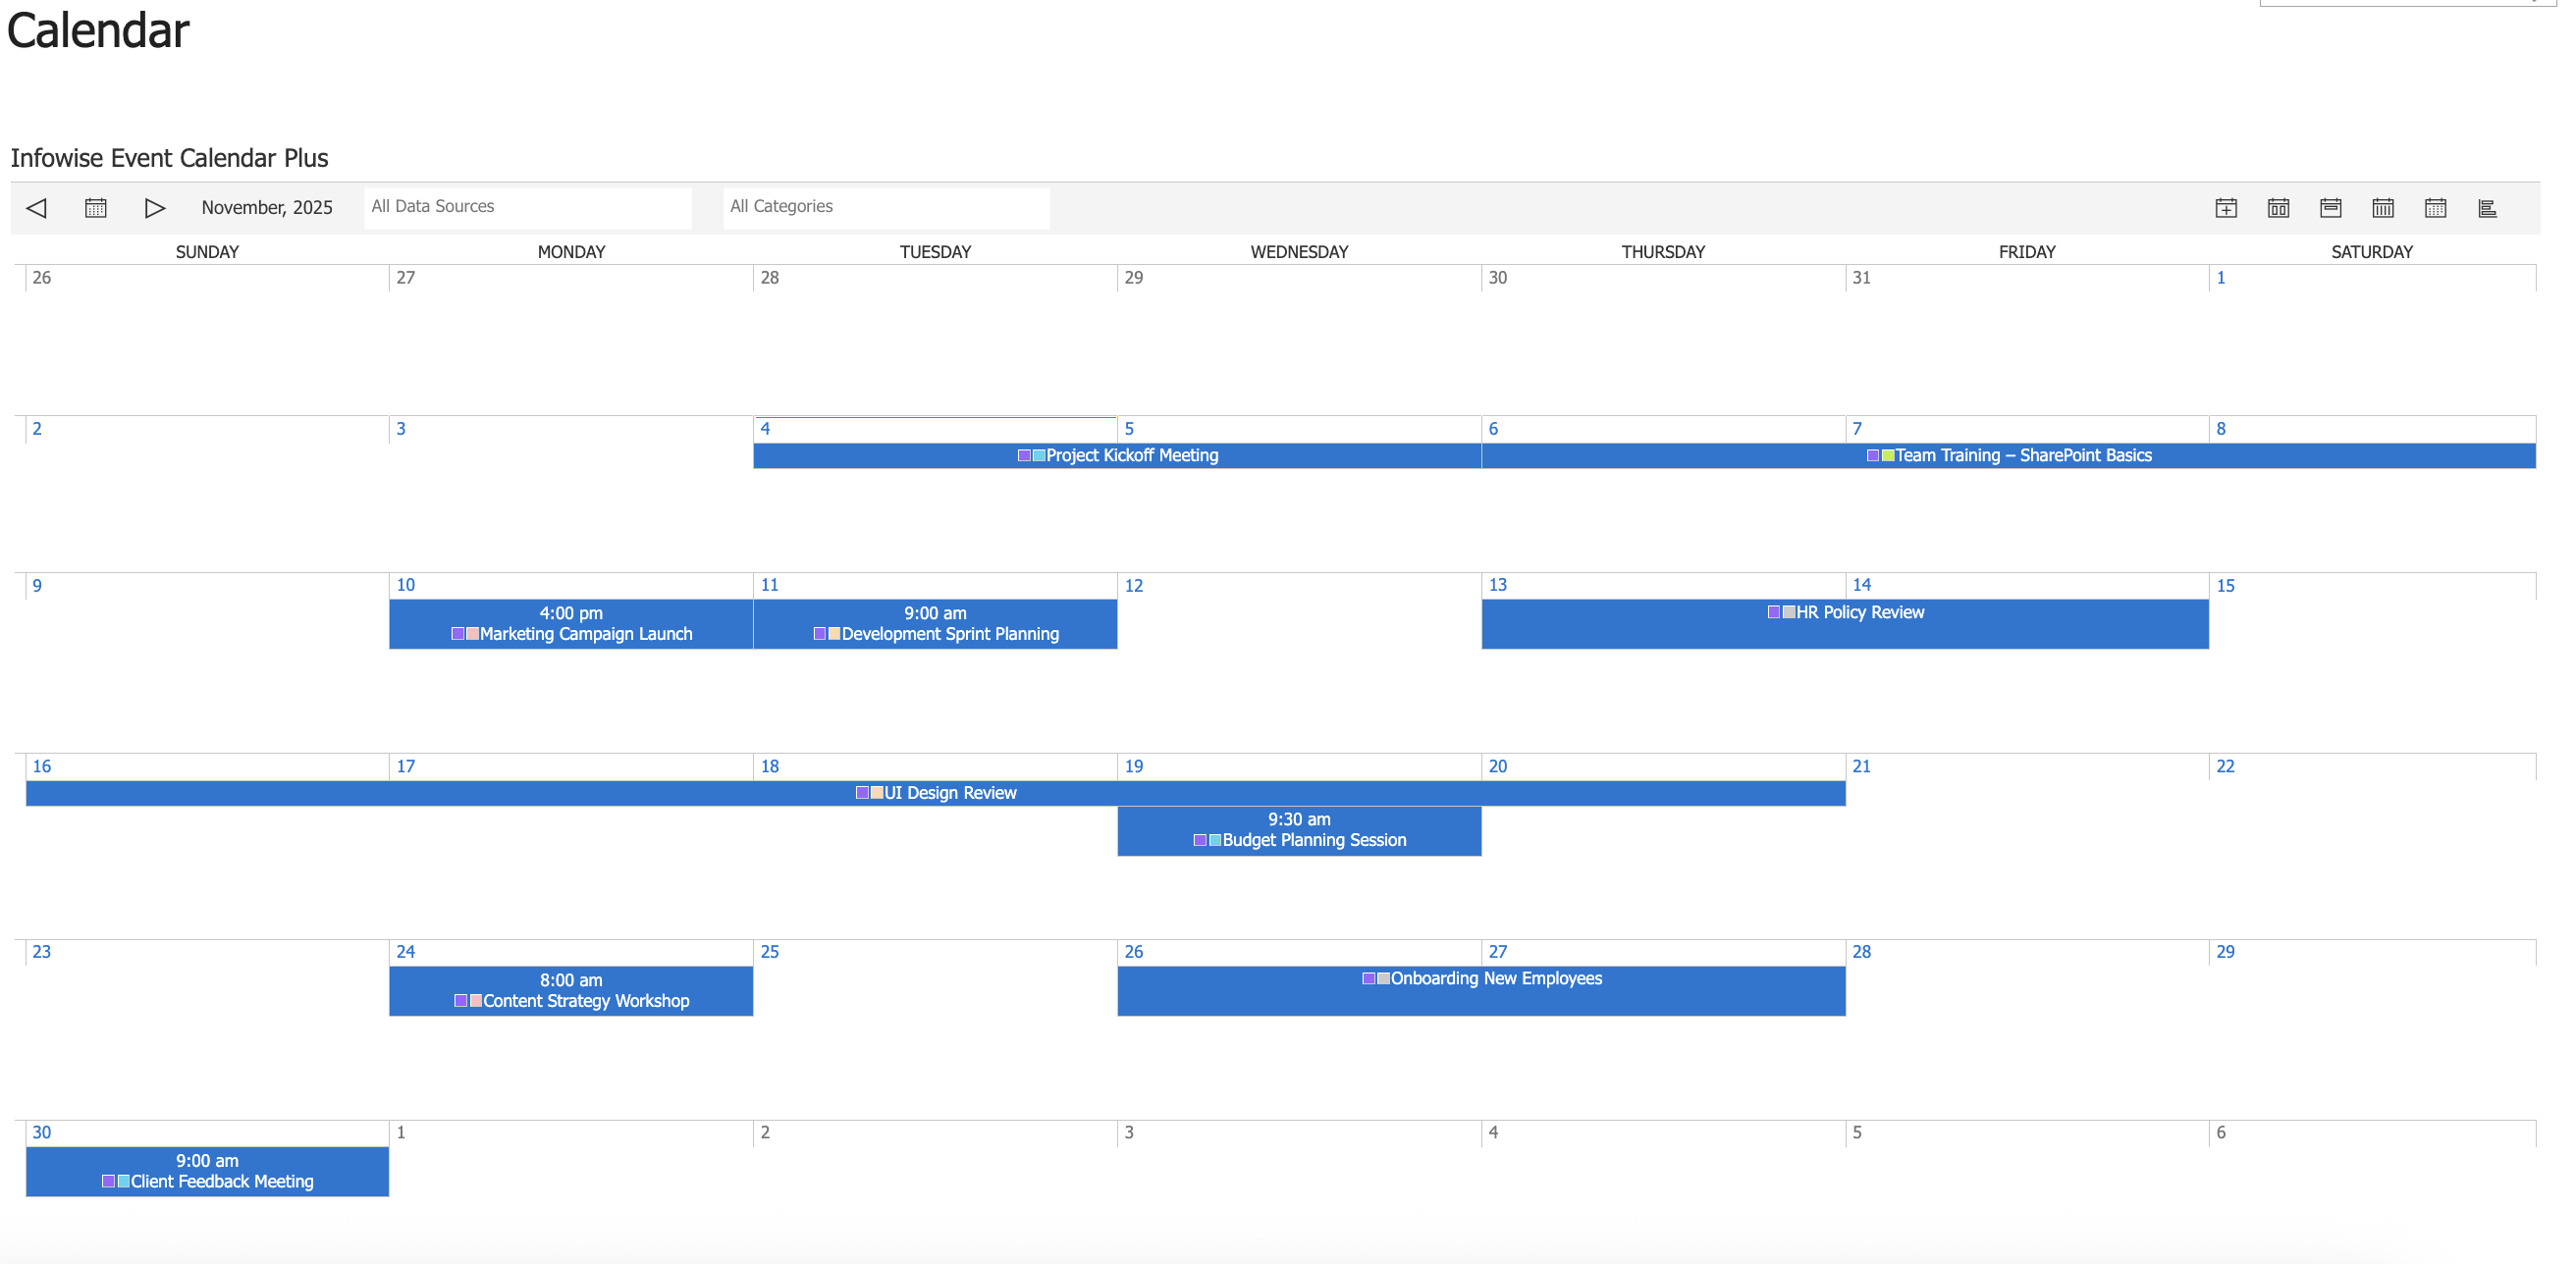
- The page will refresh, and your calendar will appear populated with events from the Tasks list.
Step 6: Test the Display and Views
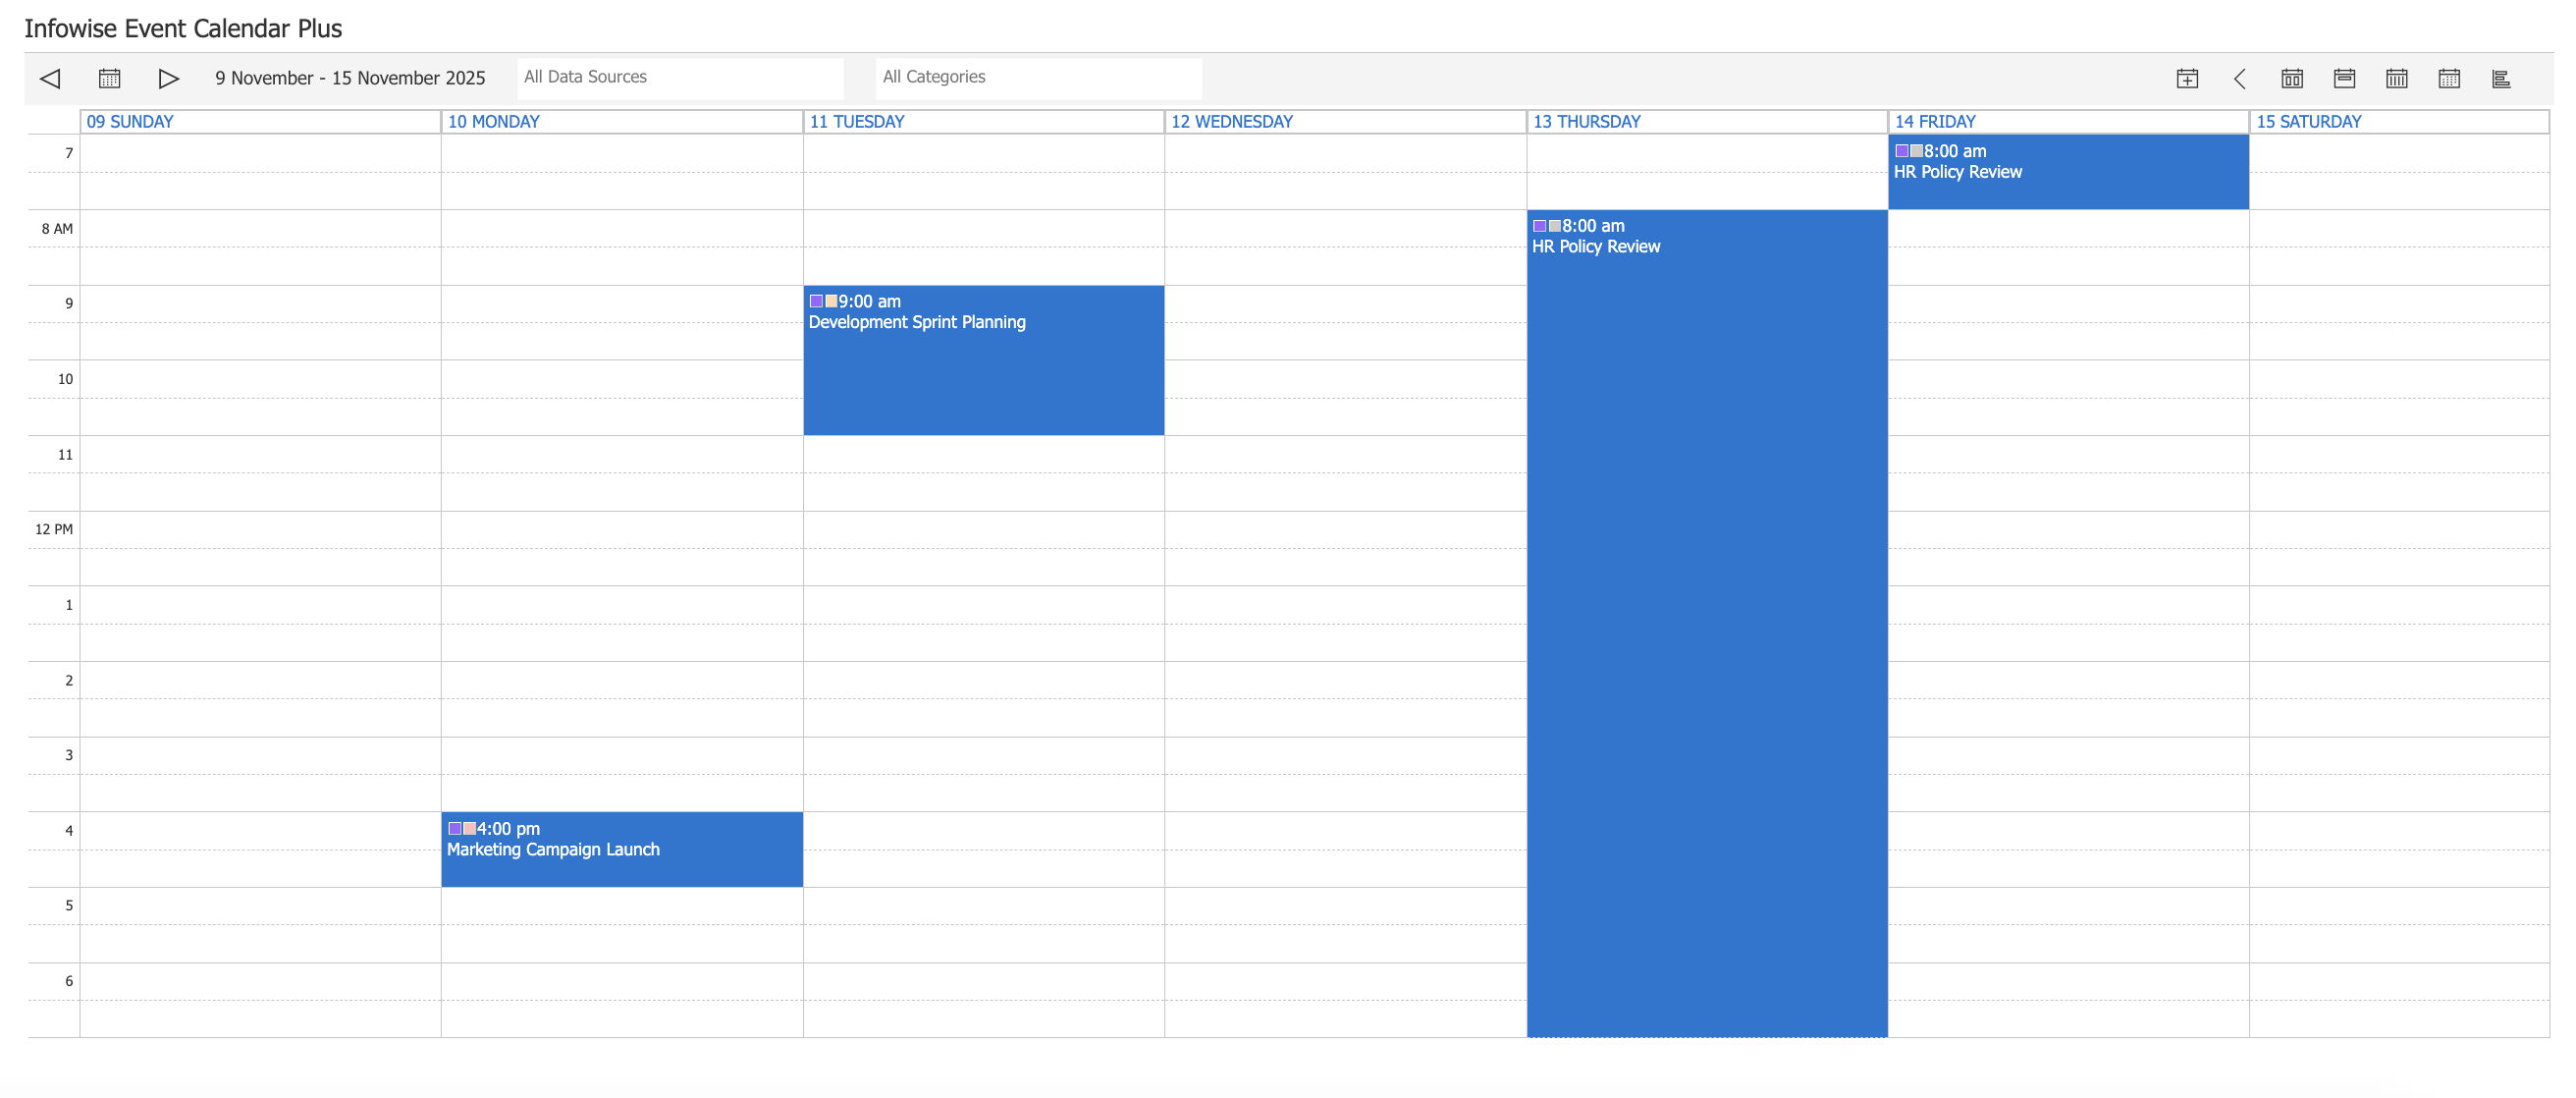
Each task is now shown as an event, automatically color-coded by its Category.
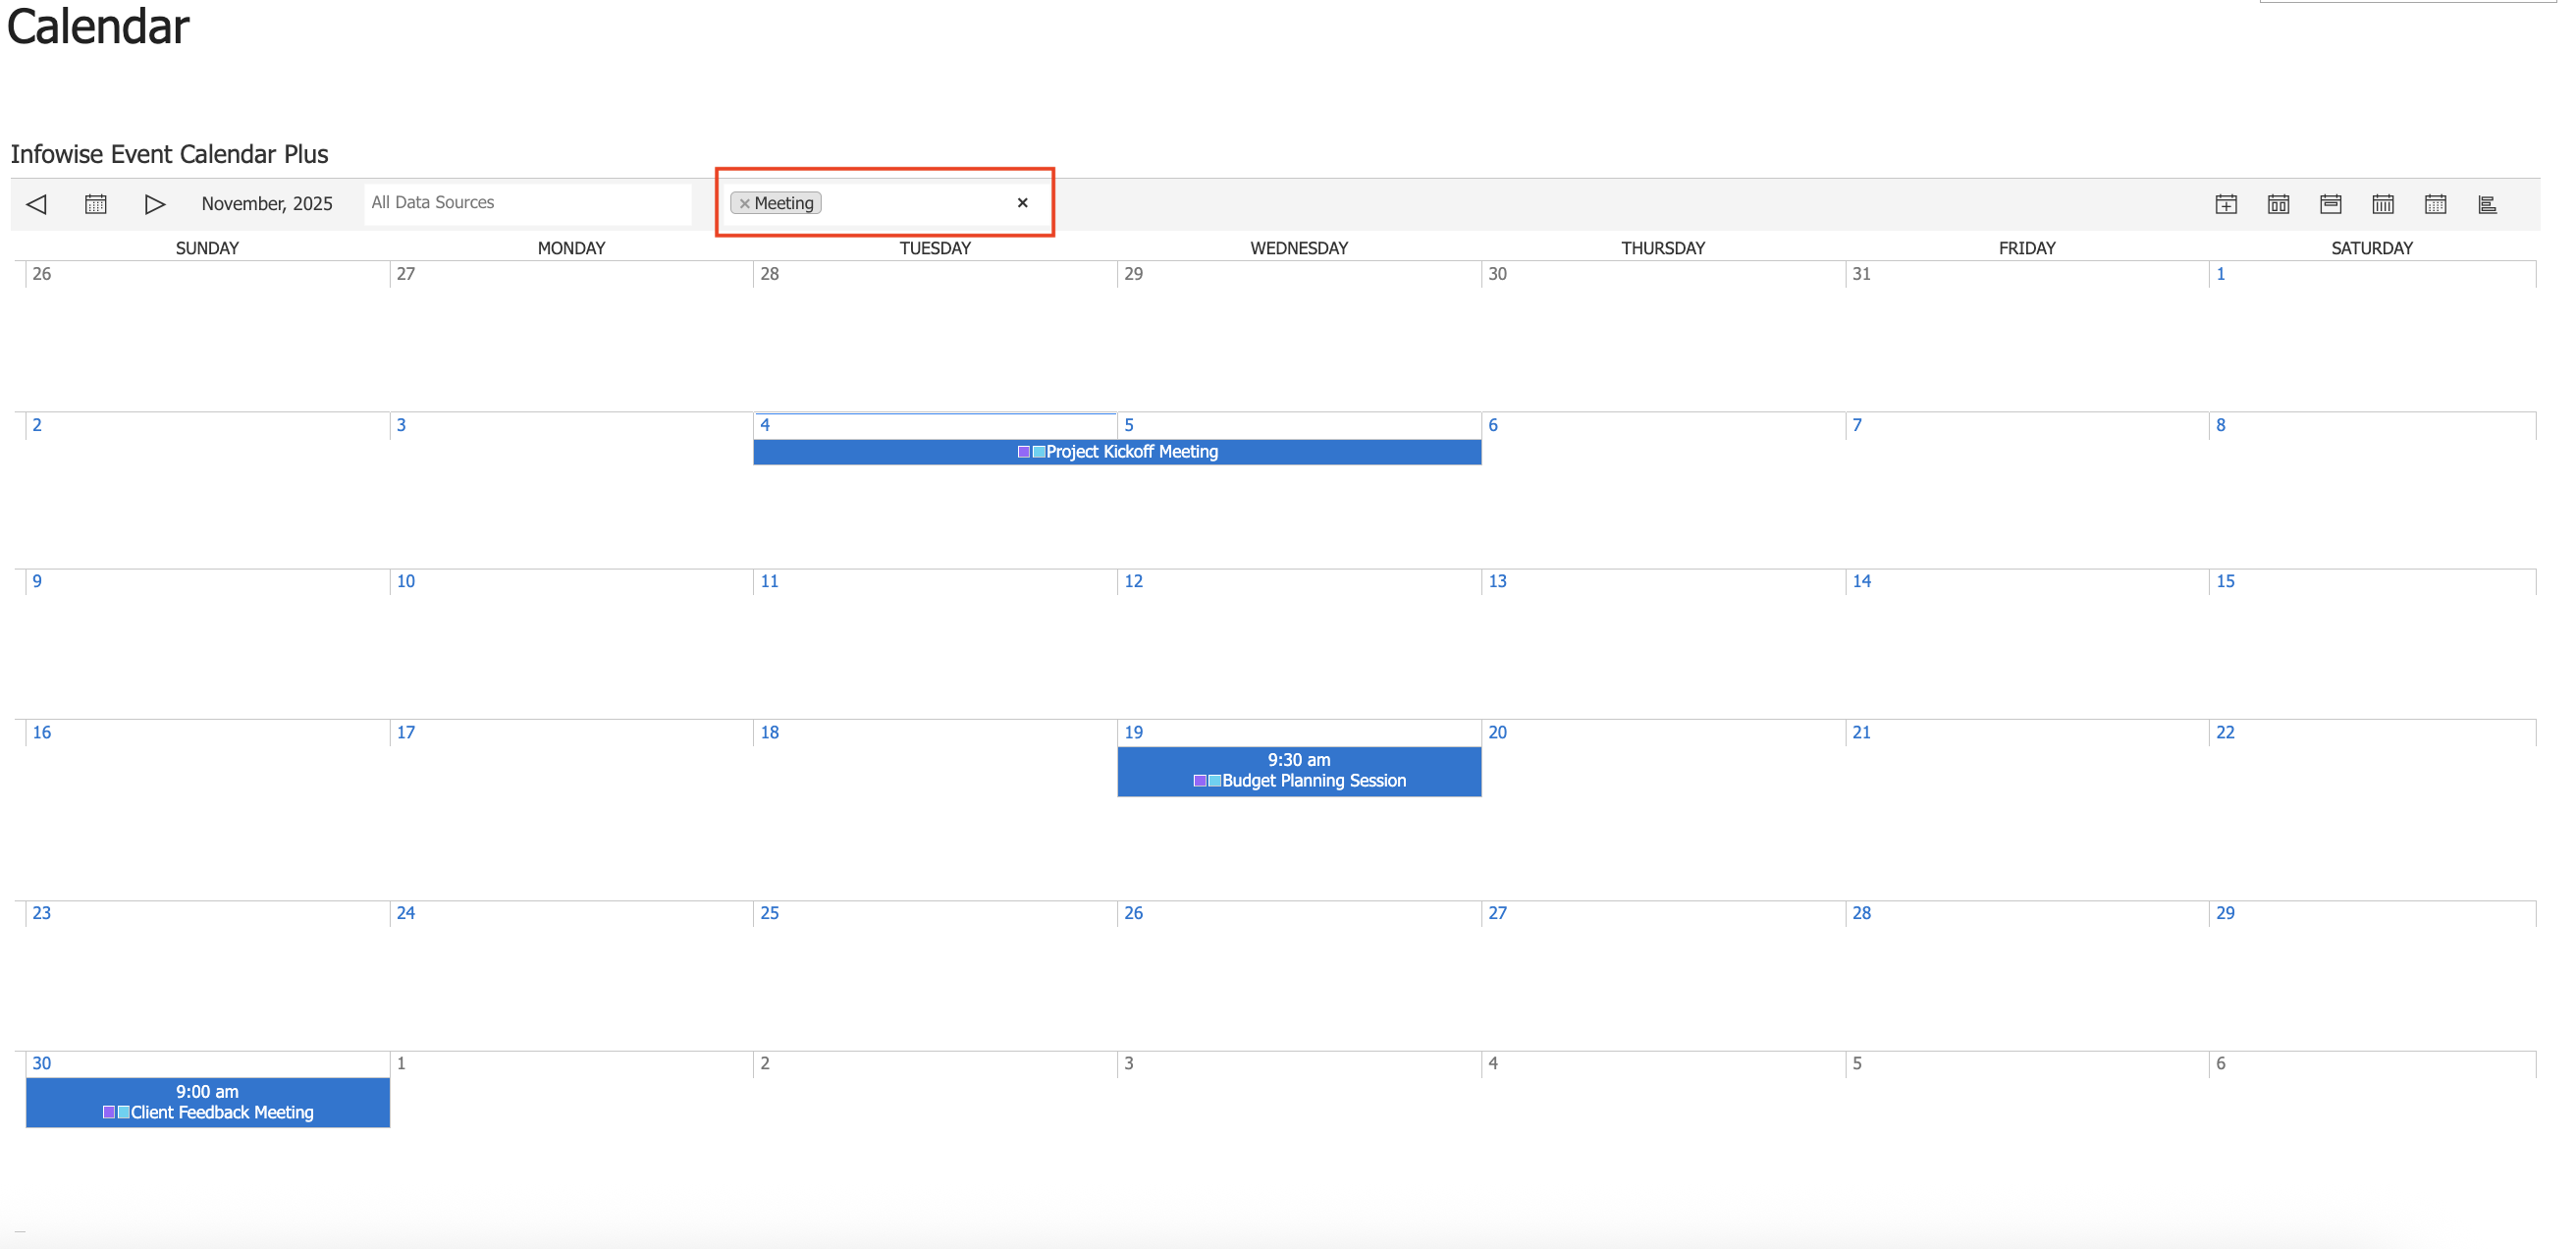
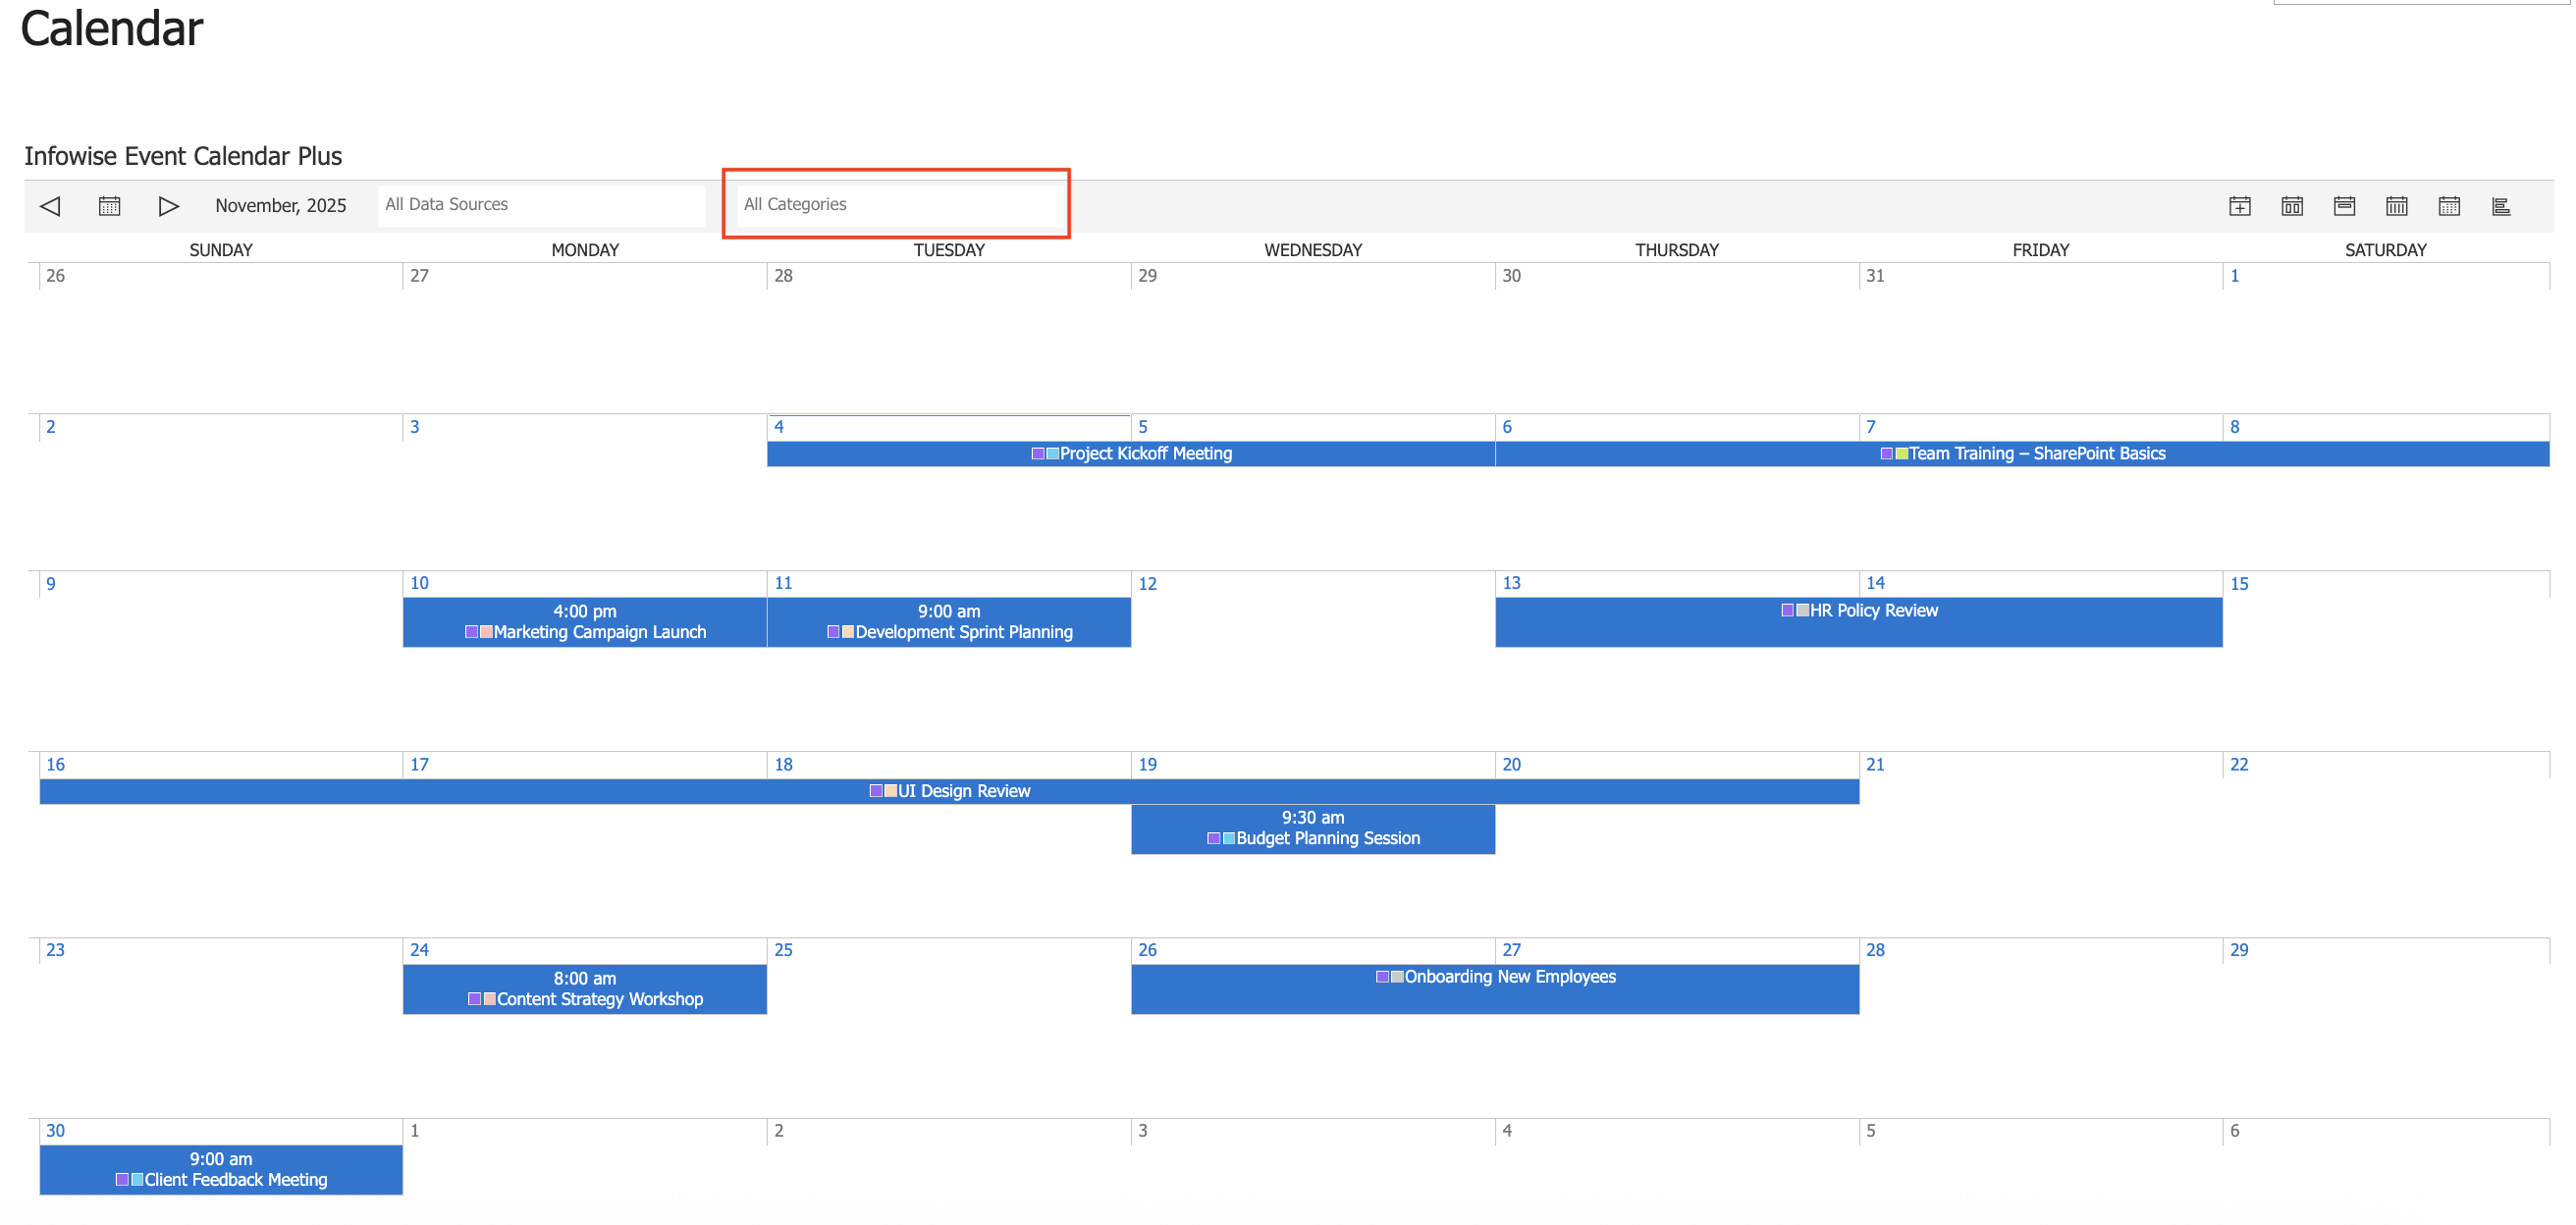
You can filter events using the Category Selector above the calendar:
- Select a specific category to show only related events.
- Choose All Categories to display every event again.
The view selector in the top-right corner lets you switch between: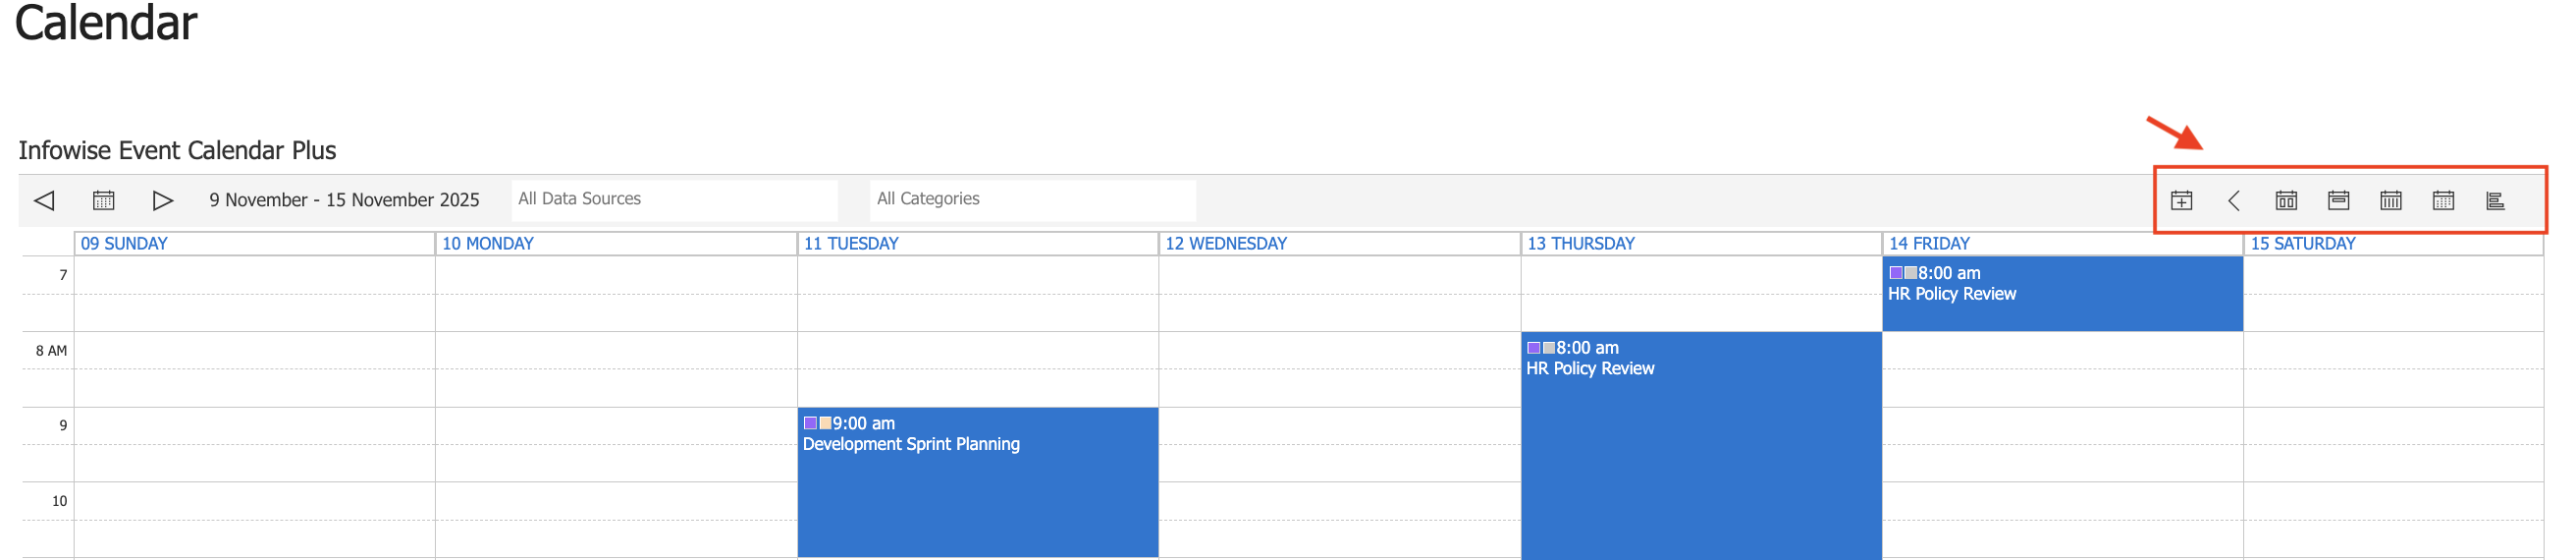
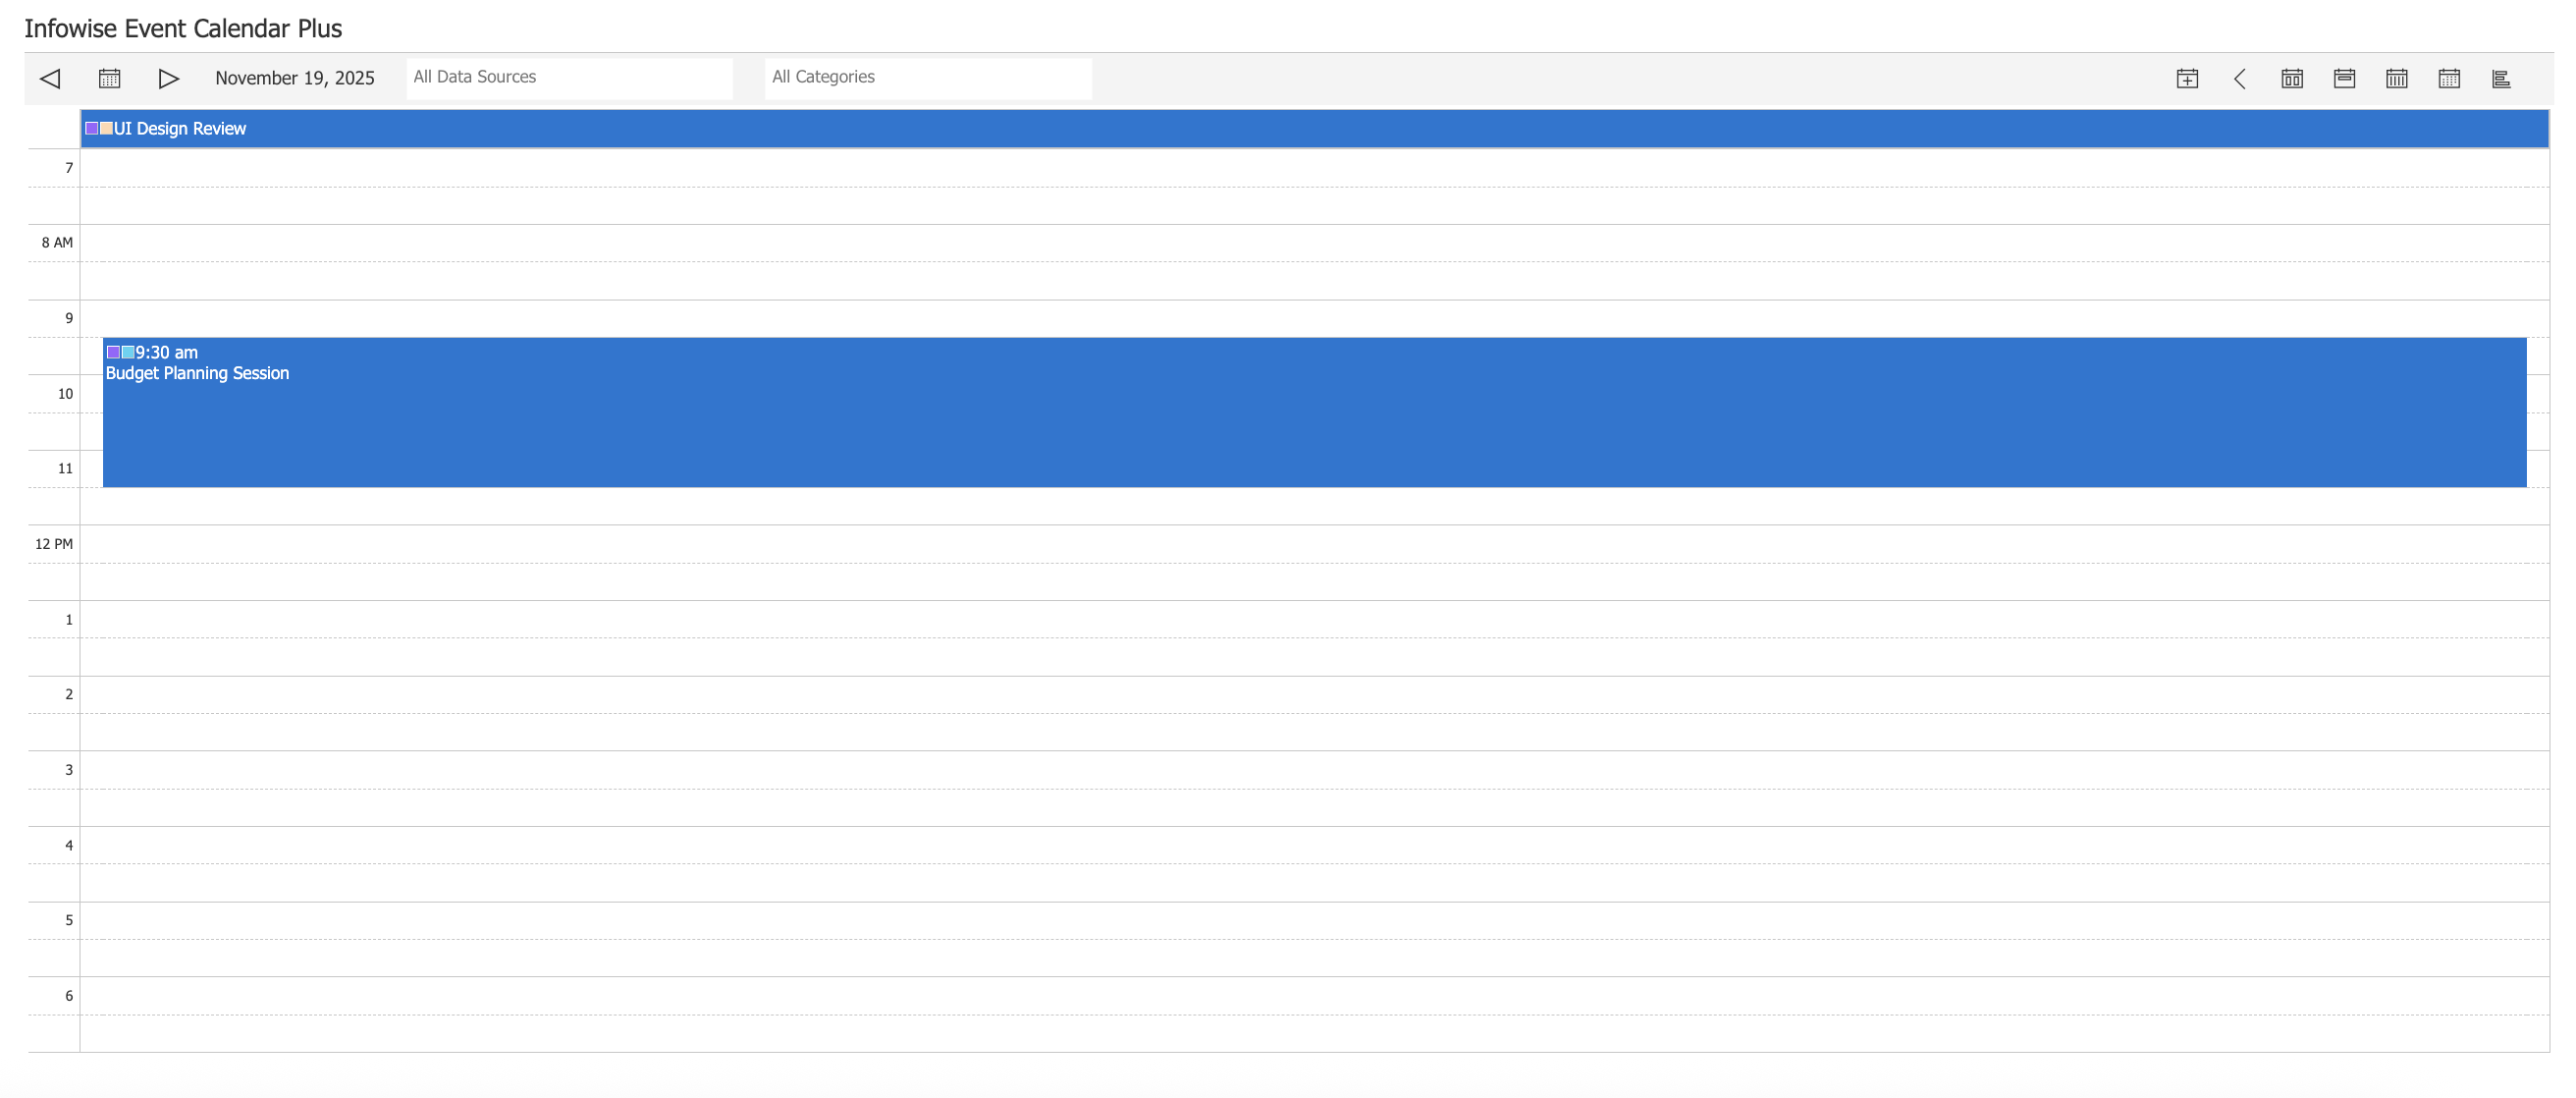
- Day – detailed hourly layout for one day.
- Week – grouped weekly schedule.
- Month – standard full calendar grid.
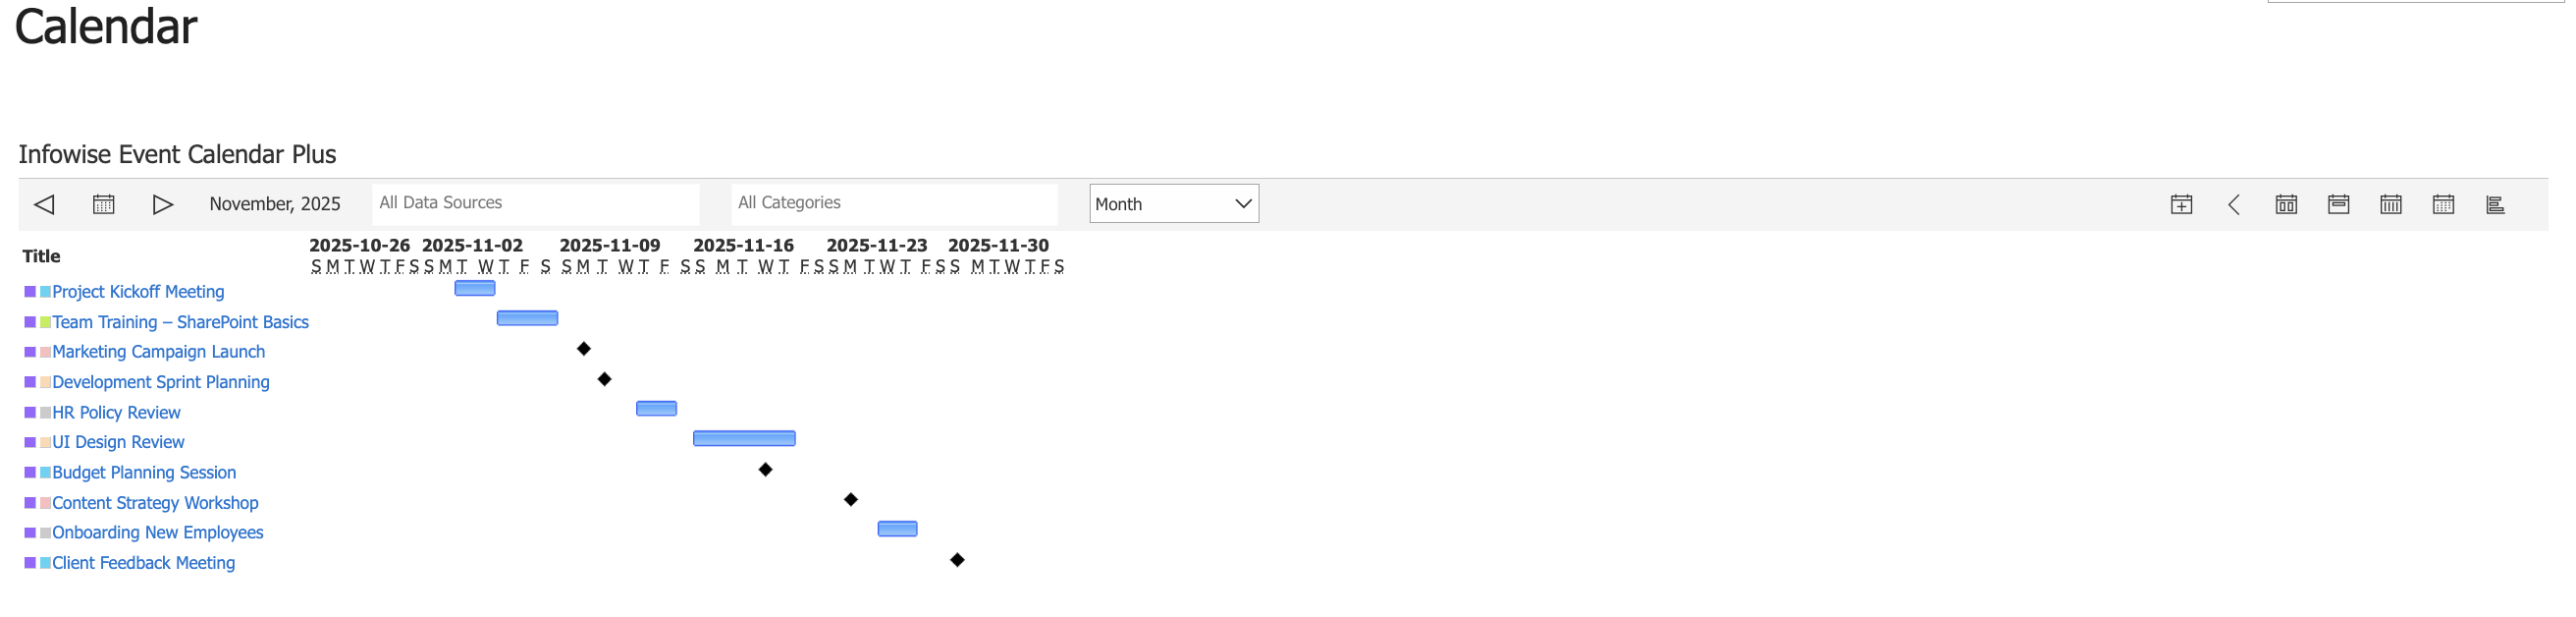
- Gantt – horizontal timeline, ideal for tracking project durations.
Watch this quick video walkthrough from Infowise:
Summary
This tutorial demonstrated how to add and configure the Event Calendar Plus web part in SharePoint On-Premise. You learned how to connect a task list as a data source, set color-coding by category, and adjust the display options. The result is a functional, interactive calendar that helps visualize tasks and schedules directly on your SharePoint page.