Since lists and document libraries grow over time, it can eventually become difficult to find the document or record you’re looking for. The Infowise List Search web part makes finding items in SharePoint much simpler.
Using the Infowise List Search web part, a user can search columns from a list or library with specific controls for different field types. The Advanced Search feature lets you chain up to five conditions together using “AND” and “OR” operators. It can save these searches for future use, while maintaining a functional context menu for the user to work out of.
The ability to add multiple lists and libraries to a single search can be useful for building site search functionality even when you have different groups of users who need to be able to search different sets of information.
Instructions
Configuring the Web Part
Setting up an Infowise List Search page in the on-premise version of Infowise is very simple.
On your web part page, click into any zone on your page; for some zones you will need to click the “Insert content” link.
Select the Insert tab in the ribbon and click the Web part icon. This will open the web part dialog.
Select Infowise in the Categories column, and then Infowise List Search from the list of available parts. Click the Add button.

Your web part will look something like this:

Edit the Web Part Properties in order to set up the Profile. Click the small arrow in the upper right hand corner of the web part and select Edit Web Part from the dropdown menu.
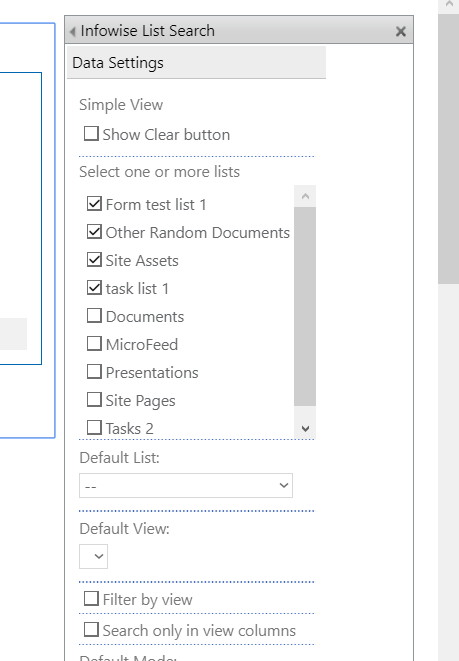
Select the lists and document libraries that you want to include in your search. You can also set one list or library as the default.

You can name the web part if you’d like, but the name is not important like it is in the Office 365 version.
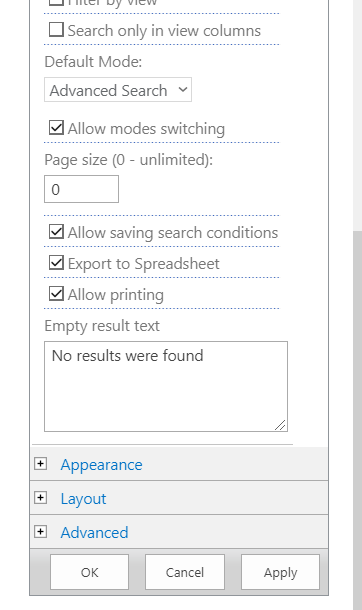
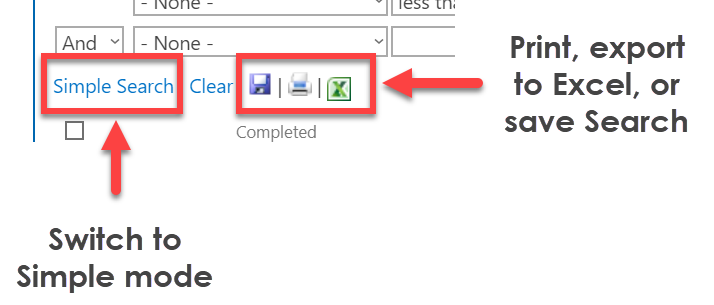
As with the O365 version, you can select Advanced or Simple search. The Advanced search allows you to chain up to five conditions with “AND/OR” conditions. Since you can toggle from Advanced to Simple if desired, it makes sense to select Advanced at this time.

You can also permit your users to save search conditions, export their searches to Excel, or print their search results.
There are other controls for size and appearance, but no changes are required unless desired.
Make sure to click Apply in Web Part Properties and then Save your page to make your changes visible.
Using the List Search Web Part
Here’s the List Search part in Advanced mode.

You can select from the different lists available in the search from the drop-down.
Using the Advanced mode, you can filter by list view, even if you did not select the “By View” option when building the Profile.
Click into the first Search line and select a field from the drop-down menu. Then, select a value criterion. Note that for numerical or date fields, you are able to select “greater or lesser than” values.
Finally, enter a search value and click Add, then Search. Your results will appear in list format on the page directly below the search.
Add more search criteria in the next search line.
If you click on a line in the search results, you will go directly to the detail window for that item in the list itself; from there, you can edit or delete the item.
You have the ability to print the list results, export them to Excel, or save the search criterion using the small icons under the search bar.

The simple search searches for single text values only.