This tutorial shows how to create your first Connected Lookup — the simplest and most common scenario:
a parent column that controls the values displayed in a child lookup column.
We’ll build a practical, everyday example:
Product Category → Product
When the user selects a category, the Product column will automatically display only the items belonging to that category.
This is the foundation for all cascading lookup scenarios, and the same logic applies to:
- Department → Position
- Country → City
- Project Type → Template
- Issue Category → Subcategory
Instructions
Step 1: Create the Source List (Products)
This list contains all products and their categories.
We will filter by Category, so it must exist in this list.
- Go to Site Contents → New List → name it: Products
- Create two columns:
- Electronics
- Furniture
- Office Supplies
- Product Name — Single line of text
- Category — Choice with values:
- Add test items.
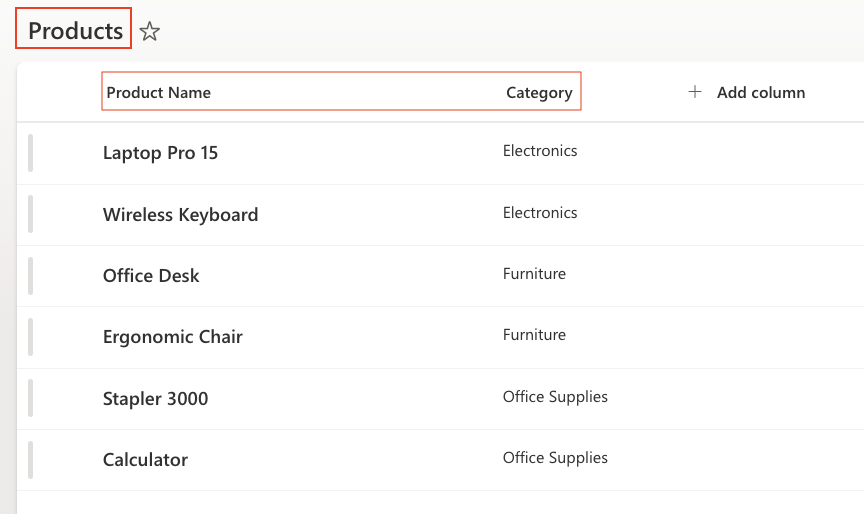
📌 Important: The Category column will act as the relationship column that the Connected Lookup uses for filtering.
Step 2: Create the Target List (Orders)
This is the form where the user will select Category and then Product.
- Create a new list: Orders
- Create the following columns:
- Category — Choice (same values as in Products)
- Product — Connected Lookup (we will configure next)
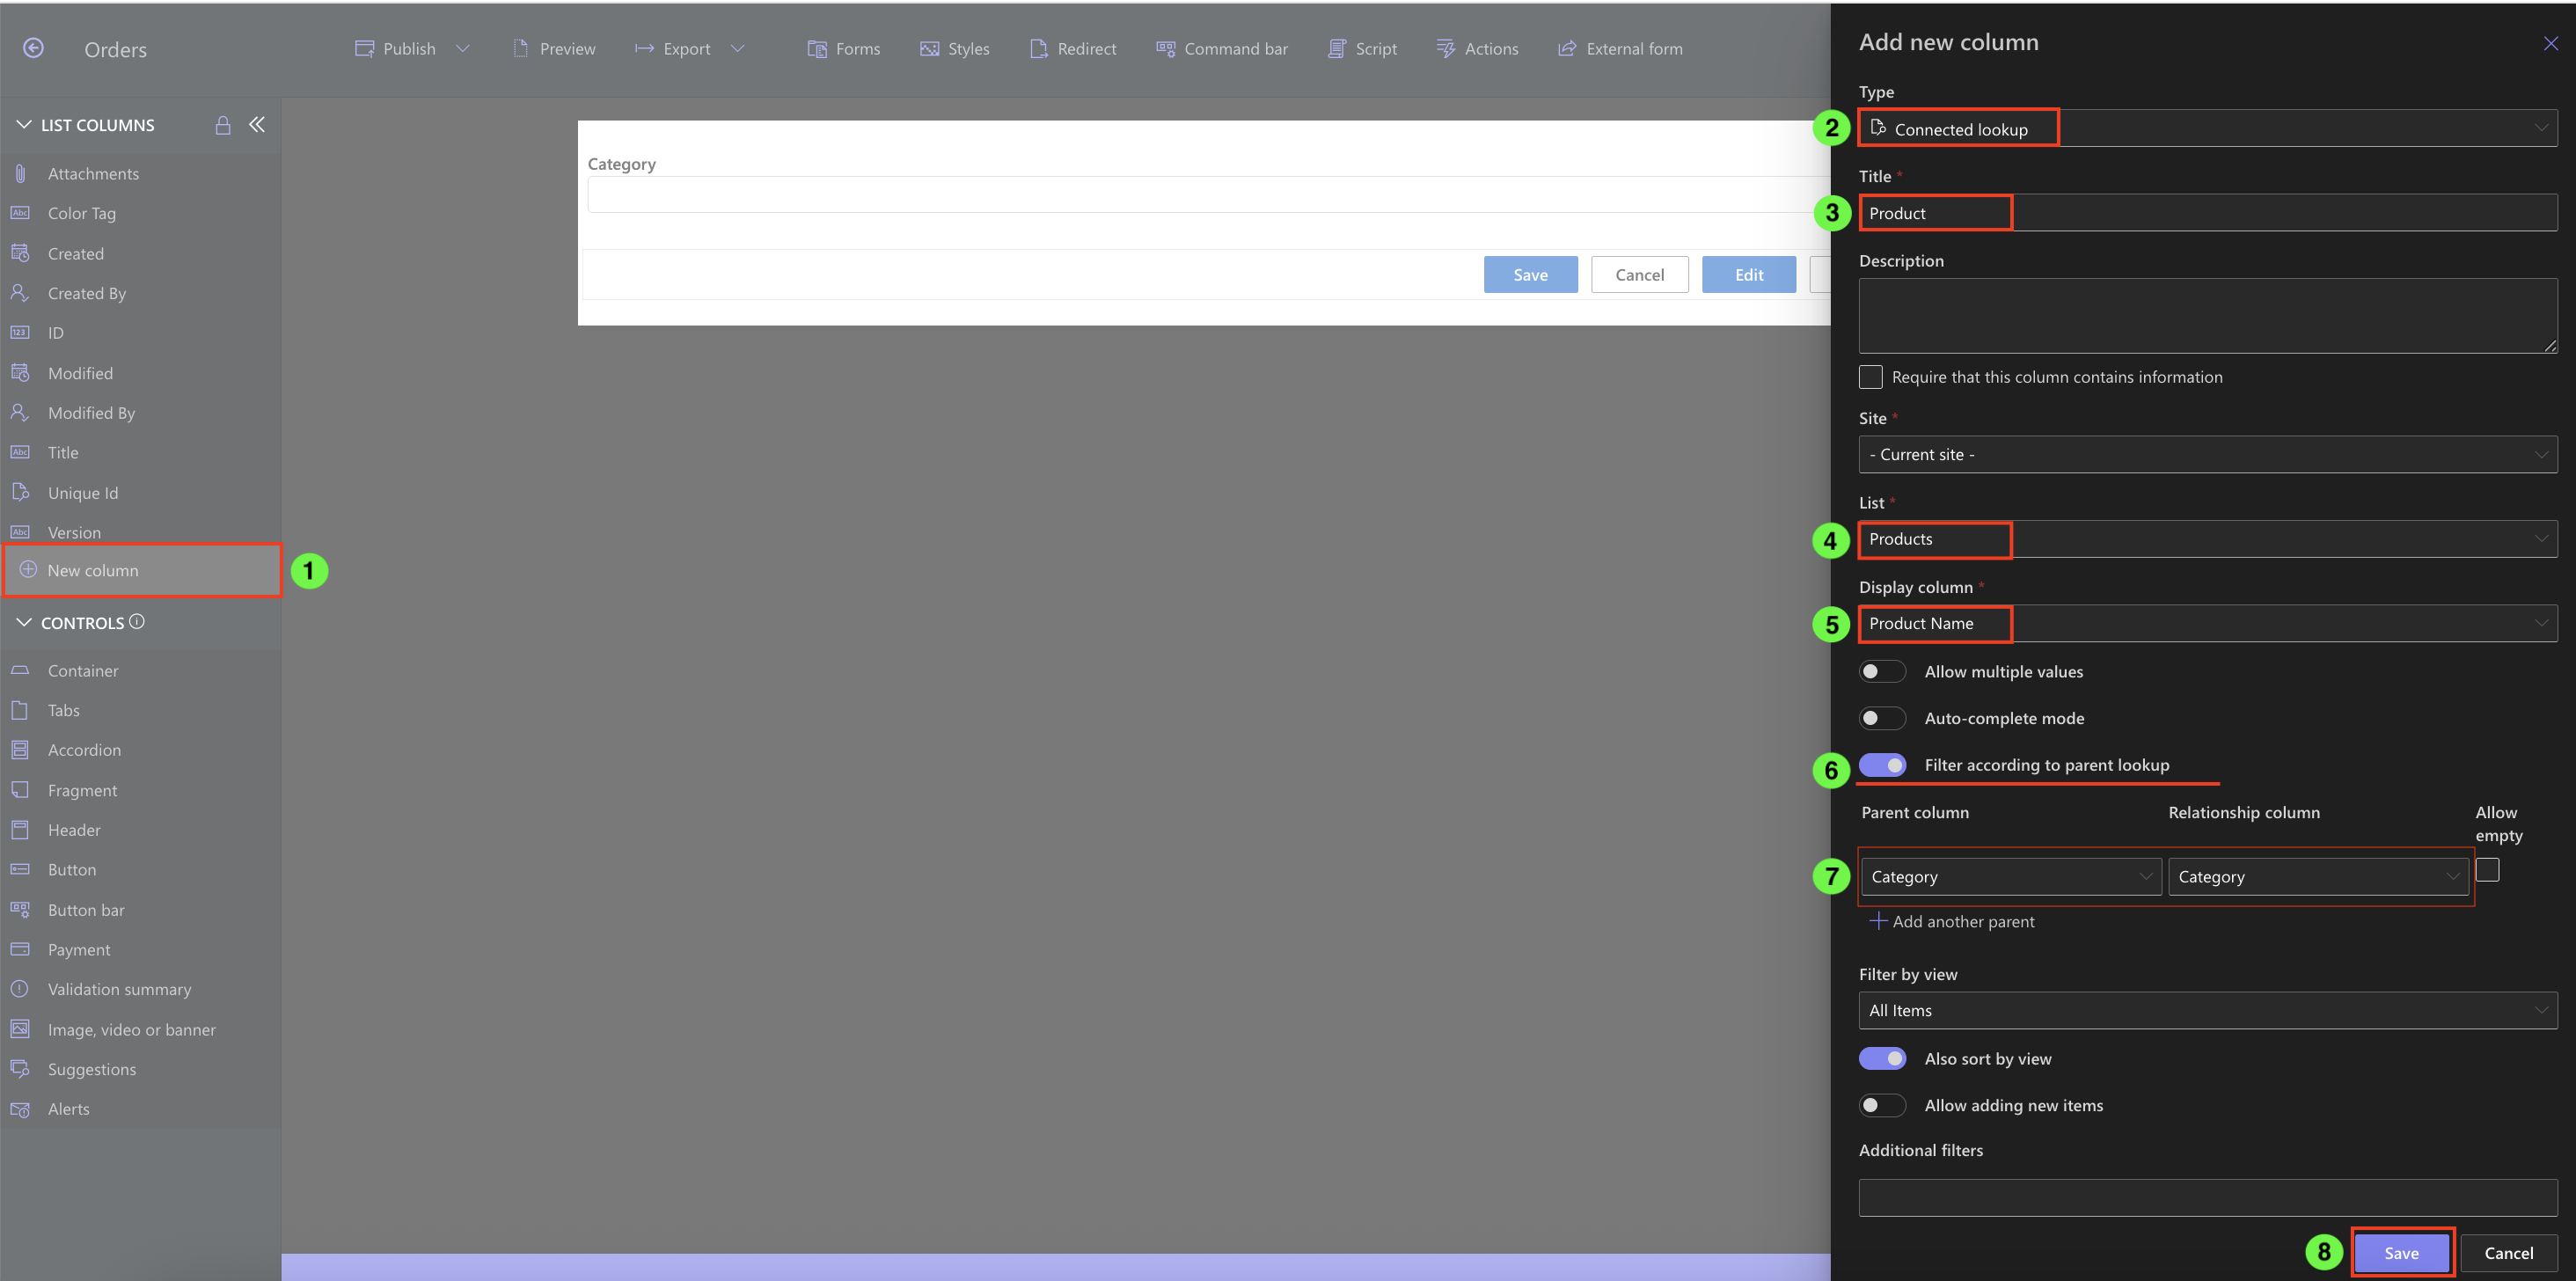
Step 3: Add and Configure the Connected Lookup Column
- Open the Orders
- Go to List Settings → Add Column.
- Choose Connected Lookup as the column type.
- Name the column: Product
- Select Source List:
- Source site: Current site
- Source list: Products
- Select the value column: Product Name (This is what will appear in the dropdown.)
- Filter according to parent lookup: Category → Category
- This tells the Connected Lookup: “Show only products whose Category matches the Category selected in the form.”
- Additional options (optional)
- ✔ Allow multiple values (if you want to select multiple values)
- ✔ Auto-complete mode ((helps when lists are long)
- ✔ Sort by view (if you have a sorted view)
- ✔ Allow adding new items (if you want to add new items without leaving the form)
- Click OK to save.
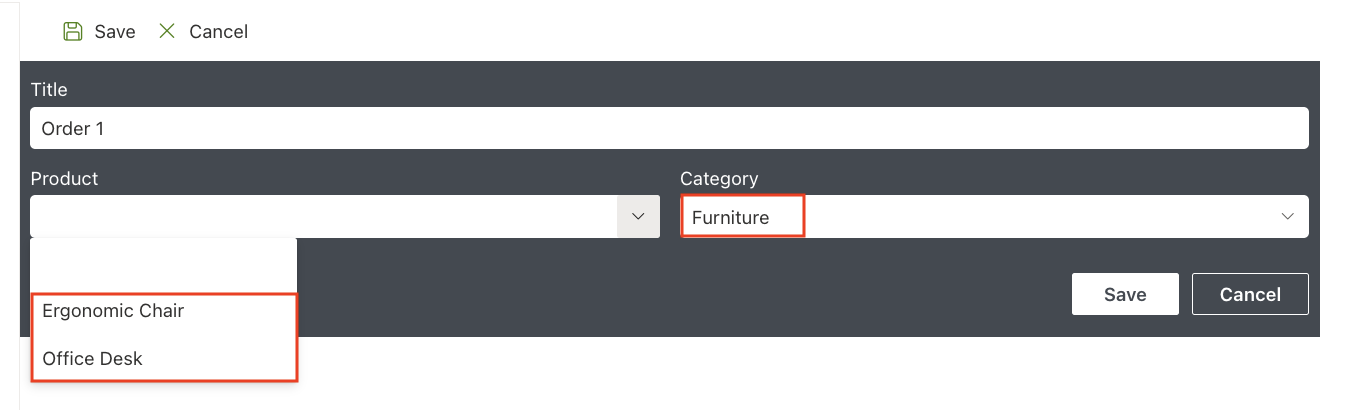
Step 4: Test the Lookup Behavior
- Go to the Orders list.
- Create a new item.
- Select a Category, for example: Furniture.
- Open the Product dropdown
- You should now see:
- Ergonomic Chair
- Office Desk
- If you choose Electronics, you will see:
- Laptop Pro 15
- Wireless Keyboard

Only products that belong to the selected category will appear.
Step 5: Common Things to Verify (If Something Doesn’t Work)
If your Product lookup column is empty, check:
- Category values must match in both lists
- Source list must have items
- Parent column must be filled before opening Product
- Parent column type must be Choice
- Products list must contain the relationship column (Category)
This solves 95% of user issues.
Summary
You’ve created your first Connected Lookup — a filtered, dynamic dropdown that updates based on the user’s selection.
This simple scenario is used in hundreds of real business cases and is the foundation for building multi-level cascades and advanced forms.