The Infowise filter web part allows you to create filters for information displayed in Infowise Charts. This gives your users an easy way to view segmented data on your site.
Instructions
Add a Infowise Chart Web Part to a Page
Step one of the process is to create a chart for your list and place it on your page. NOTE: When putting the chart on the page, you must use the Infowise Chart web part, NOT the Infowise Smart Chart app. Filters will not work in conjunction with Smart Charts.
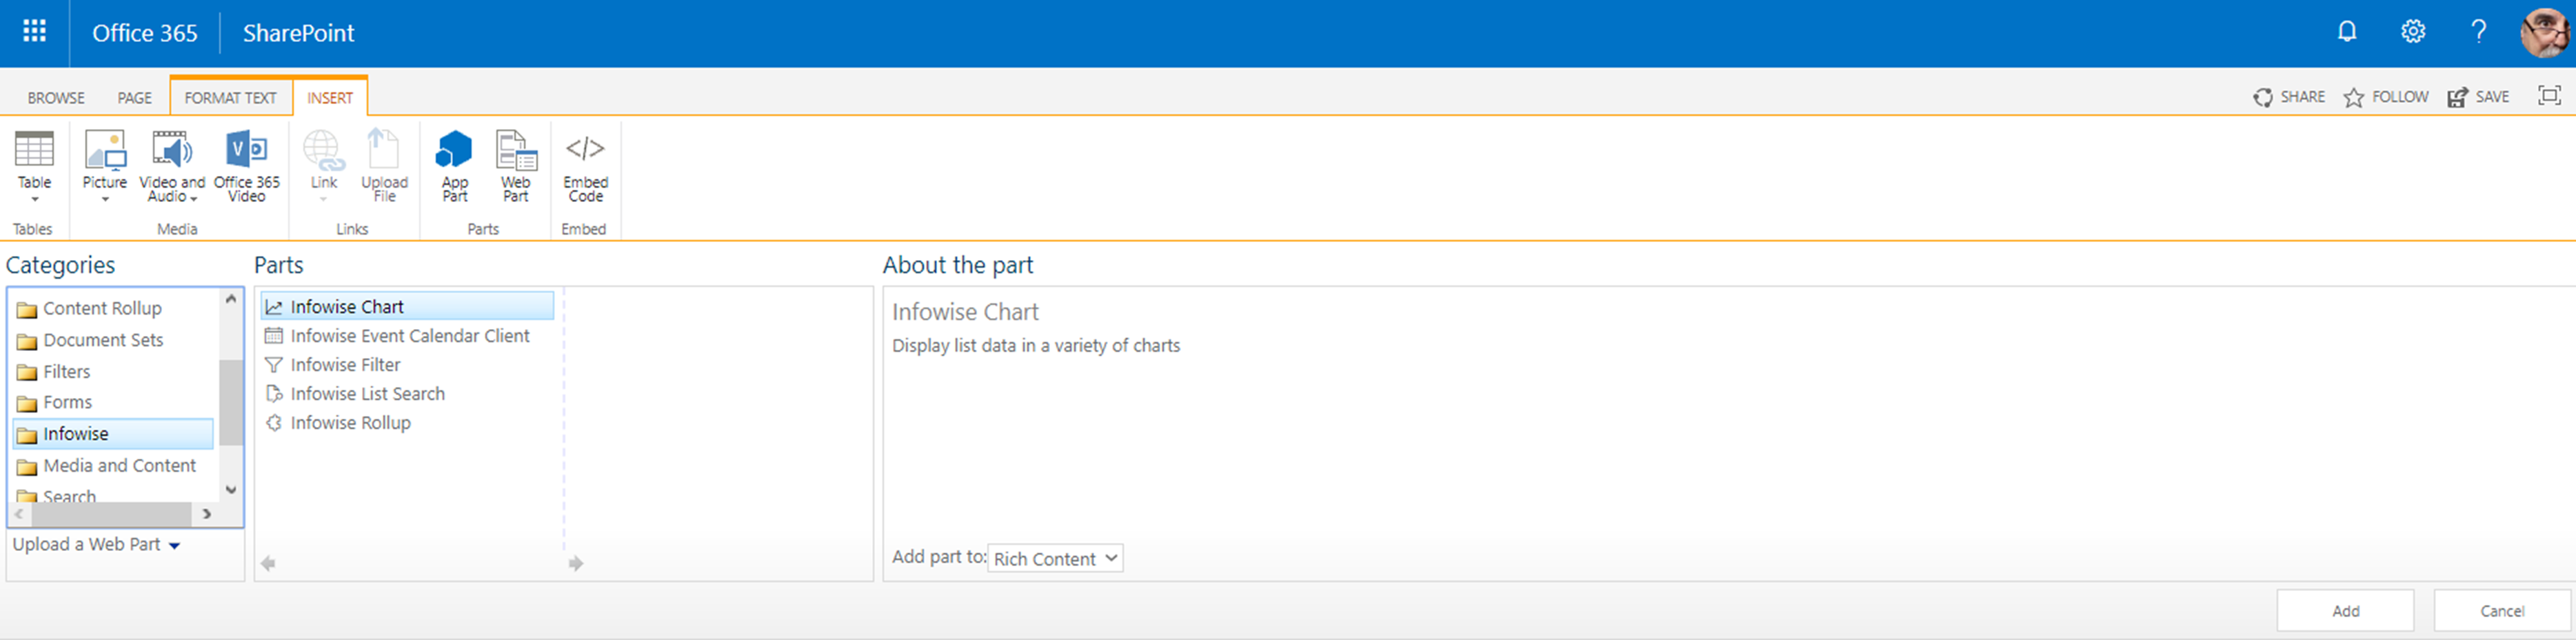
For more information on creating charts, please see Charting in O365.
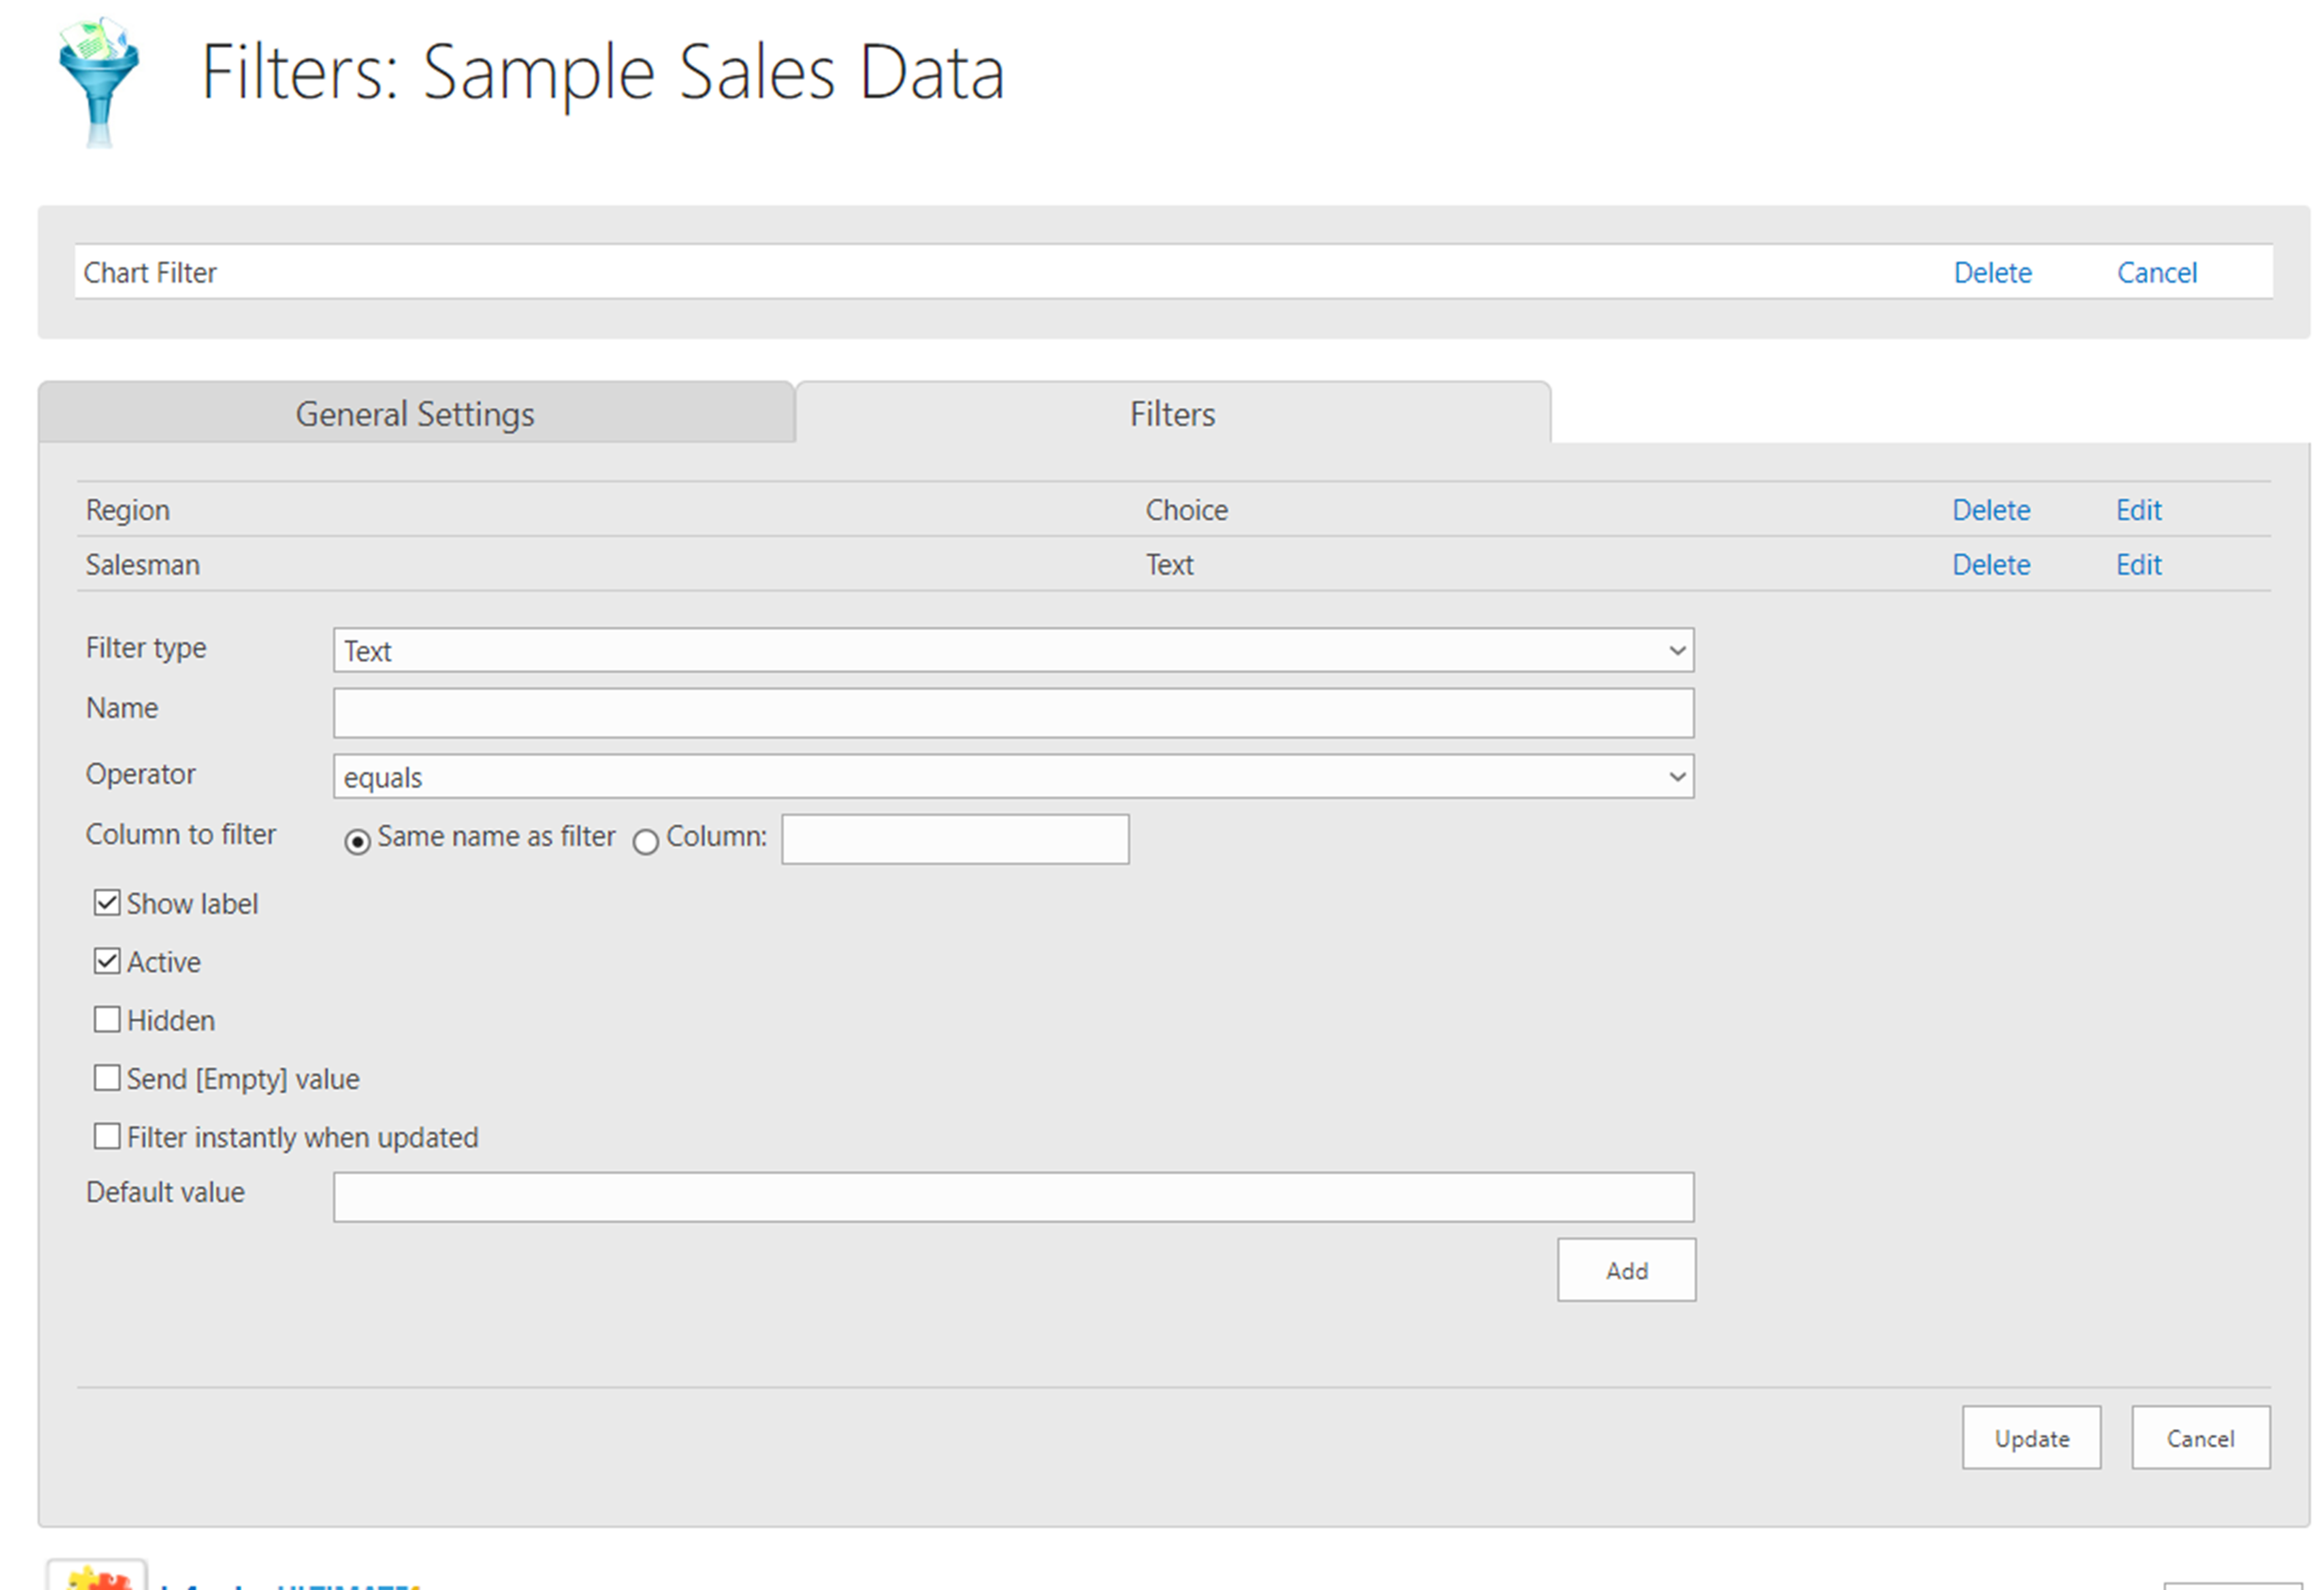
Creating the Filter
- Starting from the list you’re using for your chart information, select the List tab in the ribbon and click the Infowise “design” icon.

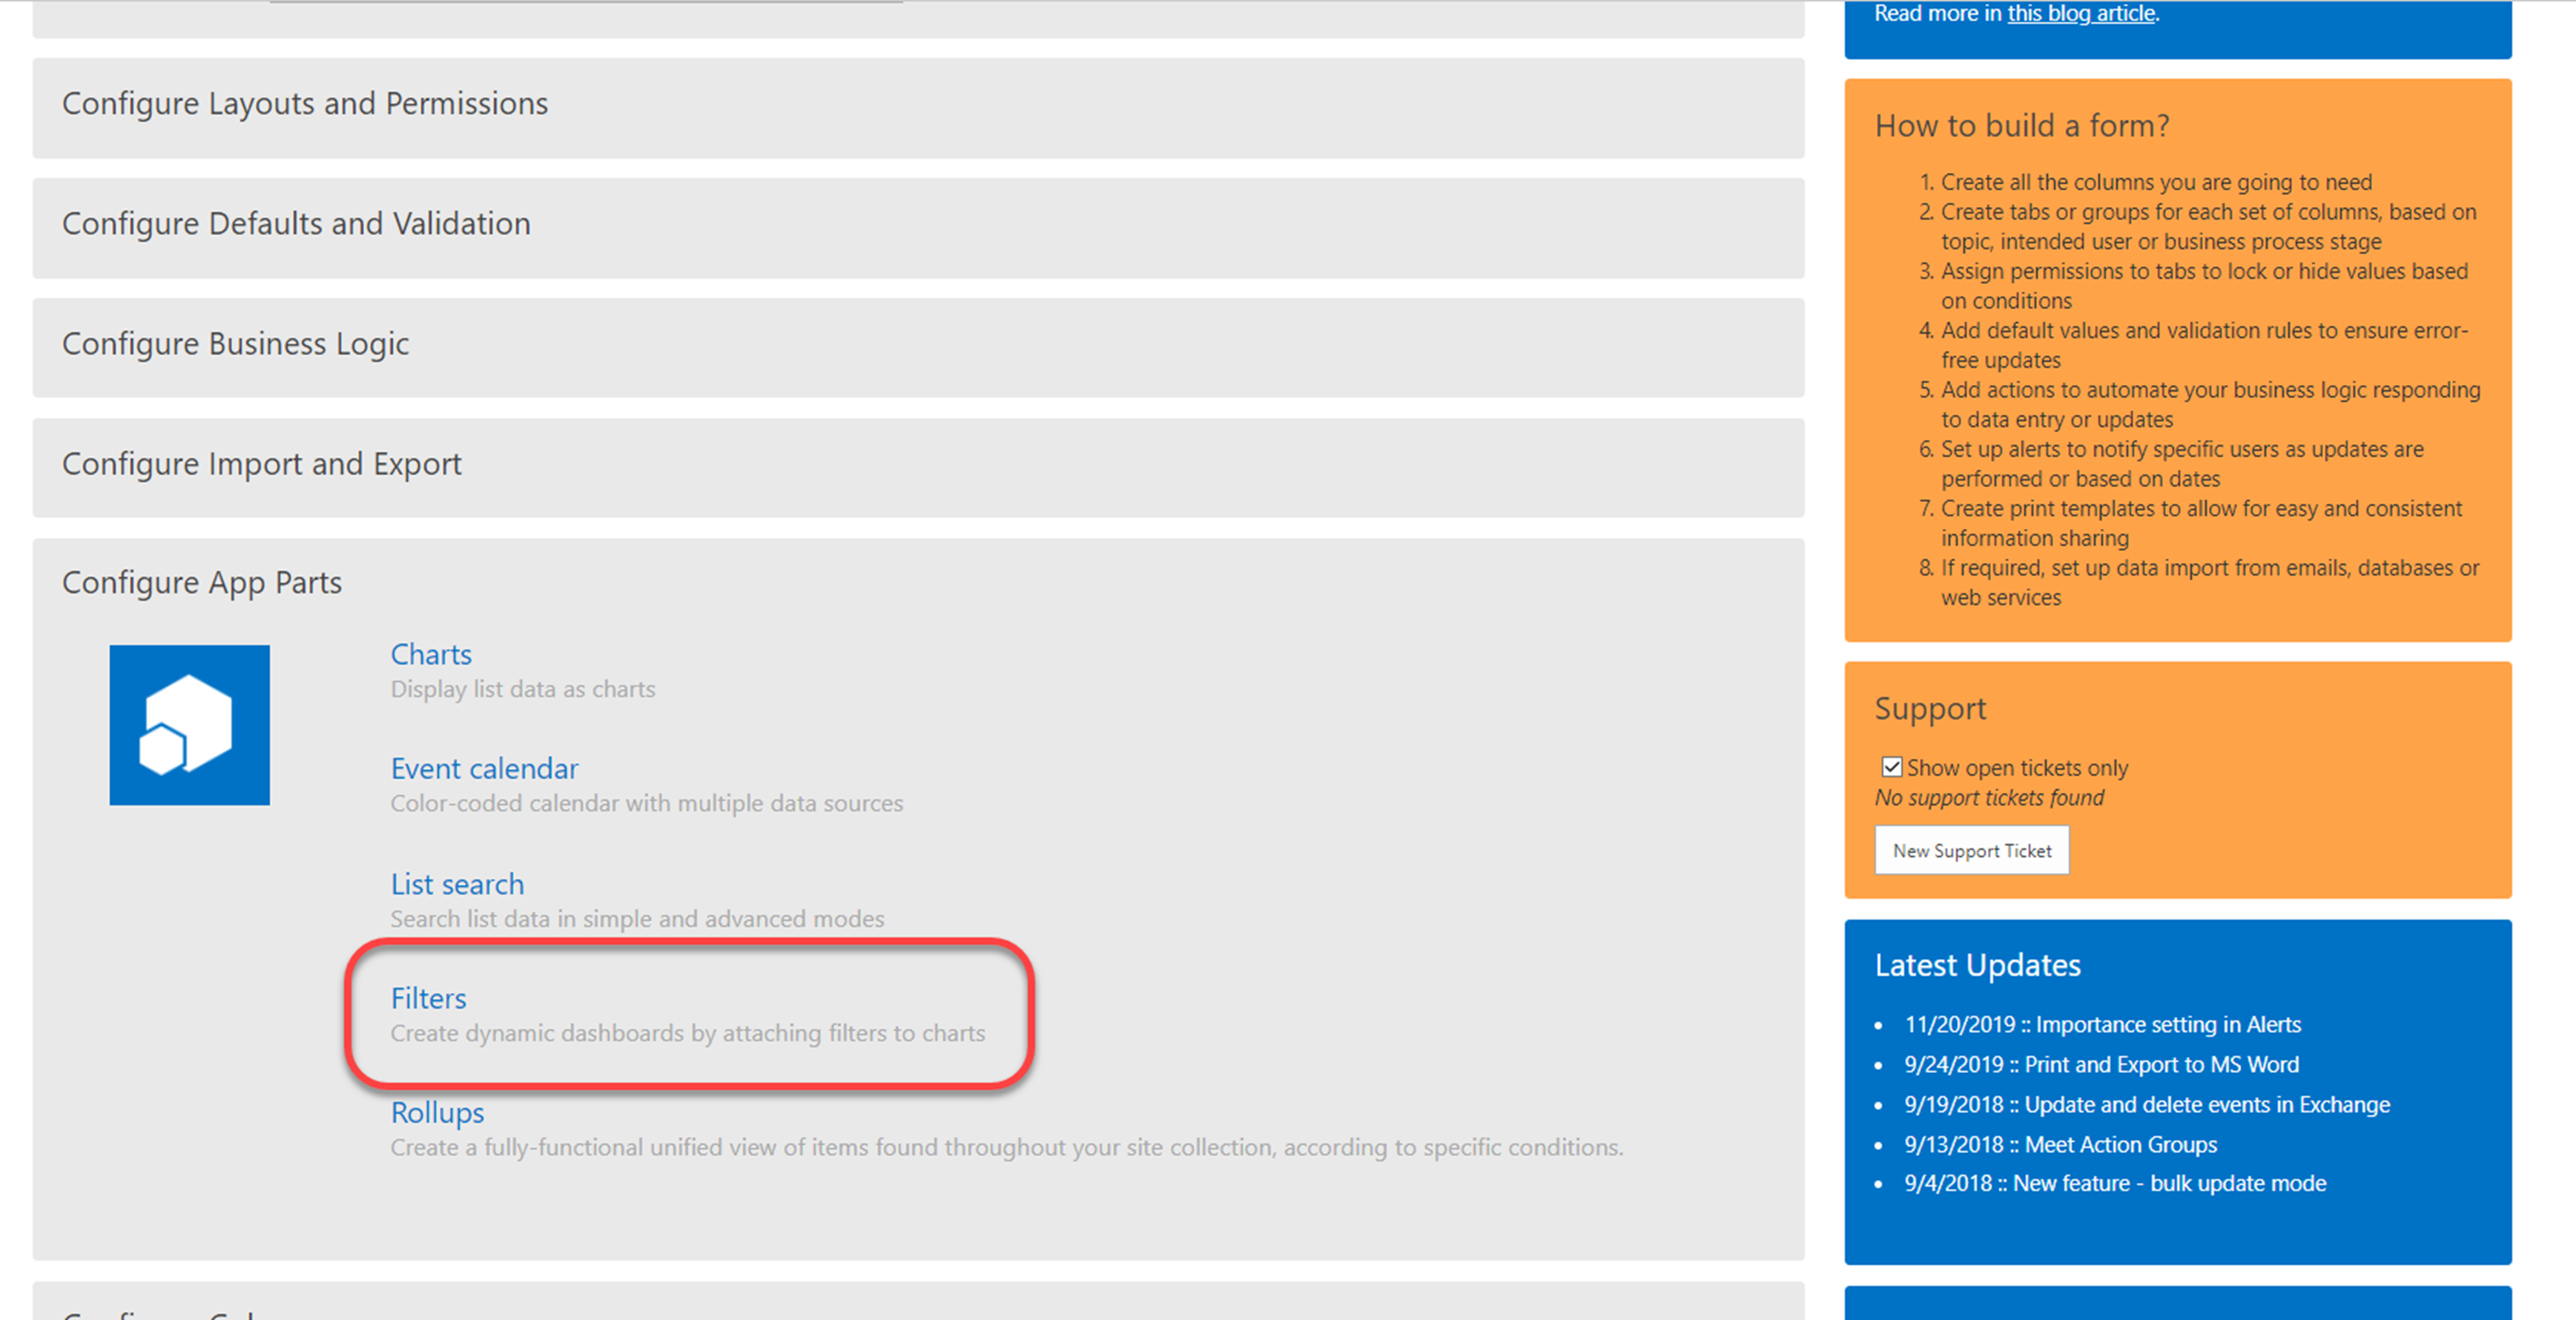
- On the Infowise app home page, open the Configure App Parts section and select Filters.
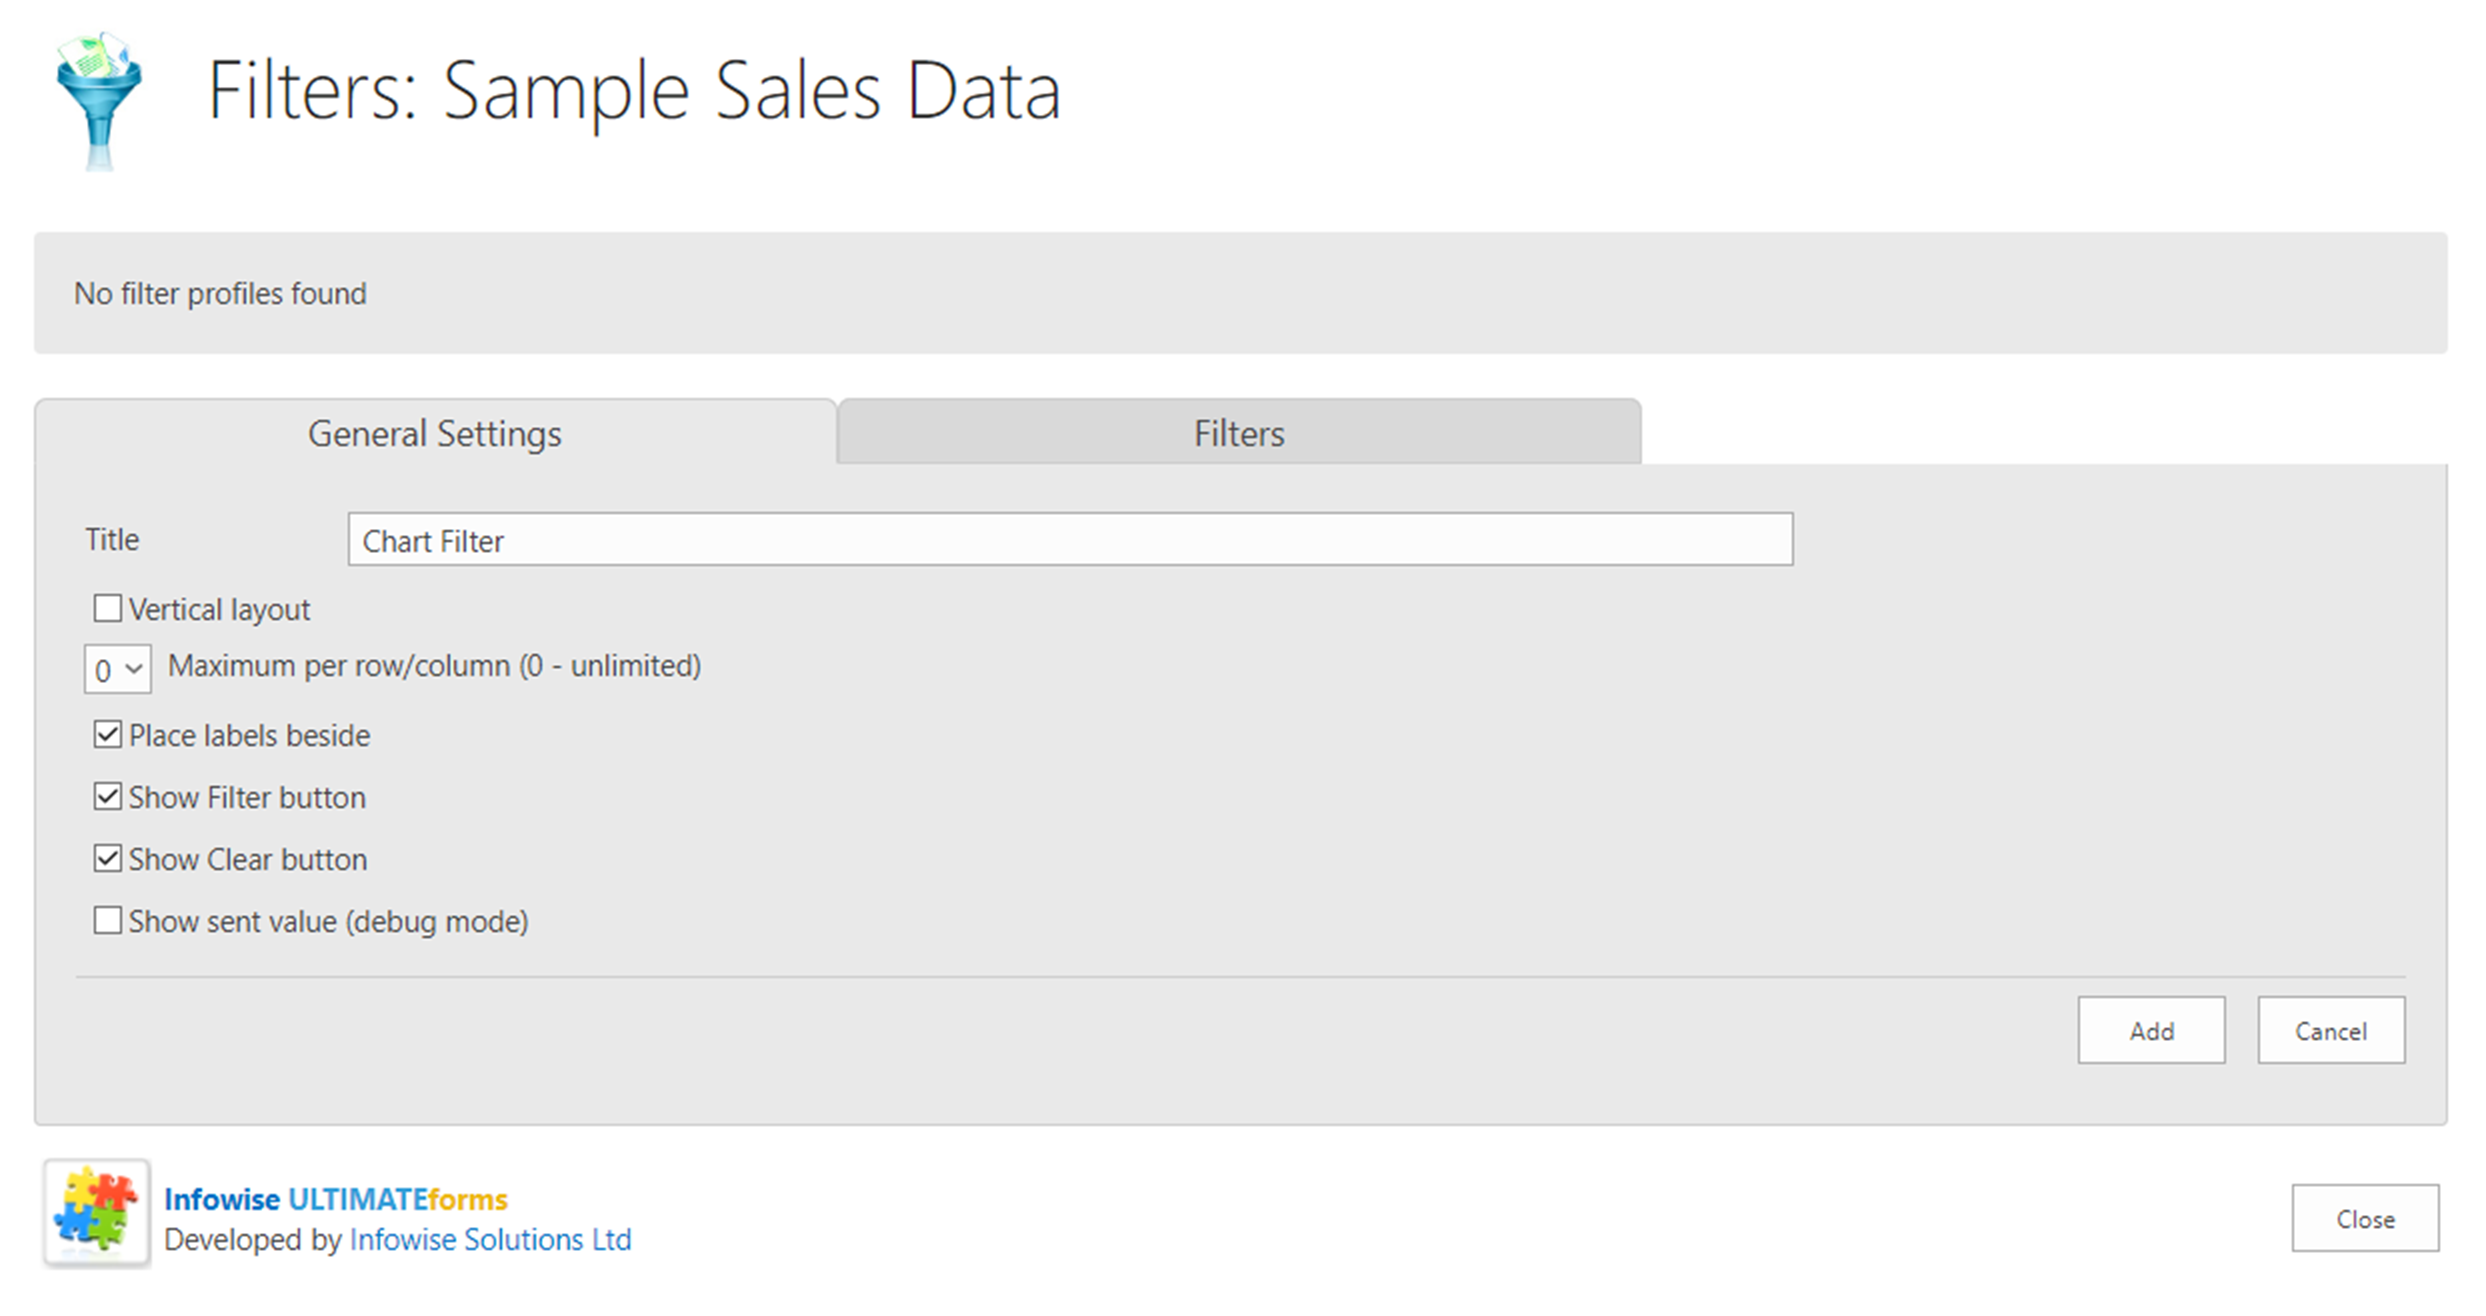
- On the General setting tab, give your filter a clear name.
- The default for the filter display is horizontal, but you can change that to vertical if you wish.
- There will be a “filter” command button in the filter by default; clicking the button after entering a filter value causes the filter to run. If you chose not to have a filter button, users will need to press Enter to run the filter.
- You can also optionally add a Clear button.
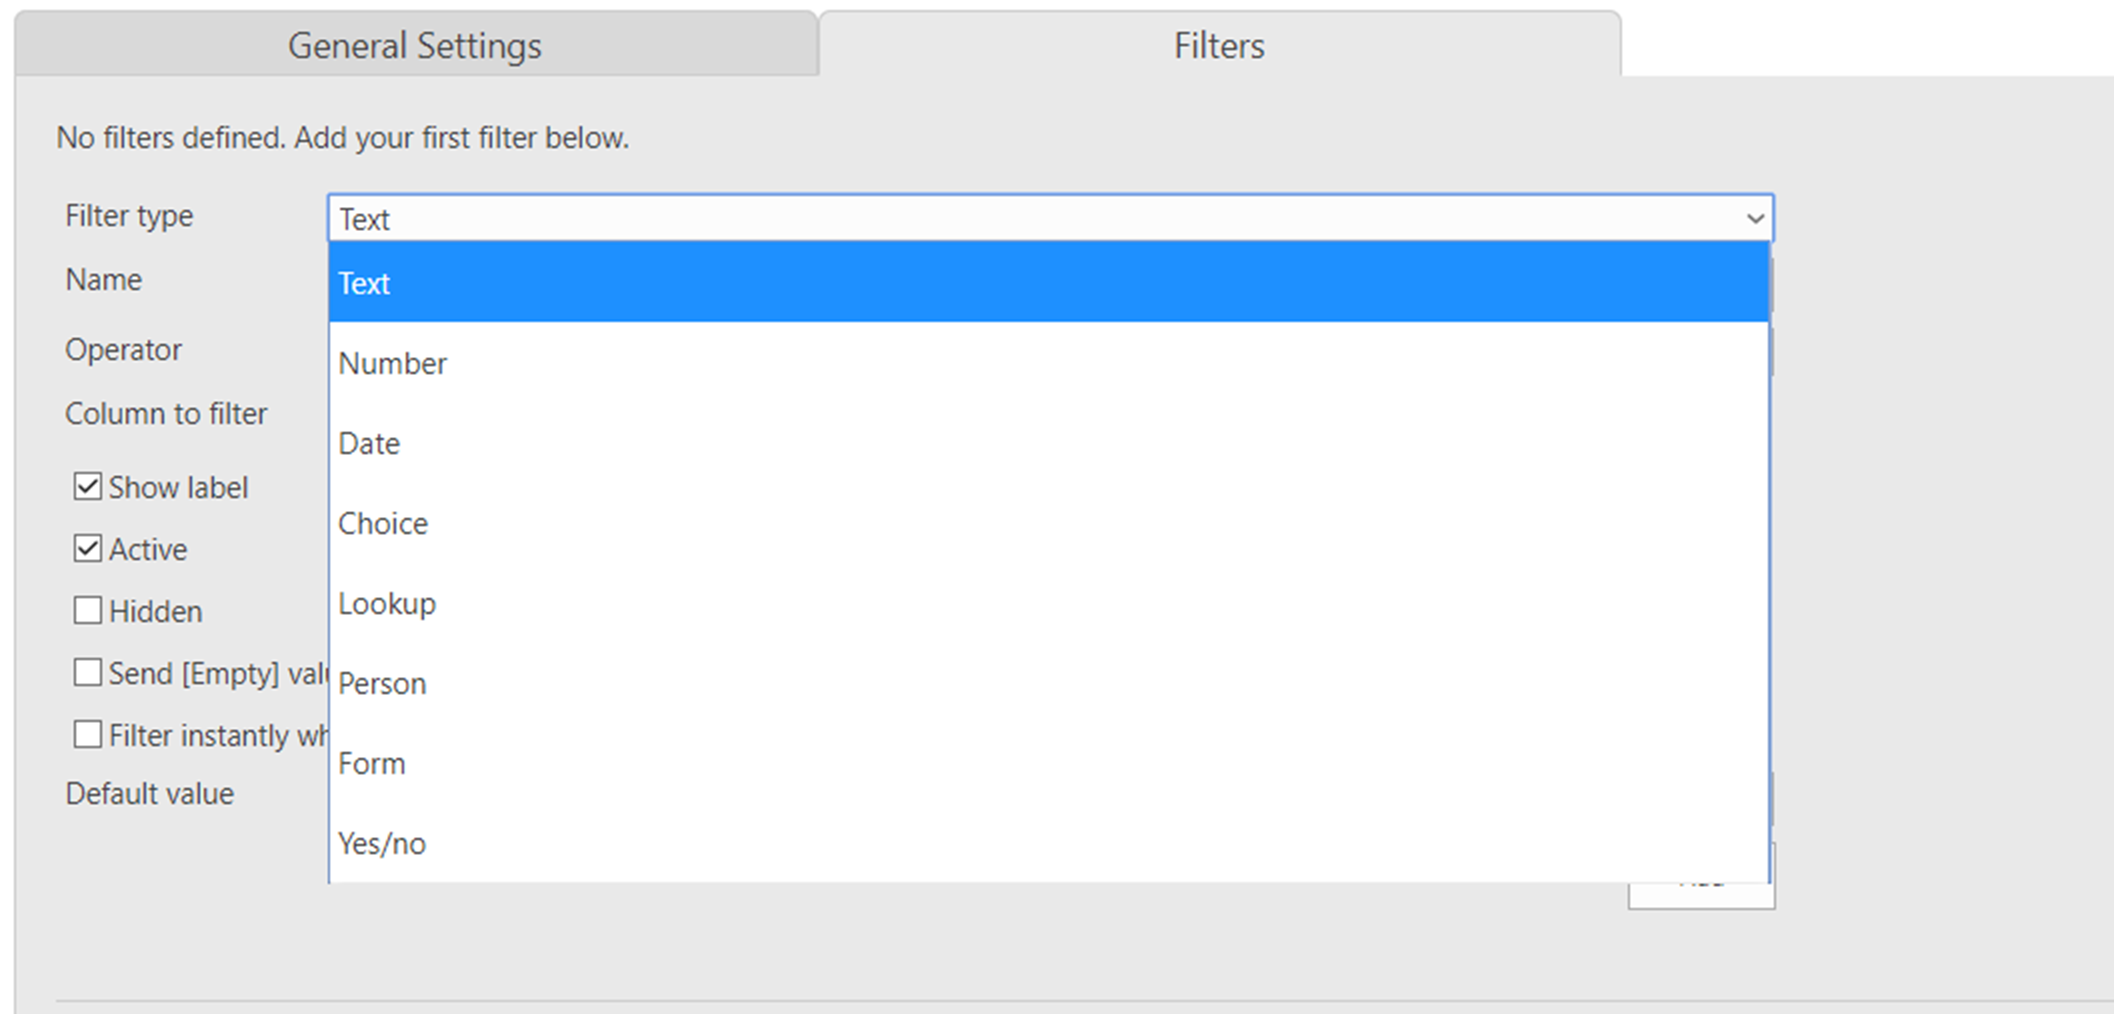
- Move to the Filter tab – do not click Add yet.
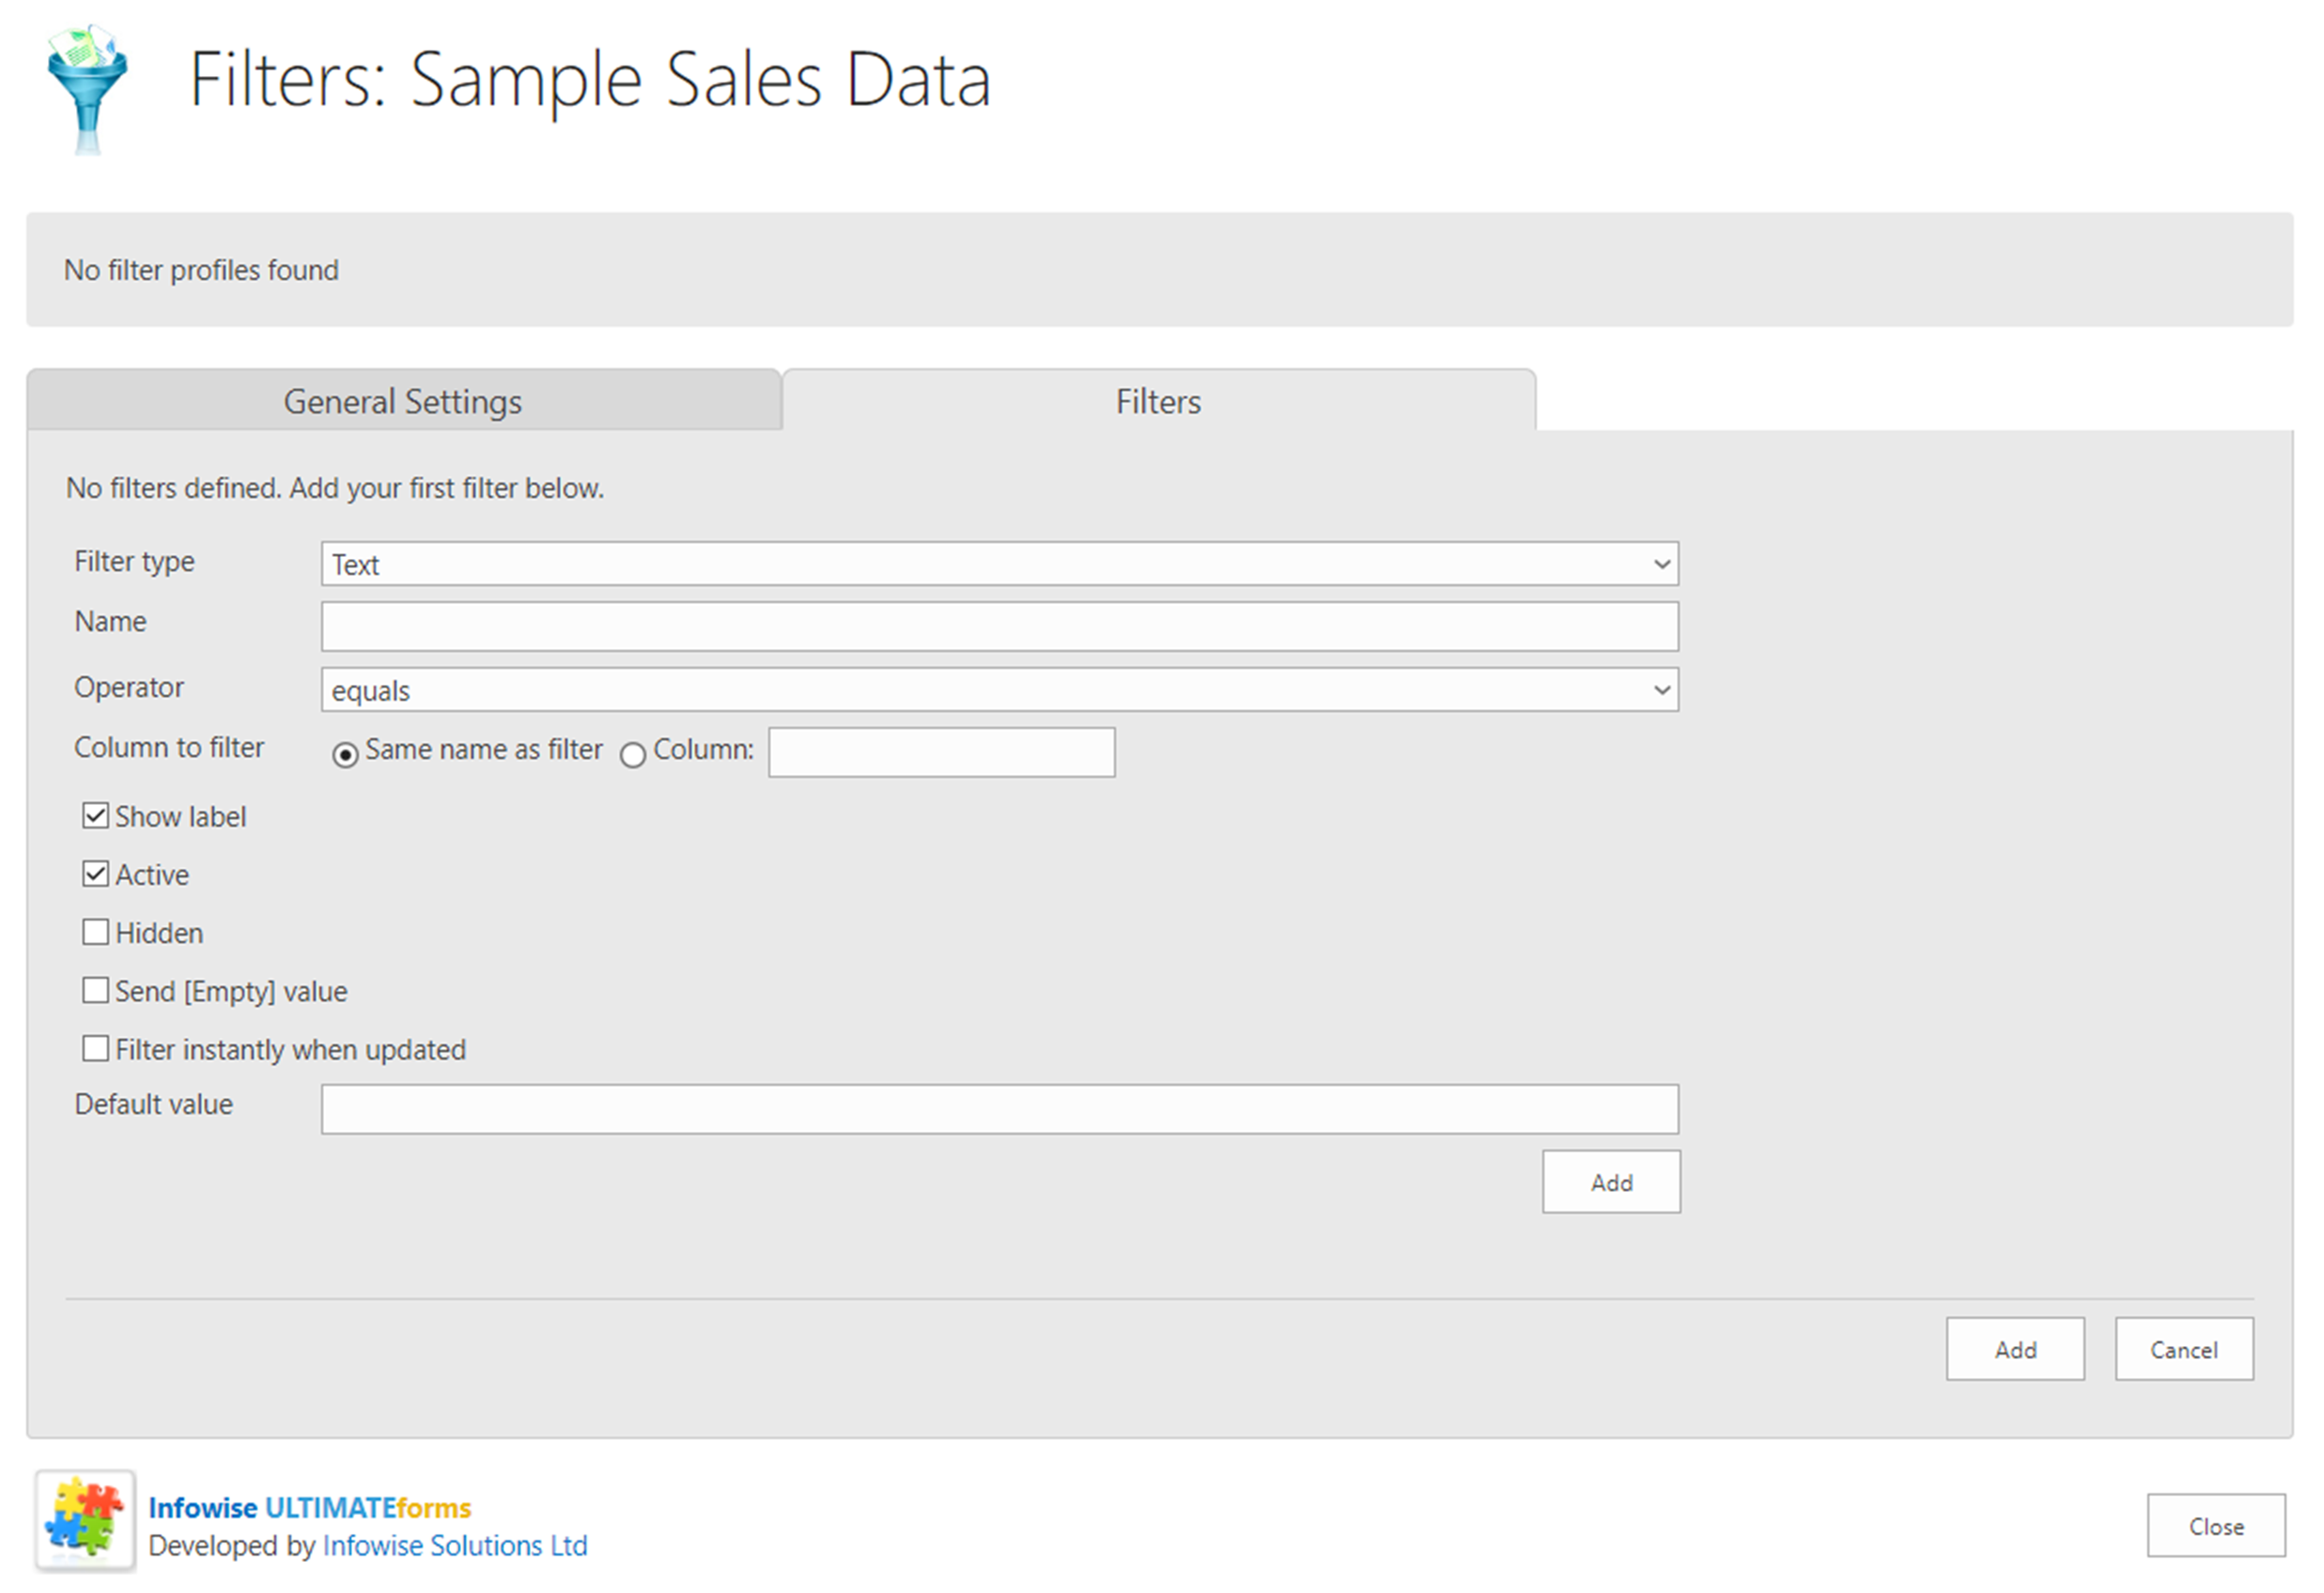
- Select the filter type. The form changes to match the different filter types. For this example, we’ll use Choice so as to demonstrate that functionality.
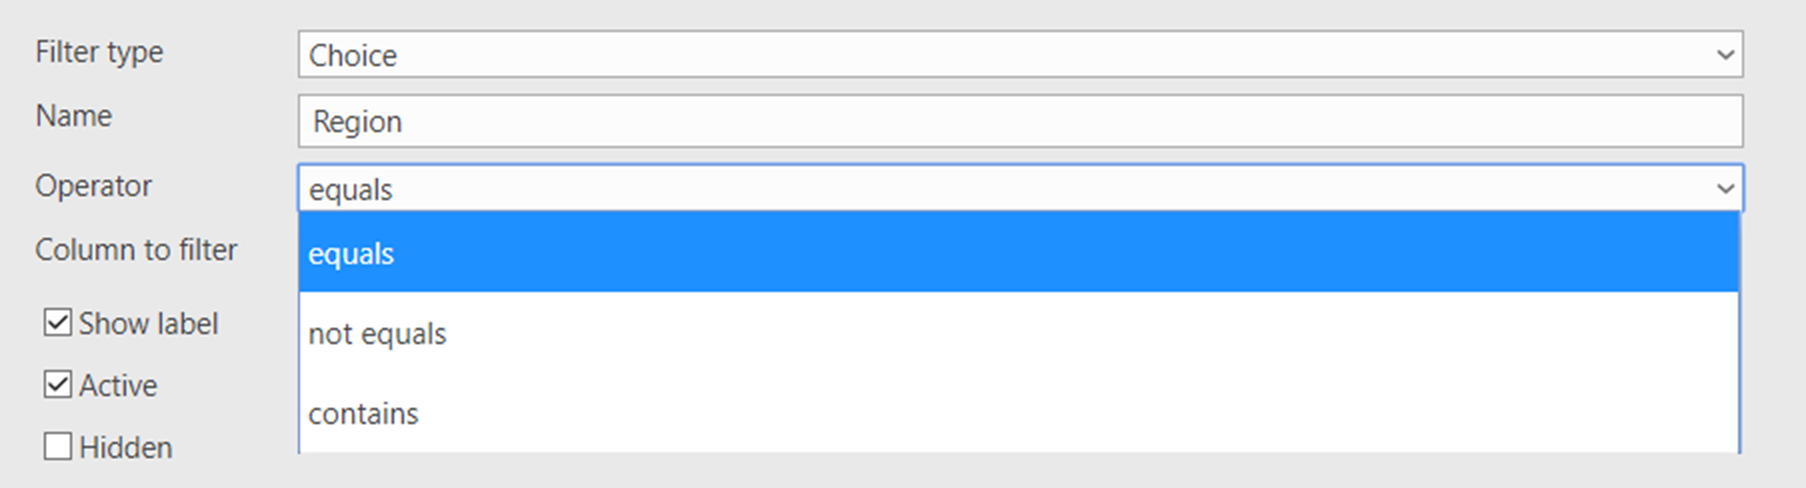
- Enter the name that will display for the data in your list that you are filtering. You can use the actual column name or an alternate if you wish.
- Select the operator for the filter. Choices are equals, does not equal, or contains.
- Select the column to be filtered. If you have used a different name in step 8 above, enter the true column name; otherwise, select the “same name as filter” option.
- Select whether or not to show the filter label.
- Default for the filter is “Active,” but you can deactivate and hide the filter if desired.
- You can have the filter update instantly when choices are made; note that this makes the “Filter” button on the General tab somewhat redundant.
- For a Choice filter, enter the choices to select from. You can add a default value if desired; you also can set the filter to accept single or multiple-choice values.
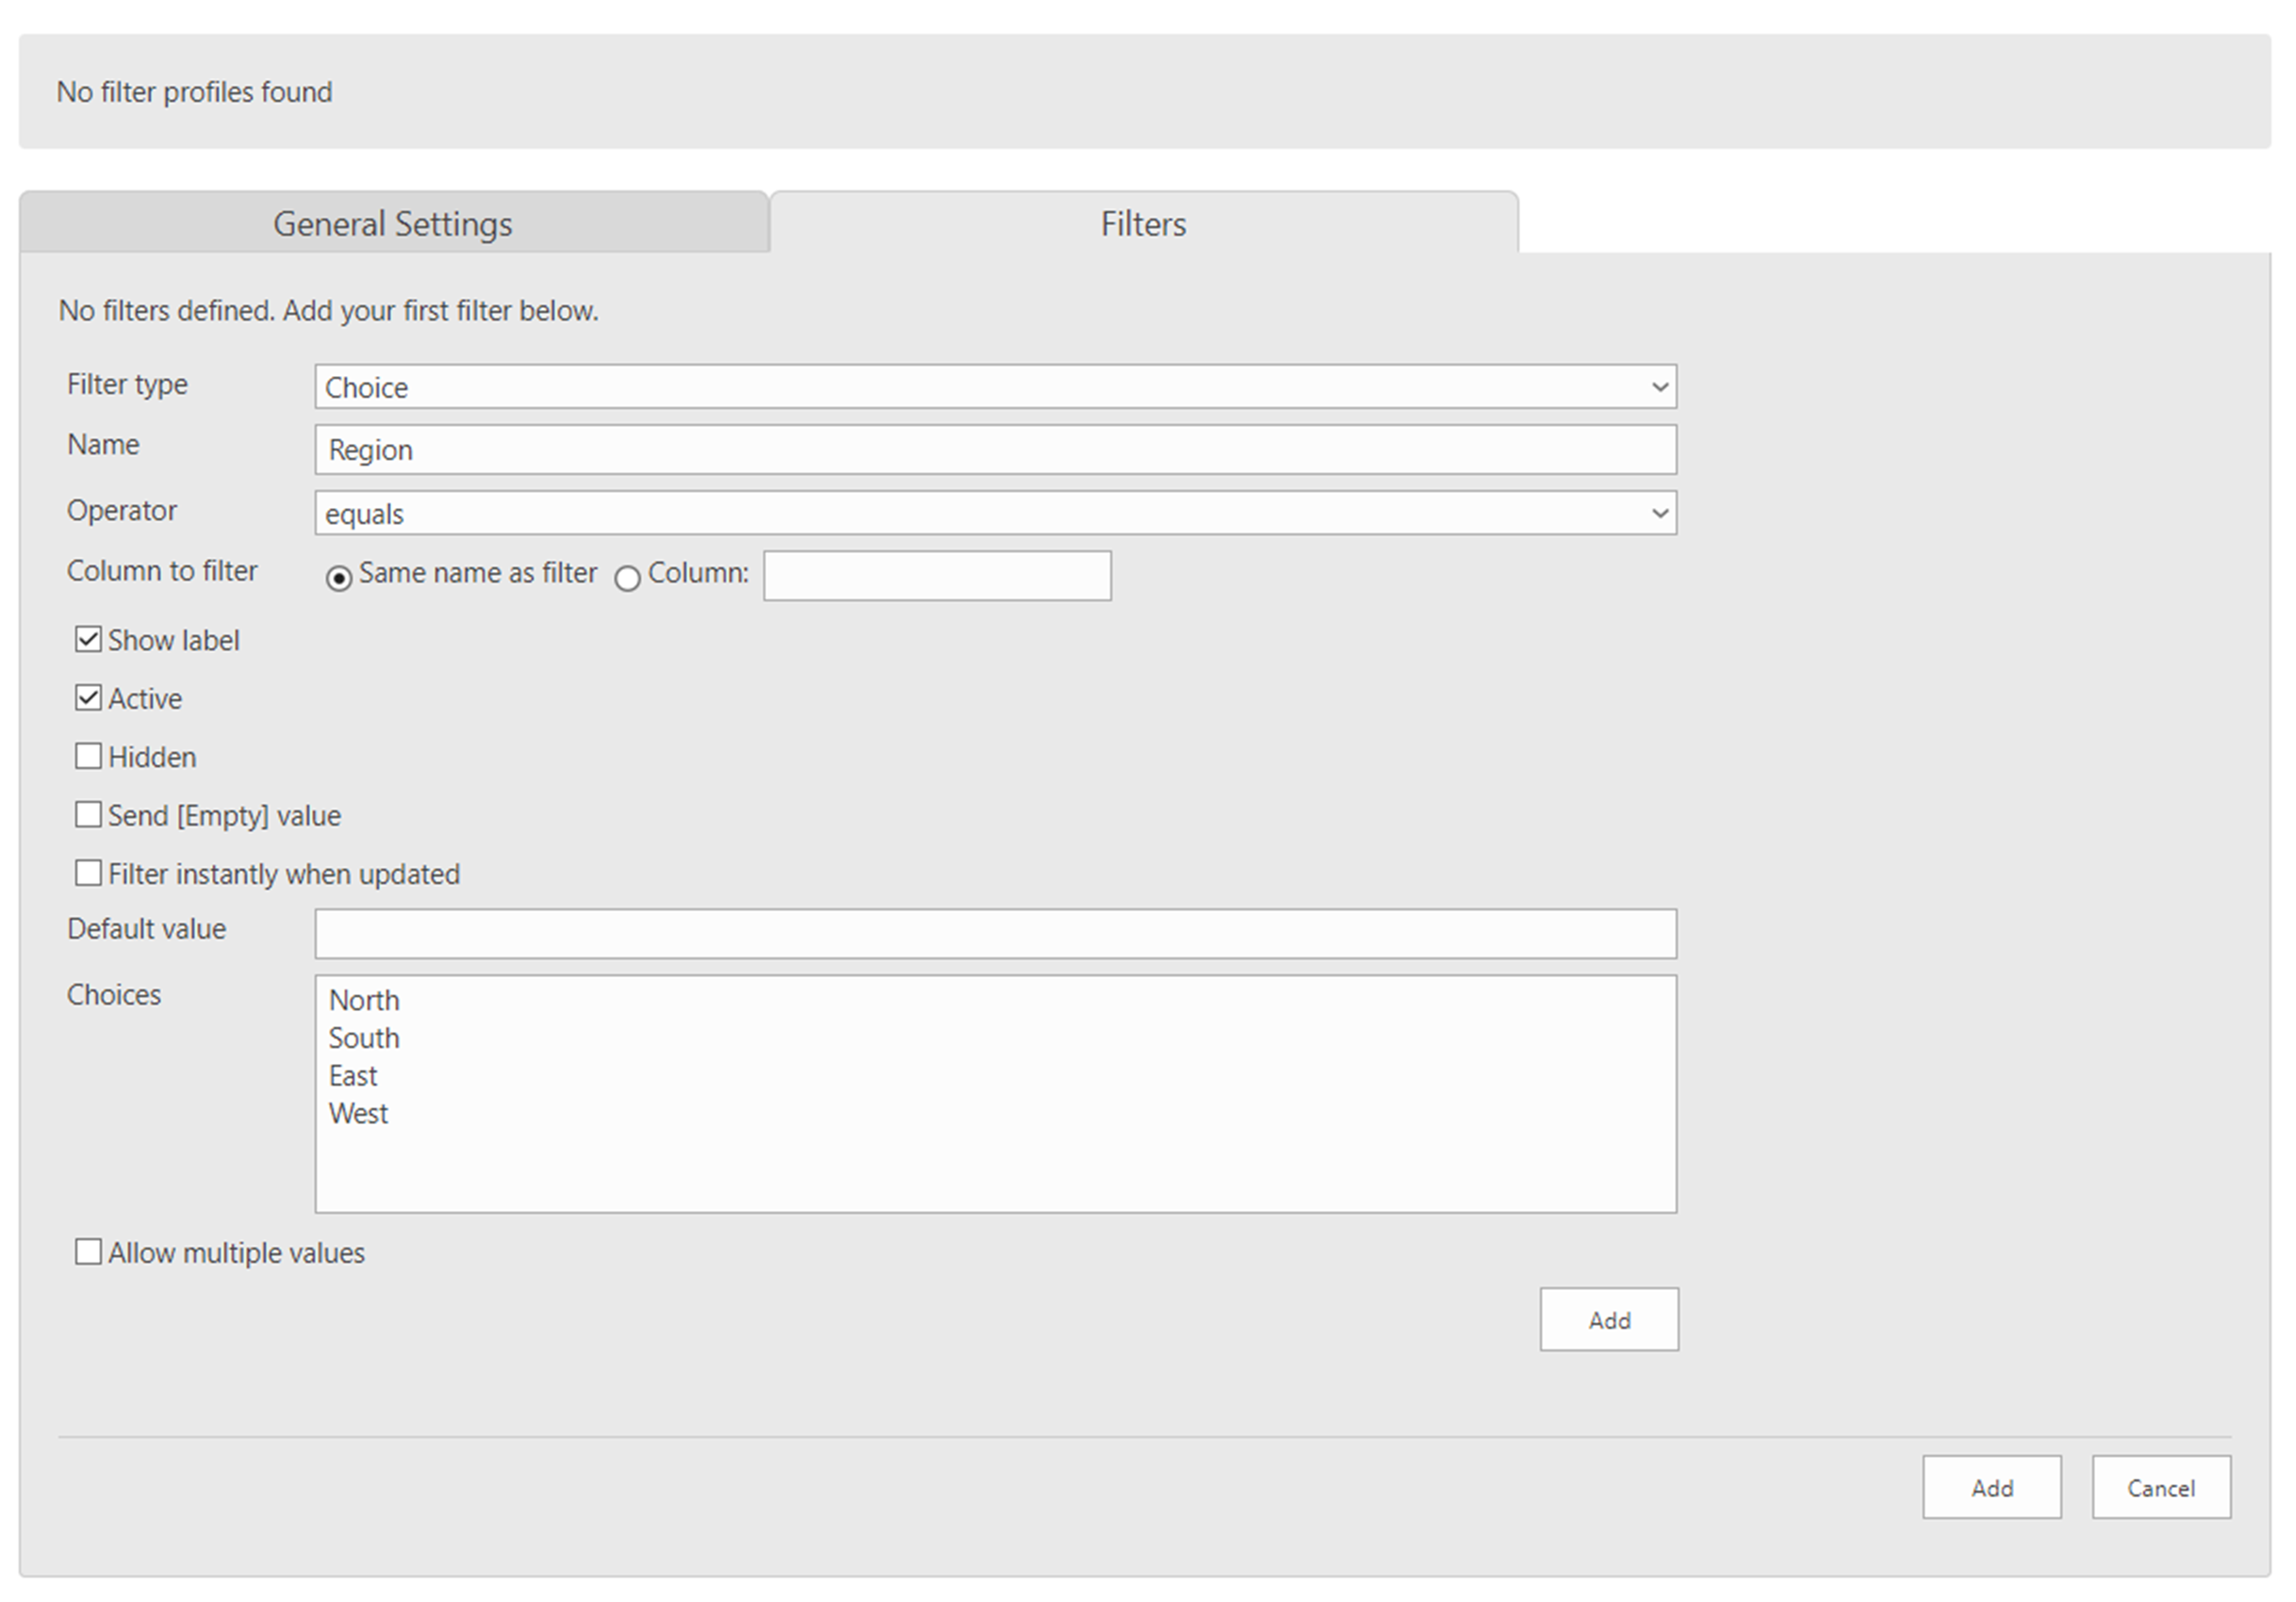
- When you are finished defining your filter, click the first Add button. This adds the filter definition to the tab. Once that is complete, click Add at the bottom of the page to save the filter for use.
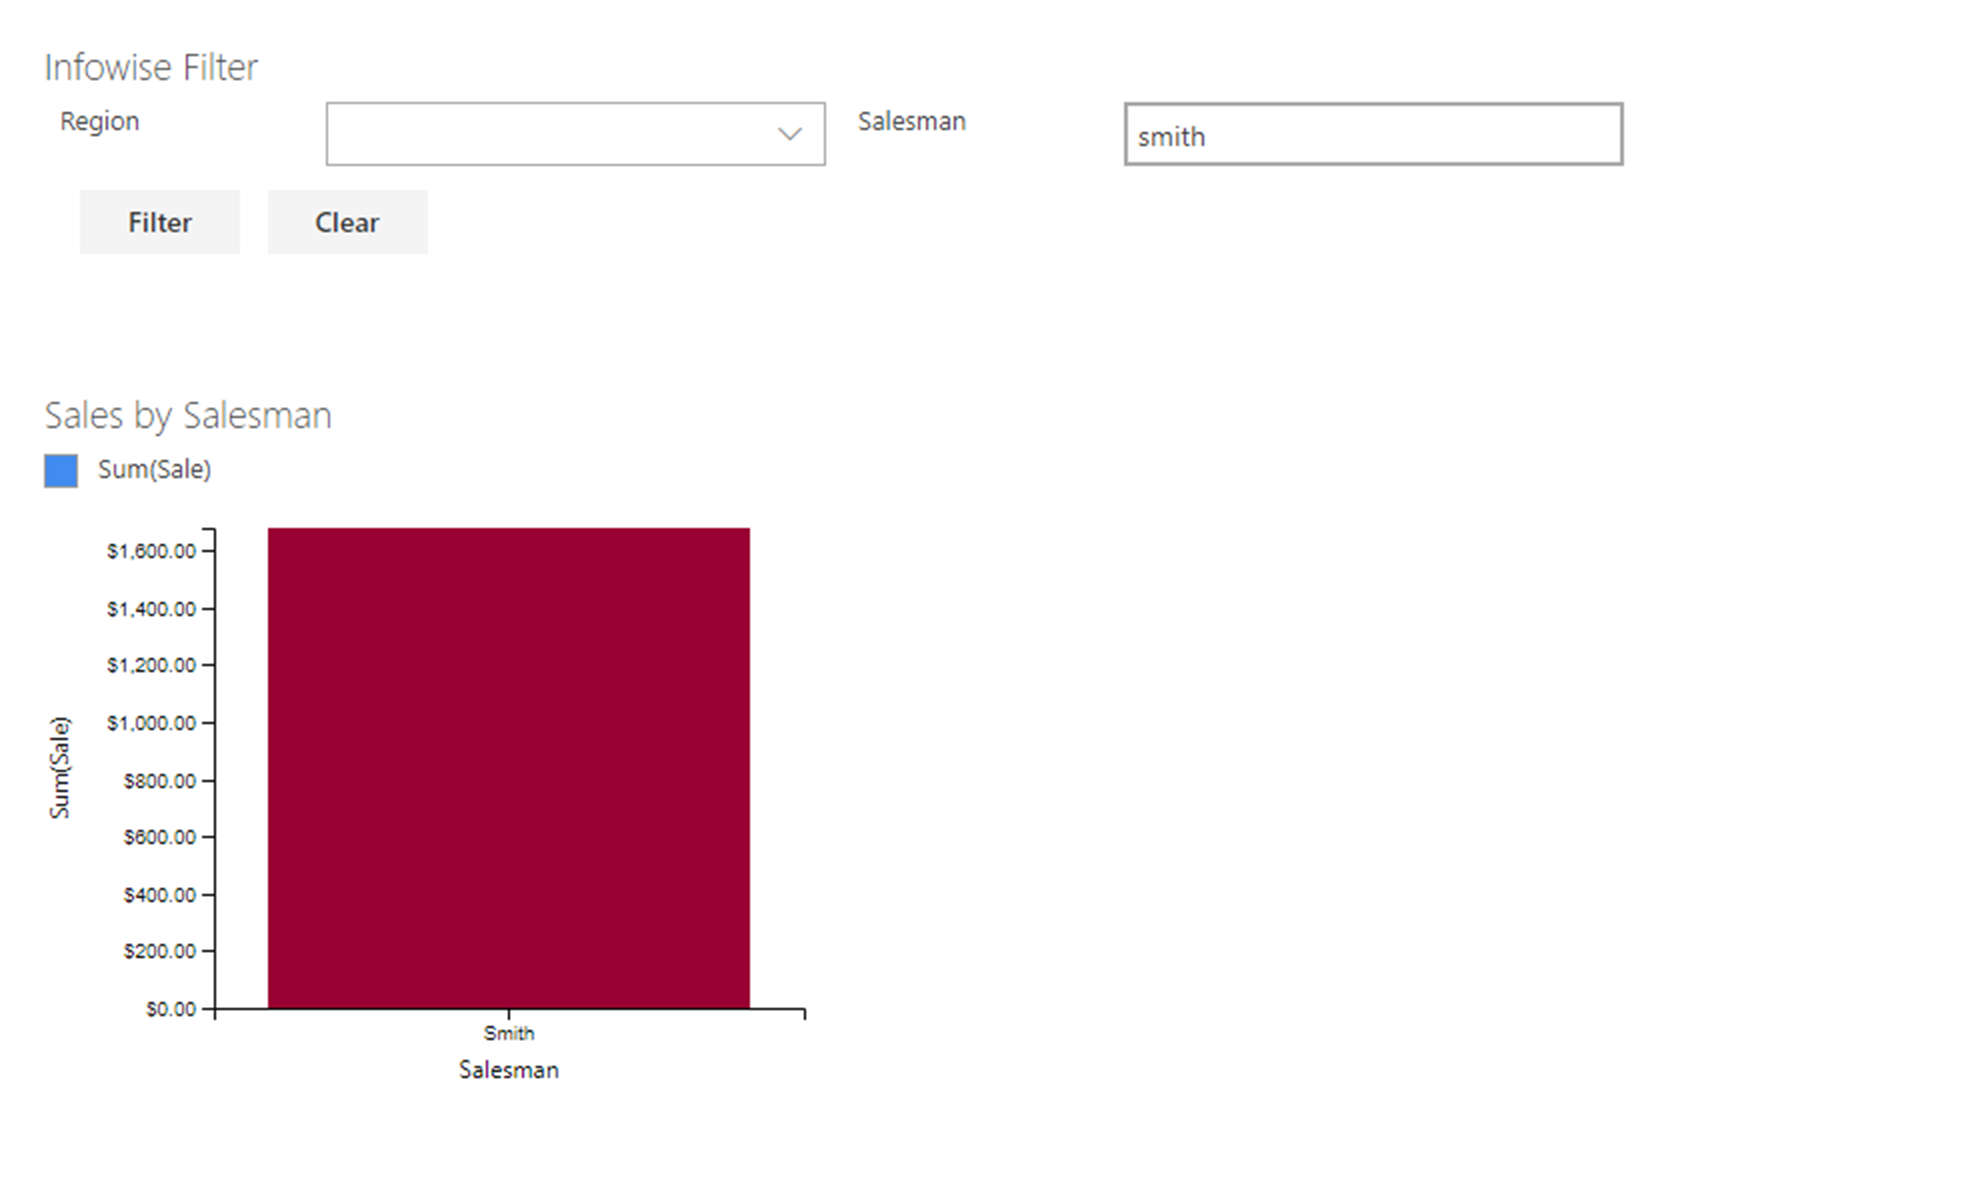
Adding the Filter to the Page
- Open the page that contains the chart for which you want to add the filter in edit mode.
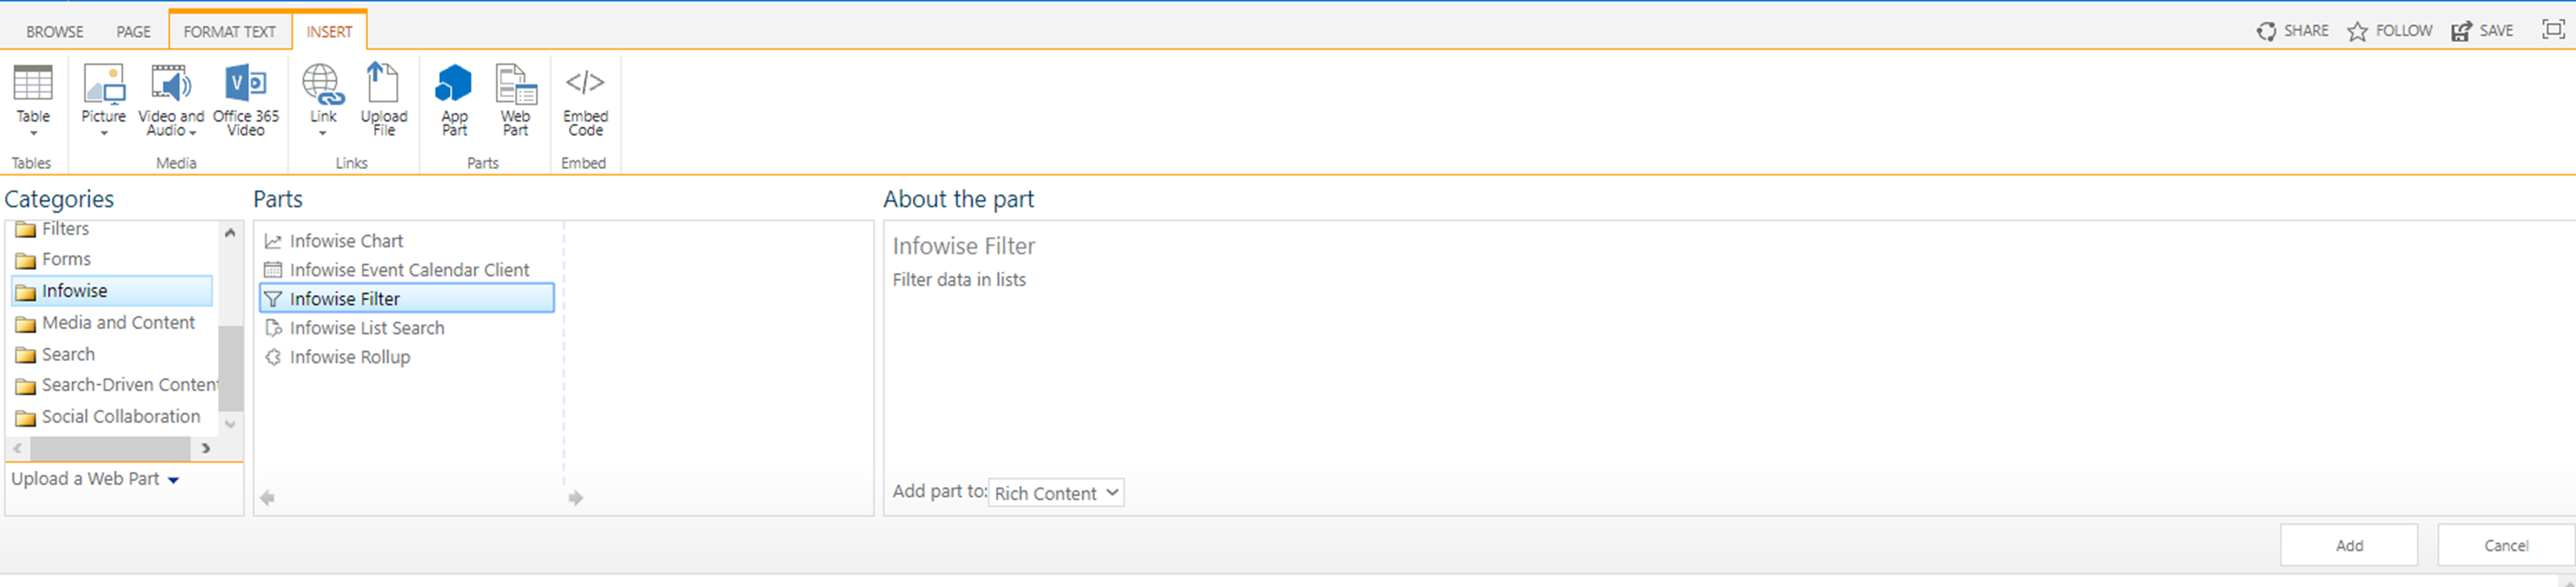
- Position your cursor where you want the filter to be (i.e., directly above the chart part), then click the Insert tab on the ribbon and select Web Part.

- Select the Infowise category and the infowise filter part, then click Add.
- The part needs to be configured before it is operational. Click the small down-arrow in the upper right-hand corner of the part and select Edit Web Part from the drop-down menu.

- In the Edit Web Part dialog, click Configure.
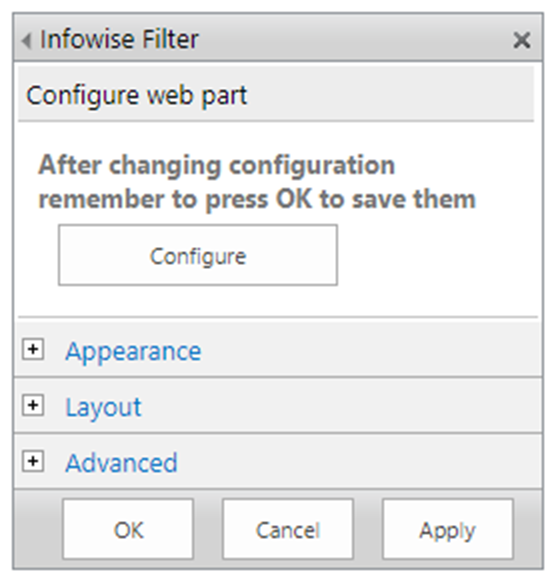
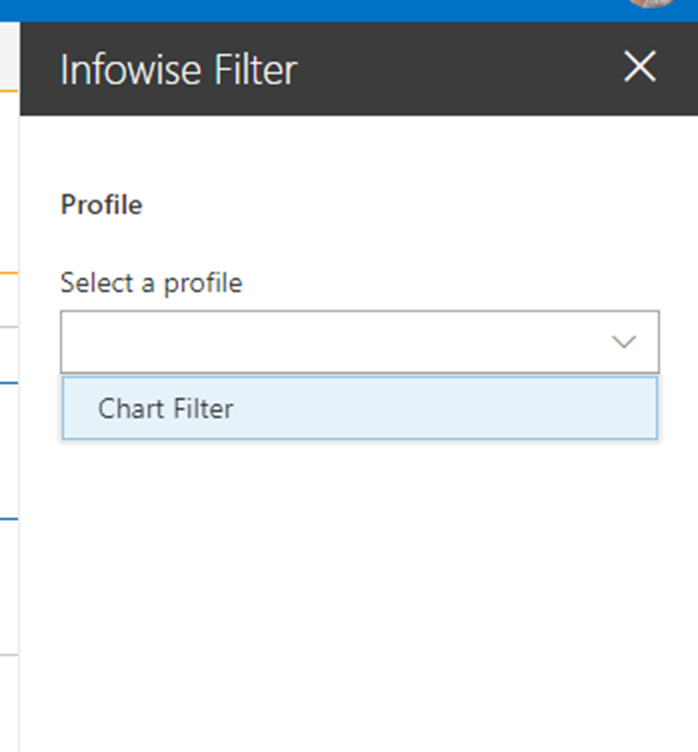
- Select the filter you want to use form the drop-down list, then click the X in the upper right corner of the dialog.
- Make any other changes to the web part configuration as desired, then click Okay.
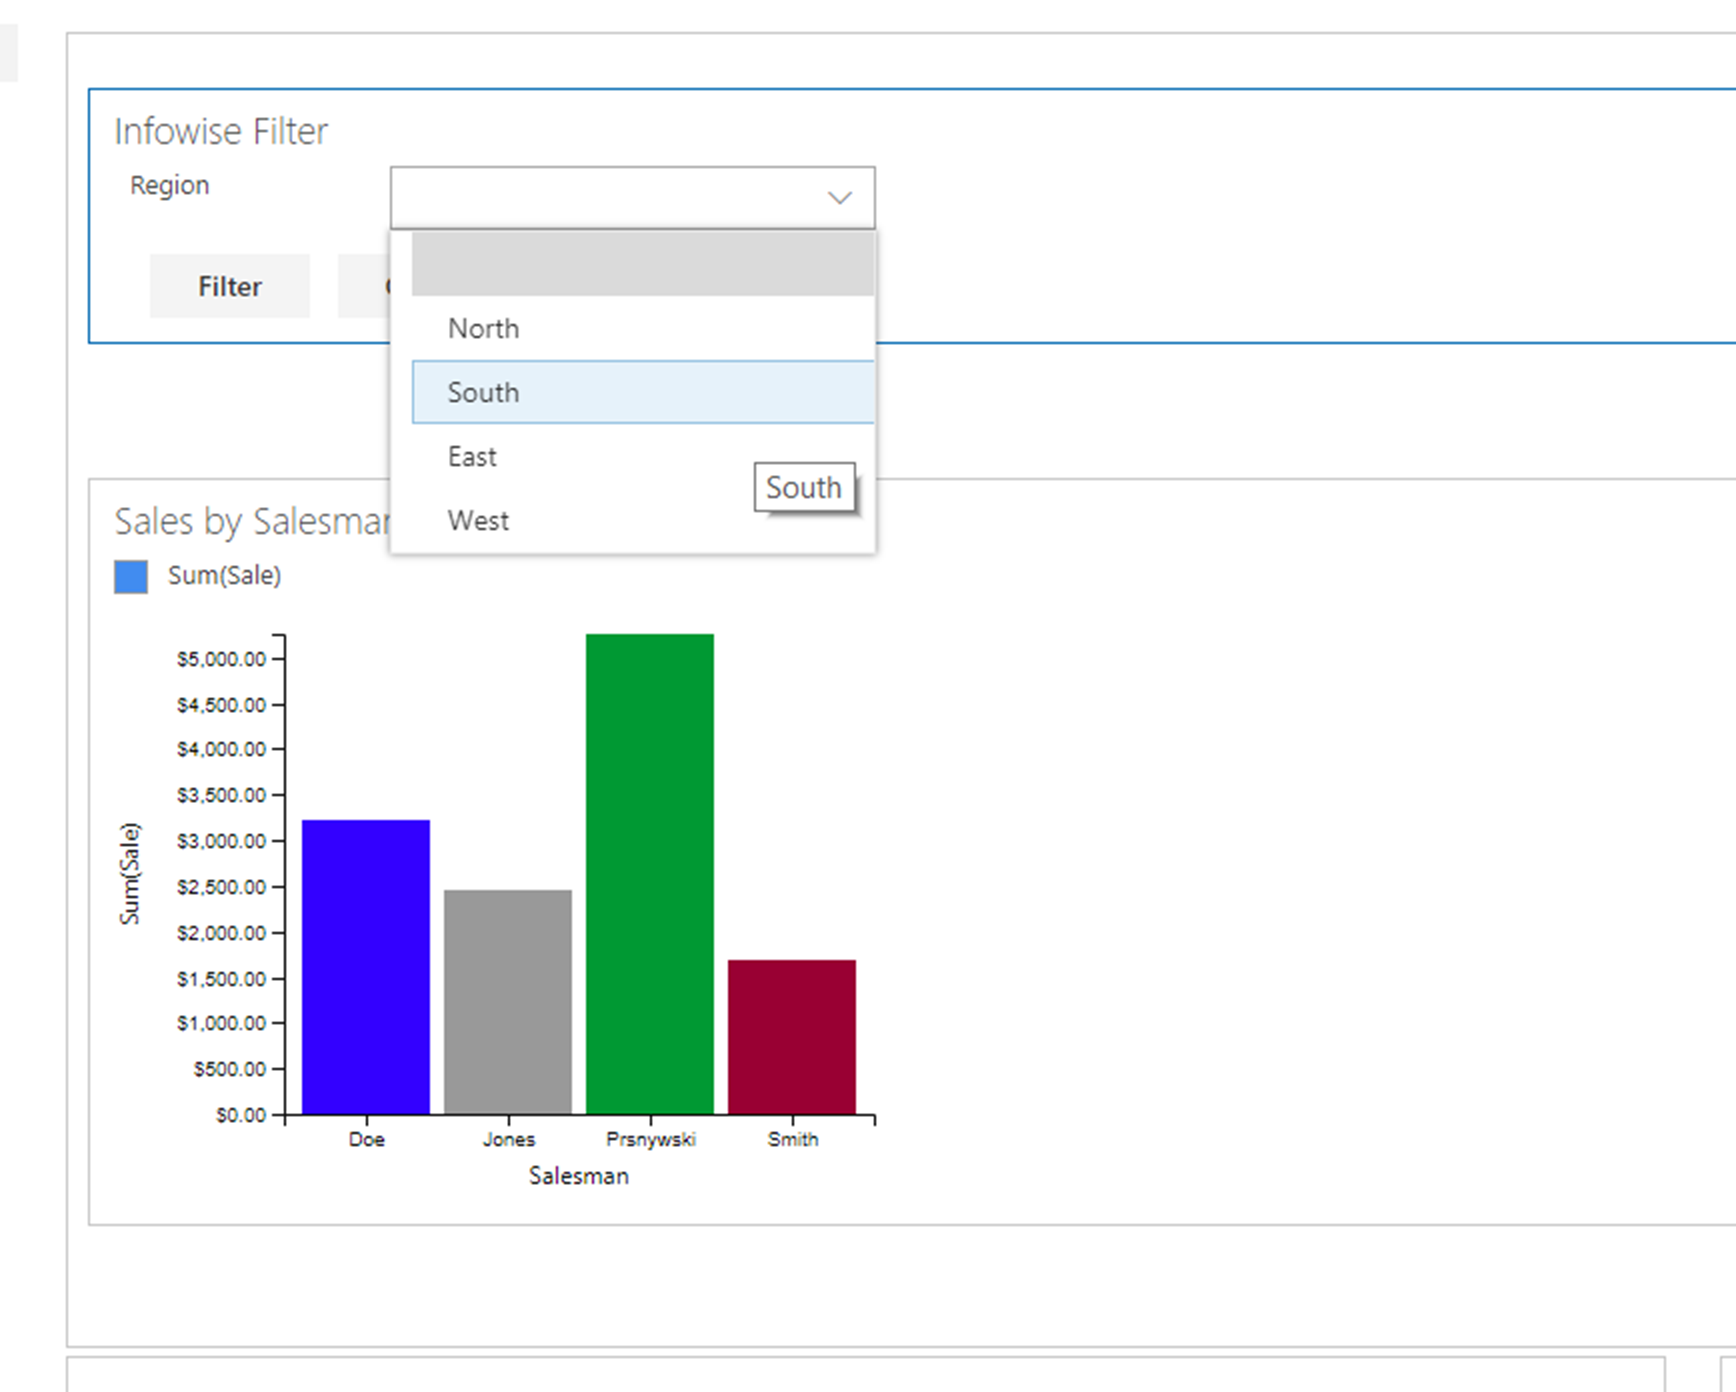
- Your filter is now active; save the page to finish.
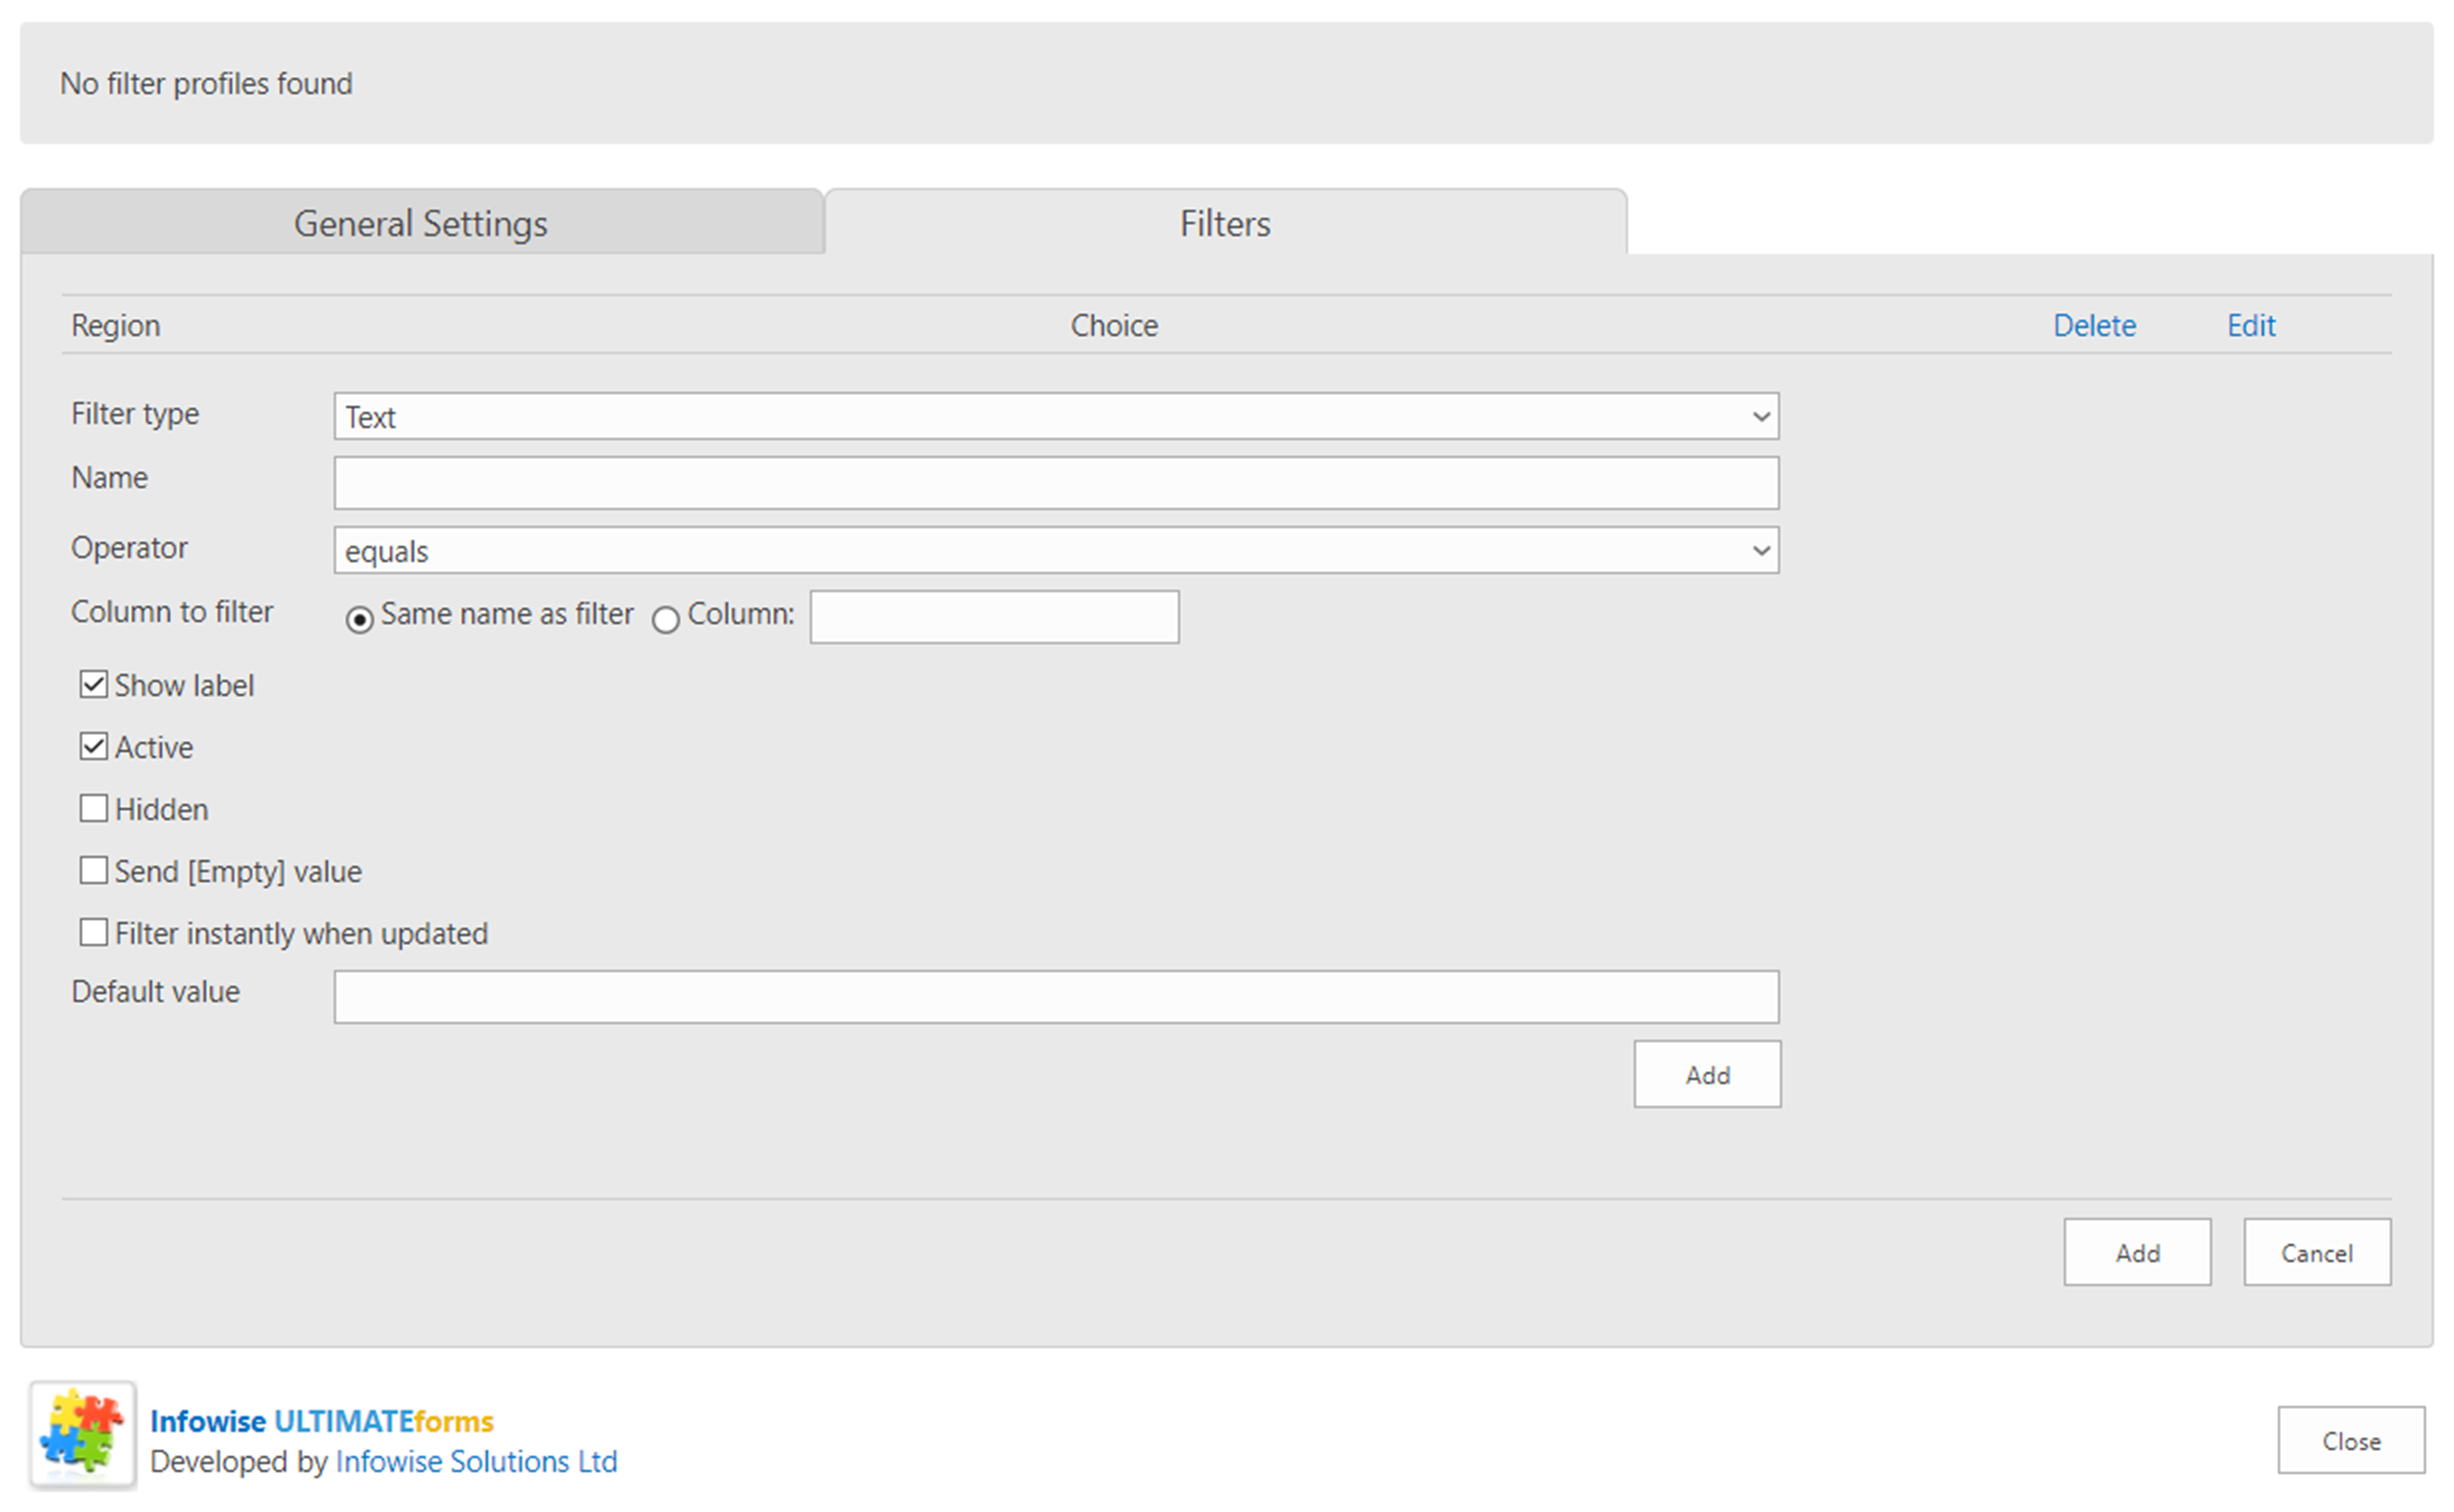
It is possible to add multiple filters into the same part. Create additional filter definitions in Infowise; they will automatically become active on the page.
For more information on setting up individual filter definitions, see the “Defining filters” section of the Smart Filter Pro Configuration document (note that not all of the document is pertinent for O365).
Summary
The Infowise filter web part allows you to create filters for information displayed in Infowise Charts. This gives your users an easy way to view segmented data on your site. For more information on setting up individual filter definitions, see the “Defining filters” section of the Smart Filter Pro Configuration document (note that not all of the document is pertinent for O365).
For more information on creating charts, please see Charting in O365.