The following instruction guides you step-by-step through the process of setting up sample definitions for the various abilities available in Smart Filter Pro. Your real-life settings procedure is very similar.
NOTE: in Microsoft 365, you will configure the filter profile through the app and then select that profile in the web part properties.
Placing Web Part on Page
The web part can be placed on any web part page in the same way as any web part.
- Open page in Edit mode.
- Click on Add Web Part at the top of the relevant web part zone.
- Under Infowise section locate Infowise Smart Filter Pro web part.
- Add it to page.
Configuring Web Part
You must configure at least one filter to be able to use the web part.
It is recommended that you connect the web part to the web part you wish to filter. The connection provides Smart Filter Pro with a list of fields available for filtering. You can use this list to map the filters you create. Nevertheless, you can also map the filters manually.
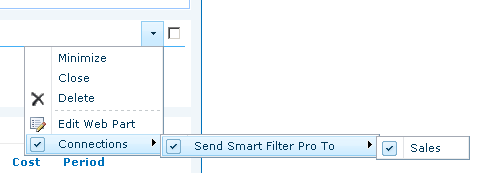
Creating Web Part Connection
NOTE: in Microsoft 365 the web part will connect automatically to all Chart controls and to the Rollup webparts on the page.
- Put the web part or the page into editing mode. One way to achieve this is to click on Edit Page in the Site Actions menu.
- In the drop-down menu at the top right corner of the web part select Connections.
- Under Connections, select Send Filter To and then select the web part you wish to filter from the list.
- In some cases you will see a pop-up message asking you to choose the connection type. In this case choose Filter.
SharePoint On Premises
M365
Note: The Infowise Filter only works with Infowise Charts and Infowise Rollup webparts
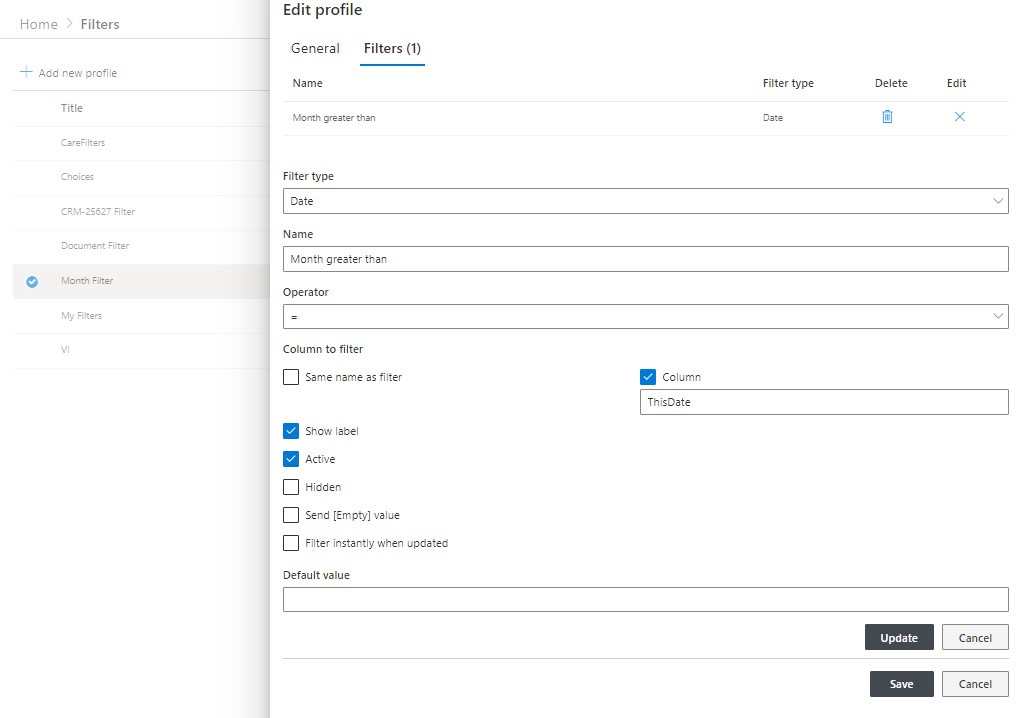
Defining Filters
- Click on Edit Web Part in the web part menu, located in the top right corner of the web part
- Click on New Filter
- Choose the filter type according to the type of the field you want to filter and the source of filtering data. For example, you may want to use the Form filter to filter according to a URL parameter, but a Date filter to present a date picker
- Enter a meaningful filter name.
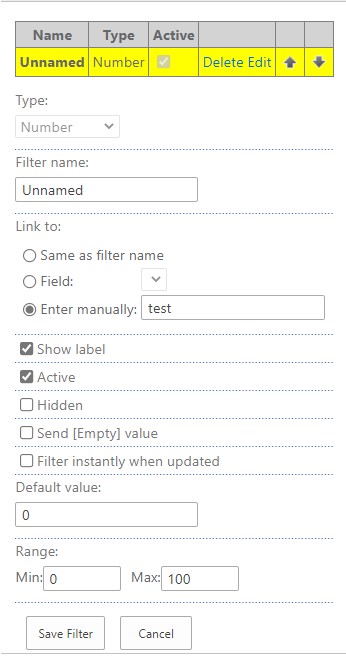
- Define the consumer field name to filter. You can either use the same name as your filter’s name, select from the fields of the connected web part or type in a value.
- You can show or hide the filter label.
- You can specify that your filter is not active. Inactive filters are not used and not shown in the user interface. You can set a filter to be inactive and thus reserve it for future use.
- You can choose to make the filter hidden, in this case it is not shown to users, but its default value is still sent to consumers.
- You can choose to send the filter value event if it’s empty. In this case the filtered web part will only show items with blank values in the filtered field.
- You can choose to apply the filter when the Apply button is clicked or instantly, when the entered value changes.
- You can specify a default value to be sent when the filter is empty or hidden.
Each filter type might also have its own specific settings:
- Text – there are no specific settings.
- Number – you can specify the range (minimum and/or maximum value). Users will not be able to enter values outside the range.
- Date – there are no specific settings.
- Choices – enter the choice items, one on each row. You can also choose to allow selection of multiple values.
NOTE: not every column can be filtered by multiple values. You can only use this setting on Choice columns configured to allow multiple values (checkboxes). All selected choices must be selected in the item for it to appear in the filter. - Lookup – select the source site, list and field name to retrieve values from a list. You can also specify a view for additional filtering and sorting. You can also demand distinct values and allow multiple values.
NOTE: you do not need to use the Lookup filter to filter Lookup column, in fact, you can use almost any filter type. In most cases you select the filter type based on the desired value entering experience.
NOTE: you can create cascading filters by chaining 2 or more lookup filters. The source list of each child filter must contain a lookup column to the parent filter’s list. This relationship will be determined automatically and the parent filter will appear for selection in the Parent Filter dropdown box. Once the relationship is defined, the list of values of the child filter is limited only to those that belong to the currently selected parent filter value. - User/Group – you can allow entering groups and multiple values.
- Form – you specify the parameter name being passed. You can also use the form (POST) parameters instead of URL query string (GET) parameters.
NOTE: This filter has no user interface. - Current Item – specify the field name to use from the current item.
NOTE: the web part page must be a publishing page or a list form to be able to use this filter. This filter has no user interface.
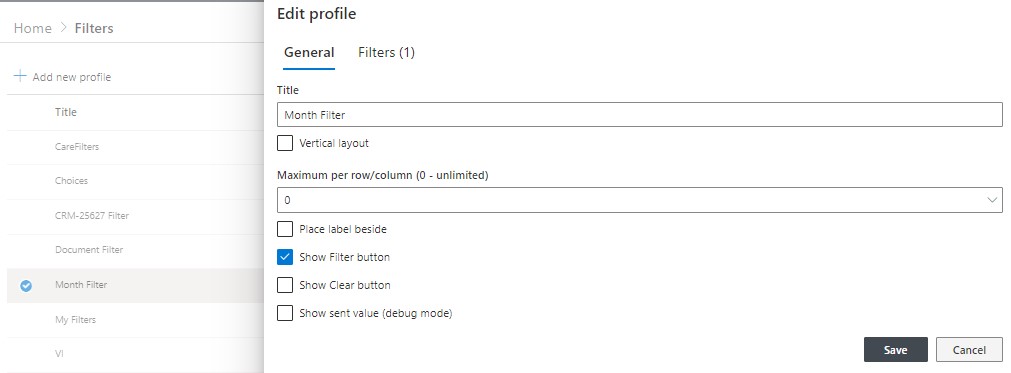
General Settings
These settings allow you to define the way the web part looks.
- Vertical Layout – place filter one under another.
- Maximum per row/column – define the maximum number of filters on a single row (or column if vertical layout is enabled). New rows/columns are added if needed. Choose if you want to place all filters in one row/column.
- Place labels beside – labels are placed next to the filter and not above it.
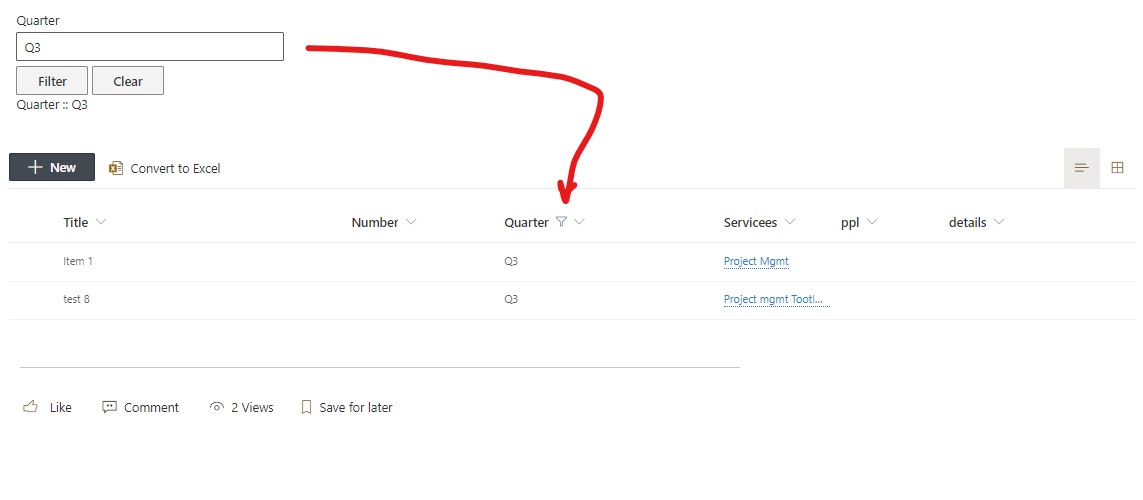
- Show Filter button – button to apply filters is shown. Otherwise you should provide your own method of page reload or use Instant filtering setting for the filters.
- Show Clear button – show button to clear entered filter values.
Microsoft 365 Filter Profile definition