You can build a complete resume submission form in SharePoint: validated candidate details, the resume attached to the record, HR notified on arrival, and every submission landing in one reviewable list. Ultimate Forms provides the pieces, a designed form, pattern validation, actions for notification and routing, and views for triage, all configured in the browser without code. This guide builds the form step by step and then covers what separates a form candidates complete from one they abandon.
The form is the front door of recruiting
Before the first interview, before the first phone screen, a candidate meets exactly one thing: your form. It makes an impression both ways.
A chaotic intake hurts twice. Candidates judge the organization by it, and good ones quietly close the tab. And whatever does arrive comes in ragged: emails with resumes buried in threads, phone numbers in three formats, cover letters pasted where skills should be. Recruiters then spend screening time retyping and chasing instead of evaluating.
A structured submission form fixes both sides at once. Candidates get a clear, professional experience. Recruiting gets uniform, validated records with the resume attached to the data instead of orbiting it in a mailbox. Everything that follows, automated candidate communication, interview scheduling, selection dashboards, stands on this foundation.
Step 1: prepare the environment
Ultimate Forms needs to be installed in your SharePoint environment. If it is not yet, get it here, it only takes a couple of minutes to install.
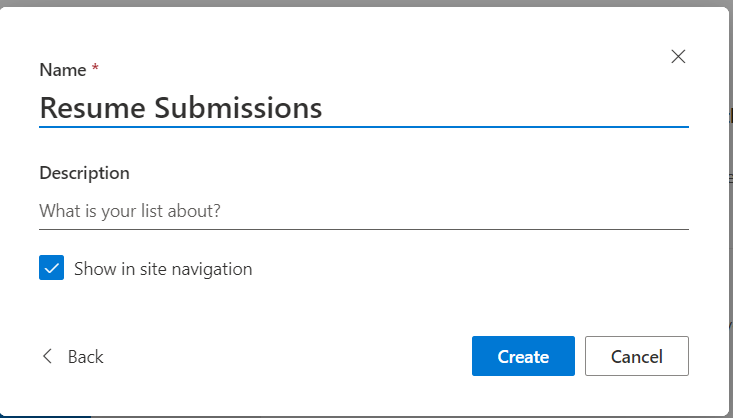
Then create the list that will hold submissions. On the site, open Site Contents, create a new list, and name it Resume Submissions:
Step 2: define the columns
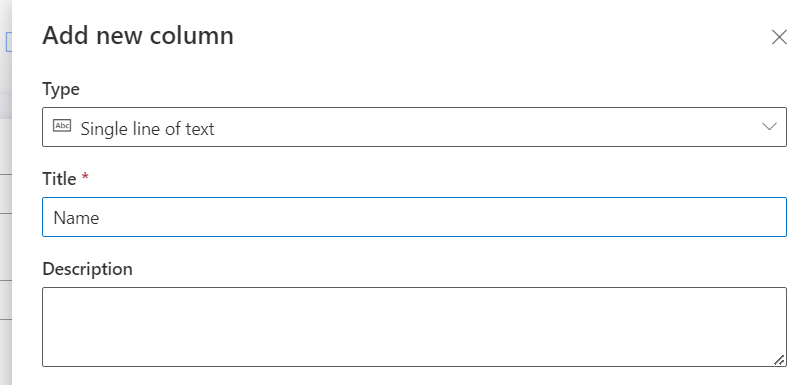
Open the list and click the Design button to enter Ultimate Forms. Add the columns that describe a candidate:
- Name: single line of text
- Email: single line of text
- Phone Number: single line of text
- Education: multiple lines of text
- Experience: multiple lines of text
- Skills: multiple lines of text
- Resume: the attachment, carrying the actual file
Resist the urge to add more. Every extra required question costs completions, and the resume itself already contains the detail. The columns above exist for what the resume cannot do: be filtered, sorted, and searched as data. Capture what you will query; let the attachment carry the rest.
Step 3: design the form
In Form Designer, drag the columns onto the canvas and arrange them in the order a candidate would naturally think: who they are, how to reach them, what they know, and the file itself last, beside the submit button.
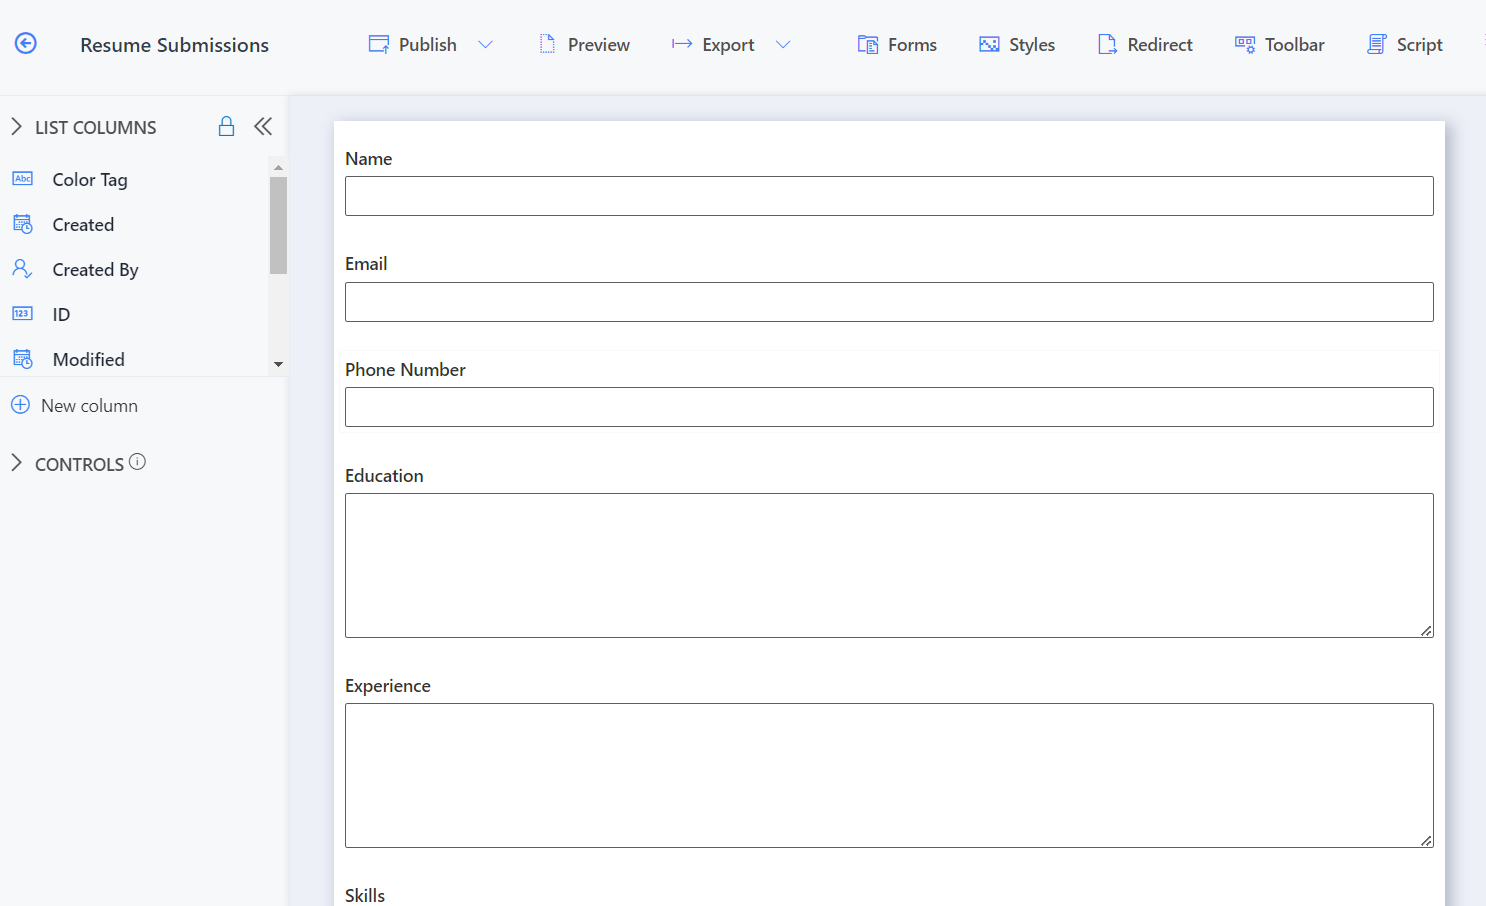
Two design choices earn their keep on an intake form. Group the contact columns in one visual block, so the form reads in sections rather than as a column list. And write the labels as a human would ask: "Tell us about your experience" collects better paragraphs than "Experience". The form is also where your branding belongs; a styled form in company colors reads as a careers page, not a database screen.
Step 4: validate at the door
Bad contact data is fatal in recruiting: a mistyped email means the interview invitation never arrives, and the candidate concludes you ghosted them.
Open the column settings for Email, switch to the Validation tab, choose the Pattern type, and select the email pattern from the dropdown. The form now refuses addresses that cannot be real:
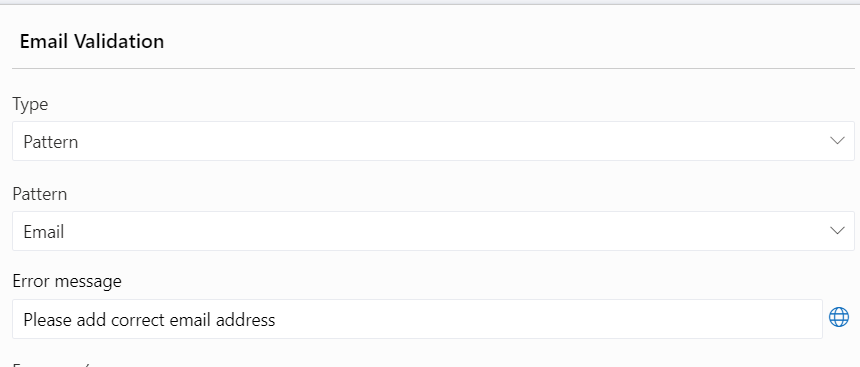
Apply the same thinking to the phone column with a phone pattern, and make the resume attachment required, since a submission without the file is a record nobody can act on. Validation messages fire while the candidate is still present and able to fix the entry. That timing is the whole value: the same error caught a day later is a lost candidate.
Step 5: wire the follow-through
A submission nobody notices is a candidate nobody calls. Alerts and Actions attach the follow-through directly to the list.
Notify the recruiter. An alert on item creation tells HR a new resume arrived, with the candidate's name and columns in the message body. Delivered to a shared mailbox or a Teams channel, it makes arrival visible without anyone polling the list.
Acknowledge the candidate. A second alert emails the candidate a confirmation. It costs nothing and answers the question every applicant has within the hour: did it go through.
Route for review. A status column, New, In Review, Shortlisted, Declined, turns the list into a pipeline. Actions can assign a reviewer, and approval-style routing moves candidates through stages with the same machinery any other process uses.
Step 6: triage with views
Once submissions accumulate, views do the screening lift. Create views filtered by status for the daily pipeline check, and views sorted by submission date so nothing ages silently. Columns you captured as data earn their place here: a recruiter filtering Skills for a keyword, or Education for a degree, is querying in one click what a mailbox full of resumes could never answer.
For leadership, a counter or chart on the recruiting page shows open positions against incoming volume, live, with no exported spreadsheet in sight.
Reaching candidates outside your tenant
One decision shapes everything above: where candidates submit from. For internal mobility, the SharePoint form is enough. For public hiring, candidates have no account in your tenant, and External Forms close that gap. The same designed form, published to a public page, no login required, submissions landing in the same list with the same validation and the same actions firing.
If you would rather start from a working system than a blank list, the free Job Applications template installs the external intake, the list, and the processing in one step, ready to adapt.
Candidate data deserves adult supervision
Resumes are personal data, and the list that holds them should be treated accordingly. Restrict the list to the recruiting team, so submissions are not browsable by the whole site. Where different roles need different depth, permission rules can show hiring managers the candidates for their own openings while HR sees everything.
Retention belongs in the design too, not in a cleanup project two years later. Decide how long declined applications stay, and let a scheduled action archive or delete records past that age automatically. The same mechanism handles duplicates gracefully: when the same email address submits twice, an action can flag the newer record and link it to the earlier one, so the candidate's history reads as one story instead of two orphaned rows. A form that collects well and also forgets on schedule is what compliance reviews want to find.
Small refinements that compound
A few touches turn a functional form into a polished one. A thank-you page after submission tells candidates clearly that the application is in. A dropdown for the position applied for, fed from your open positions list, saves recruiters from guessing which role a resume targets, and makes per-position views possible. And a quarterly look at where candidates abandon the form, which the submission data itself reveals, keeps the intake honest as roles and volumes change.
None of these require revisiting the architecture. The list, the form, the validation, and the actions you built in the steps above carry every refinement, which is the quiet advantage of building recruiting intake on SharePoint: the system grows with the hiring, not against it.
Frequently asked questions
Add your comment