Many organizations receive structured information by email. Supplier invoices. Order confirmations. Client submissions. Support requests. Inspection reports. The content arrives in a predictable format, contains data the organization needs to act on, and almost always needs to be stored somewhere accessible. And often as a formatted document that can be filed, shared, or archived alongside other records.
The problem is that getting information from an email into SharePoint as a properly formatted PDF document is, in most organizations, a manual process. Someone reads the email, creates a document, formats it, saves it to SharePoint. Multiply that by the volume of emails your organization receives, and the hidden cost of this process becomes significant.
Ultimate Forms automates the entire pipeline in three steps:
- Import the email data into a SharePoint list
- Apply a print template to format it
- Trigger a print action that converts the result to a PDF and stores it in a document library
No developer required. No custom code. Configured entirely in the browser by the administrator who manages the SharePoint environment.
Why This Matters
The gap between "information arrives by email" and "information is stored as a formatted document in SharePoint" is where organizations lose time, introduce errors, and create compliance risk.
Manual email-to-document workflows depend on someone remembering to act on each incoming email. When the person responsible is absent, emails are missed. When the volume increases, the backlog grows. When the format of the email changes slightly, the person processing it has to notice and adapt. And when an auditor asks for documentation of a process, the manual workflow leaves a gap. There is no reliable evidence that every email was processed, every document was created, and every record was filed correctly.
An automated pipeline addresses all of this. Every email that matches the import criteria is captured, processed, converted, and filed. Consistently, immediately, and without human intervention. The record of what arrived and what was generated from it lives in SharePoint. There it can then be searched, filtered, and reviewed by authorized staff.
Step 1 — Set Up the Import Profile
The first step is configuring an Import profile that monitors an email address and captures incoming messages into a SharePoint list.
How Import works
Ultimate Forms Import connects to a monitored email inbox and checks for new messages on a schedule you define. When a message arrives that matches the configured criteria, Import reads the message data and creates a new item in a specified SharePoint list. The email subject, sender, body, and any structured data in the message can each be mapped to a corresponding column in the list.
Configuring the profile
Create a new list to store the imported email properties. Depending on your needs, you might create columns to Subject, Body, Sender Email and so on.
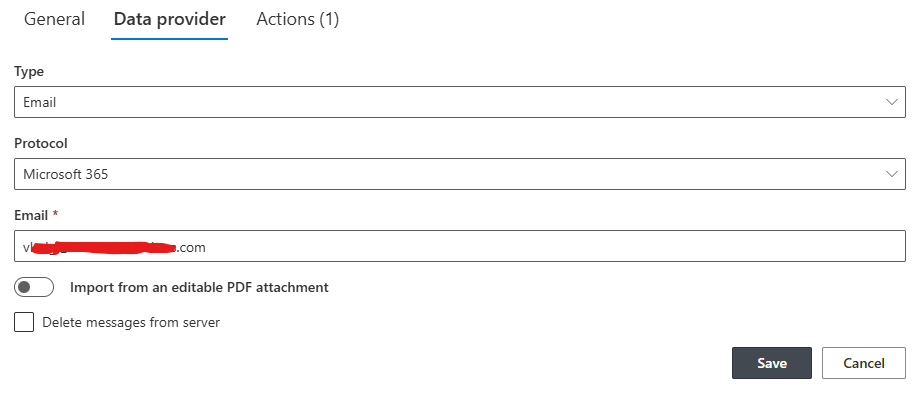
Navigate to the Ultimate Forms via the Design button in the list command bar, then open Import. Click to add a new profile. Leave the Polling frequency at Immediately. This will ensure emails are imported almost as soon as they arrive. Leave Email as the source type and provide the email address for the inbox to be monitored.
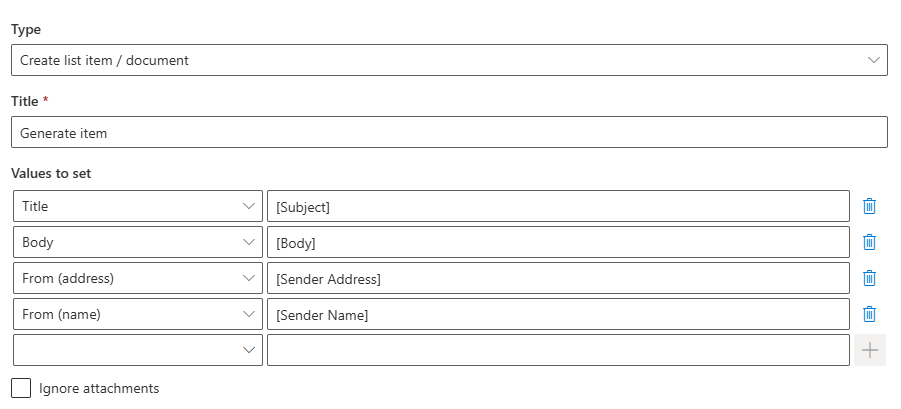
Next create an import action. Import action specify what is to be done with the imported data. You can create new list items/documents and/or update existing ones. In the action settings map the incoming data to list columns. The sender's email address maps to a column. The email subject maps to another. If the email body contains structured data (a supplier reference number, an order total, a date) those can be extracted and mapped to dedicated columns using the field parsing functions.
Optionally, add conditions to only import emails that are relevant. For example, you can add a condition to exclude emails coming from within the organization or those that do not contain a certain marker in the subject line.
Save the profile and send a test email to confirm that incoming messages are being captured correctly. This will create a new item in the target list based on the properties of the email you sent.
The result
Once the profile is active, every email that meets the criteria appears as a new list item in SharePoint. These list items can now serve as data source for PDF generation.
Step 2 — Create a Print Template
With email data arriving as structured list items, the next step is creating a print template that defines how that data will appear in the PDF document.
What a print template does
A print template in Ultimate Forms is a document layout that combines fixed content (headers, labels, a company logo, standard body text) with dynamic column references. These references pull the current item's data into the template at the moment of printing. The result is a formatted document that looks the same every time and contains the correct data from the specific item it was generated from.
Building the template
Open Ultimate Forms for the list (same one where we just created the import profile) and navigate to the Print and Export component. The template editor presents a choice of document configuration options:
- Simple - select columns to include and they will be stacked in a table format in the resulting document. It's the simplest and fastest way, but also the least customizable
- Advanced - rich text interface to include free text/formatting and column placeholders.
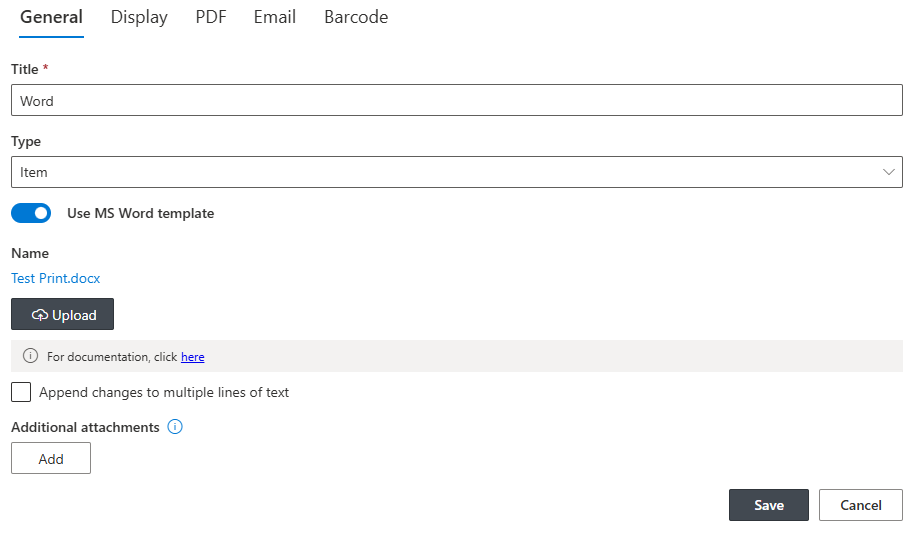
- Word - upload a Word document that includes column placeholders (column names surrounded by double square brackets, e.g. [Title]
Choose the option most suitable for the desired outcome. Structure the body of the document with the labels and layout appropriate to the document type. For an invoice, this might be supplier name, reference number, line items, and total. For an order confirmation, it might be order number, customer details, and delivery date.
If not using a Word template, add a header with the organization's name and logo. If using a Word template, add those directly in the Word document.
Preview the template against a real list item to confirm the layout and the column references are correct. Adjust the formatting (fonts, spacing, section breaks) until the output matches the document standard required.
The result
The print template defines a reusable document format that can be applied to any item in the list. The same template that formats a supplier invoice correctly in November will format one correctly in March, regardless of who triggers it or what the email content contains.
Step 3 — Add a Print Action
The final step connects the import and the print template into a fully automated pipeline. A Print Action, configured to fire whenever a new item is created in the list, generates the PDF automatically and saves it to a specified document library.
Configuring the action
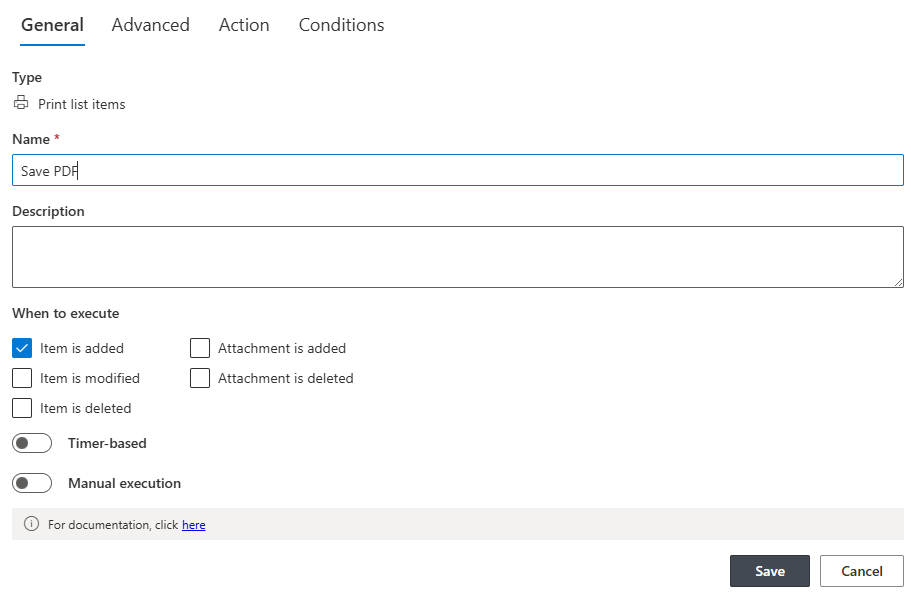
Open Ultimate Forms on the same list, then click on Actions. Add a new action and select Print list items as the action type.
Set the trigger condition to Item is added. This ensures the action fires once for every item created by the Import profile — immediately after the email data is captured — without requiring any manual intervention. No button to click. No form to submit. The import creates the item, the action detects the new item, and the PDF is generated and filed automatically.
- Switch to Action settings.
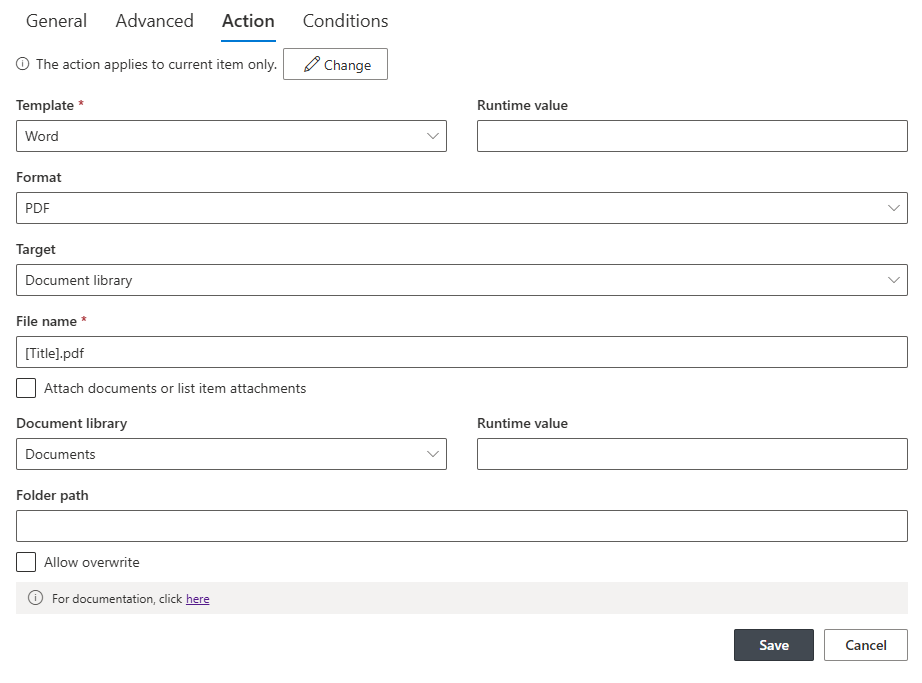
- Select the print template created in Step 2.
- Ensure PDF is selected as the output format.
- Select Document library as the output target.
- Define the file naming convention. Typically a combination of column values that produces a unique, descriptive filename for each document.
- Specify the SharePoint document library where the generated PDF should be stored. Optionally specify a folder path within the library, if required.
Optionally, configure the action to send a notification email when the PDF is generated — informing a relevant team member that a new document has been filed, with a direct link to the document library item. This keeps the team informed without requiring them to monitor the list.
The result
Every email captured by the import profile produces a corresponding PDF document in the document library, filed automatically with a consistent name, within seconds of the email arriving. The process runs unattended, at any volume, at any time of day.
What the Complete Pipeline Looks Like
From the administrator's perspective, the configuration takes place in three familiar interfaces — the Import administration page, the form designer's print template section, and the Actions configuration panel. None of it requires technical skills beyond the ability to navigate the Ultimate Forms interface. An administrator who has configured a basic Ultimate Forms form can configure this pipeline in a single session.
From the end user's perspective, it is invisible. Emails arrive. Documents appear in the document library. The manual step that used to sit between the two simply no longer exists.
From the organization's perspective, every incoming email that matters is captured, formatted, and archived without depending on someone remembering to do it. The pipeline works the same way on a Monday morning as it does on a Friday evening. It does not take sick days.
Where This Applies
The email-to-PDF pipeline is broadly applicable across industries and document types. Procurement teams use it to capture supplier invoices and order confirmations. Compliance teams use it to archive client communications in a standardized format. Operations teams use it to process incoming service requests or delivery notifications. HR teams use it to capture external application submissions.
Any workflow where structured information arrives by email and needs to be stored as a formatted document is a candidate for this approach. The configuration is the same regardless of the document type — only the column mapping and the print template layout change.
A Starting Point That Grows With You
The three-step pipeline described in this article is the foundation. From here, additional actions can be layered on: routing the imported item through an approval workflow before the PDF is generated, writing data from the imported item to an external database, or triggering a notification to a team in Microsoft Teams when a high-priority email is captured.
Each addition follows the same pattern — a condition, an action, a result — and each is configured in the same interface by the same administrator. The complexity of the pipeline can grow to match the complexity of the process it supports, without ever requiring a developer to step in.
Documentation for the Import feature, print templates, and Actions is available at infowisesolutions.com/documentation. A free 30-day trial is available at infowisesolutions.com/installer/uf.
Add your comment