File attachments on a list is a standard ability within Sharepoint that allows the user to upload additional documents pertaining to a specific record. There are some pros and cons to using this feature.
With Ultimate Forms we already have capabilities to help with alternatives to File Attachments, such as Associated Documents, when documents in a document library can be listed within the parent list item, and Document Link column, which provides lightweight linking and uploading of documents through a list item like the list attachemnts functionality.
In some cases, you want to be able to convert where your existing documents reside, for example, promote attachments to a document library or copy/move documents from a document library and create list item attachments from them. Until now it was not an easy task, basically requiring manual download and upload of documents.
With the new Manage attachments action type you can accomplish the following:
- Copy/move attachment to document library - take your list item attachments, all of them or filtered by file name and/or size, and copy them to the specified document library. They can be placed in the root or in a specific folder (folder can be automatically created when needed). You can also specify any additional metadata based on the list item properties. Optionally, you can link the documents to a Document Link column within the item.
- Copy/move from document library - specify query conditions and then copy/move those found documents into attachments.
- Delete attachments - delete all or filtered attachments.
In the following example, we will be promoting all attachments that have the word "instructions" in their names to be documents in a document library, while specifying the target folder, setting some metadata and even linking those documents, in their new location, back to the item using Document Link column.
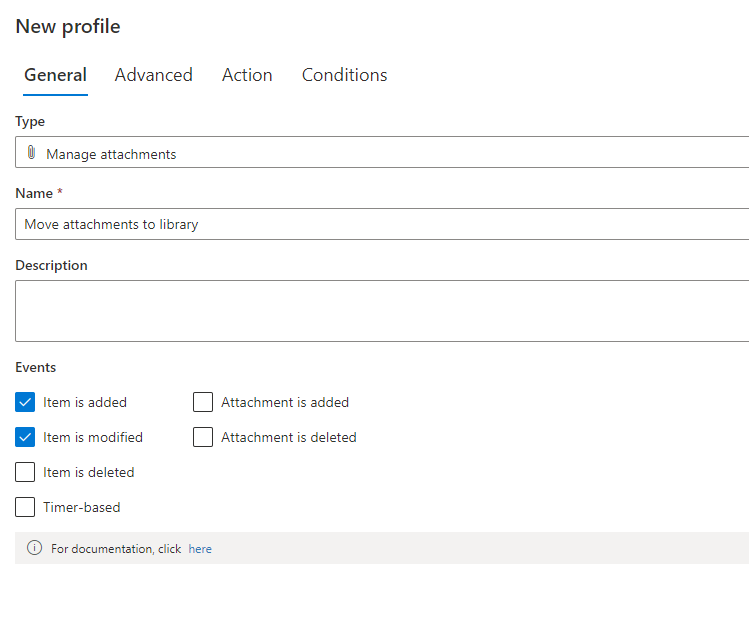
- First, create a new action. Choose Manage attachments as your action type and enter some meaningful action name
- Next, select what list items you want to run on. By default, it will already select the current item (the one on which the action runs) by specifying ID=[ID], but you can affect any number of items in any site:
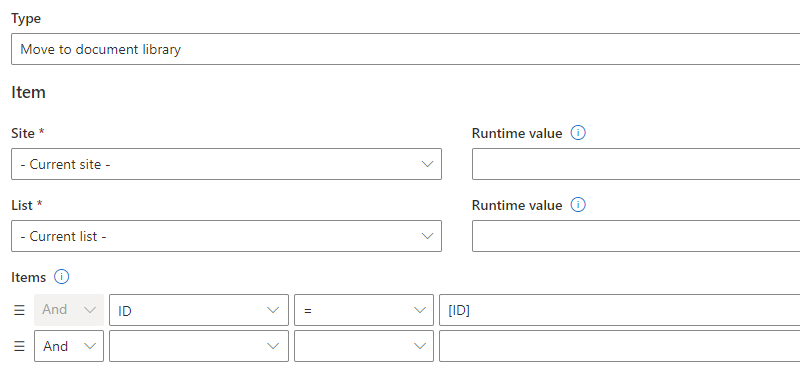
- Next, optionally specify filters based on attachment file name and size:

- Now we need to specify the target document library. It can be found on any site. You can even specify dynamic runtime site URL and library name:
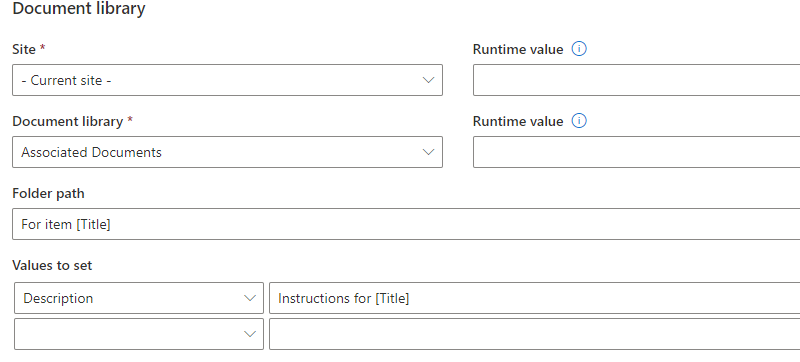
- Optionally set the folder path (from the root of the library) and map any metadata you want to set. In our case, we are setting the document description and folder, specified dynamically based on the list item title.
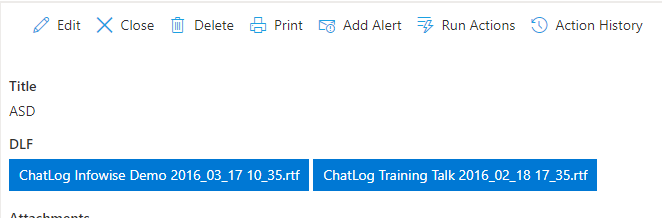
- I'm using a Document Link column called DLF here. Promoted documents' links will be automatically stored here so you can easily access them from the list item:

- And this is how it will appear in the list item (didn't actually filter the attachments by name when running my example)
As you can see, it's easy to work with, yet incredibly powerful!
Possible use cases
Import: Normally, when you set up an import profile on a document library, only the first document is taken from the email. If your emails contain multiple attachments and you want each to become a document in your document library, you can set up your import on a list and add an action on New to then to move list item attachments to the document library, each one will become a separate document!
Coverting List Attachments: One of the cons with list attachments is that they can interfer with your synchronous actions and ItemID processes , due to the way Sharepoint handles uploads of attachments. Converting to Document Links or Associate Document items woudl help resolve this. And this action makes that conversion possible. You can even setup this action as a manual action to easily convert older records after you have switched to using the Document Link or Associate Document Items.