
Introduction
Integrating online payments into SharePoint forms can significantly enhance the efficiency of transactions, donations, bookings, and other financial interactions within your organization. Infowise Ultimate Forms offers a seamless, no-code solution to incorporate payment processing directly into your SharePoint environment. It makes it easy to leverage popular payment gateways like Stripe, PayPal and Authorize.Net.
Why Integrate Online Payments into SharePoint Forms?
Incorporating payment capabilities into your SharePoint forms streamlines processes by allowing users to complete transactions without leaving the platform. This integration is beneficial for various scenarios, including:
-
Event Registrations: Collect fees for conferences, workshops, or seminars.
-
Donations: Facilitate contributions for non-profit initiatives.
-
Product Orders: Process payments for goods or services offered.
By embedding payment processing within SharePoint forms, organizations can reduce administrative overhead, minimize errors, and enhance user experience.
Setting Up Online Payments with Infowise Ultimate Forms
Infowise Ultimate Forms simplifies the integration of online payments into SharePoint forms through its Payment control feature. Here's a step-by-step guide to setting up this functionality:
1. Prepare Your SharePoint List
Create a SharePoint list that includes the necessary columns for your transaction. For example:
-
Invoice ID: A unique identifier for each transaction.
-
Ordered By: Person or group column to capture the user's identity.
-
Date: Date column to record the transaction date.
-
Quantity: Number column to specify the amount or units.
-
Total: Currency column to calculate the total amount due.
-
Additional Options: Any other relevant fields, such as product choices or special requests.
Pro-tip: use Form Generator to create your list and form quickly and easily!
2. Design the Form
Using Infowise Ultimate Forms' Form Designer, design a modern form that aligns with your requirements. You can customize the layout, add tabs, and apply styling to enhance usability.
Here you can see an example of such form: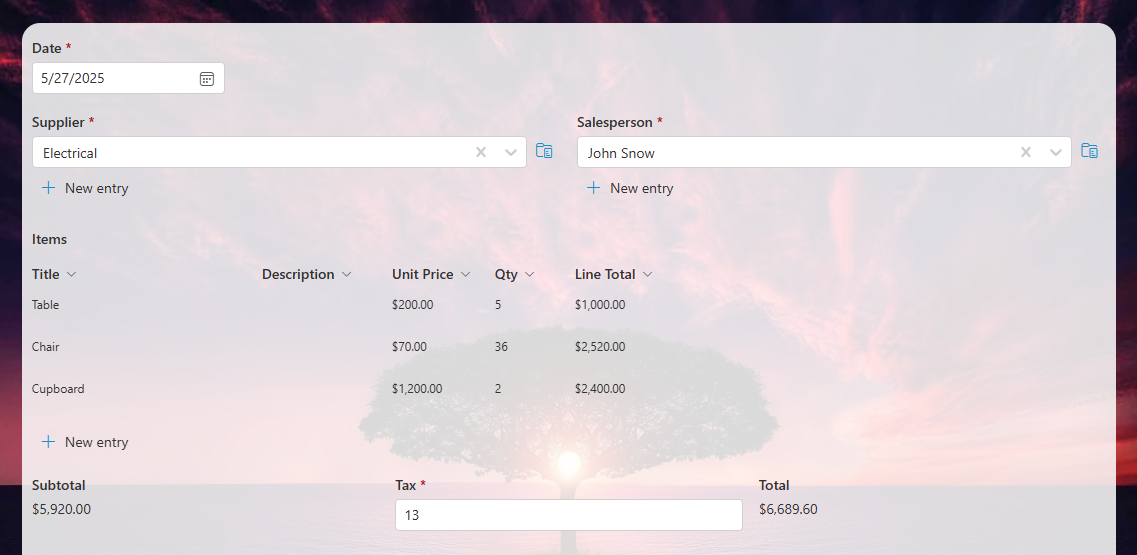
Note that here we are using Associated Items column to implement the repeating table of items. Additionally, we are using Associated Items Summary column to automatically calculate Subtotal. We are also using dynamic rules to calculate Total based on Subtotal and Tax percentage.
3. Add the Payment Control
In the Form Designer, insert the Payment control where you want the payment option to appear. Configure the control by selecting your preferred payment provider (Stripe, PayPal or Authorize.Net) and inputting the necessary credentials:
- Stripe: Enter the API keys obtained from the Stripe Dashboard.
-
PayPal: Enter your Client ID obtained from the PayPal Developer Dashboard.
-
Authorize.Net: Provide your Login ID and Transaction Key from your Authorize.Net merchant account.
Specify the Amount column that the Payment control should reference, typically the "Total" column. You can also specify an Invoice ID column. This is where the Payment control will automatically enter the transaction ID upon payment. This way the form will maintain reference to the actual payment details.
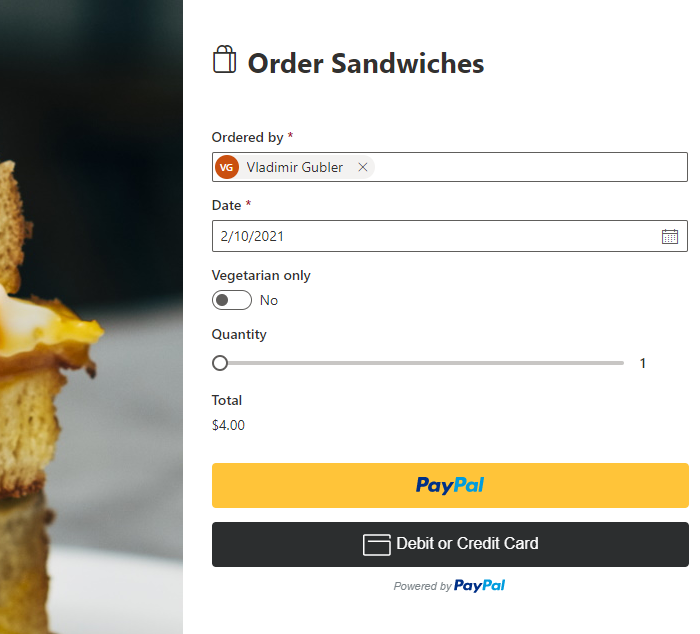
Here you can see an example of form utilizing PayPal:
And here you can see a form using Stripe:
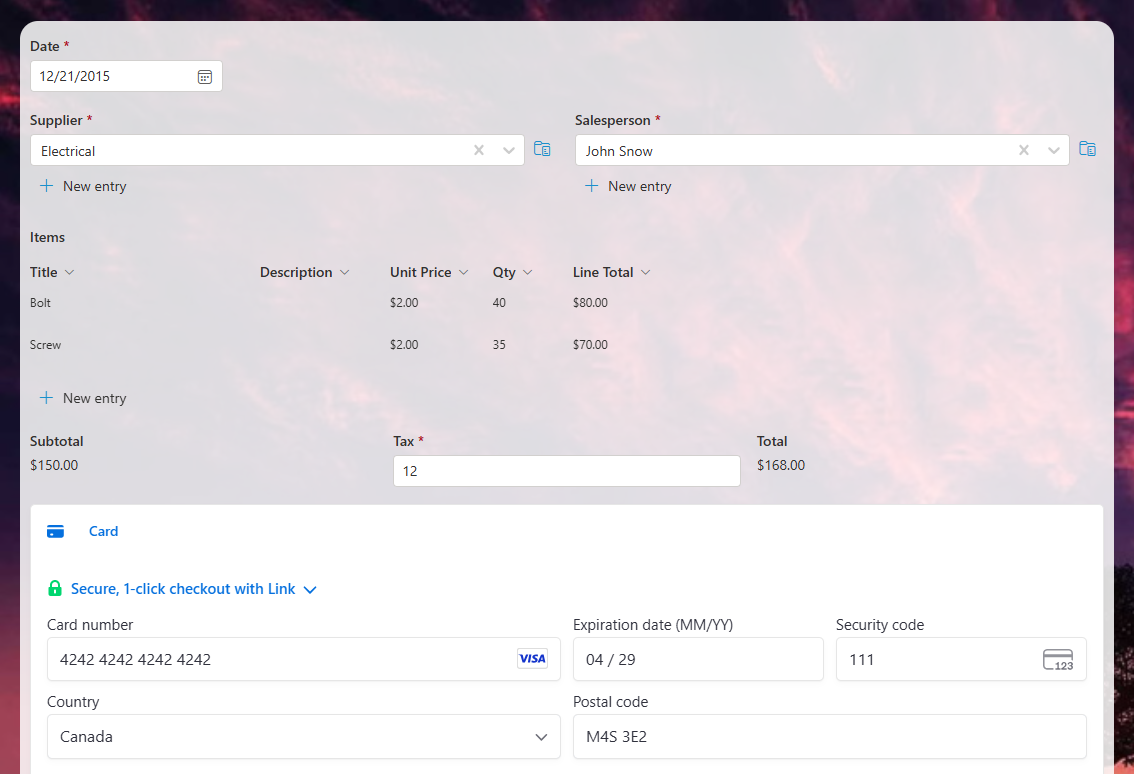
Note that with all payment providers, the payment is performed directly between the user browser and the payment provider. The payment and card information does not pass through and is not stored in SharePoint at any point.
4. Configure Business Rules
Implement rules to enhance the form's functionality:
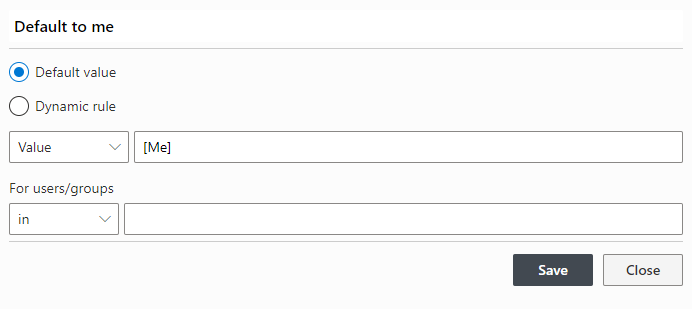
-
Default Values: Set default values for fields like "Ordered By" to auto-populate with the current user's information.
-
Calculations: Define rules to calculate the "Total" based on the "Quantity" and unit price.

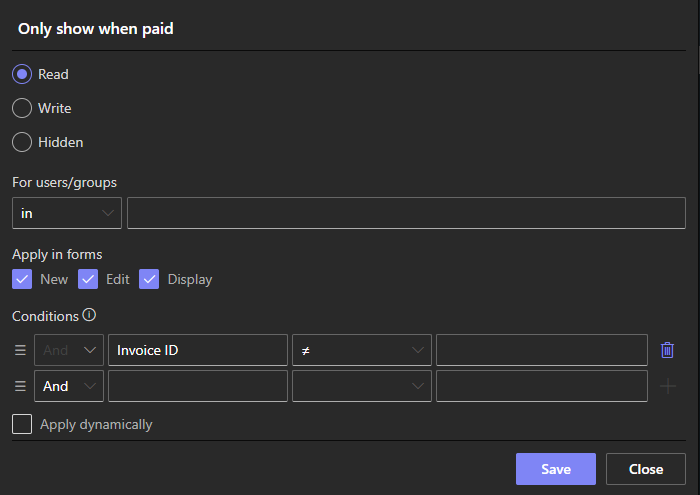
5. Set Permissions Post-Payment
To prevent modifications after a payment is completed, configure permission rules:
-
Read Rule: Only display the "Invoice ID" column, in read-only mode, when it's not empty. This will indicate that the payment is completed.
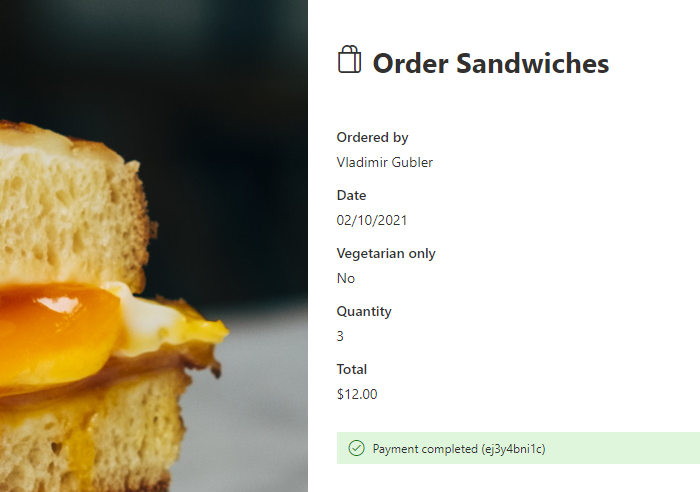
Here is an example of how the form would look after the payment with permission rules enabled:
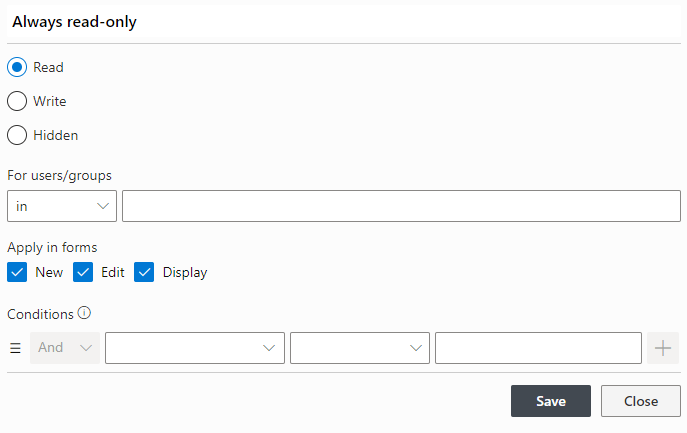
You use the same logic to ensure Total column is always read-only, as its value is set only via a dynamic rule:
6. Enable External Access (Optional)
If you intend to collect payments from external users, enable the External Form feature. This allows you to share the form via a public URL or embed it on your website. Public forms do not require authentication and are open to the public.
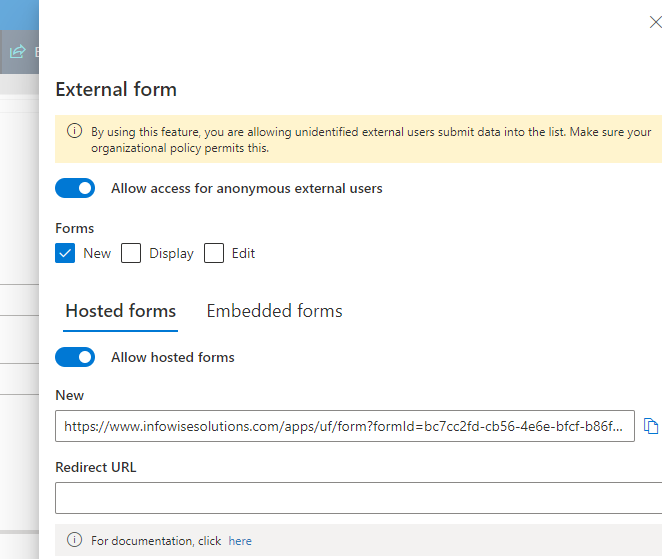
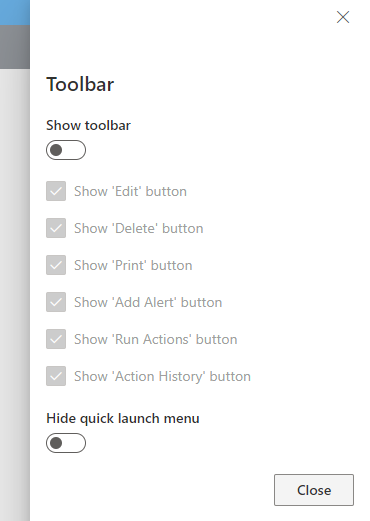
Note that if you don't want the toolbar with Save/Cancel buttons to appear at the top, disable it:
Best Practices for Implementing Online Payments
-
Testing: Utilize sandbox environments provided by payment gateways to test transactions before going live.
-
Security: Ensure that sensitive data is handled securely, adhering to compliance standards and best practices.
-
User Experience: Design intuitive forms with clear instructions to guide users through the payment process.
-
Notifications: Set up alerts to notify administrators of successful transactions or any issues that arise.
Conclusion
Integrating online payments into SharePoint forms using Infowise Ultimate Forms empowers organizations to streamline financial transactions within their existing workflows. This no-code solution offers flexibility, security, and efficiency, catering to various use cases from event registrations to product orders. By following the outlined steps and best practices, you can enhance your SharePoint environment to support seamless payment processing.
For more detailed guidance and tutorials, visit the Infowise Ultimate Forms Documentation and explore our Training Resources.