
Introduction
The Print component of Ultimate Forms is an amazingly powerful for printing and exporting SharePoint data. It makes it incredibly easy to generate a variety of document types, such as PDF or MS Word, right out of SharePoint items.
With Ultimate Forms, our goal is to provide a comprehesive platform for implementing business solutions in SharePoint. We thrive to make it easier and faster, without relying on complex solutions or complicated scripting.
In this article, I'm introducing a new integration option, based on customer feedback. You can now generate documents directly from forms with a single button click. You no longer have to open print preview, select a print template and generate the document. The process has been streamlined as much as possible. And it even has the ability to save your item. This way the new document is generated with all the latest changes already baked in.
What Do You Need?
The implementation is as simple as anything you do in Ultimate Forms. You start with creating a print template, then you add a button to your form, publish it and you're done!
Print Template
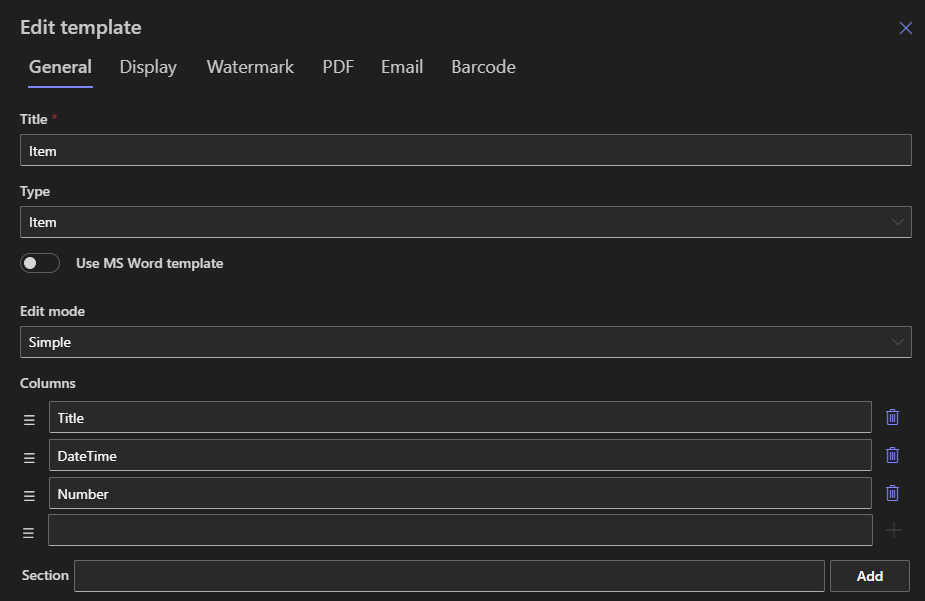
If you haven't done so yet, you need to create a new print template via our Print component. As we are printing a single item open in the form, the type of the template has to be Item.
- Go to your list and click on Design on the toolbar.
- Inside Ultimate Forms click on Print and export.
- Name your template and choose the columns you want it to include. You can also optionally use a Word document as a template. Just create a regular Word document. In its content include the column names from the list surrounded by double square brackets, like so: [[Title]]. The values will be replaced with the actual values from the item. Then simply upload the document with .docx extension into the print template.
- The only thing you should ensure is that the Type is Item.
- Save your template when ready.
Form Button
Now we need to add a special button to your Modern form. With the button we are going to execute the print template, generate the document and download it to our computer.
- On the main page of Ultimate Forms click on Form designer.
- If you do not have a modern form yet, you will be presented with the options to generate one for you or you can start from a blank canvas. The choice is yours.
- Once you have designed the form according to your needs, time to add the button.
- Drag a new button from the control gallery on the left onto the design canvas.
- Click on the button to display its properties on the right.

- Change the Type of the button to Print and export.
- Select the print template you want to use. You must have at least one Item-based template before you open Form Designer to have it available for selection.
- Select the output format for the document. You have a choice of HTML, PDF, Word and Excel.
- Optionally toggle "Commit unsaved changes". With this option activated, the form will automatically save any changes just before it generates a document. If you are on the New form, it will create an item and then automatically switch to Edit form. This way you make sure that when users use your new Print button on Edit or New form, all the changes are saved first. The Print component will then generate a document based on the up-to-date information.
- Optionally enable requesting confirmation when the button is clicked. You can provide your own confirmation prompt, even localized into different languages your users might have set as default.
- You can also optionally add permission rules for the button to ensure it only appears when needed (for example, when Status equals Approved). You can also hide the command bar Print button under the Command bar settings to prevent any confusion.
- Publish your form when done.
Testing It Out
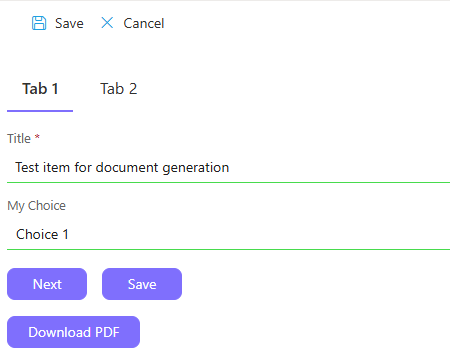
Go back to your list and click on any item to show it in its Display form. Click on your Print button and see how a document is downloaded to your browser. Next edit the item, make some changes and click on Print. You will see how the form first saves itself and then generate a document. That is of course if you enabled the option to commit unsaved changes. You can also try creating a new item and clicking on Print before you save it. That will save the brand new item and generate a document for it.
Last Thoughts
You can use all the features of our Print components. You can for example embed list item attachments of various supported types within the resulting PDF document. Or you can even specify additional attachments that are going to be included in any generated PDF, without being attached to each list item.
And I would also like to take this opportunity to remind you that you also have Actions to your disposal. Using Actions, you can generate, save or email document in the background without any user intervention. For example, you can automate emailing a generated document to the recipient when the Status changes to Approved.
This new itegration options makes the document generation a simple, intuitive and integral part of the form-filling process. It will save your users time and simplify the form usage training process.