
Welcome to our Our Article on “Create Tabs with Tab Permission using Infowise Ultimate Forms in SharePoint Online Microsoft 365”. In this article, I am going to explaining how to create tabs, and also how we can show or hide tabs using tabs permission using Infowise Ultimate Forms in SharePoint Online.
Tabs are important views and a very common requirement for business users. Users want business users should see tabs which they have permission only.
Business Requirement:
For example, I have created a list and then I am going to create two tabs using Infowise Ultimate forms. One for student registration form and one for Trainer and fee details. Student views the Student registration form tab only, the Trainer and Fee Details tab hiding to the Student. Student request for course details sends mail to the Admin. Then Admin will send back the mail with Trainer and fee details.
If you are new Infowise Ultimate Forms then I would like you to read my previous posts, and you will be able to know how you can do lots of things without using any code.
- InfoPath alternatives for designing SharePoint Forms
- Top SharePoint Workflow and Forms Applications Price Comparison
- Easily Configure Email Notifications using Infowise Ultimate Forms action
- Infowise Actions Vs SharePoint Workflow: Automate Site Creation process Infowise Ultimate Forms Create a Site Action in SharePoint
- Infowise Actions vs SharePoint workflows: Copy List Item easily using Infowise Action SharePoint Online
- Team Leave Request Management Solution with Infowise Ultimate Forms
- Set Default Values in List Columns using Infowise Ultimate Forms in SharePoint Online
Step 1: I have created a list in my SharePoint Site Known as “Student Details” which has few columns like below.

infowise ultimate tab and tab permissions in Microsoft 365
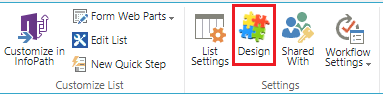
Step 2: Go to the List tab and click on the Design button as shown below.
infowise ultimate tab and tab permissions in Microsoft 365
Design Tabs and tab permissions using Infowise Ultimate Forms:
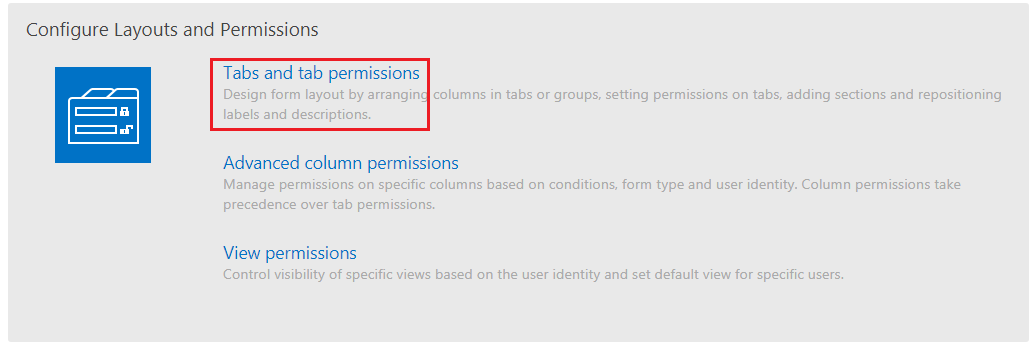
Step 3: In Infowise Ultimate forms, go to Configure Layouts and Permissions and click on Tabs and Tab permissions.
infowise ultimate forms tab and tabs permissions fro Microsoft 365
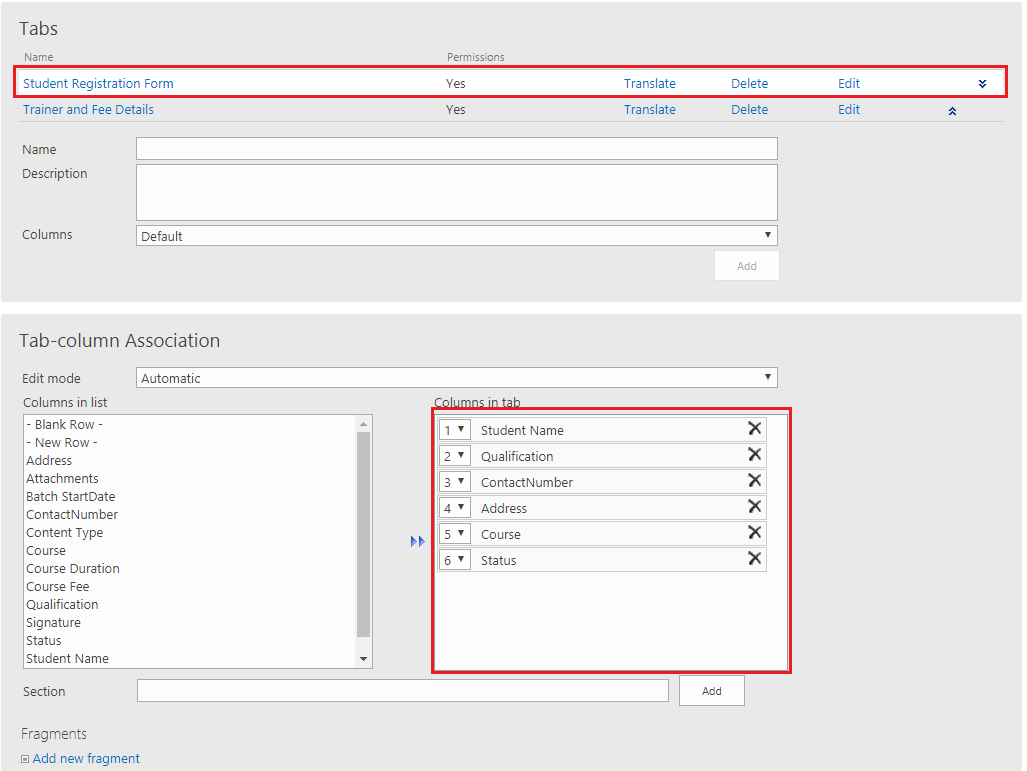
Step 4: Creating the tabs for the list in the Infowise Ultimate forms for Microsoft 365.
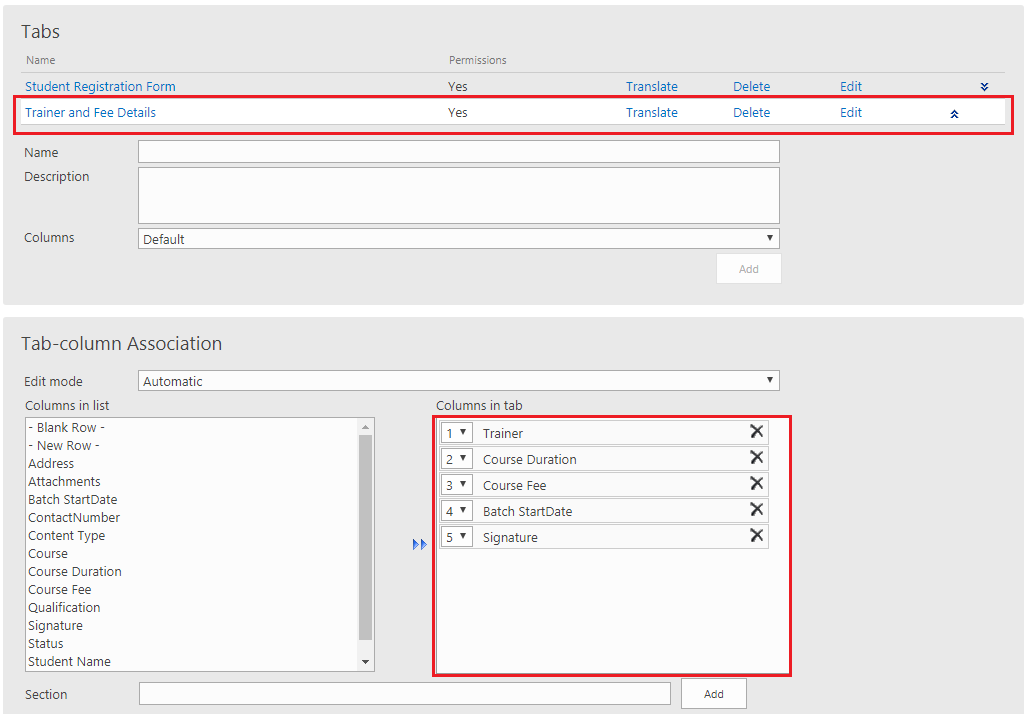
- I have created two tabs One is Student Registration form and Trainer and fee details as shown below.
- Creating Student Registration Tab, In the tabs section, enter Name and Description for tab and click on Add Button now tab will be created as shown below.
- Next, go to the Tab-column Association, select column form the Columns in the list and add to the Columns in tab one by one.
infowise ultimate tab and tab permissions in Microsoft 365
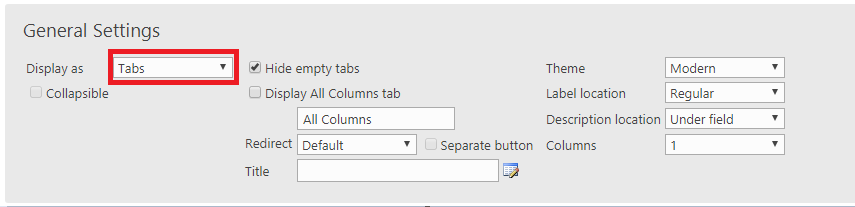
- Next, go to the General Settings, select display as ” Tabs “from the drop-down and Click on Save button.
how to create tab permissions in infowise for Microsoft 365
- Next, Create another tab and named it as Trainer and Fee Details. Fallow the same steps for the tab creation as shown above.
infowise ultimate tab and tab permissions in Microsoft 365
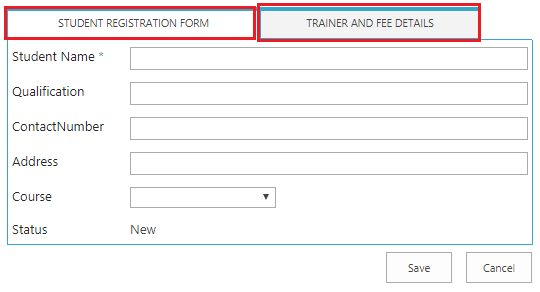
Step 6: Go to your list and click on new Item, two tabs will appear as shown below.
infowise ultimate forms tab and tabs permissions
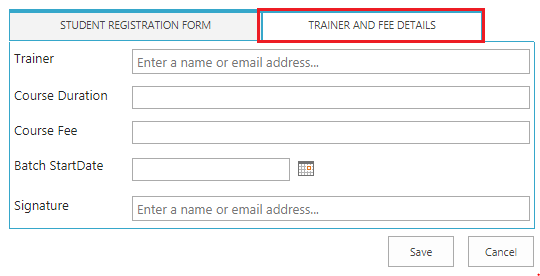
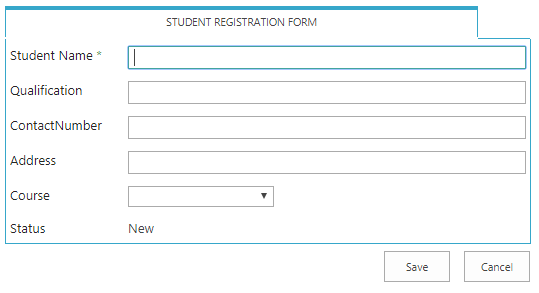
- Next, Click on Trainer and fee Details tab. It will appear as shown below.
how to create tab permissions in infowise for Microsoft 365
Add Permissions for Tabs using Infowise Ultimate Forms:
Step 7: Add permissions to tabs in Infowise Ultimate forms for Microsoft 365.
- I have added permissions to Student Registration form tab as shown below.
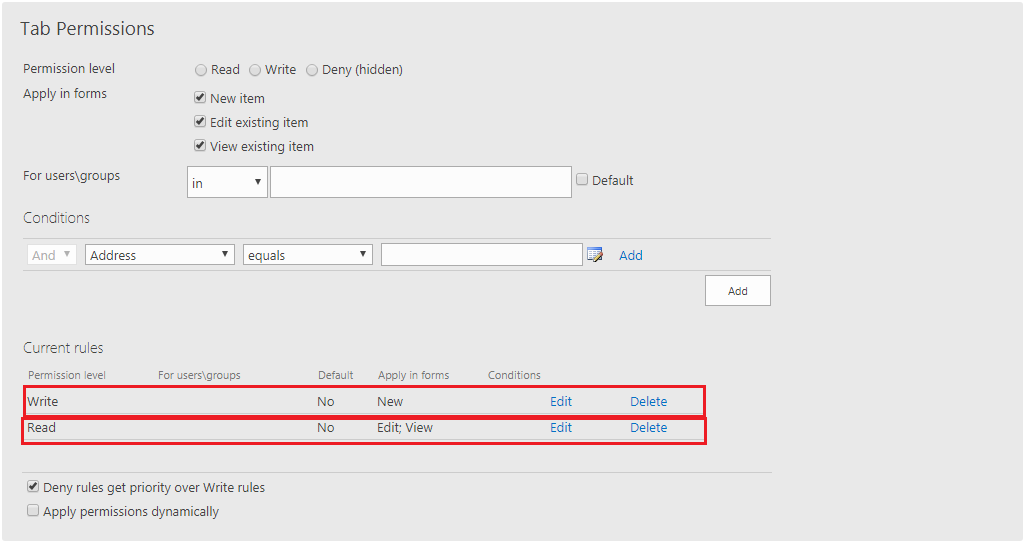
- I have added Write and Read permissions to this tab. When it is in Read mode the student cannot be able to modify the data.
- Go to Tab Permissions, adding permissions follow the steps.
- Permissions level: Write
- Apply in Forms: New Item
- Click on Add Button.
- Do the same steps for the Read Permissions also.
infowise ultimate create tabs for Microsoft 365
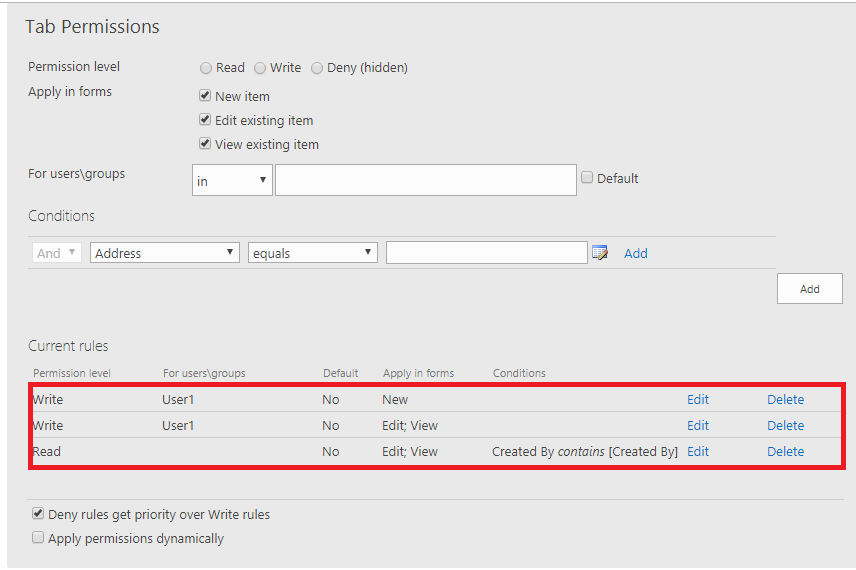
- Go to Tab Permissions, adding permissions follow the steps.
- Permissions level: Write
- Apply in Forms: New Item
- For Users\Groups: user1(Enter username here).
- Click on Add Button.
- Do the same steps for the Read Permissions also as shown below.
infowise ultimate collapsible tabs for Microsoft 365
Step 9: Now go to to your list click on new Item, check the tabs Trainer and Fee Details tab will be hidden.
create tab and tabs permissions in Infowise for Microsoft 365
Conclusion:
In this article, we learn about how to create the tabs and hiding the tabs based on permission using Infowise Ultimate forms for Microsoft 365 in SharePoint online. In the next article, we will learn how to create the “collapsible tab” and “All Columns” tabs using Infowise Ultimate Forms.