Introduction
In many SharePoint solutions you’ll find a single list that needs to handle more than one “type” of item. For example, a Helpdesk list might include hardware requests, software issues, and new-employee setups. Rather than creating three separate lists, SharePoint lets you define custom content types. Now one list can host multiple, distinct item types.
When you combine this capability with the no-code power of Ultimate Forms — enabling dynamic columns, conditional logic, tailored layout, and business-process automation — you can turn a single SharePoint list into a multi-faceted business tool. This article walks you through why this is useful, shows how to set it up, explores common use-cases and best practices, and highlights things to watch out for.
Why Use Custom Content Types?
1. Logical separation of item kinds
With content types you can define distinct schemas (columns) for each type of item in a list. For example:
-
Hardware Request might require columns like Device Type, Serial Number, Warranty Status.
-
Software Issue might require columns like Application Name, Version, Impact Level.
-
New Employee Setup might require columns like Employee Name, Department, Start Date.
Even though all these share common columns (Requestor, Date, Priority) you still get the flexibility to add type-specific columns. This avoids having multiple lists, reduces duplication, and simplifies maintenance.
2. Streamlined user experience
From the end-user’s view, when they click New, they see the different item types (e.g., Hardware Request, Software Issue) and the correct form layout and columns appear. This gives clarity and reduces form-filling errors.
3. Unified reporting and automation
Because all items live in the one list, you get simpler queries, consolidated dashboards, unified workflows. And when paired with Ultimate Forms, you can apply rules, alerts or print templates that respect the content type.
How Ultimate Forms Enhances the Content Type Model
Ultimate Forms extends SharePoint’s content type capability in several powerful ways:
-
Dynamic rules based on content type: You can apply conditional logic so that if Content Type = “Hardware Request” then column “Priority” becomes visible, required, or defaulted.
-
Tailored forms & layout: While SharePoint content types define columns, Ultimate Forms allows you to design entirely custom form layouts, tabs, containers, visibility-permissions by content type.
-
Automated processes: You can create alerts or actions that fire only when a specific content type is used (e.g., send email when a “New Employee Setup” item is created).
-
Reuse and scaling: Because you keep everything in one list, you can more easily scale, maintain and replicate across sites or tenants.
Step-by-Step: Setting It Up
Below is a practical walkthrough using SharePoint & Ultimate Forms.
Step 1: Enable content types on the list
-
In your SharePoint site, create or navigate to the list you want to use.
-
Click Settings → List Settings → Advanced settings.
-
Under Allow management of content types? select Yes, click OK.
-
Back in the List Settings page you’ll now see a section titled Content Types.
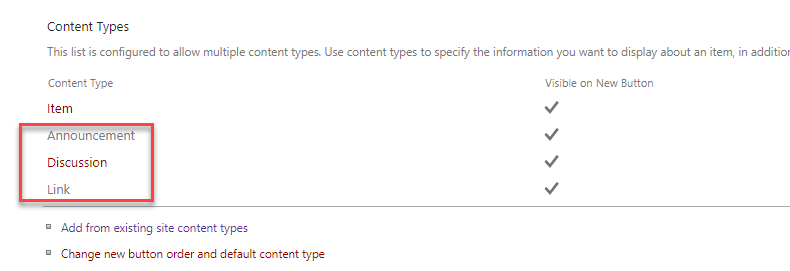
Step 2: Add or create content types
-
In List Settings → Content Types click Add from existing site content types.
-
From the list of available content types, select those you want (or create new custom ones via Site Settings → Site content types).
-
After adding, each content type appears in the list’s Content Types section. Click a content type name to add/remove columns or manage settings.
-
Exit settings, return to the list, click New Item and you should see each content type as an option. Select each to see different column sets.
Step 3: Configure Ultimate Forms logic by content type
-
In the SharePoint list command bar, click Design.
-
Under you can now select Alerts, Actions, or other modules.
-
Example: Set up an Alert that triggers when Item is Added and Content Type = “Announcement”.
-
Use the condition builder to target the content type column.
-
-
You may also use the Values section in Form Designer to specify default settings per content type. If the content type dropdown is blank it applies to all types; if you specify “Hardware Request” it applies only to that.
-
Design the form layout: you can conditionally hide or show sections based on content type, or set column permissions so that only certain roles see certain columns.
Step 4: Test and refine
-
Create a new item of each content type and verify: correct columns appear, rules fire, alerts are sent.
-
View how items of different types show up in lists and forms.
-
Adjust permissions, layout, rules as needed.
-
Document your logic and maintain it as you grow.
Common Use-Cases
Here are examples where combining content types + Ultimate Forms makes a big difference:
-
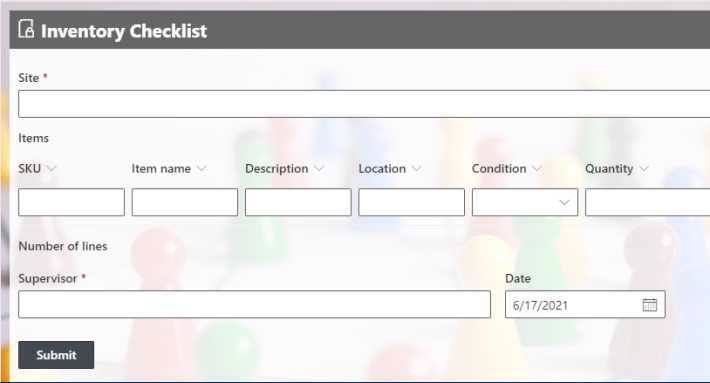
Helpdesk system: One list handles hardware, software, network issues, new employee setups – each with its unique columns and workflows.
-
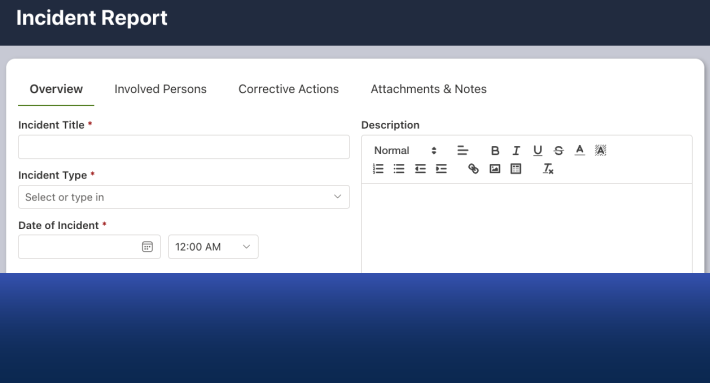
Project tracker: Items could be Task, Milestone, Issue, Change Request — same list, but content type drives form columns and rules.
-
Document review portal: Content types might include Policy, Procedure, Form — each has different metadata, approval steps, print templates.
-
Sales quote system: Content types for Quote, Order, Return – same list but branching logic, printing, layout vary by type.
Best Practices & Tips
-
Keep content types lean: Only include columns unique to that type; reuse where you can for efficiency.
-
Name content types clearly: Use meaningful names (e.g., “Hardware Request – Helpdesk”) so users pick the correct type.
-
Leverage visibility rules carefully: Hide irrelevant columns to simplify the UI. With Ultimate Forms you can show/hide based on content type value.
-
Monitor list growth: Although you’re using one list, large lists may impact performance — incorporate indexes, filtered views.
-
Use metadata views: Create views filtered by content type so users see only items applicable to them.
-
Govern your automation: When you have rules/actions based on content type, ensure they’re documented and test across types.
-
Versioning and template management: As you replicate lists/sites, maintain a standard set of content types and Ultimate Forms templates to accelerate deployment.
Limitations & Things to Watch
-
Complex content type + form logic combinations can increase maintenance overhead; keep design as simple as possible.
-
If many content types and columns exist, performance may degrade — test for load, large datasets.
-
When replicating across multiple sites/tenants, ensure consistent content type provisioning so Ultimate Forms logic maps correctly.
-
While Ultimate Forms provides no-code, business users still need governance and care when designing multiple types and rules.
-
Ensure that users understand the difference between content types; incorrect selection can lead to wrong columns or workflows.
Summary
By combining SharePoint’s custom content types with the flexibility and automation power of Ultimate Forms, you can transform a single list into a dynamic, multi-type business application without writing code. Whether you’re building a helpdesk, project tracker, or HR system, this approach simplifies form design, increases maintainability, and accelerates deployment. Use the step-by-step setup above, follow best practices, and you’ll be well positioned to harness this powerful pattern.
Add your comment