Setup Instructions
In order to use the HR Recruitment Process correctly, there are several steps that are needed to be completed. The system is using several lists to store and maintain roles, additional data such as (Departments or Divisions) and more. These lists have to be configured before the first use of system.
Please follow these Setup Instructions:
Miscellaneous Remarks
- Note! – Avoiding these steps may affect the way the process work and in most cases
may cause it not to work. - Note! – Every stage designed for a different role (which can be a user, users or
group) , Do not assign the same user or group for all the process stages, please use
different users or groups for each stage. - Note! – All the users who participates the process should be a member of the Team
Site Members SharePoint Group - Note! – When testing the system, please use test email address as the system sends
auto emails for rejection letters and job offers.
Stages Role
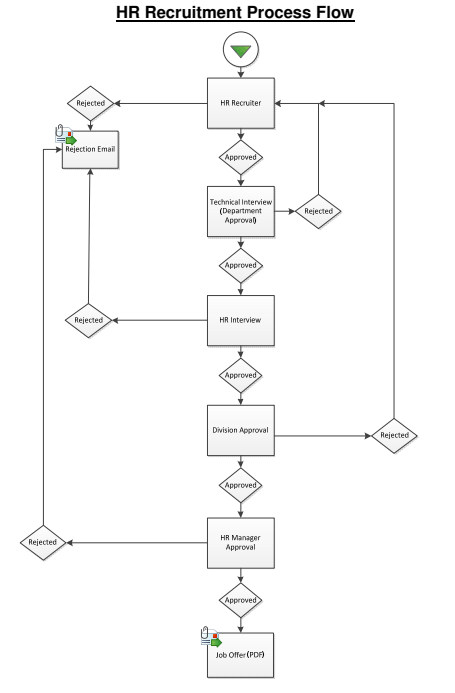
- The process has five stages, each stage represents a different role. Each role has to
be assigned to a user or group. There are two methods of adding users or groups to
a role:- By adding a user/group to a SharePoint group
- By adding a user/group to a definition list which is a SharePoint list within
the HR recruitment site that maps roles to users/groups.
- Here are the necessary role configuration steps for each stage:
- HR Recruiter Stage: to configure the HR Recruiter role –
- Go to - Site Settings -> People and Groups
- Add user/group to the HR Representatives SharePoint group.
- Technical Interview Stage: to configure the Technical Interview role –
- Add a new list item on the Departments List
- Fill out the Department name and choose the Division from the
lookup list. - Fill out the user/group who should conduct the technical interview
for the department.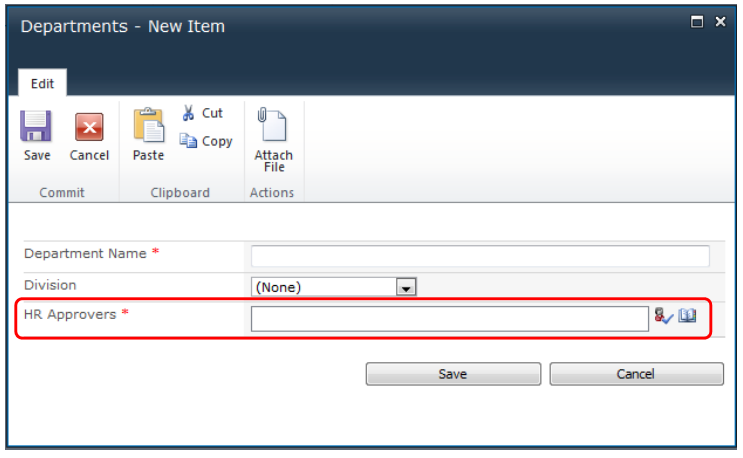
- Save the item.
*repeat this for each department that participates on the
recruitment process.
- HR Interview: to configure the HR Interview role – no need to configure,
these are the same users/groups from the HR Recruiter stage (stage 1). - Division Approval : to configure the Division Approval role –
- Add a new list item on the Divisions List
- Fill out the Division name.
- Fill out the user/group who should conduct the Division Approval
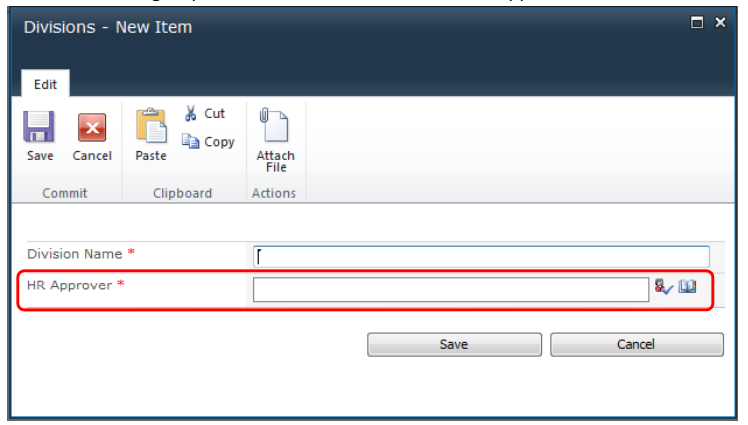
- Save the item
*repeat this for each division that participates on the recruitment
process.
- HR Manager Approval: to configure the HR Recruiter role –
- Go to - Site Settings -> People and Groups.
- Add user/group to the HR Approvers SharePoint group.
- HR Recruiter Stage: to configure the HR Recruiter role –
Email Import
- If you wish to add the capability of sending an email with a CV to the
recruitment list, and start the process by doing that (instead of creating an item for each CV manually) – please edit the Hr Email Import profile and change the connection settings to your corporate inbox. This can be done by going to Import Settings under the Recruitment List - List Settings.
Miscellaneous
- Organizational roles List.
Organizational role is the actual job title of candidate – e.g. Support Engineer 2 or
Personal assistant to the Division Manager.
Although the Technical Interviewer and the Division Manager can add
organizational roles right from their forms as a part of the process - please add all
possible organizational roles of your organization in advance , this will save time and
later on. - Classifications and Sub-Classifications lists.
Although these lists came with a sample data, please add the Classifications and
Sub-Classifications items which more suitable to your organization. Adding items is very easy, the Classifications and Sub-Classifications lists are regular lists. Please add items first to the Classifications list and only then to the SubClassifications list as it relies on the Classifications list data.
Get helpful videos
Also read these:
Last modified: 10/6/2021 9:42 PM
Loading...
Add your comment
Comments are not meant for support. If you experiencing an issue, please open a support request.
Reply to: from