
In the Previous article, we learn how to create a column and how to add “Infowise Associated task” Content type to this column. We also learn how to create the “Signature” column in Infowise Ultimate forms for Microsoft 365.
Configure the Business logic in Infowise Ultimate forms for Microsoft 365
Sharepoint Document Library(SOP):
Step 1: Go to your SharePoint Document Library, click on Library tab->click on ” Design “. It will open the “Infowise Ultimate forms”.
Step 2: Go to Alerts in Configuration Business Logic for creating alerts as shown below.
Read and Sign document in info wise for Microsoft 365
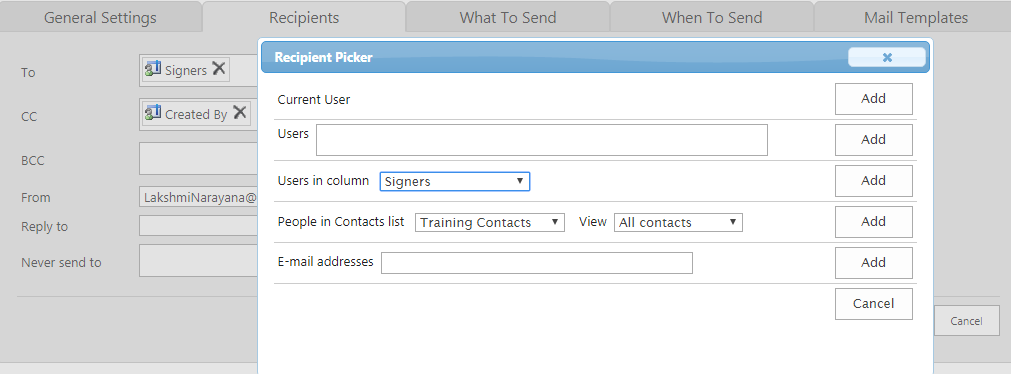
- In General Settings tab, Enter Title, Select Site, and Select List from the drop-down(by default Site and List names are selected).
- Next, coming to the Recipients tab, Select users from Recipient Picker for “TO” as shown above in the screenshot.
- Do the Same thing for “CC”(if you need “CC”).
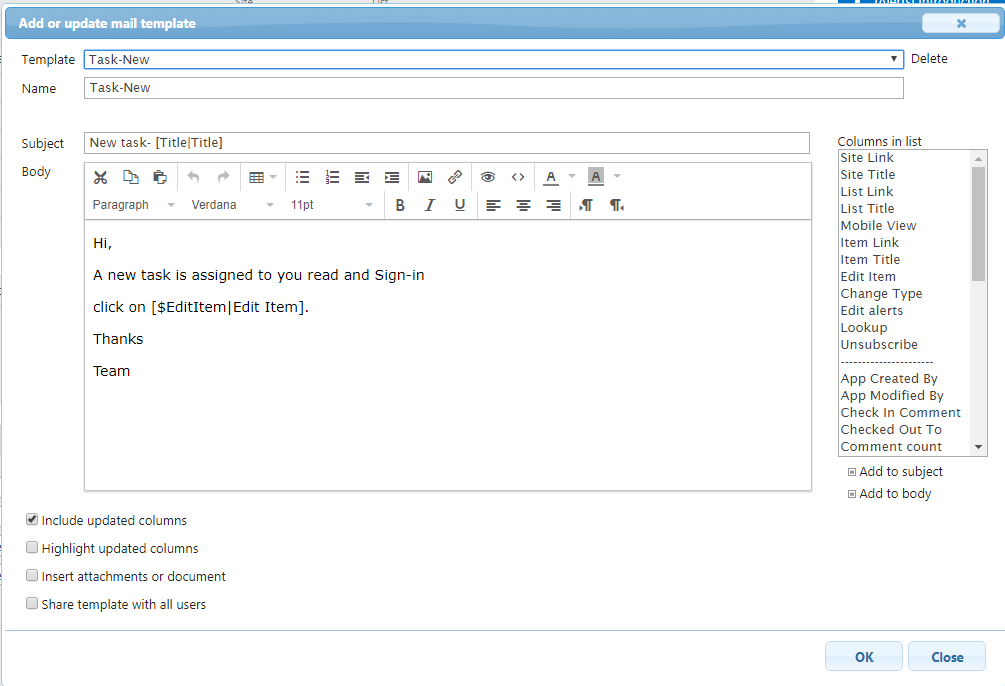
- Next, go to the Mail Templates, click on Add or update mail template. It will open “Add or update mail template” Dialogue box here enter detail as your requirement and click on Ok button.
using electronic signature in infowise for Microsoft 365 in sharepoint online
Step 1: Go to your SharePoint Task List, click on List tab->click on ” Design “. It will open the “Infowise Ultimate forms”.
Step2: Go to Alerts in Configuration Business Logic for creating alerts as shown below.
Infowise-SOP-Read-and-Sign-for-office-365
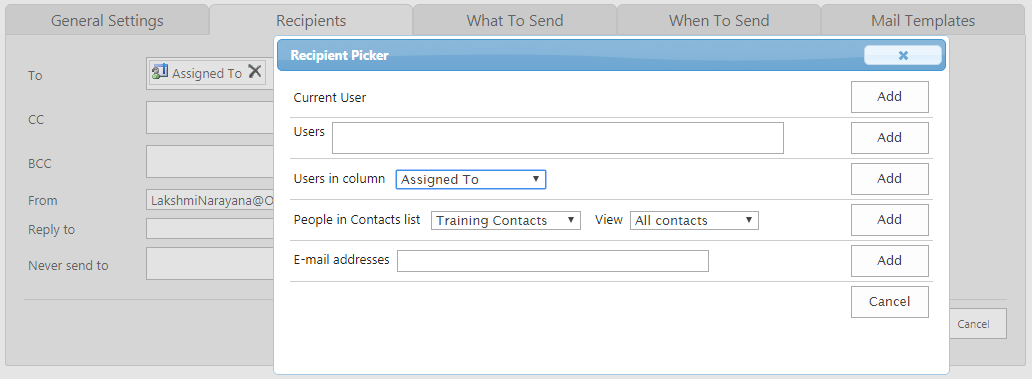
- In General Settings tab, Enter Title, Select Site, and Select List from the drop-down(by default Site and List names are selected).
- Next, coming to the Recipients tab, Select users from Recipient Picker for “To” as shown above in the screenshot.
- Next, go to the Mail Templates, click on Add or update mail template. It will open “Add or update mail template” Dialogue box here enter detail as your requirement and click on OK button.

using electronic signature in info wise for Microsoft 365 in SharePoint online
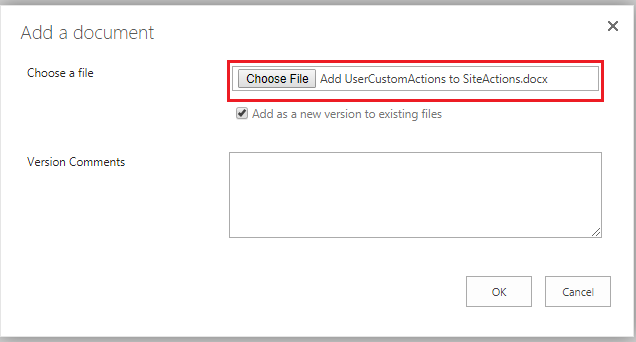
Step 1: Now go to your SharePoint Document Library(“SOP”) upload the document as shown below.
Read and Sign document in infowise for Microsoft 365
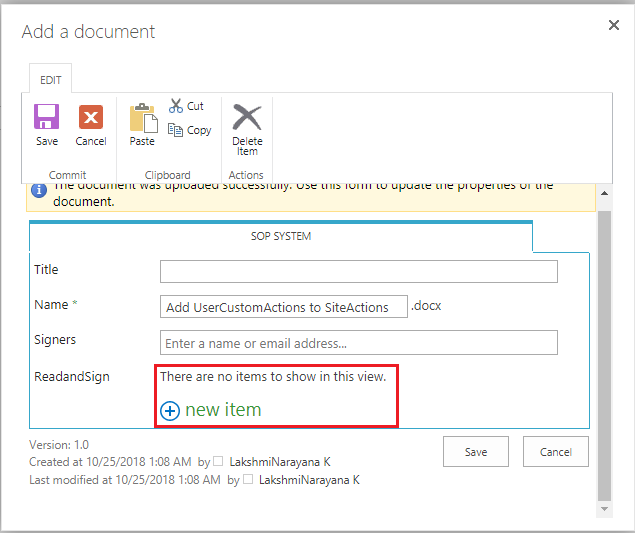
Step 2: Next Click On “OK“, it will open “SOP SYSTEM” form. Enter Title, Signers and next click on “New Item” for assign task to the users as shown below.
using electronic signature in infowise for Microsoft 365 in sharepoint online
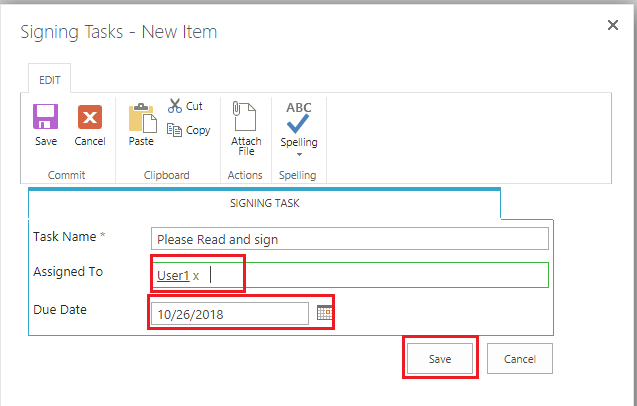
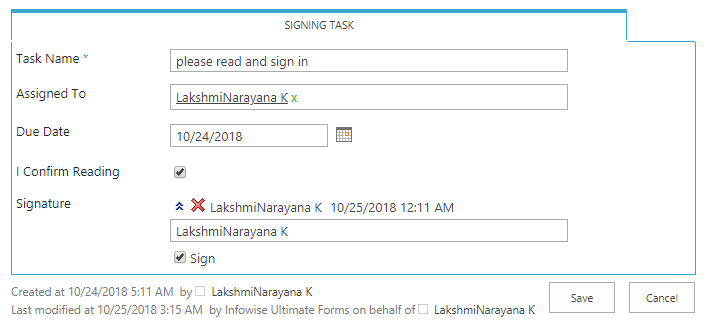
Step 3: When clicking on New Item, ” Signing Task “form will be open.
- Enter “Task Name”, Add username in ” Assigned to“, “Due Date”.
- Next click on the Save button as shown below.
Infowise Electronic Signature field for office365
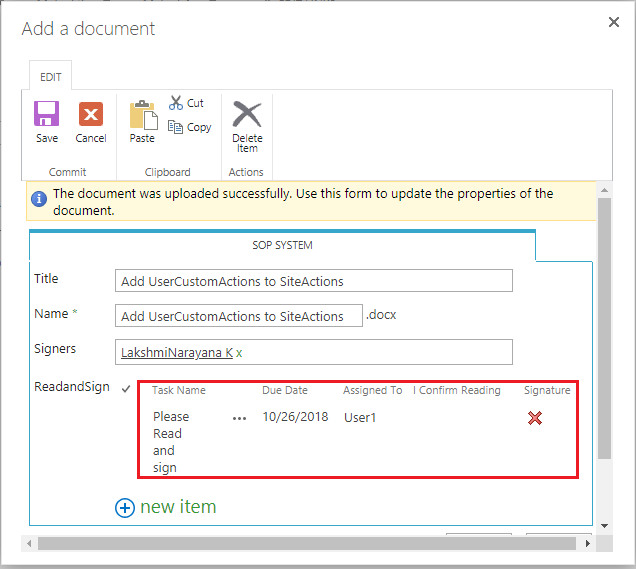
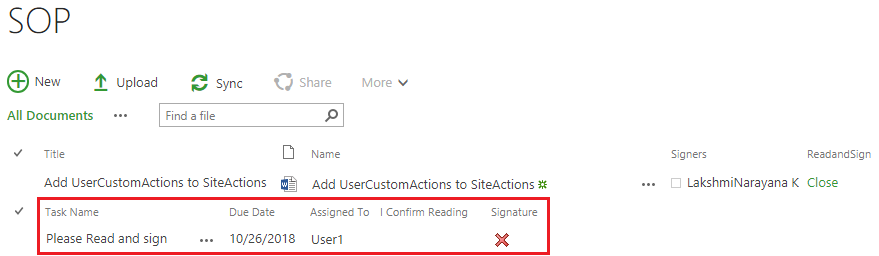
Step 4: Now the item is added in the “Read and Sign” column as shown below.
- if you want to add one more item you can add it by “new item“.
Infowise Electronic Signature field for office365
Step 5: Next click Save button item will be added to the Sharepoint Document Library as shown below.
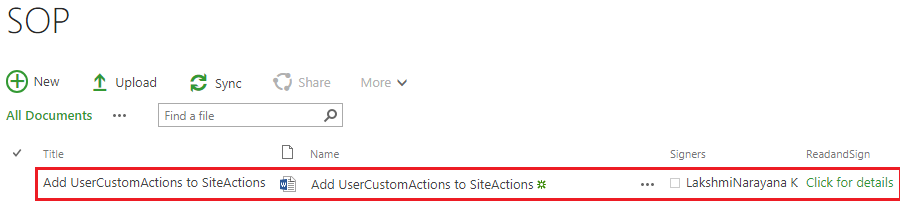
Read & Sign document info wise ultimate forms for Microsoft 365
Step 6: Now go to the “Read and Sign” Column, click on “Click for Details”. It will show the task details as shown below.
Infowise Electronic Signature field for office365
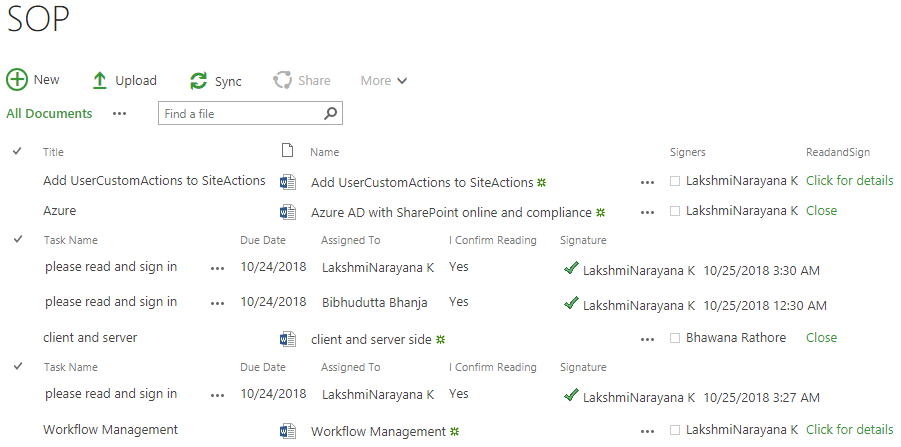
Step 7: like that we can add multiple users to the single document as shown below.

Infowise Electronic Signature field for office365
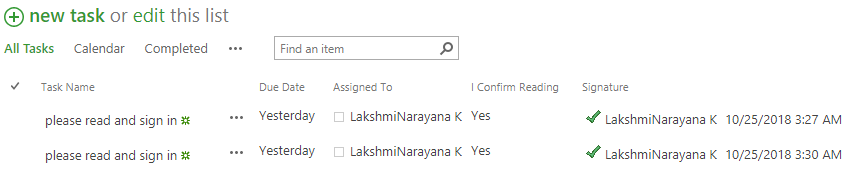
Step 8: For reading & Sign in the Document, the user will go through the mail or go the TaskList(in our example “Signing Tasks”).
- Go to the task list, open on the task item.
- Tick on the checkbox of “I confirm Reading” and Check on the “Sign” CheckBox.
- click on the Save button as shown below.
using electronic signature in infowise for Microsoft 365 in sharepoint online
Step 9: Now the item is updated in the task list as shown below.
Read & Sign document infowise ultimate forms for Microsoft 365
Step 10: See in your SharePoint Document library all task has been updated as shown below.
Infowise Electronic Signature field for office365
If you are new to Infowise Ultimate Forms, you can read some more tutorials and get to know about various features.
- Create Collapsible tabs and All Columns tab using Infowise Ultimate Forms in SharePoint Online Microsoft 365
- Create Tabs with Tab Permission using Infowise Ultimate Forms in SharePoint Online Microsoft 365
- ITSupport Ticketing System using Infowise Ultimate Forms Part-1
- ITSupport Ticketing System using Infowise Ultimate Forms Part-2
- Set Default Values in List Columns using Infowise Ultimate Forms in SharePoint Online
- Implement Date Validations using Infowise Ultimate Forms in SharePoint Online List Forms
- Infowise Actions Vs SharePoint Workflow: Automate Site Creation process Infowise Ultimate Forms Create a Site Action in SharePoint
- Infowise Actions vs SharePoint workflows: Copy List Item easily using Infowise Action SharePoint Online
- Easily Configure Email Notifications using Infowise Ultimate Forms action
- Update Field Value without using Workflow by using Infowise Update Action
Conclusion
In this article, we learned about how to Read and sign in the document in a document library in SharePoint Online Microsoft 365, How to create Signature, and how to add “Infowise Associated task” content type to the column in the Infowise Ultimate forms for Microsoft 365 in SharePoint online.