
Introduction
In SharePoint, arranging your list forms in multiple layout columns can dramatically improve usability. Especially when you have many fields, logically grouped data, or want a cleaner desktop interface.
With Ultimate Forms’ modern drag-and-drop Form Designer, you can easily build multi-column layouts, apply rules, permissions and styling — all without writing code.
In this article we’ll walk you through how to design and configure multi-column forms, when it makes sense, and how to do it in the modern SharePoint experience using Ultimate Forms.
Why Use Multi-Column Layouts?
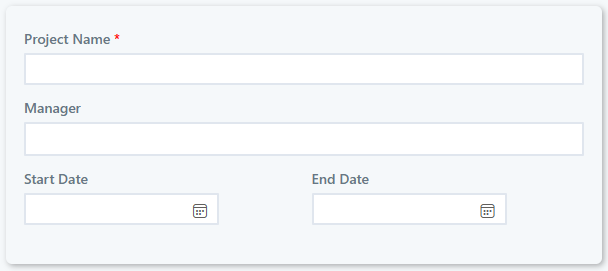
When you create a SharePoint list form, the default layout places fields vertically in a single column. That works fine for simpler forms. But in cases where you have many fields, or related field pairs (for example “Start Date” / “End Date” alongside “Budget” / “Actual”), a multi-column layout can:
-
Improve readability and structure — fields appear side-by-side rather than stacking endlessly.
-
Reduce scrolling and make forms feel more compact and professional.
-
Help align the form visually with desktop interfaces or business-application aesthetics.
That said — multi-column designs should be used judiciously. In many cases, a single column is still the most appropriate and easiest option.
How Ultimate Forms Supports Multi-Column Layouts
Ultimate Forms brings advanced form design tools that make multi-column layout easy and flexible:
-
The Modern Form Designer is a drag-and-drop interface built into Ultimate Forms that lets you arrange fields in tabs, containers and columns.
-
You can specify container layouts (for example two-column grids) so that fields align left/right rather than in a single stack.
-
You can combine multi-column layout with form rules, permissions, visibility and dynamic behaviour — so even in a multi-column view you still control which users/conditions see what.
Step-by-Step: Designing a Multi-Column Form
Here’s how you can create a multi-column layout with Ultimate Forms’ Form Designer:
Step 1: Start in Modern Form Designer
-
Navigate to your SharePoint list and click on Design, then select Form Designer.
-
This opens the intuitive drag-and-drop interface. Form Designer will even suggest to configure a new form for you when none exists.
Step 2: Define the Layout
-
Add a container element. You can then change its properties to display a 2-column grid (or more, as needed).
-
Drag in your fields: e.g., Column 1: “Project Name”, “Start Date”; Column 2: “Budget”, “End Date”. Fields will automatically arrange themselves into 2 layout columns.
-
Use the grid handles to adjust widths or spacing so fields align neatly. It will also automatically adapt to the current screen size. For instance, on mobile phones the container will display a single layout column automatically.
-
Optionally add a header or description above each container to guide users.
Note that you can place containers within containers. This allows you full flexibility when designing the layout of your form.
Step 3: Configure Rules, Visibility and Permissions
-
For each field, tab or container you can add permission rules: e.g., if Budget > 1,000,000 show “Executive Approval” field.
-
You can also configure container or tab-level permissions so only designated users and/or groups can view or edit fields.
-
Use default values or dynamic expressions to pre-fill fields where possible.
-
Use value rules to automatically set field value based on other fields, calculations, functions and expression to create a truly dynamic form.
- Use validation rules to ensure only high quality data is entered via the form.
Note that permission rules are inherited and overridden at any level. Consider a container with Write permission, inside of it - another container with a Read permission that contains a specific field with a Write permission. This is easily accomplished by assigning permission rules to each element. Nested elements inherit the permissions of their parent elements, unless specific rules are assigned to the element itself.
Step 4: Preview and Optimise
-
Use the built-in preview to test the form in different screen sizes.
-
Check how the form renders on different devices.
- Optionally use multi-lingual features and see how the form appears in different languages.
Step 5: Publish and Maintain
-
Once satisfied, publish the form design.
-
Document any column or layout logic for future edits.
-
Monitor user feedback and performance — if the form becomes too busy, consider simplifying or breaking into tabs.
Best Practices & Performance Considerations
-
Use multi-column sparingly: It’s most appropriate when you have many related fields or pairs; avoid over-complex grids that may overwhelm users.
- Ensure logical grouping: Place related fields side-by-side (e.g., “Start Date” vs “End Date”) to improve user experience.
-
Monitor form load times: Complex forms with many columns, containers, rules and lookups may impact performance. Use indexing, efficient lookups, and avoid unnecessary conditional logic.
-
Govern changes: Make sure layout decisions are documented; avoid “one-off” forms built without vision leading to inconsistent UI across lists.
Summary
When your SharePoint forms feel modern, well-designed and aligned with business workflows, users adopt them more readily, data quality improves and applications scale more effectively. Ultimate Forms’ modern Form Designer gives you the flexibility to take a plain list form and transform it into a professional, custom layout — combining multi-column structure, tabs, rules and permissions — all without writing code.