
Introduction
Import component of Ultimate Forms allows you to set up an automated, background import process of data from a variety of external data sources into SharePoint. We support emails, various databases and Excel files, REST and SOAP web services and even text files.
The process runs automatically in the background. It periodically looks for new and updated items. Then using that data to create and/or update list items and documents in SharePoint.
More and more of our customers are incorporating SMS text messages into their business processes. They provide a fast and reliable way of sending notifications and information to employees, customers and vendors.
One of the recommended ways of integrating SMS messaging is using Twilio, the world leader in SMS integration. With their ease-to-use API, the integration is simple and fast. I already blogged in the past on how to use our Actions to send SMS messages through Twilio.
SMS Import
The Import component provides a built-in ability to import messages sent and/or received via Twilio. You can now integrate incoming text messages in your business solutions, for instance, implement approvals via text messages.
Step-by-step Implementation
Let me guide you through the integration steps. In this scenario we are simply going to import all messages from Twilio, incoming and outgoing. But of course, you can set it up in a much more sophisticated ways.
SharePoint List
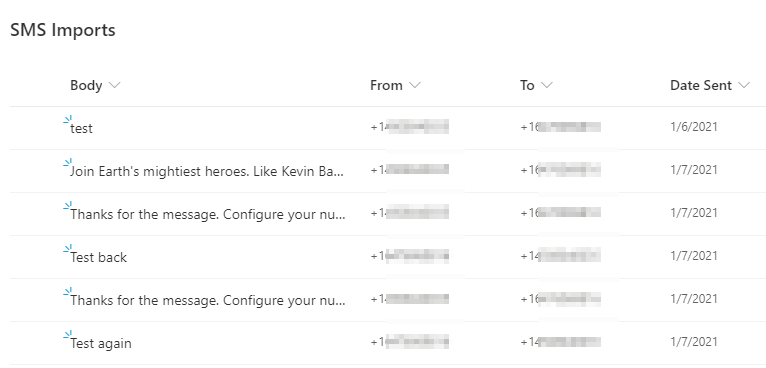
First, let's create a list in SharePoint where we are going to store the messages. I'm using a simple generic list with the following columns:
- Body - this is the built-in Title column, I simply renamed it.
- From - single line of text, I will store the sender phone number here.
- To - single line of text, I will store the recipient phone number here.
- Date Sent - date/time, I will store the date/time message was sent.
- Direction - single line of text, I will store the message direction here (incoming or outgoing).
- Status - single line of text, I will store the message status here (success or error).
You don't have to use an exact same list structure. Import allows flexible mapping of data as you will see later.
Twilio Account
Next, you need to sign into your Twilio account. If you don't have an account yet, create a new one. Even a trial account will be sufficient for our purposes.
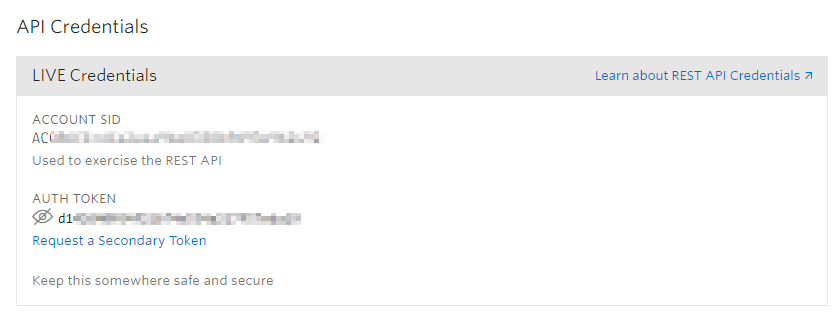
Go to Settings and scroll down to API Credentials section. You are going to use Account SID and Auth token.
Import Profile Configuration
- Return to your SharePoint list and click on Design to enter Ultimate Forms.
- Click on Import under Import and export
- Click on Add new profile
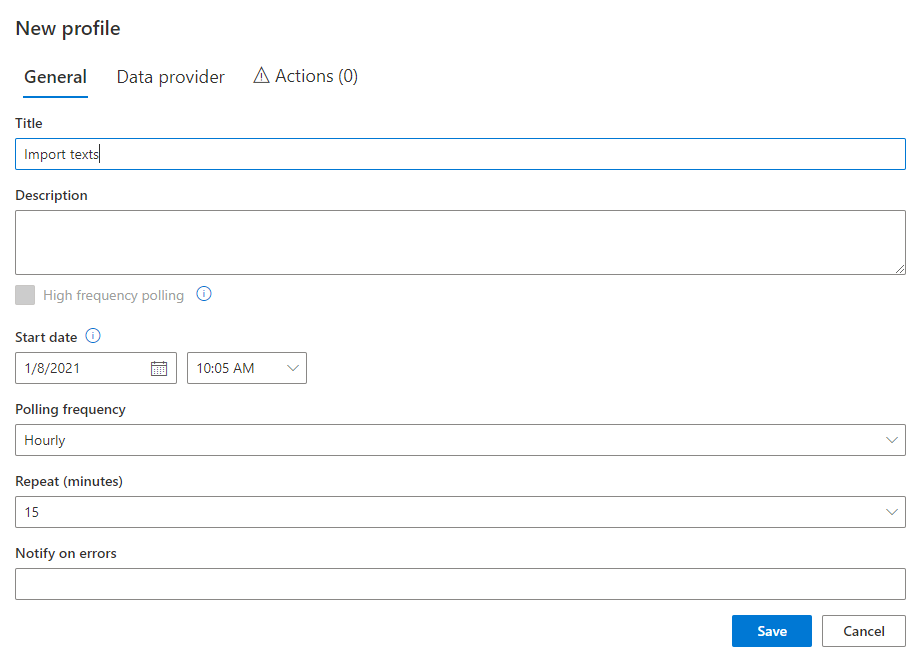
- Enter profile title of your choosing.
- Start date value controls which messages will be imported. To be imported, message has to be received after this date. By default, the value is set to the current date/time of the profile creation. If you want your profile to import past messages, change the date to be earlier than the first message you want to import.
- Polling frequency controls how often the profile will automatically log into Twilio to search for new messages. The default is 15 min, but you can change it to any other interval. The value of None means you choose to execute the profile manually.
You can also contact us to sign up for High frequency polling option. It is a premium feature that sets the interval to 2 minutes. - Switch to Data provider tab.
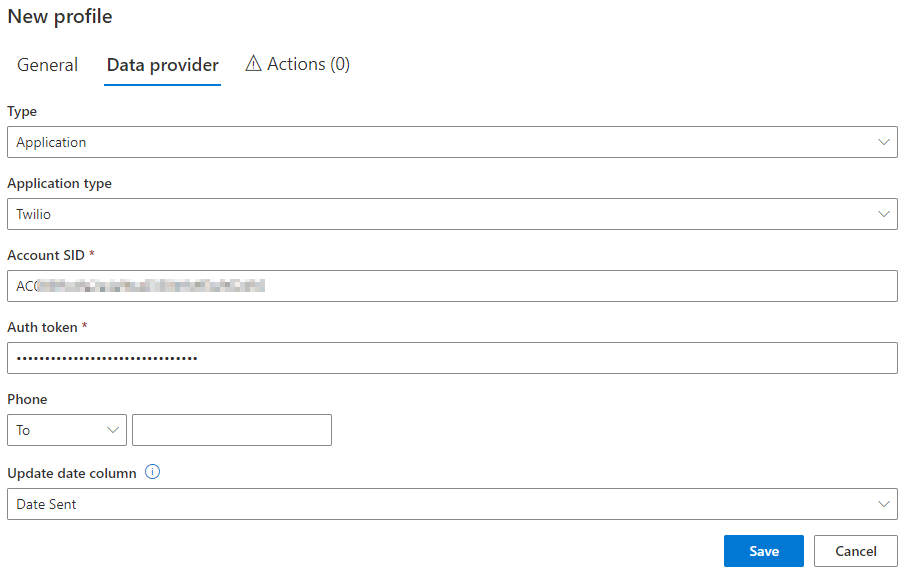
- Switch Type from Email to Application, then choose Twilio under Application type.
- Enter your Account SID and Auth token you copied from Twilio.
- You can limit the import to message only sent or received from a specific phone number. I'm leaving this field empty.
- Update date column controls what property we use to check the date on the item and only import new items during each run. We are leaving the default value here.
- Switch to Actions tab.

- Actions specify what we do with the messages that we are importing. You can use actions to create and/or update list items in SharePoint. These actions will be using the data from the imported messages.
- Create a new Create list item / document action, give it a title of your choosing.
- Map columns in the message to the columns in the list. In my case, I'm simply doing a direct one-to-one mapping. You can use our Value Builder to use expressions and functions to manipulate the values.
- Save the action, then save the whole import profile.
Testing
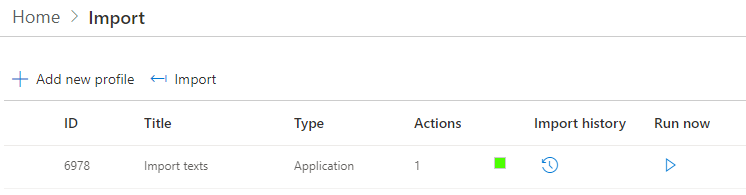
If needed, send or receive message in Twilio to ensure there is something to import. Wait for the profile to run automatically or click on Run now.
You can open Import history to view the execution steps of the run.
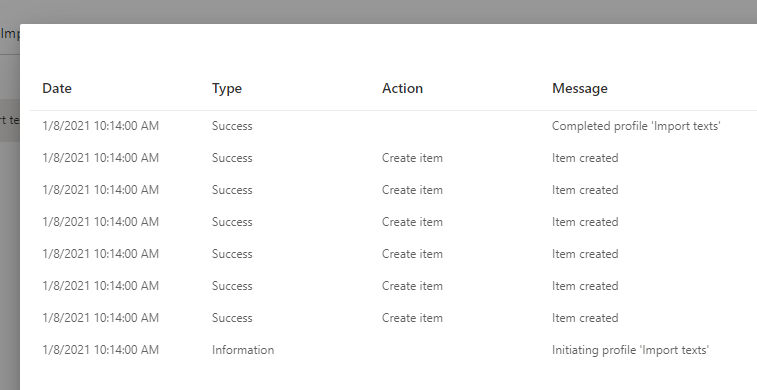
Once the profile is completed, go back to your list, you should now be able to see the newly imported items.
Conclusion
As you can see, implementing text message import is a simple and straightforward process! You can add your own conditions, functions and mapping to ensure it integrates into your business logic. You can also add Alerts and Actions to trigger additional steps. I invite you to enjoy exploring the unlimited possibilities of Ultimate Forms integrations!