
Introduction
As form designers, we are always torn between two opposites: trying to include all the necessary columns in our form and trying to create a form that is as short and simple as possible. Using modern forms in Ultimate Forms you can leverage the power of our Tabs control to subdivide the form into mutliple tabs. Each tab then contains a set of columns describing the same topic or area of the form.
To make it even simpler and easier for the customers to navigate the form, we can implement button navigation between tabs, clicking on Next after filling out columns on the current tab. Plus, we have the added benefit of always knowing at what stage of the form filling process we currently are.
Tabs in Progress Theme
With our specialized Progress theme for our Tabs control, the multi-step form is becoming even more visual and user-friendly.
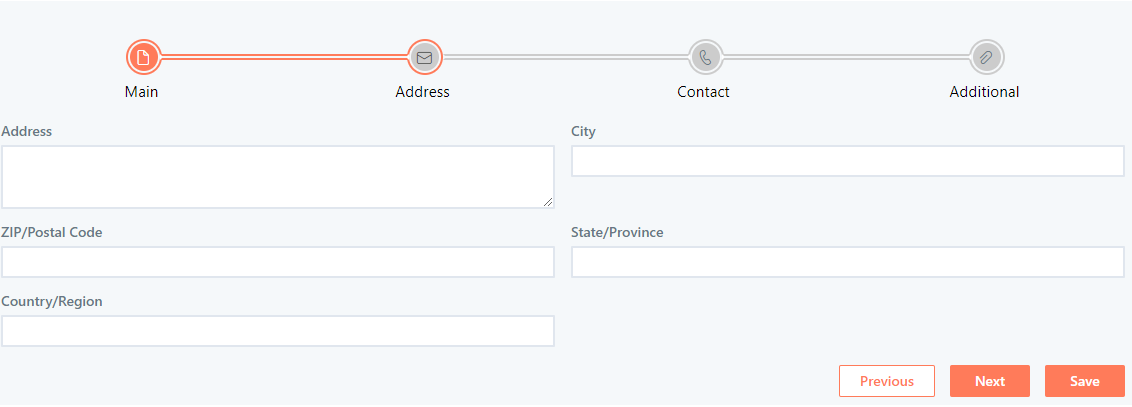
As you can see, the tab headings are now providing simple visual cues, guiding the user through the form. The buttons at the bottom are set to provide the sole means of navigating between the tabs, to ensure the users are filling the form step-by-step, as we intended.
Step-by-step Instructions
Let's take a deeper look into how such a form can be configured using Ultimate Forms' Form Designer.
- I am using a regular SharePoint Contacts list, but of course any list will do.
- Click on Design on the list view to enter Ultimate Forms, then go into Form Designer.
- On the design canvas, drag a Tabs control from the gallery on the left.
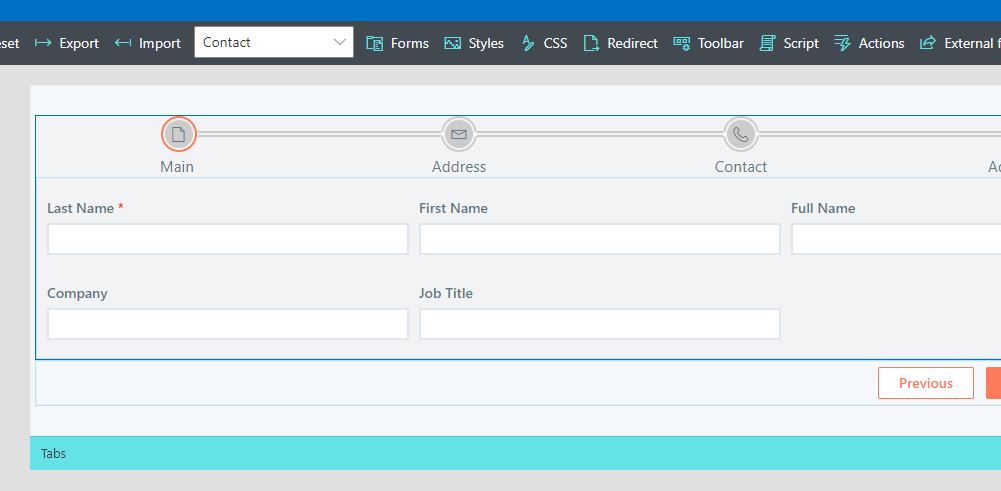
- Click on the Tabs control to see its settings on the right.
- First define the names of the tabs you want, then configure navigation options.
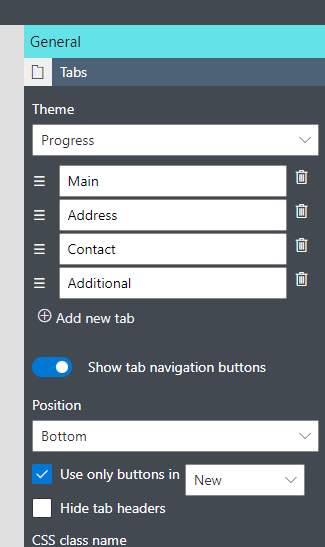
- Things to notice here:
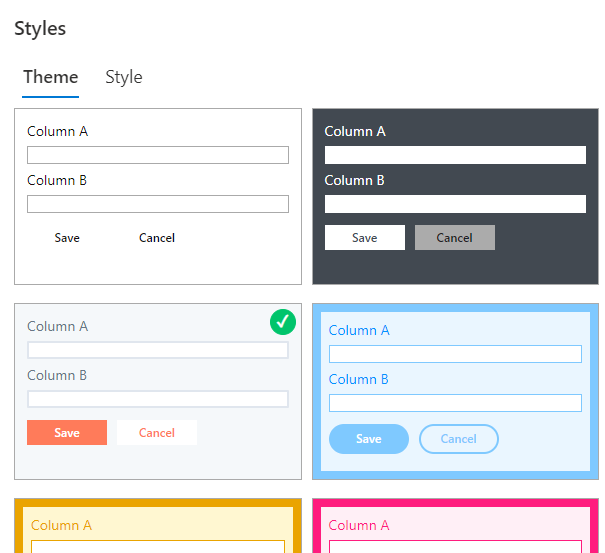
- Theme is set to Progress. There are several visual themes available for Tabs (and you can always use CSS to configure your own unique look). But Progress is the most visually suitable for multi-step forms. That exhibits itself in terms of its visual language. The functionality always remains the same, regardless of the theme.
- Enable the option to show navigation buttons.
- Enable the option to only allow navigation through buttons (in this case, I'm only using this option in New form, but it's up to you).
- Once done, you can further define the actual tabs. Click on the tab surface. If you end up selecting a column on the tab, you can always click on Tab in the breadcrumbs at the bottom of the canvas to reach the tab itself.
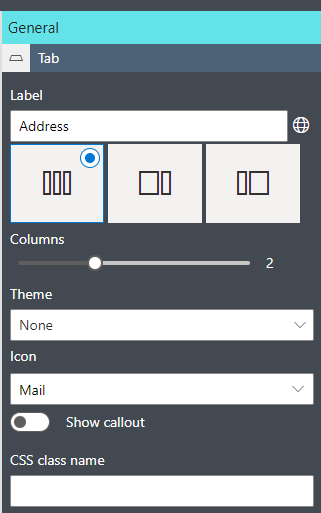
- Here we can define the layout of the tab, as well as the icon and the callout (dynamic help). I defined a suitable icon for each tab.
- Drag the columns from the gallery on the left into each tab. You switch between tabs by clicking on the tab header within the canvas.
- I also aligned the buttons to the right by clicking on the button bar and configuring its settings.
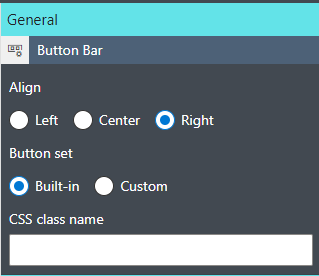
You can also modify the button set and add your own buttons. - The last thing I did was selecting a different theme for the whole form.
- Publish the form, it is ready to be used!
Conclusion
As you can see, the form will display the process progress in a simple and obvious way, while guiding the user towards the next steps of the process.
This blog illustrates a simple multi-step process. Tabs control offers many other amazing features, such as hiding or showing tabs based on conditions, automatically opening a specific tab on form open based on conditions. There are too many other powerful features in just a single blog. But no fear, we have many other blog artilcles available.
Enjoy!