Introduction
In today's fast-paced business environment, it’s crucial to have effective tools for managing documents, especially when dealing with projects. The process we are going to describe automates the creation, copying, and linking of documents for each project within a SharePoint system using Infowise Ultimate Forms. This approach helps streamline and expedite document management, ensuring accessibility and proper linkage to projects.
In this article, we will walk you through how to automate the process of copying relevant department documents into a dedicated folder for each new project in the Documents library and associating those documents with the project for easy access. We will focus on leveraging Ultimate Forms: Forms, SharePoint, and Microsoft tools to achieve this automation.
Structure Overview
Templates Document Library
- The Templates document library holds pre-defined templates associated with specific departments. Each document is tagged with a Department field, which helps in identifying the relevant templates for each project.

Projects List
- The Projects list contains basic project information, including:
- Title: The name of the project.
- Project Department: This column links the project to the relevant department, matching the Department field in the Templates library.
- Documents: This is a lookup column that connects the copied documents to the project through the Ultimate Forms: Associated Items field.
Documents Library
- The Documents library is where the documents will be copied to, organized by department and project name. Each document in this library will have a Project lookup column, which connects the document to its corresponding project in the Projects list.
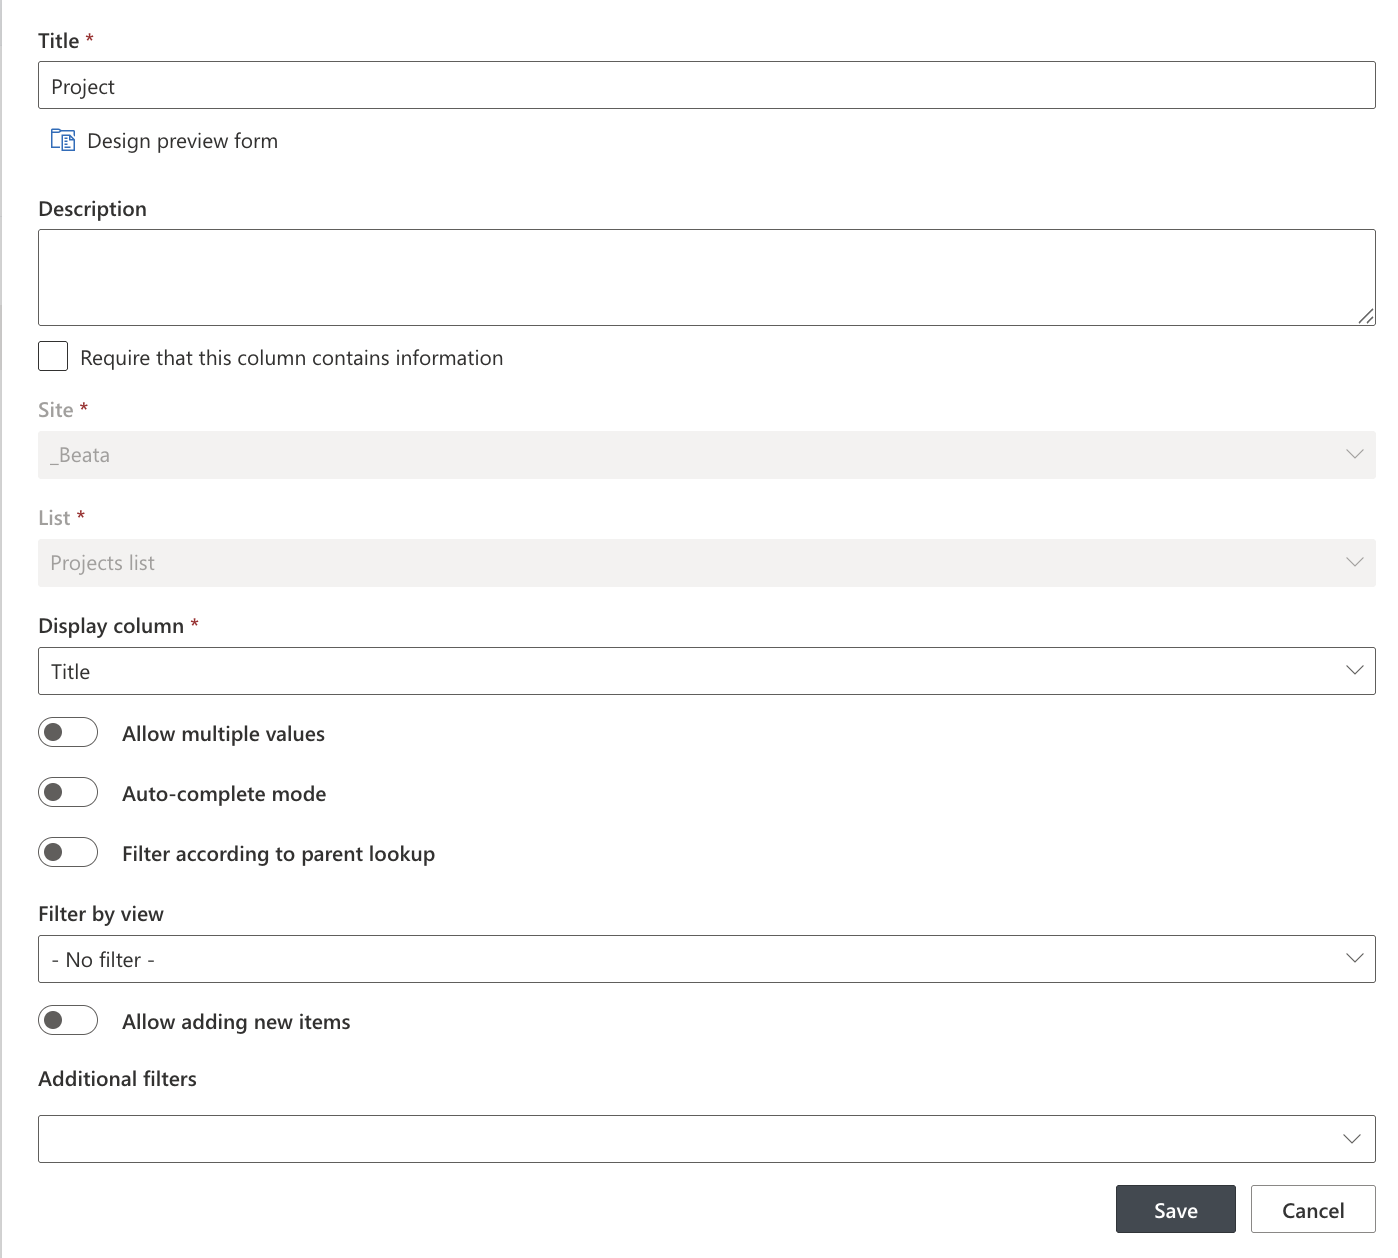
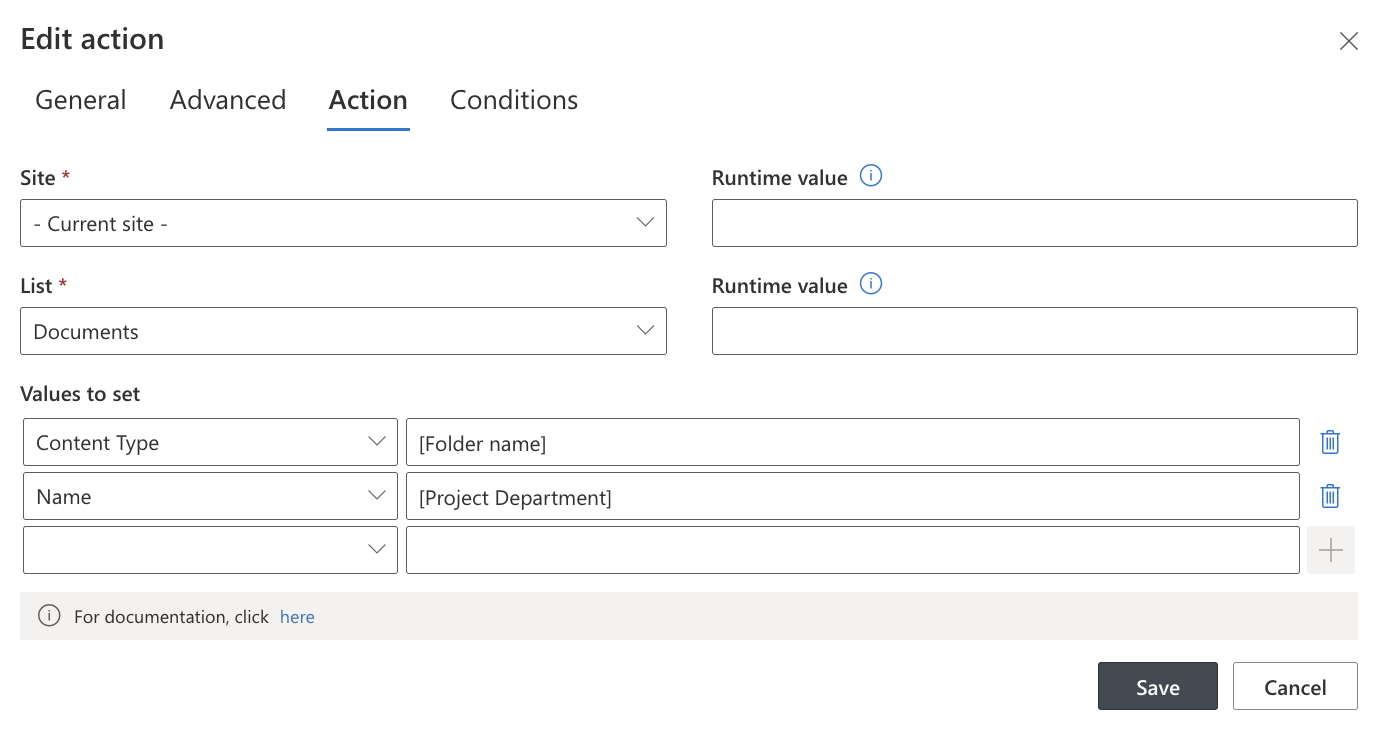
Action: Update list item:
.png)
The Automation Process
We will now go over the steps for automating document management using Ultimate Forms: Actions.
Step 1: Create the Department Folder in the Documents Library
- Action: When a new project is created, the first action checks if the department folder exists in the Documents library. If the folder doesn't exist, it is automatically created under the structure {Project Department}.
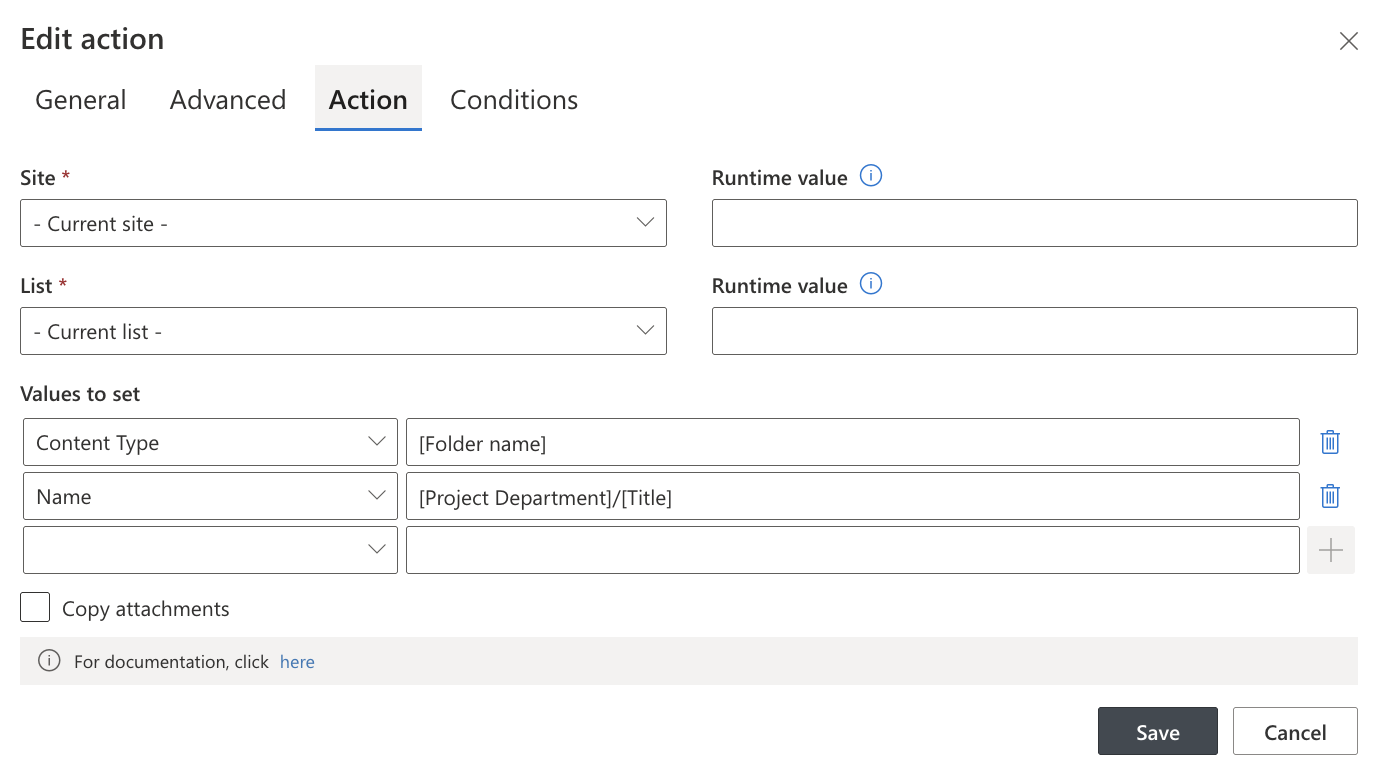
Step 2: Create the Project Folder Under the Department Folder
- Action: The second action creates a project-specific folder inside the corresponding department folder. This folder follows the naming convention {Department}/{Project Name}, ensuring proper organization.
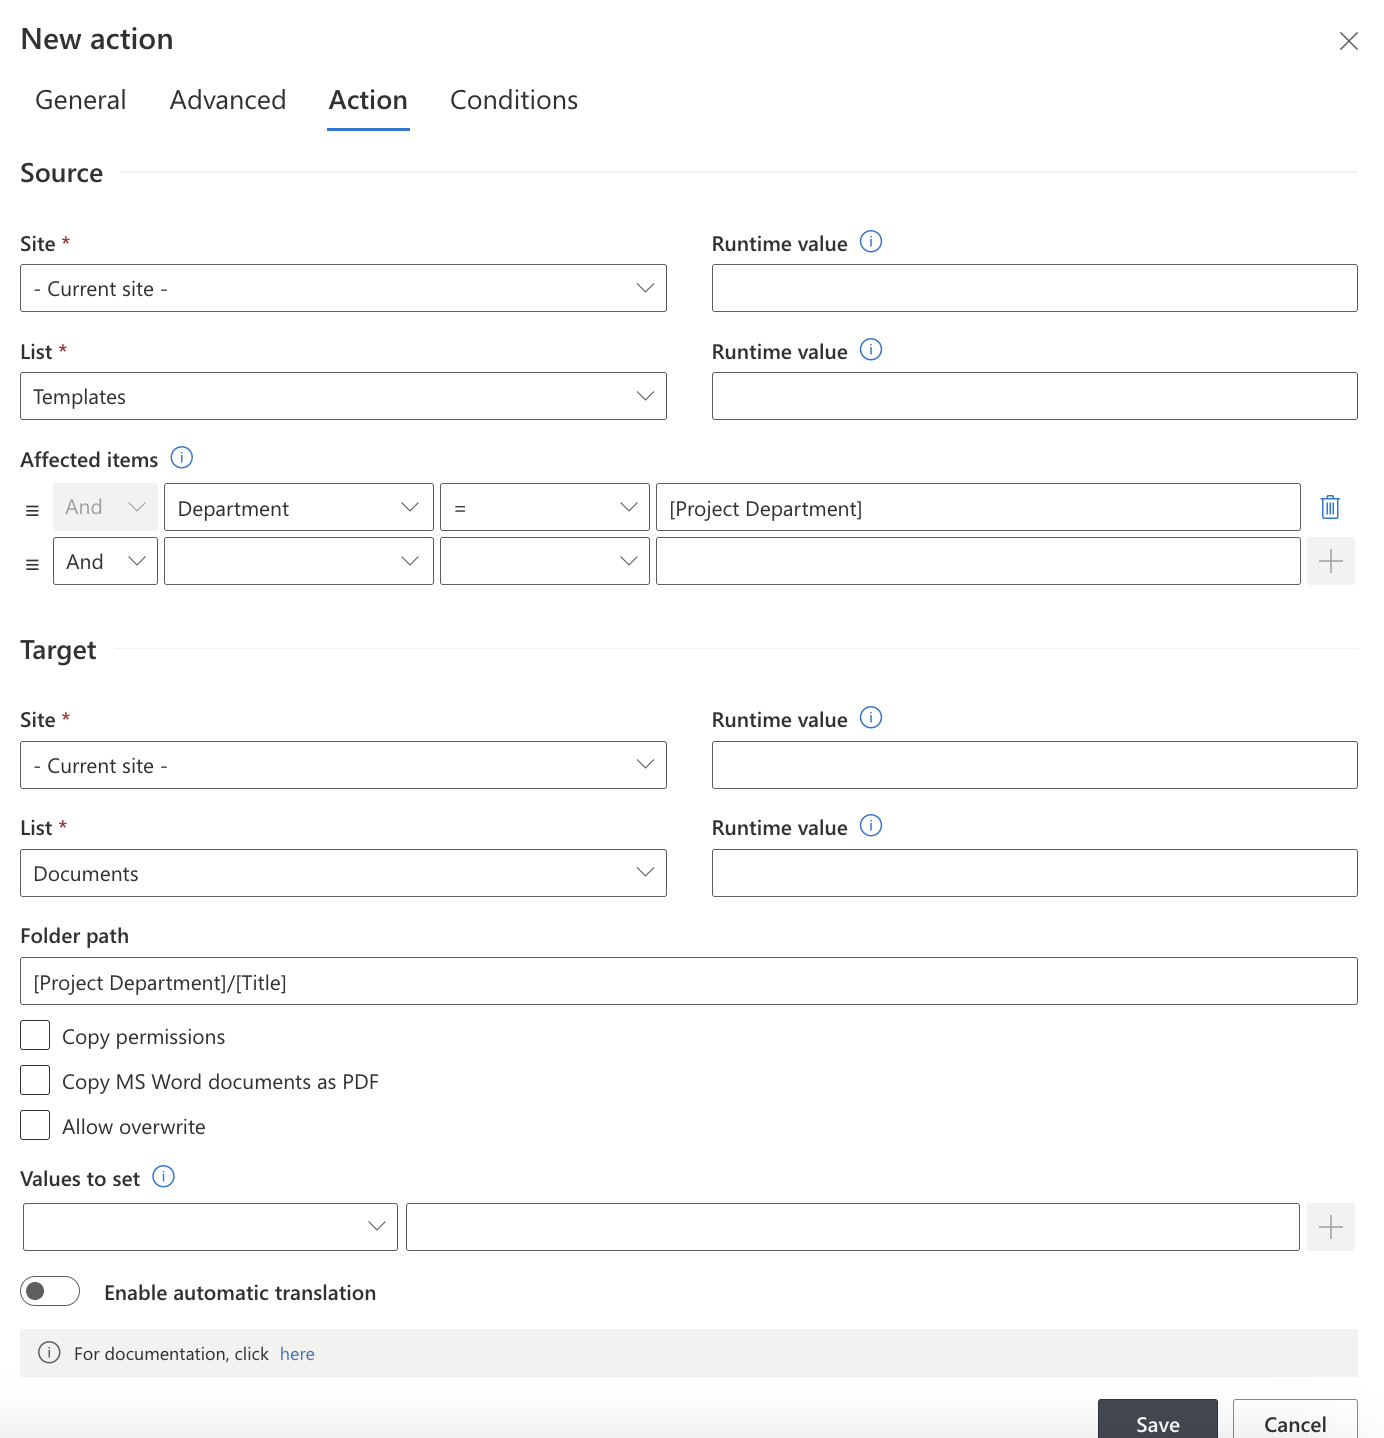
Step 3: Copy the Documents from the Templates Library to the Project Folder
- Action: The third action copies the relevant documents from the Templates library into the newly created project folder in the Documents library. The templates are selected based on the Project Department chosen for the project.
Example Workflow
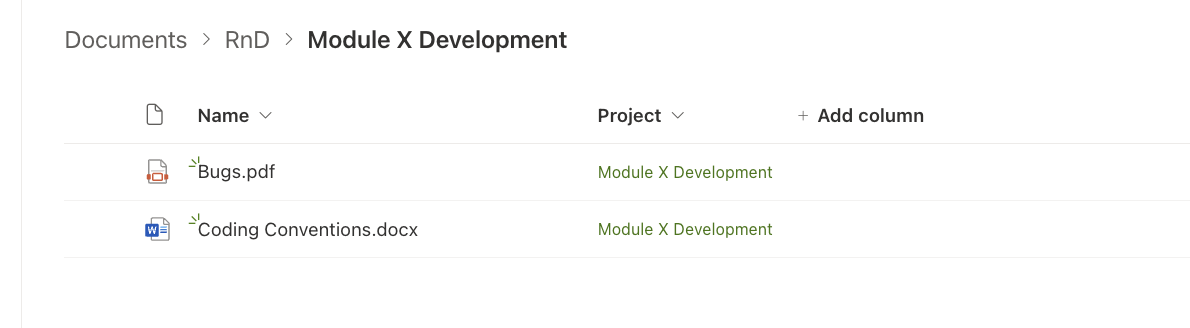
Let’s walk through an example where a new project is created in the Projects list.
Project Name: "Module X Development"
Project Department: "RnD"
The Following Actions Occur:
- Create the RnD Folder: A folder named "RnD" is created in the Documents library if it doesn't already exist.

- Create the Project Folder: A folder named "Module X Development" is created under the "RnD" folder.

- Copy Documents: Relevant documents associated with the RnD department (from the Templates library) are copied into the RnD/Module X Development folder.
Summary of the Process
- A new project is entered into the Projects list.
- The following actions are automatically triggered:
- Create Department Folder: If it doesn't exist, a folder for the department is created.
- Create Project Folder: A folder named after the project is created under the department folder.
- Copy Documents: Department-specific templates are copied into the project folder.
- Each document added to the Documents library triggers the following action:
- The Project lookup column is set to the folder name (which is the project title), linking the document to its corresponding project.
Conclusion
By automating these steps, you can streamline your project document management and ensure that all necessary templates are properly copied, organized, and associated with the correct project. This process not only saves time but also ensures that documents are easy to find and access, improving overall project efficiency.
Using Infowise Ultimate Forms and SharePoint, you can create a fully automated system that enhances project management workflows, reduces manual errors, and improves team collaboration.
With this automation in place, you'll be able to focus more on the content of the projects and less on the management of the documents. It's a powerful way to integrate document management with your project tracking system and ensure smooth project execution.
Add your comment