Introduction
Electronic signatures has been a feature of Ultimate Forms from the very beginning. It's easy to sign SharePoint list items and document metadata using any of the available signature providers and then automatically track any changes to the signed information. Our customers have been successfully using it in a variety of applications, including regulatory compliance.
We've long been asked about the ability to add signatures within documents themselves. Our signature implementation does not allow it, as it adds a signature to list items only.
We are happy to announce that through a partnership with DocuSign we are now able to implement this functionality! You will be able to use our Print functionality to generate documents in various formats, then send them to DocuSign for signature collections. Our initial version will allow to add one or more signatures by a single signer and store the signed document within DocuSign.
You will need a subscription with DocuSign online service to be able to leverage this integration.
How it's done with DocuSign
Let me show you how I implemented a simple process of requesting a manager signature within a PDF document I'm generating based on some list item column values. First we will create a print template that will control how our list item converts into a document, then we will add a print action that will automate the process of document generation and then send it to DocuSign for digital signature collection. This automated signature process enhances efficiency and ensures that all necessary approvals are captured.
Print template
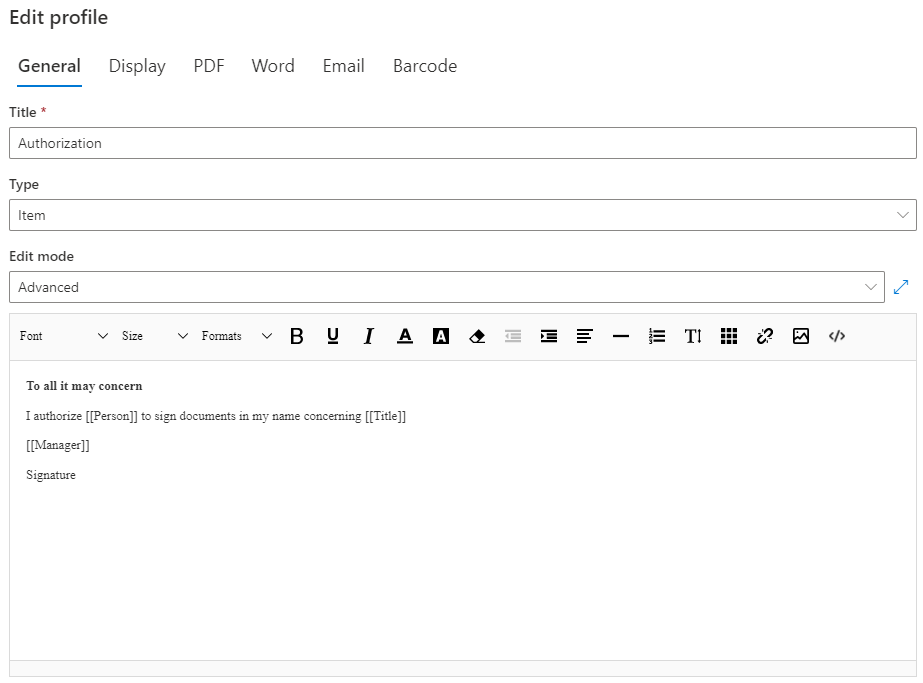
First, we will need to create a new Print template. Go into Ultimate Forms -> Print and export, then click on Add new profile. Note that I'm using Advanced edit mode, so I'm able generate my document in the exact format I need, as we all placing signature placehoders where I want them. I decided to use the word Signature where I want users to place their signatures. I do not have to use any particular word, it's my choice to use the word Signature.
Action
Once I've created the print template, I will now create a Print action to implement the actual process. Go into Actions, then click Add new profile. Choose Print list items action type. This action will generate and send documents for signature directly from SharePoint, streamlining the workflow.
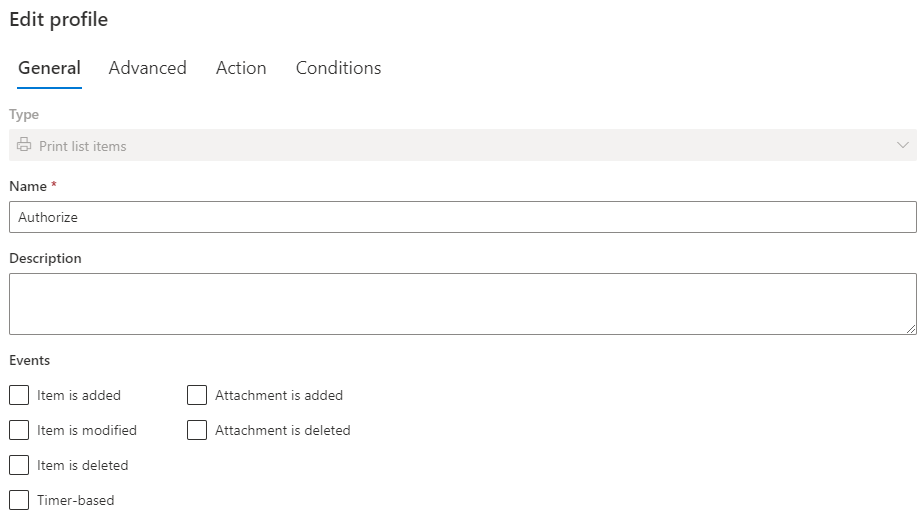
I'm calling my action Authorize, note that I unchecked all Events, as I want to trigger this action manually.
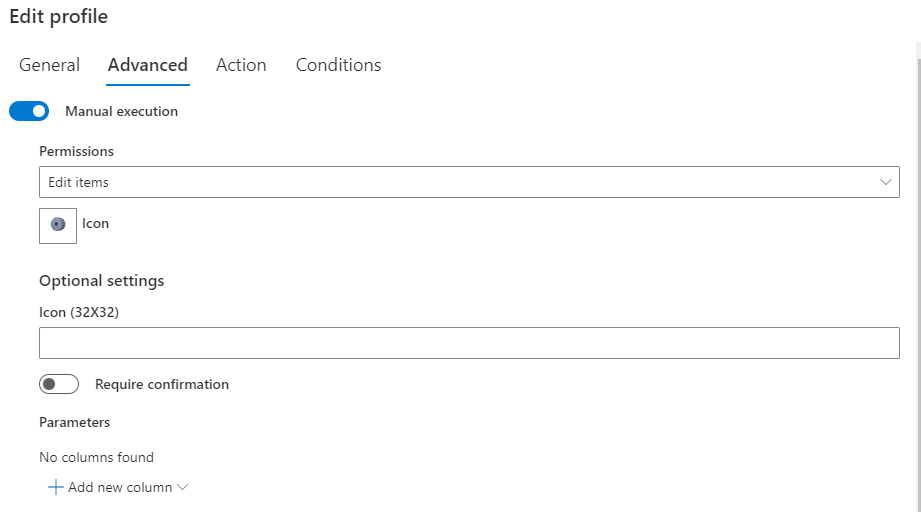
Under Advanced settings, I'm checking Manual execution. It allows users to trigger the action either from SharePoint list views or from SharePoint forms. When triggering from views, you can select and send multiple items at the same time.
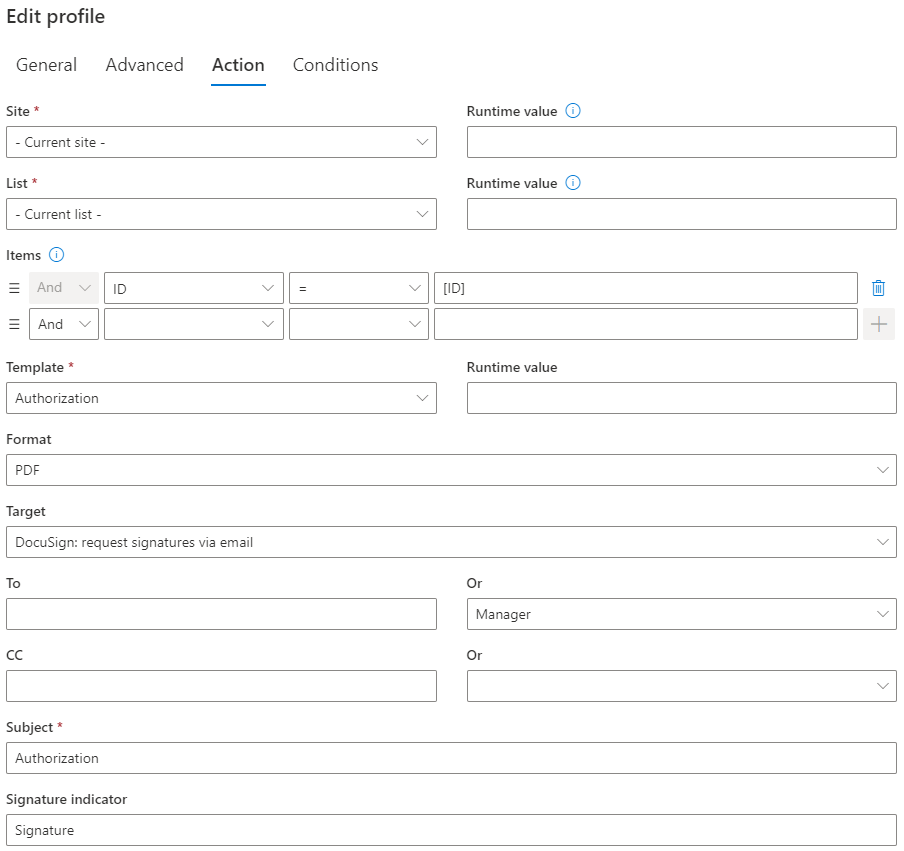
Under Action settings, select the Print template we created earlier, PDF format (although you may also use any other format, as well as Word format based on a pre-defined Word document. Under Target select DocuSign: request signatures via email. Under To, select our signer, that will be the value of Manager column, this way we are determining the value dynamically. Subject field will contain the email subject (and it's also used as the file name of the signed document). Under Signature indicator enter the same exact signature placeholder we decided to use in our print template.
Note that this process can also involve external parties, ensuring that all necessary stakeholders can review and sign the document.
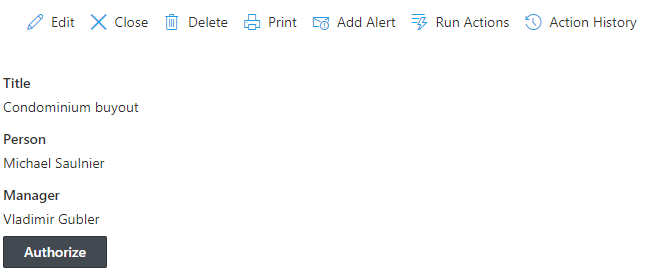
I've create a form for the list item using Form Designer and added a button of type Trigger action, binding it to the newly created action. That allows users to trigger the signing process directly from the form.
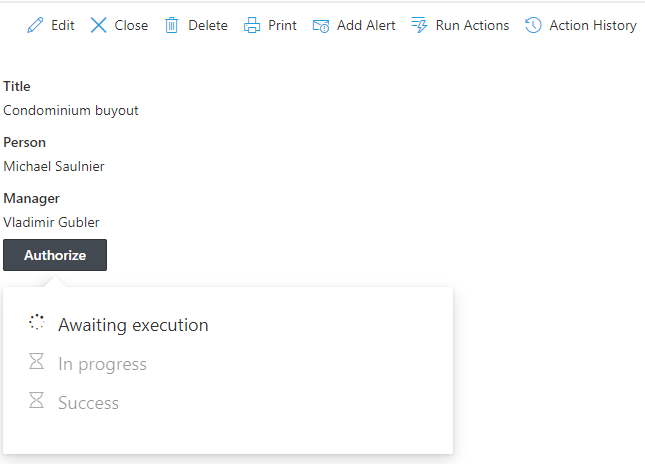
When the user clicks on the button, the process is started and an interactive progress window is shown.
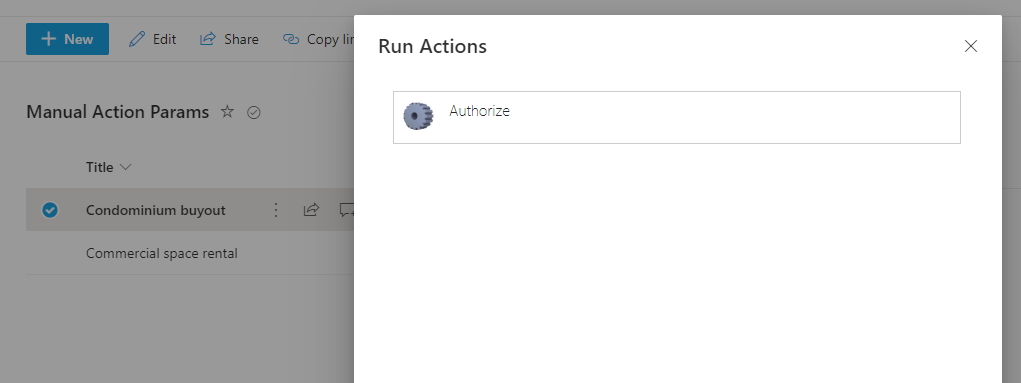
Same can be done from list views by selecting a list item, clicking on Run Actions from the SharePoint list toolbar, then clicking on our action. In this scenario, custom SharePoint form is not required.
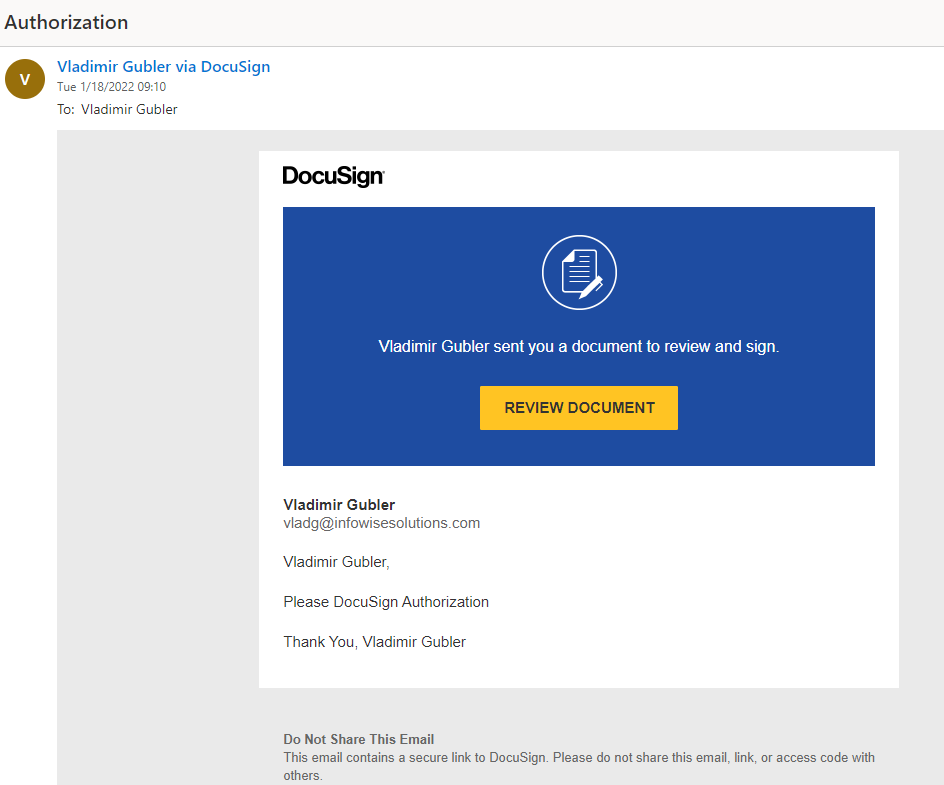
Once the action is completed, an email is sent to the manager, inviting them to review and sign the document via DocuSign.
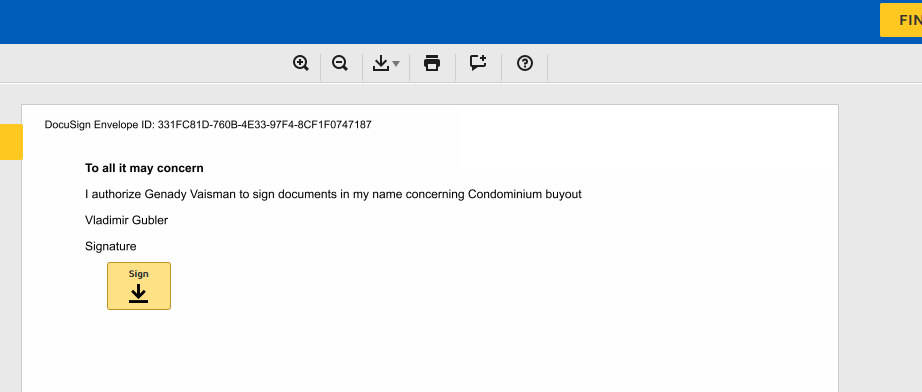
Under each Signature placeholder they will be able to place their digital signature, then click on Finish.
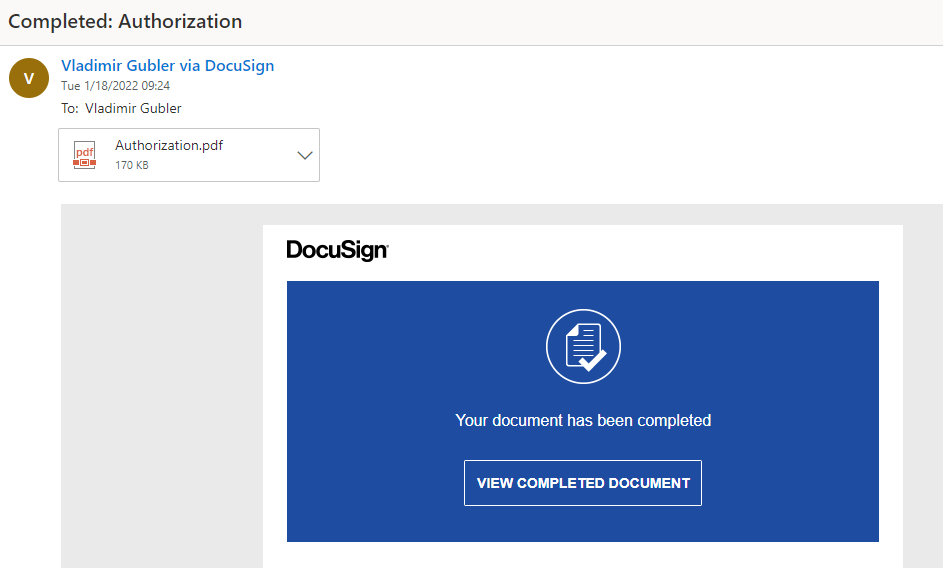
A signed document is delivered to the action creator in PDF format.
Conclusion
As you can see, the process is quite simple and doesn't take more than just a few minutes to implement, while allowing you to integrate advanced functionality in your system. Digital signatures are becoming a crucial part of any business process in today's world and it's essential to be able to integrate them into your processes in fast and efficient manner, as I showed you today. Using DocuSign digital signature integration, you can be sure that the most secure industry-standard approach is taken!
Add your comment