The process of adding the web part is similar to adding any other built-in web part:
- Edit the page
- Add the web part to any web part zone
After adding, set the web part properties:
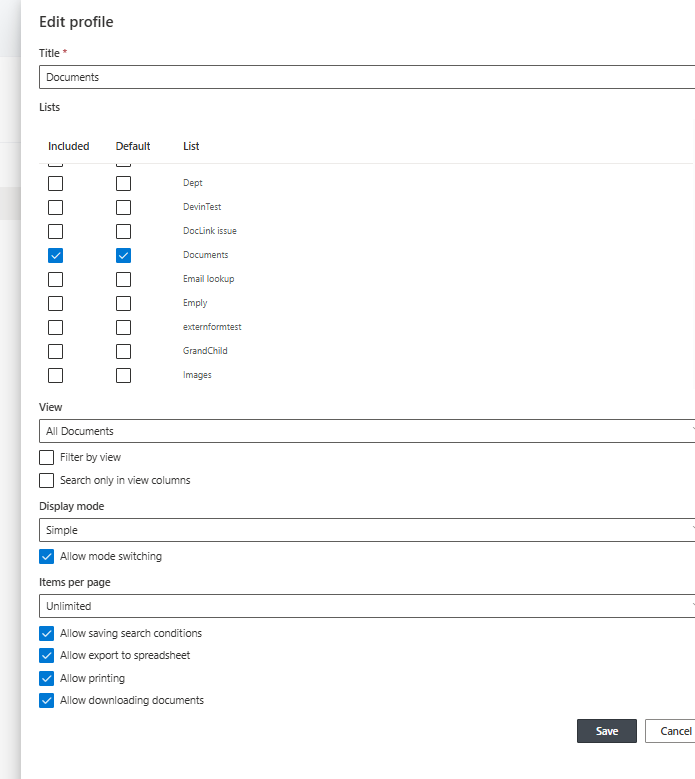
- Target lists – required, select the lists that will display in the search options
- Default List – define pre-selected list to search
- Default View – define pre-selected list view to search or display
- Filter by view – only search item in the selected view (or default view if none is selected). Any filters present in the view are applied within the search query.
- Search only in view columns – the search is performed only within the selected view’s columns (or default view’s columns if none is selected). In Advanced mode you can only use these columns in conditions.
- Default Mode - select the default search mode (Simple search or Advanced search)
- Allow Modes Switching - will the user be allowed to switch between Simple and Advanced modes from the web part itself.
- Page size – enter a number greater than zero to enable paging of search results
- Allow saving search conditions – allow users save their search conditions in Advanced mode for re-use
- Export To Spreadsheet - users will be able to export the search results into a spreadsheet file
- Allow Printing - allow printing of the results. Note: this option will be available, only when the Print component is activated on the current site

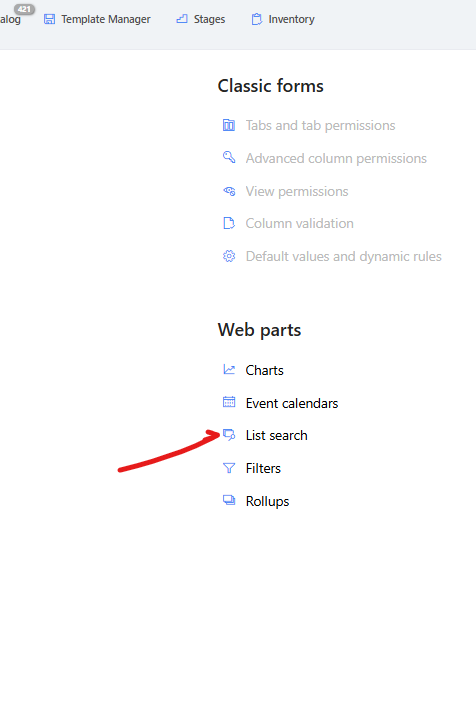
To configure for use in M365 tou need to first create a List Search Profile in the Infowise app.
and define how the webpart profile will work
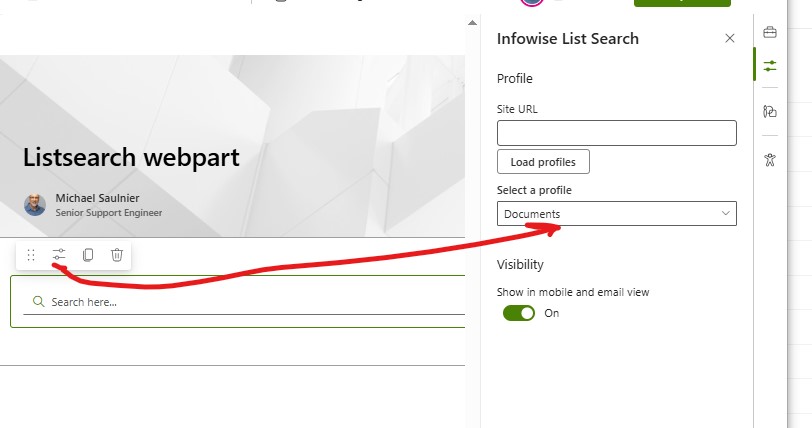
Once this profile is created you can now add the webpart to the site pages and using the webpart properties select that profile for that page
Get helpful videos
Last modified: 9/10/2025 5:05 PM
Loading...
Add your comment
Comments are not meant for support. If you experiencing an issue, please open a support request.
Reply to: from