This feature enables integration of automatic content translation into Actions. The Copy list item action automatically translates text column values, and, in case of document libraries, supported file types as well (Word, Excel, PowerPoint and PDF).
The supported translation providers include Google Cloud Translation and Azure Cognitive Services.
Note: That these are paid services and you need to establish a payment profile with the provider, although small monthly volumes might fall under the free tier.
Azure Cognitive Services
First you need to create a Translator in your Azure, then configure a Copy list item action that will copy an item while translating its column values.
- Log into Azure.
- In the search box type Translators.
- Click on Create.
- Enter the required information. For pricing tier breakdown, go to Azure Pricing.
- Review and create your translator
- Go to the new resource and click on Keys and Endpoint on the left
- Copy one of the keys and the location, you will need both when you configure your action
Now click here to configure the Copy action.
This provider is only able to translate any kind of text column data (single and multiple lines of text), not documents. To support translation of documents you will need to use Google Cloud Translation Services.
Google Cloud Translation Services
You first need to configure the service under your Google Cloud account.
- Log into your Google Cloud Console
- Start with a creation of a new project. In this example it is called Translations, but you can use any name you like. You can also leverage an existing project if you have one.
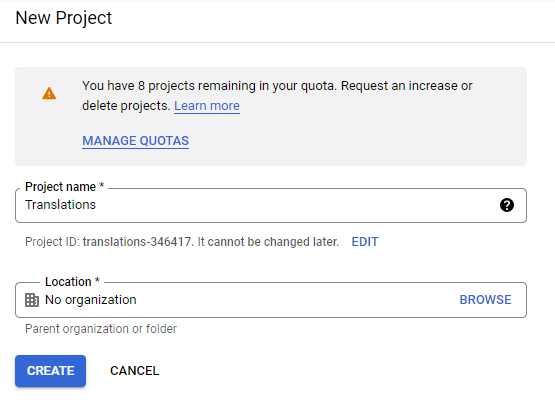
- Take a note of the Project ID, it will be required it later.
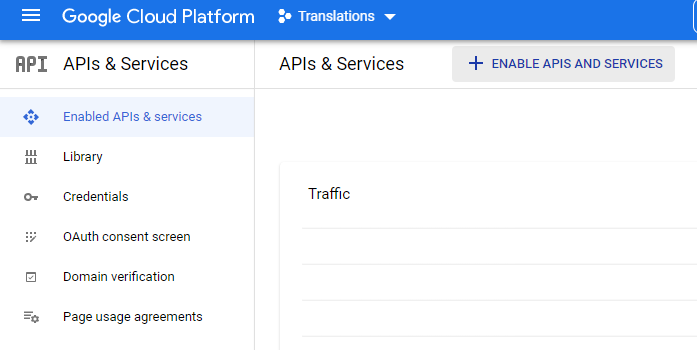
- Next click on Enabled APIs & Services of the project, then click on ENABLE APIS AND SERVICES
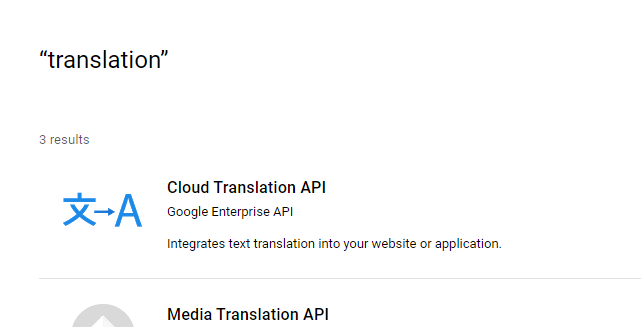
- Search for "translation"
![]()
- And choose "Cloud Translation API"
- Click on Enable for the API

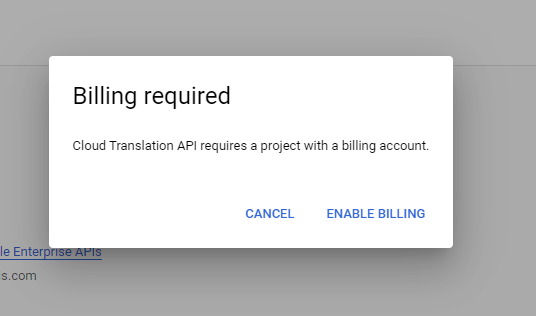
- If you haven't previously enabled billing on your account, you will be prompted to do it now. Translation is a pay-as-you-go service. See Google pricing information under Advanced section.
- Next click on Credentials in the left menu to generate credentials that the app will use to gain access to the service

- We need to create a new service account, so click on Create Credentials, then Service Account
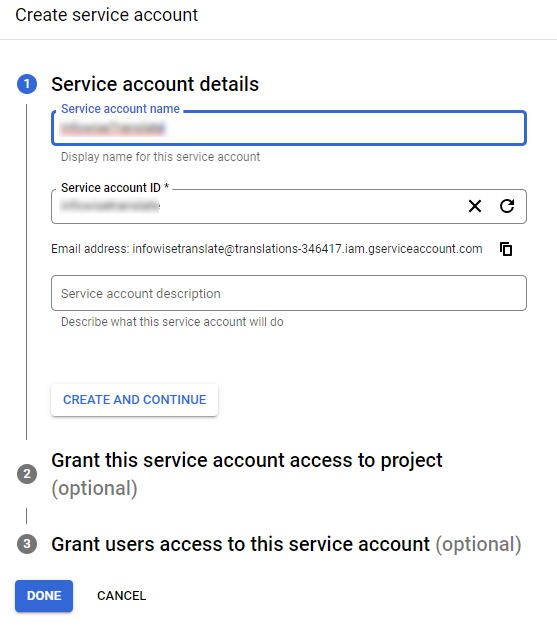
- Click on Create and Continue, then enter Translation in the search box for the role and select Cloud Translation API User. That will ensure the service account is allowed to perform calls to the translation service.

- Once you create the service account and see it in the list, you can generate keys, which will then be given to our app. Click on Manage Keys under Actions
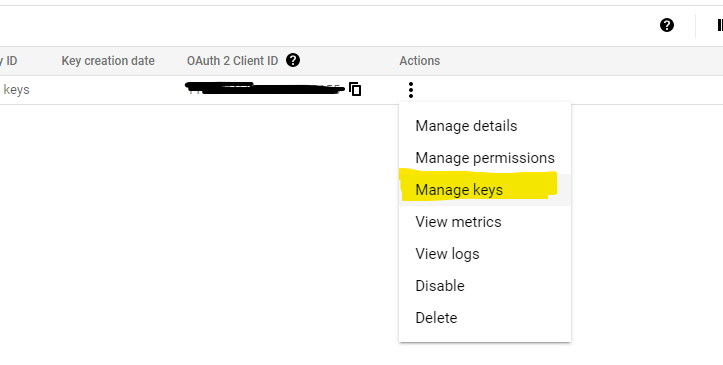
- Then click on Create new key under Add key

- Create a new key in JSON format. It will download a text file to your computer, make sure to keep it in a safe place.

- We are done on the Google side.
Creating the Copy Action using Translation Services
Now go into your list or document library, click on Design -> Actions -> and start creating your new Copy list items action
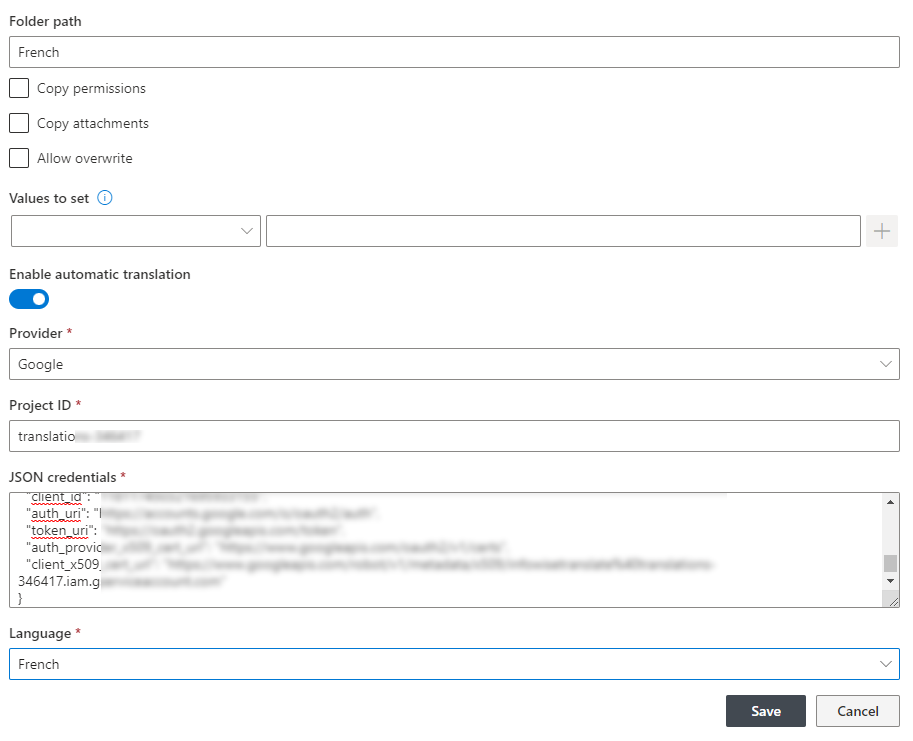
- Under Action settings, toggle Enable automatic translation on.
- Under Project ID, enter the project ID from google, as we created it earlier.
- Under JSON credentials, past the contents of the JSON key file we downloaded.
- Select the translation target language and save the action.
Google Translation Services setup
Azure Translation Services Setup

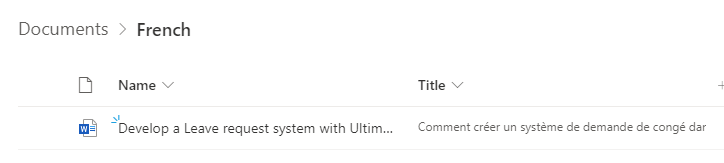
- In this example, the action is configured as a manual action. On a click it will translate a document into French and place the translated copy under French folder

- Once the action is executed, the French folder will contain the new document.
As you can see, all text columns are translated as well, as shown here with Title column.
- And if you open the document itself, you can see that it's in French

The process is explained in more detail in our blog article, read it here