You can generate and upload documents based on the form data. Supported document formats are Word, Excel and comma/tab delimited text files. Form data will either generate a new file (always for Word, otherwise based on the uniqueness of the file name) or append data to an existing file with the same name.
You can upload your document to a document management system:
- SharePoint document library / OneDrive
- FTP/FTP-S
- Google Drive
- Dropbox
- Box
Start with defining the file properties:
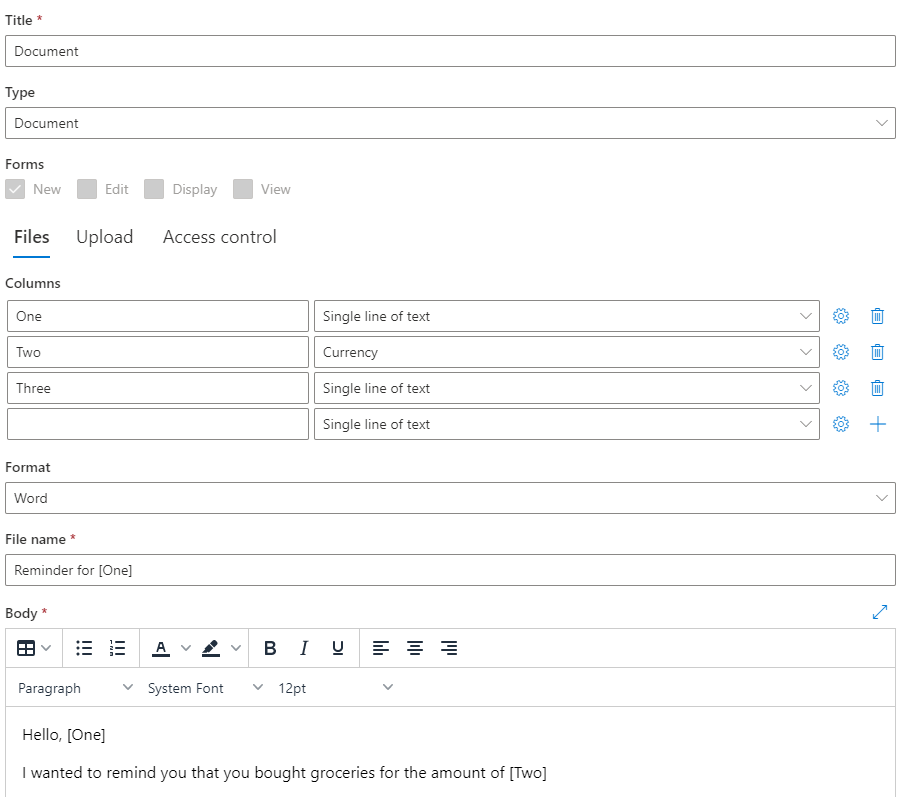
- Define columns which you want to include in your form
- Select document format
- Enter file name, it may include column values and/or functions
- If you picked Word, specify the document body template, while including column values within the text
Now specify your upload settings:
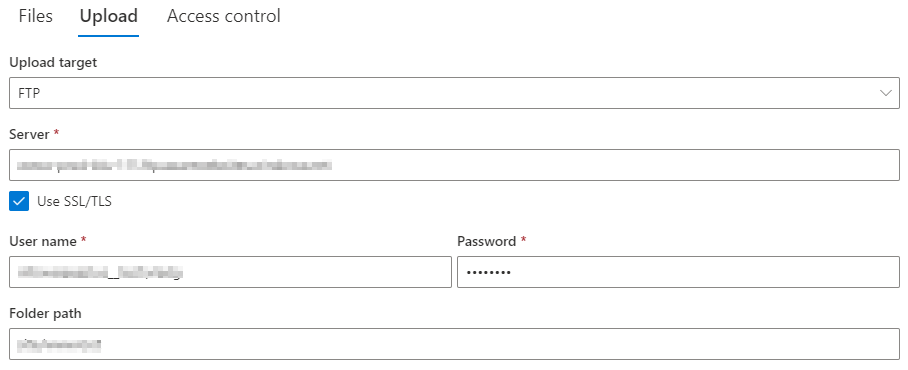
- Select upload target type
- For SharePoint, enter site URL, click Connect, then pick document library. You need to grant permissions to access SharePoint, which can only be granted by a Global Administrator of the tenant. Note that the connection can target any tenant, as long as you have permissions for it.
- For FTP, enter server URL, user name + password and upload directory path, relative to root.
- For Dropbox, click Connect and log in with your Dropbox credentials
- For Box, see instructions below
NOTE: upload will automatically overwrite any existing file with the same name. If using SharePoint, make sure that the existing file, if any, is not checked out, as that will result in error and loss of form data.
Connecting to Box
To connect to Box, you need to create an app in Box, export JSON configuration file and copy the file's content into the JSON property of the data connection.
- Log into Box as an administrator.
- Click on Dev Console in the bottom of the left menu.
- Click on Create New App.
- Click on Custom App.
- Enter Infowise Ultimate Forms (but the actual name doesn't matter) at the bottom and click on Create App.
- Under Application Scopes check Write all files and folders stored in Box.
- Under Add and Manage Public Keys click on Generate a Public/Private key pair.
- A JSON file will be downloaded, you will need the contents of this file for your data connection.
- Under Authorization click on Review and Submit.
- Once authorized by an admin in your organization, who can also be you, the app is ready to be used by the data connection.