NOTE: in Modern forms you can enjoy much higher levels of control and flexibility, such as permission rules on any types of controls and cascading inherited permissions. It is recommended to upgrade to Modern forms at the earliest convenience.
Optionally, you can add permissions to the tab.
- Click on the Permissions section to open that section.
- Define if you want the tab to be editable, read-only or hidden
- Define to which forms you want to apply the permission rule
- Optionally, enter the user/group to assign the rule to. You can leave this field empty to create a rule that applies to all users. The following options are available:
- User is as specified or a member of the specified group (both AD and SharePoint groups are supported)
- User is not as specified or not a member of the specified group
- User is specified in Person or Group column of the List/Library (or member of the group specified in the column of the List/Library)
- User is in the Person or Group column of a look up item specified in the Lookup column. For example, when member of Manager column of the Department item selected in the Department column of the Purchase Request list.
- You can drag and drop the tabs on the tab list to change the order of the tabs. Note that the first tab on the list is always the default.
- Optionally add conditions to the rule:
- Check the Conditions checkbox to make the conditions section visible
- Choose columns, operator and value to create a condition, after that click on Add link button.
- Click the large Add button to add the permission rule
NOTE: When at least one permission exists for a tab, the tab is hidden, unless there is an explicit permission granting access to the user. For instance, when granting Write permission to a specific group, also grant Read permissions to other users (without specifying a group), otherwise no one else will be able to view the tab.

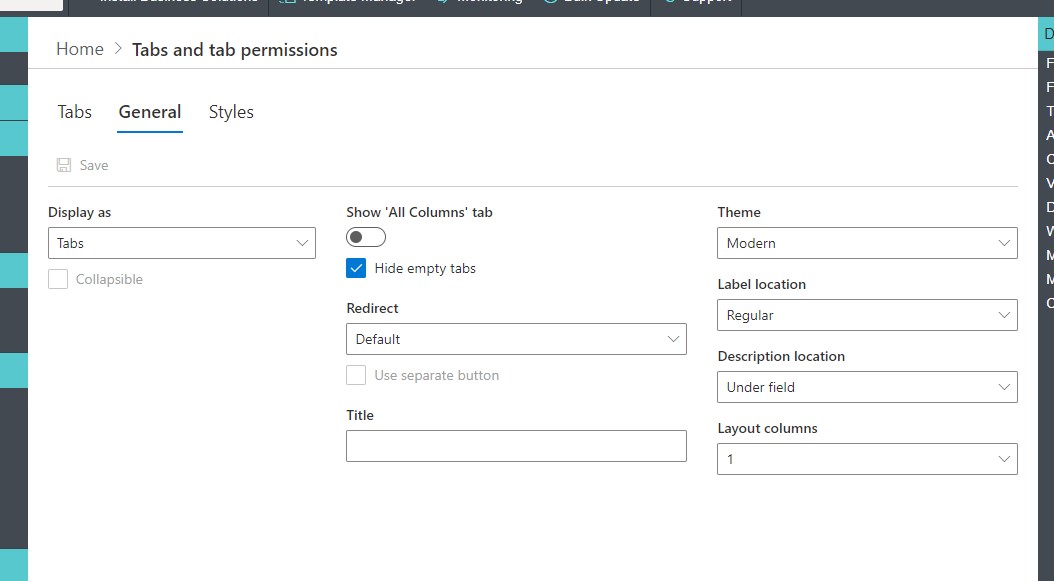
In the General Settings section you can define:
- Display tabs as groups (one below the other) or use the tabs for permissions only without any visual representation.
- In Groups mode, you can define the groups to be Collapsible. So only one group is expanded each time.
- Hide empty tabs – tabs without any columns are hidden. Otherwise the tab header is still visible.
- Display All Columns tab - whether or not to include All Columns tab. All Columns tab will include all list columns.
- Wizard mode (not available for groups and for Smart List Lite). Refer to Wizard Mode section of this user guide for more details.
- Title – add a form title above tabs. You can create your own title based on column values. Not available for groups.
- Theme - display tabs in one of 4 available themes. Not available for groups.
- Label location – either regular or above the column value.
- Description location – specifies whether to keep column descriptions under value, or show them under column labels or as pop-ups visible when hovering over the Help icon.
- Columns – you can display the fields in up to 5 layout columns side-by-side. Suggestion: use label location “Above field” when using multiple columns to save space.
NOTE: this setting can be overridden on the tab level.
Get helpful videos
Last modified: 11/27/2025 6:43 PM
Loading...
Add your comment
Comments are not meant for support. If you experiencing an issue, please open a support request.
Reply to: from