Once you created a tab, you need to assign columns to it. Begin by selecting the tab row in the TAB section.
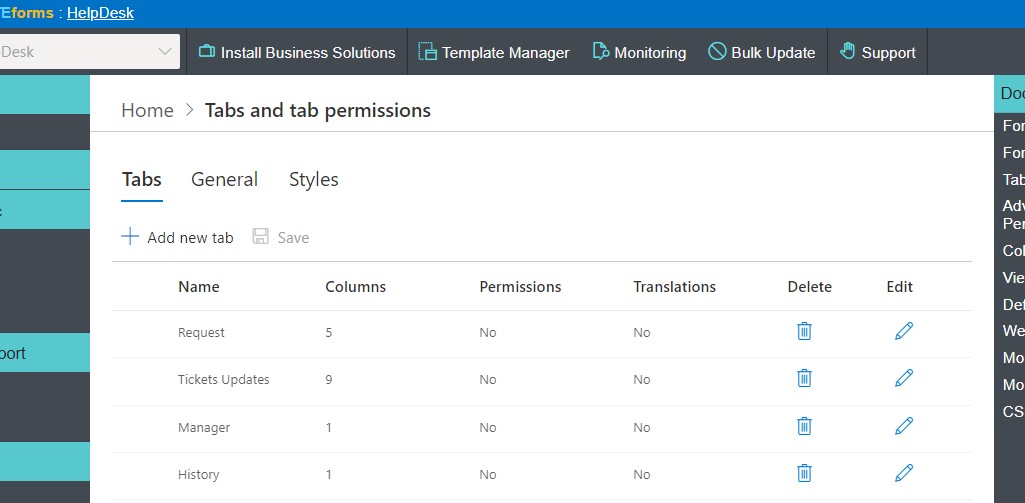
Then you can associate columns to that selected tab by selecting one or more column and pressing right arrow icon. Alternatively, you can double-click columns.
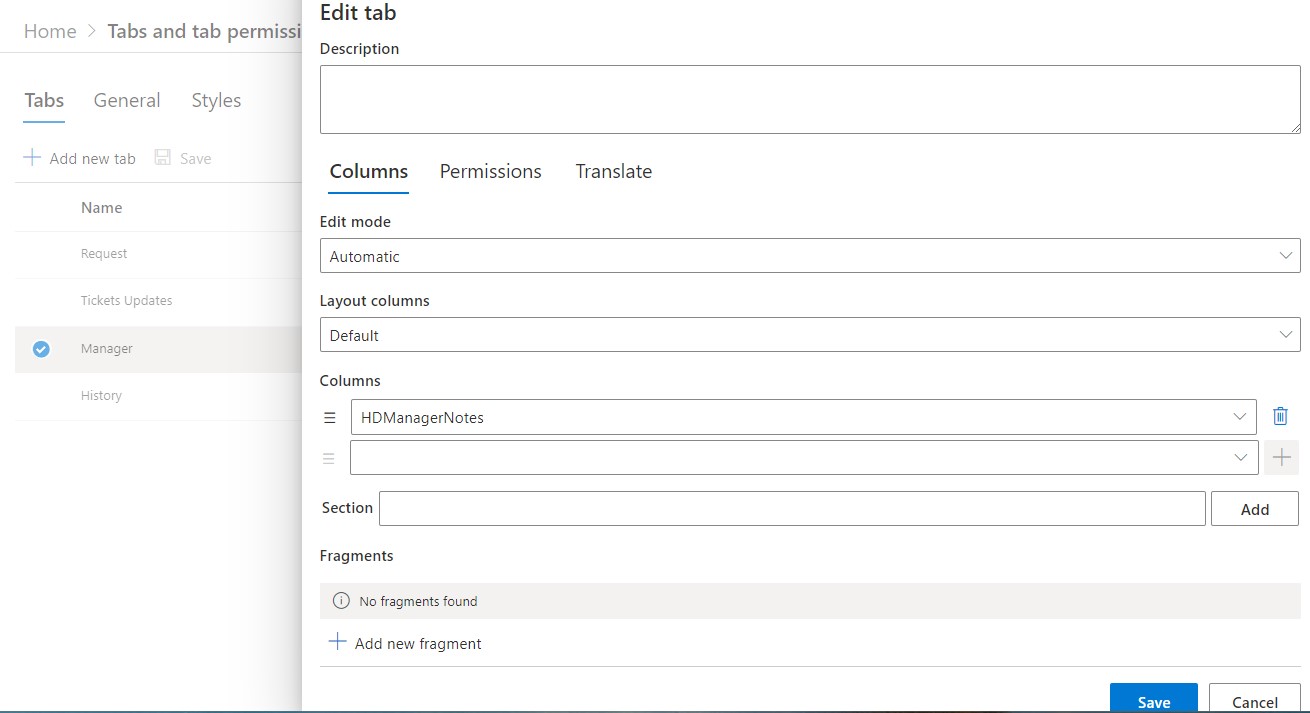
The column order control the layout order on the forms. You can easily change the desired column order.
When your tabs are set to display more than one layout column, the column order applies in left-right order (right-left in RTL languages). For instance, if you have 2 layout columns, the tab columns are positioned:
- First row left
- First row right
- Second row left
- Second row right
- ...
An alternative method of associating columns with a tab is by Manually designing the layout, using a rich text editor. Columns and their labels can be inserted by column selection and a click of the appropriate button.
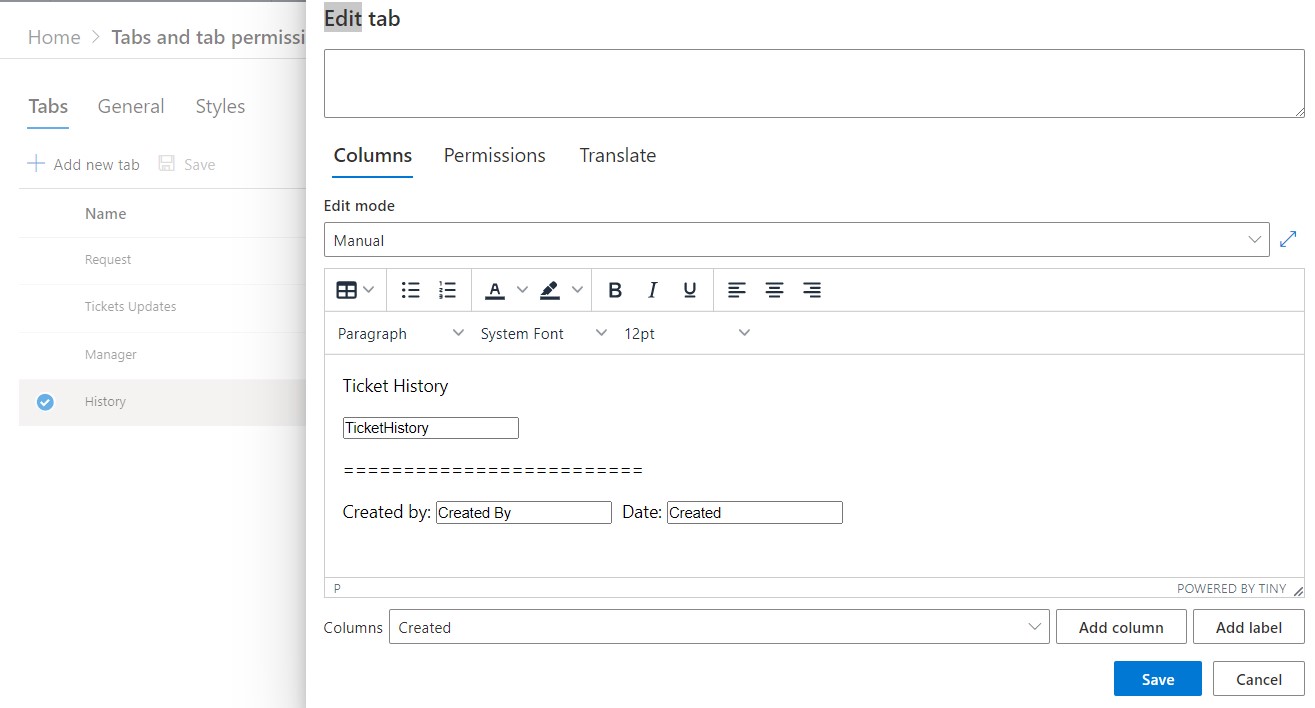
You can also include blank rows, section headers and fragments. Blank rows adds a separator between columns or rows of column in a form of an empty row. Section header adds a separator with a caption of your choosing.

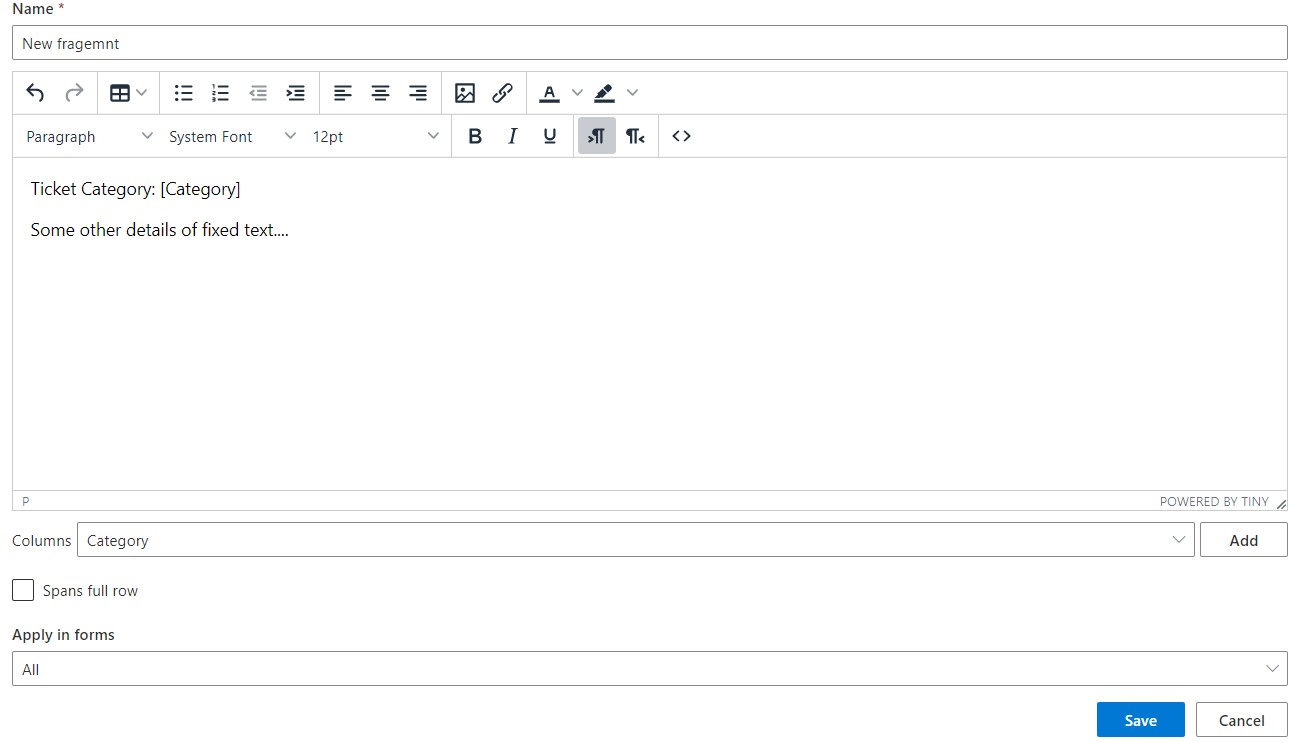
Fragments allow you to create a re-usable visual segment that can be placed on your tabs (column values, text, logos or any other set of visual elements). Fragments are defined for the whole list and can be added to multiple tabs in numerous locations. Fragments can be set to span one column or the whole row (only matters when your tab contains more than one layout column).
NOTE: when tabs visibility is set to Do Not Display, tab-column association is used for permissions only. Ordering, blank rows, sections and fragments are ignored.