The process of adding the web part is similar to adding any other built-in web part:
- Edit the page
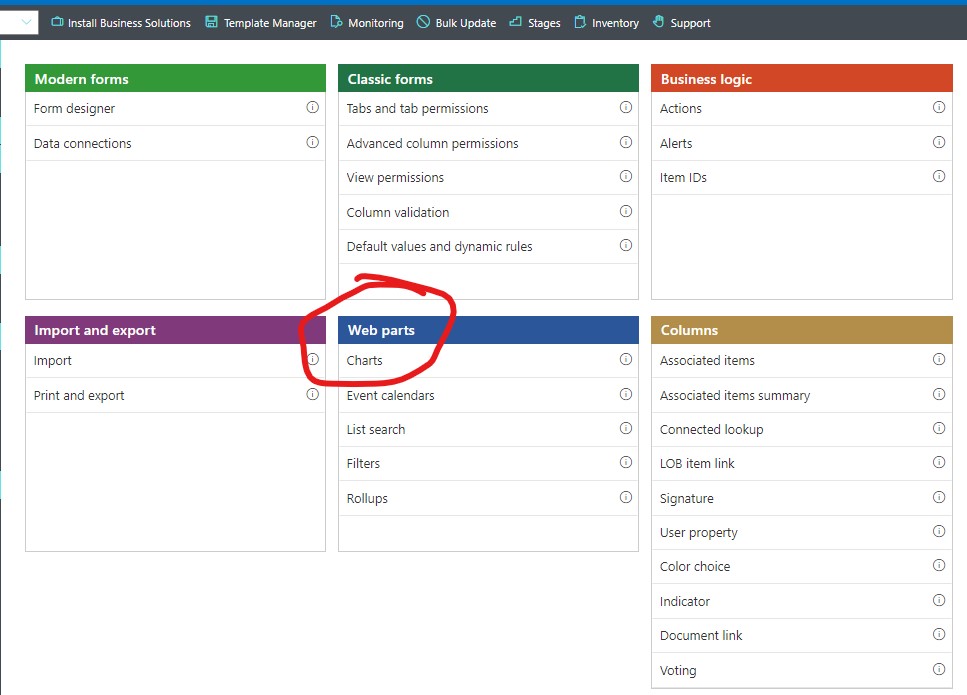
- Add the Infowise Calendar web part to a web part zone
Use the web part properties to define the data connections and the display parameters.
Data Settings sections allows you to input the data source settings.
NOTE: you can add as many data connections as you like, of different types, but you should make sure not to add too many slow responding data source not to slow down the whole web part page
When used for the first time, the web part has no data sources available. The tool pane will automatically enter the New Data Source mode.
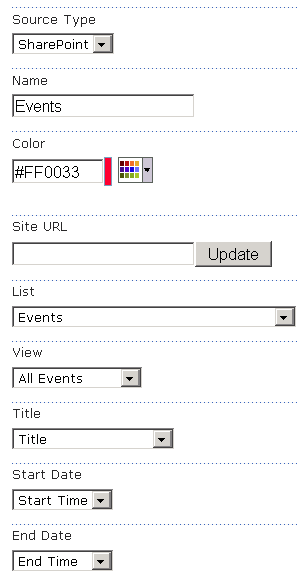
- Select the desired data source type. You can select one of the following:
- SharePoint – SharePoint lists and document libraries. The list can be located on any site of the farm as long as your users have the appropriate permissions.
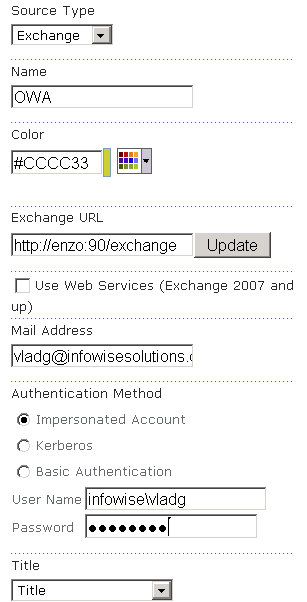
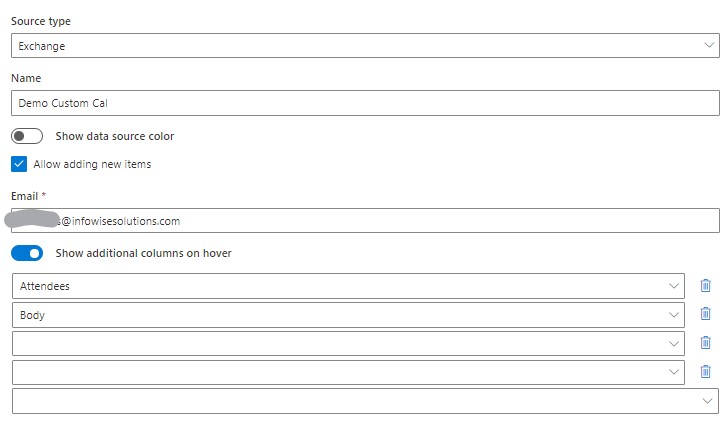
- Exchange – personal or shared calendars.
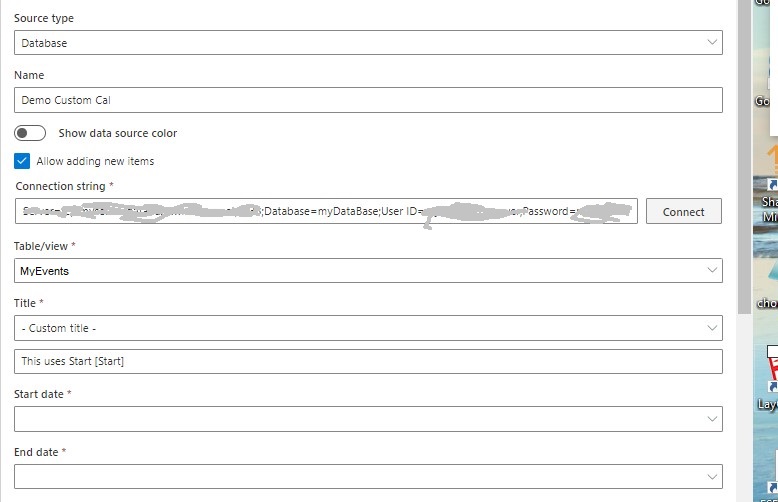
- Database – any database accessible using generic ODBC drivers (all mainstream databases are supported, you may need to download and install the appropriate drivers from the vendor’s site.
- Enter a recognizable data connection name
- Optionally, select a color to mark the events coming from this data source.
- Enter settings specific to the selected data source
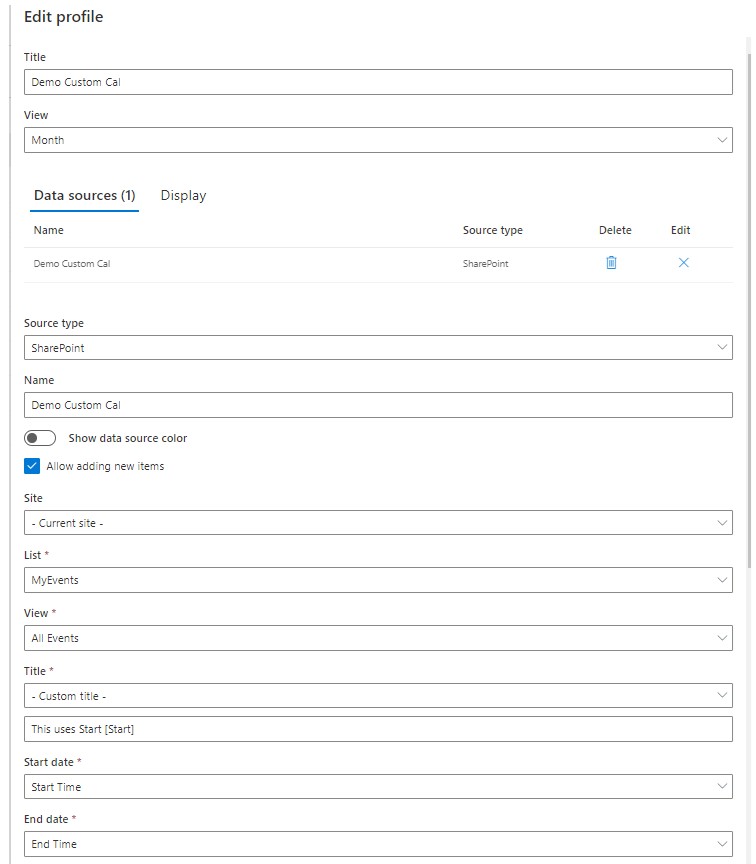
Defining a Calendar webpart for Microsoft 365
While to process for defining this webpart in Microsoft 365 is very similar, you will need to define most of the same information in the Infowise Calendar webpart interface as a Calendar webpart profile first before using it in the actual webpart page.
See the profiled setup beside below for consistency.
Then after creating the profile adding it to the webpart like this

SharePoint List and Document Libraries
- Site URL - enter the site URL (empty for the current site). The site must be located within the local farm.
- List - select a list to display, the selected list can be of any type, as long as it contains fields that can be mapped to the required fields of the web part (such as title, start date and end date)
- View - select a list view. Only items returned by the view will be displayed.
| On-Premise Webpart Editor | Microsoft 365 Calendar Profile |
 |
 |
Exchange
- Exchange URL – enter URL of the Exchange website, usually in the format of http://server/exchange or http://server (when used with Web Services).
- Mail Address – to target a shared calendar (such as a conference room) enter the appropriate user name or email address. If left blank, current user’s private calendar is shown.
- Authentication Method – select whether to use current user’s identity through Kerberos delegation or access Exchange as the impersonated account without delegation. In the first case you need to make sure Kerberos is enabled on the Exchange web application and the SharePoint server is set to be trusted for delegation in the Active Directory. In the second case, you need to make sure the impersonated account has appropriate access rights to the calendar to be shown.
| On-Premise Webpart Editor | Microsoft 365 Calendar Profile |
 |
 |
Database
- Connection String – enter ODBC connection string. Click Update to retrieve the list of tables
- Table – select one of the tables
| On-Premise Webpart Editor | Microsoft 365 Calendar Profile |
 |
 |
Field Mapping
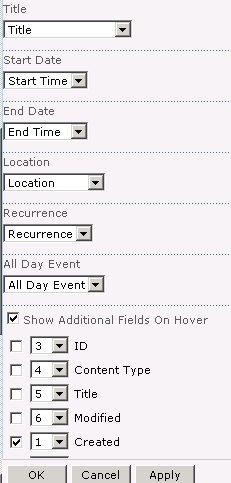
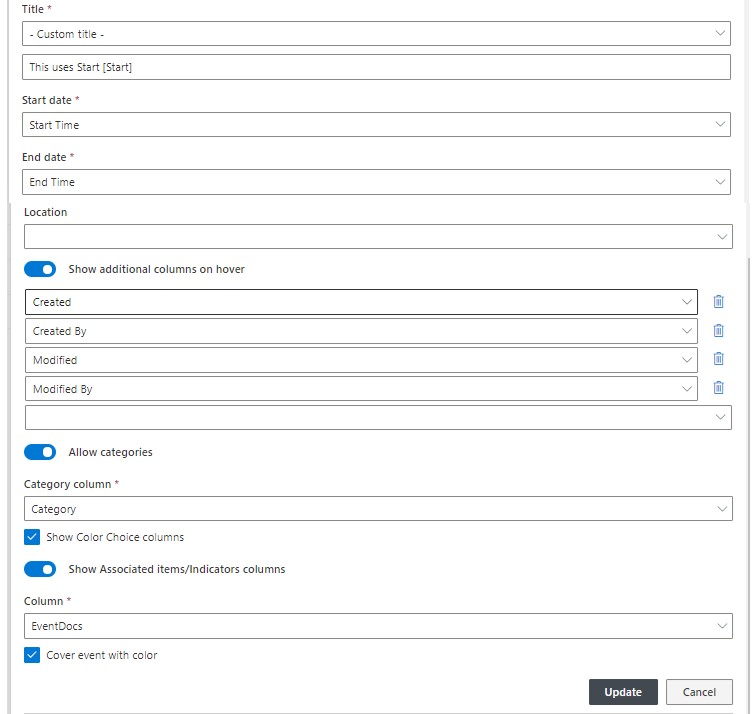
- Title – set the title column of the event. Any field of the event can be set. You can also use a custom template, by selecting the value Custom Pattern in the dropdown box and creating the pattern in the Custom Pattern textbox. The pattern can contain any character as well as field value from the item itself. To specify a field value, enter the field name surrounded by square brackets. For example, to create a custom pattern that displays the title field and the creator name in parenthesis enter the following: [Title] ([Author]). Use [$DataSource$] token to include the data source name.
- Start Date – defines the start date field of events.
- End Date - defines the end date field of events.
- Location – specifies field containing the location information of events. This field is optional.
- Recurrence – specifies field containing the recurrence information of events. This field is optional. Recurrence is not supported in databases.
- All Day Event – specifies field defining whether events span the whole day. This field is optional. In databases, any Boolean column can be mapped to this setting.
- Show Additional Fields on Hover – specifies appearance and order of additional fields that are shown when the mouse pointer hovers over an event. Each data connection defines its own additional fields, but the checkbox whether to show the additional fields at all is common to all data connections.
| On-Premise Webpart Editor | Microsoft 365 Calendar Profile |
 |
 |
Event Categories
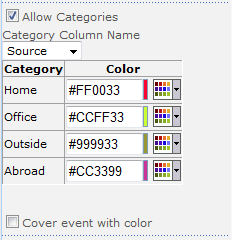
- Allow Categories- specifies whether to allow categories. In SharePoint lists, category field can be a choice field or a lookup field. The Category Column Name drop-down box contains both types of columns from the events list. In databases any text field can be used as category. Categories are not supported in Exchange calendars.
- If a choice field is selected, all the possible options will be show and a color can be selected for each option:
- If a lookup field is selected, choose the column in the lookup list that contains color values. The column must of type single line of text and can contain color names or hexadecimal values. Refer to section 2 for additional information
- Cover event with color – set whether to color the event’s entire surface or place a small square next to the event title. Please note that this setting applies to the data source color as well.
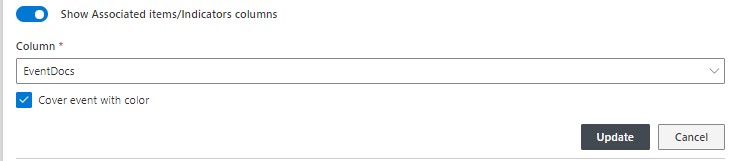
Color Field Integration
If you installed Infowise Color Field and have one or more Color fields in your lists, you can allow your calendar to show a color indicator[s] next to the event title. All color choice fields are shown, with a color box specific to the selected value of each column.
| On-Premise Webpart Editor | Microsoft 365 Calendar Profile |
 |
 |
Associated Tasks
Associated tasks allow you to create and managed attached tasks from within any SharePoint list item. In the context of Infowise Event Calendar Plus you can view and edit tasks from within the calendar itself. The functionality is available for any SharePoint data source.
NOTE: the following functionality is only available when Infowise Associated Items column is also installed and used. You can find additional information on the component here.
Once the functionality is enabled, you will see a progress bar under each event that possesses associated tasks. The progress bar visually indicates the percentage of tasks that have been completed. Clicking on the progress bar displays an overlay window that shows that task information and allows setting task status as Completed.
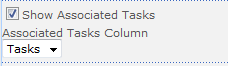
- Show Associated Tasks – set to enable the progress bar of percentage of completed tasks. The checkbox is only enabled for the WSS (SharePoint) data source.
- Associated Tasks Column – select a column of type Associated Tasks to use for the retrieving information on the associated tasks.
| On-Premise Webpart Editor | Microsoft 365 Calendar Profile |
 |
Assoicate tasks not implemented yet for Microsoft 365 |
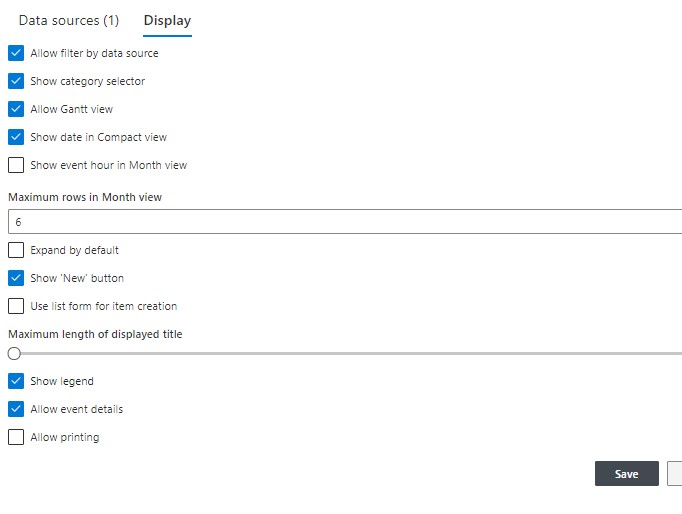
View Settings
These settings define the way calendars appear and behave.
| On-Premise Webpart Editor | Microsoft 365 Calendar Profile |
 |
 |
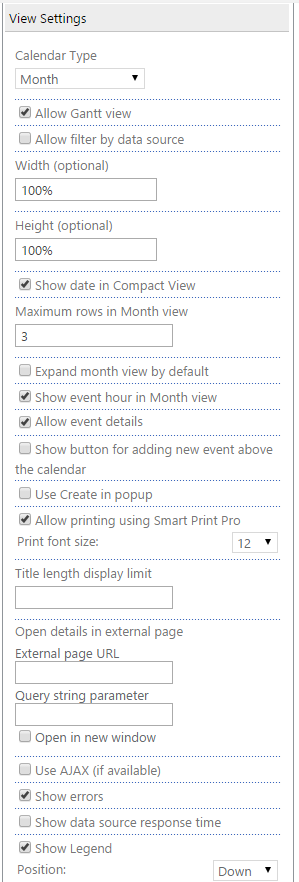
- Calendar Type – select one of the available calendar types.
- Width (optional) – define calendar width in pixels or percentage. Please note that the calendar may be rendered wider if the content is too large.
- Height (optional) – define calendar height in pixels or percentage. Please note that the calendar may be rendered taller if the content is too large.
- Show date in Compact View – only applies to the Compact view. Specify whether or not to show date part of start time of events on mouse over.
- Maximum rows in Month View – only applies to the Month view. Specify the number of event rows for each day. If the number of events exceeds the number of rows, a link to the Day view will be shown in place of excessive events. The default value is 6.
- Show event hour in Month View – only applies to the Month view. Specify whether or not to show events’ start time above events’ title.
- Use Create in popup – specify whether to allow creating new event directly from a popup when right-clicking the calendar. If not enabled, a context menu will be shown listing the SharePoint data sources, where you can click on the data source to create a new event in to be transferred to the New page of that list. You must use this option to be able to add new items to non-SharePoint data sources.
- Allow printing using Print – when you have the Print component of Ultimate Forms installed and activated, you can select this checkbox to display a print icon above the calendar. Clicking the icon will display the calendar in a print preview window. Then you can print it, save it as PDF or email it.
- Title length display limit – optional, specify the maximum shown length of event title. Titles exceeding this value will be truncated.
- Open details in external page – allows drill down view in a different calendar. For instance, a Day view can be shown on a different page when a day is clicked in the Compact view.
- External page URL – full URL of the external page, including the ASPX file name
- Query string parameter – parameter to pass containing date and view type. The name of the parameters depends on your setup. Usually it is the same name you see in the address bar when performing actions on a calendar. The parameter is specific to each calendar web part and is in format [ZoneID]_[ZoneIndex], such as Right_0. Just perform an action on the target calendar to find out the name of the parameter. Please not that when you use the Calendar Connector web part, you need to set this value to the same value you specified in the Connector Parameter Name field.
- Open in new window – whether or not open the details page in a new window.
- Use AJAX - load the content asynchronously.
- Show errors - display errors that might occur during the rendering process.
- Show data source response time - shows how much time took the fetch process of each data source.
- Show Legend - show legend of the data sources and the categories. Position - will add the legend above or below the calendar content.