
Introduction
SMS messages are a great way to send notifications. When you need to make sure the message reaches its recipient fast and is read right away, SMS is the way to go. Using the Actions component of Ultimate Forms you can easily implement this functionality both on premises and in the cloud. You don't need to deal without complex configuration, integrating the text message functionality in your work processes.
Let's do it
In this example, we are going to be sending a text message to a user for whom we create a task in a Tasks list. Once a task is created and the user is specified in the Assigned To column, a text message with the task title will be automatically sent. Additionally, we will send a text message when Assigned To value changes in subsequent updates to the item.
Register with Twilio
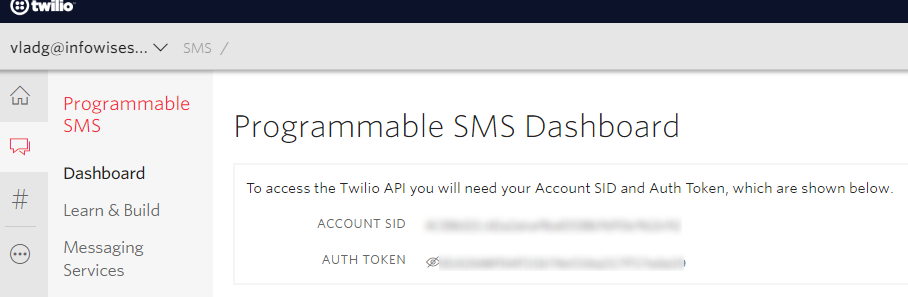
First, we need to sign up for an SMS service. There are many options available out there. But we will be using Twilio. We've been using it for a while internally and found it to be reliable and affordable. The service exposes a REST API that allows us to send text messages programmatically. Once you're signed up, you will receive API Credentials (Account SID and Auth Token). Basically these are your user name and password for use with the REST API.
Create User Property column
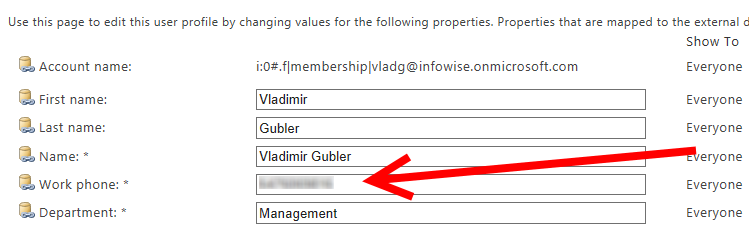
Now we are switching to SharePoint to implement our business logic. Although not required, I will be using our User Property column. It is able to automatically fetch user's phone number. It can use the SharePoint Profile service or retrieve it directly from Active Directory (on premises only). Of course, you can just type the number in when you create a task. But agree with me that it's a lot easier and cooler when it's done automatically. I'm using the Microsoft365 version of Ultimate Forms here, but your on-premises experience is similar. Needless to say, your Profile Service or Active Directory must contain phone numbers for your users.
Add a new User Property column to your Tasks list and call it Phone.
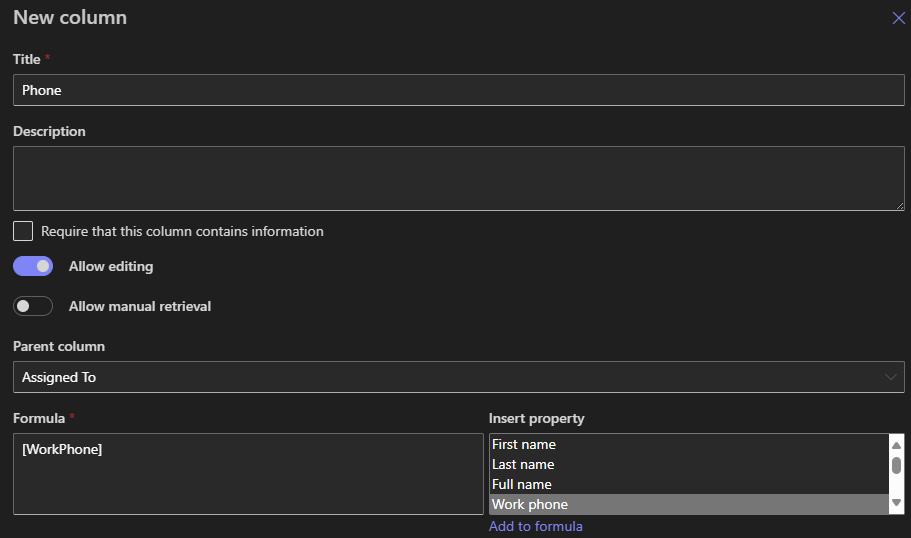
Note a couple of things here. First, I checked Allow editing. That causes the value of the field to not just simply fetch the data for the current user. It will become more dynamic such as allow manual entry of the user to fetch. Or, as in our case, take the user name from a parent column, such as Assigned To in our case. Locate Work phone in the box on the right and add it to formula.
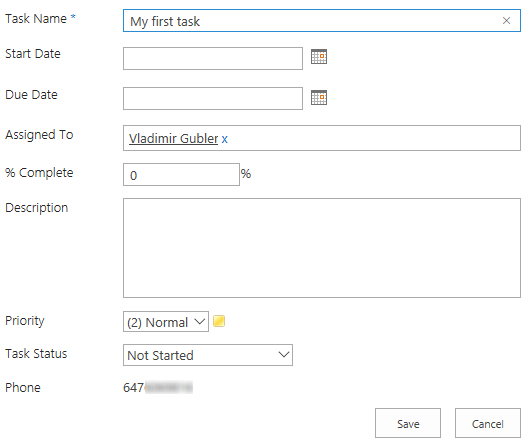
Now when we create a task and specify a user, it will fetch the phone number automatically.
Create the action
Next, we add the action that will actually send the text message. Click on Design button in the ribbon, go over to Business Logic section and click on Actions. Select Call application or service action type and configure the general settings:
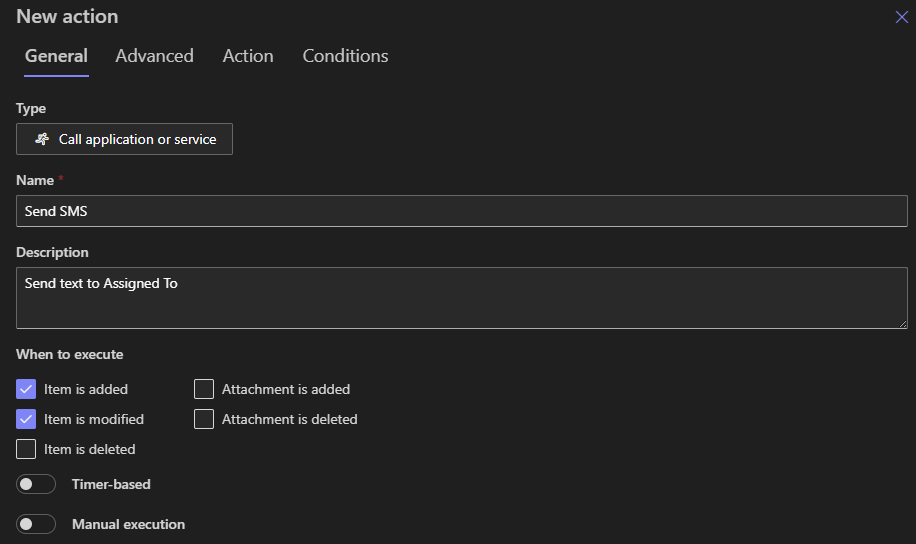
The only important thing here is to make sure Run on events is set to Item is added and Item is modified. That will ensure the action runs when an item is added to the list or when Assigned To changes.
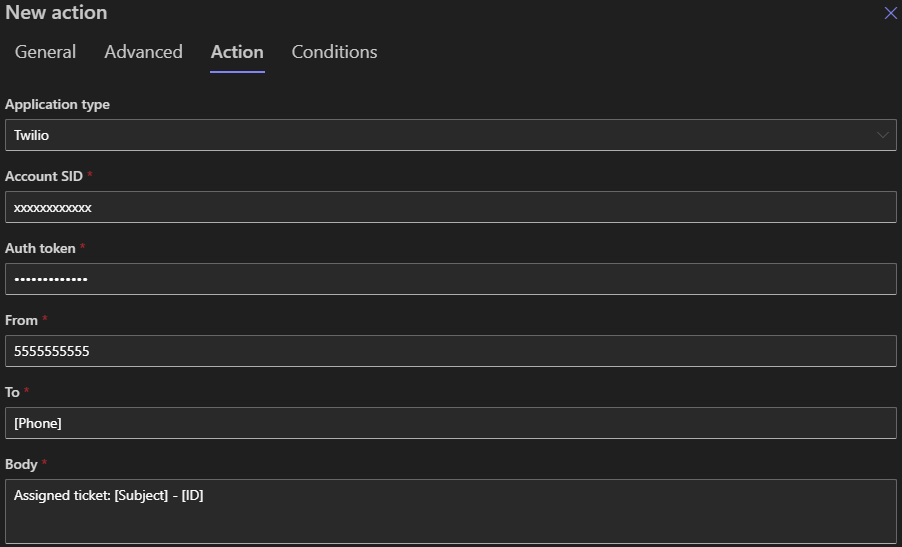
Switch to Action tab, this is where we actually configure our connection to Twilio, our SMS service provider.
- Change Application type to Twilio
- Set Account SID as created earlier
- Set Auth token as created earlier
- Add property mappings:
- To -> [Phone] - maps the recipient to the Phone column value
- From -> enter the outgoing phone number from Twilio
- Body -> [Subject] and [ID] - maps the body of the message to the Task name and item ID
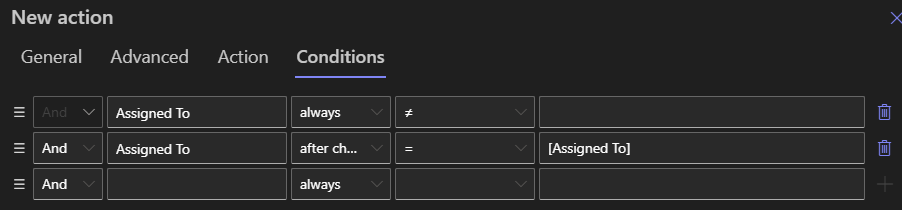
Switch to Conditions tab, here we want to ensure that the action is only triggered when the task is actually assigned to a user. Add a condition: Assigned To not equals and leave the field on the right empty. Additional condition is to send when Assigned To value changes, here we compare Assigned To after change to itself. It ensures the condition only passes when the previous value of Assigned To is different from the current one. That would mean that the value was changed.
Save the action, you are done! Try adding a new task and assigning it to yourself, check if a text message is delivered. That's it, it just took 2 minutes to implement SMS functionality!
Summary
Ultimate Forms makes it easy to automate and integrate your SharePoint-based solution. It is fast and easy to do and doesn't require to be a developer or memorize any special syntax. In our example here we saw how easy it is to integrate sending SMS messages from SharePoint list items. SMS message help your system to becomes more relevant, precise and on time.